How to change disk drive letter in Windows 10 and 11?
Change the drive letter on Windows 11 through settings
Before changing the drive letter on Windows, there are a few things to note about the process. First, you shouldn't try to change your local C: drive letter, as that's where Windows and most applications run. Changing the primary drive letter will cause Windows to not start and applications to not run at all.
With that in mind, changing your drive letter on Windows 11 is a simple process if you use Settings. Getting Started:
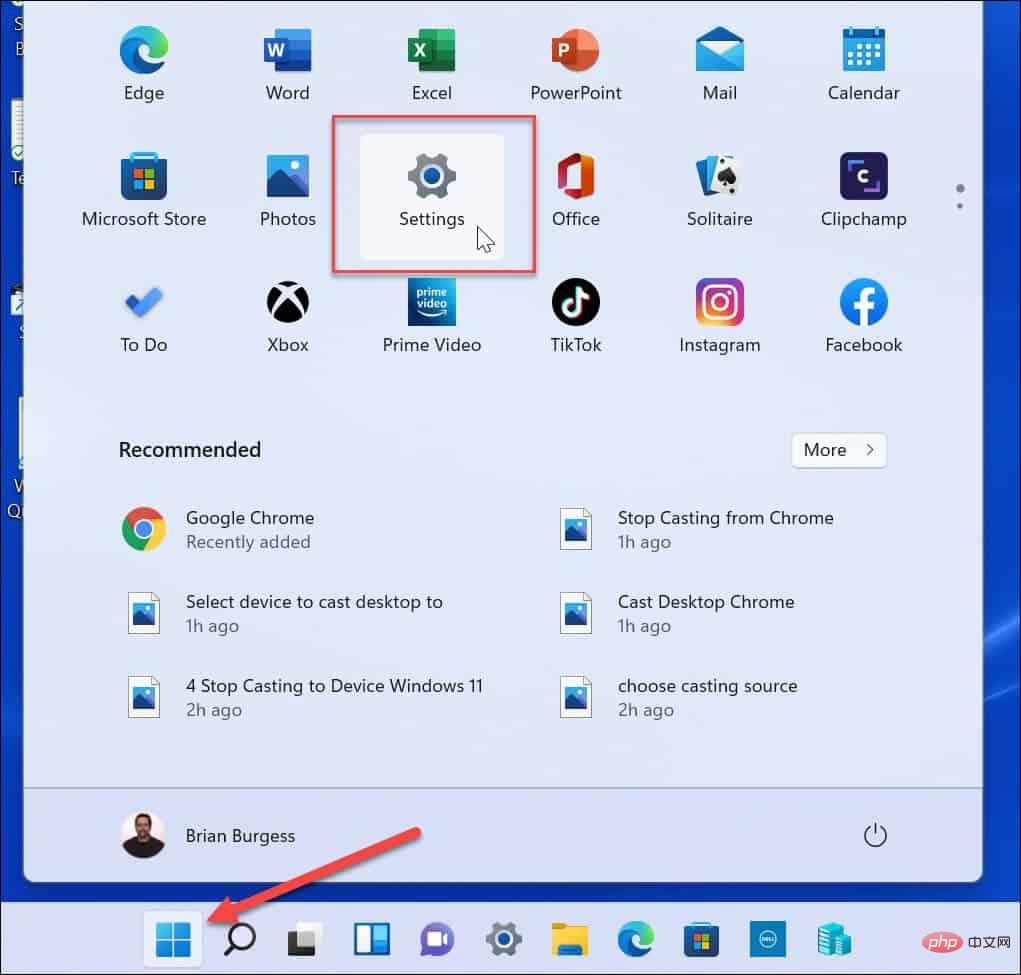
- Click the Start button and select the Settings icon.

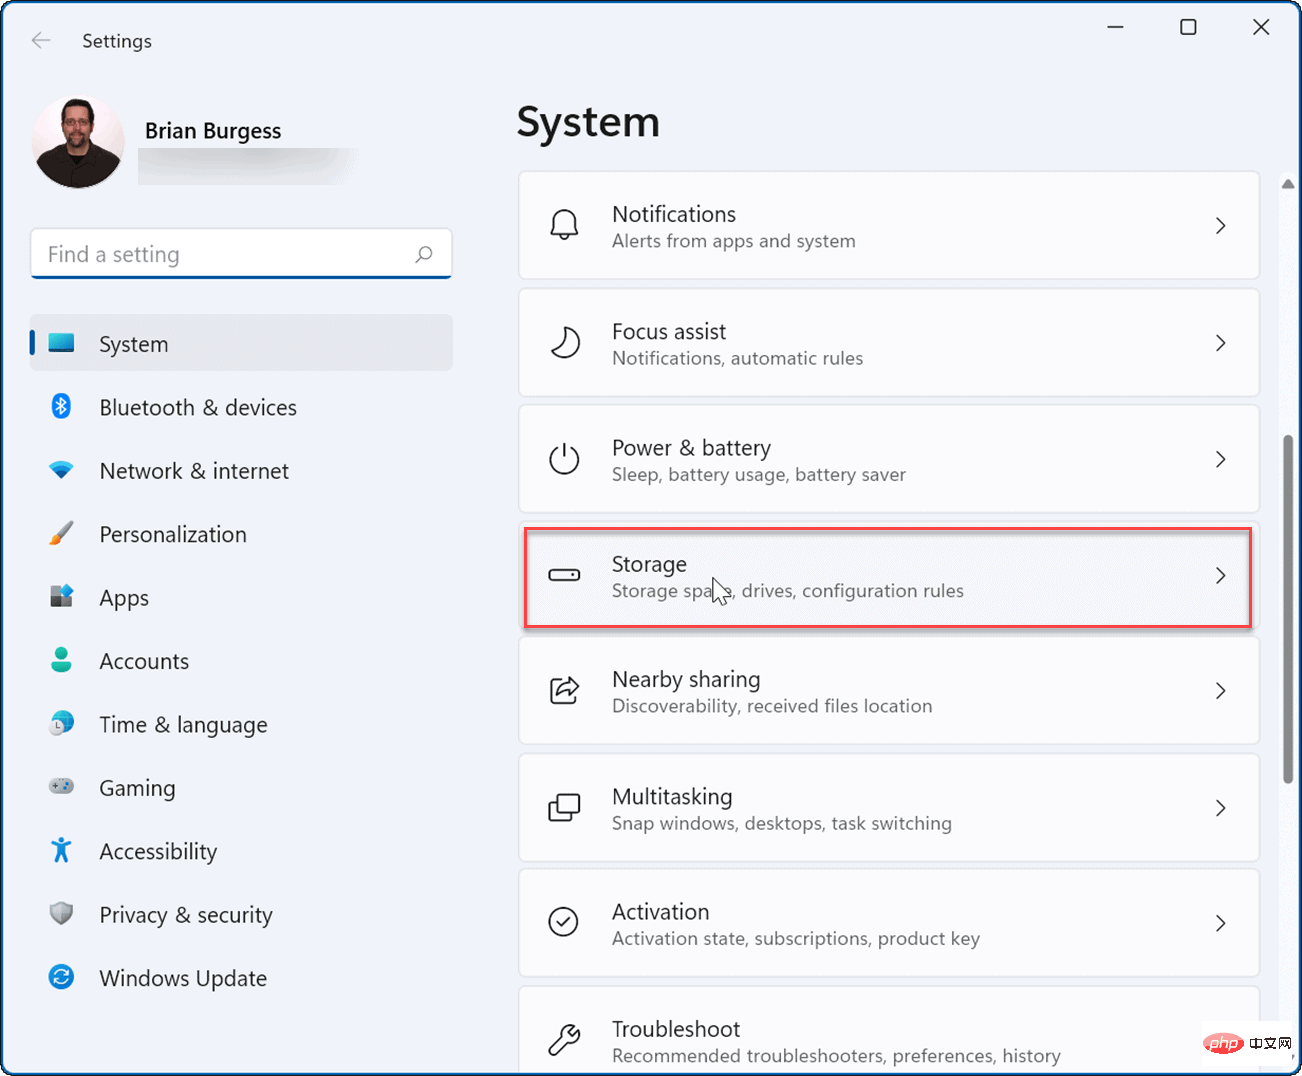
- When Settings opens, navigate to System > Storage.

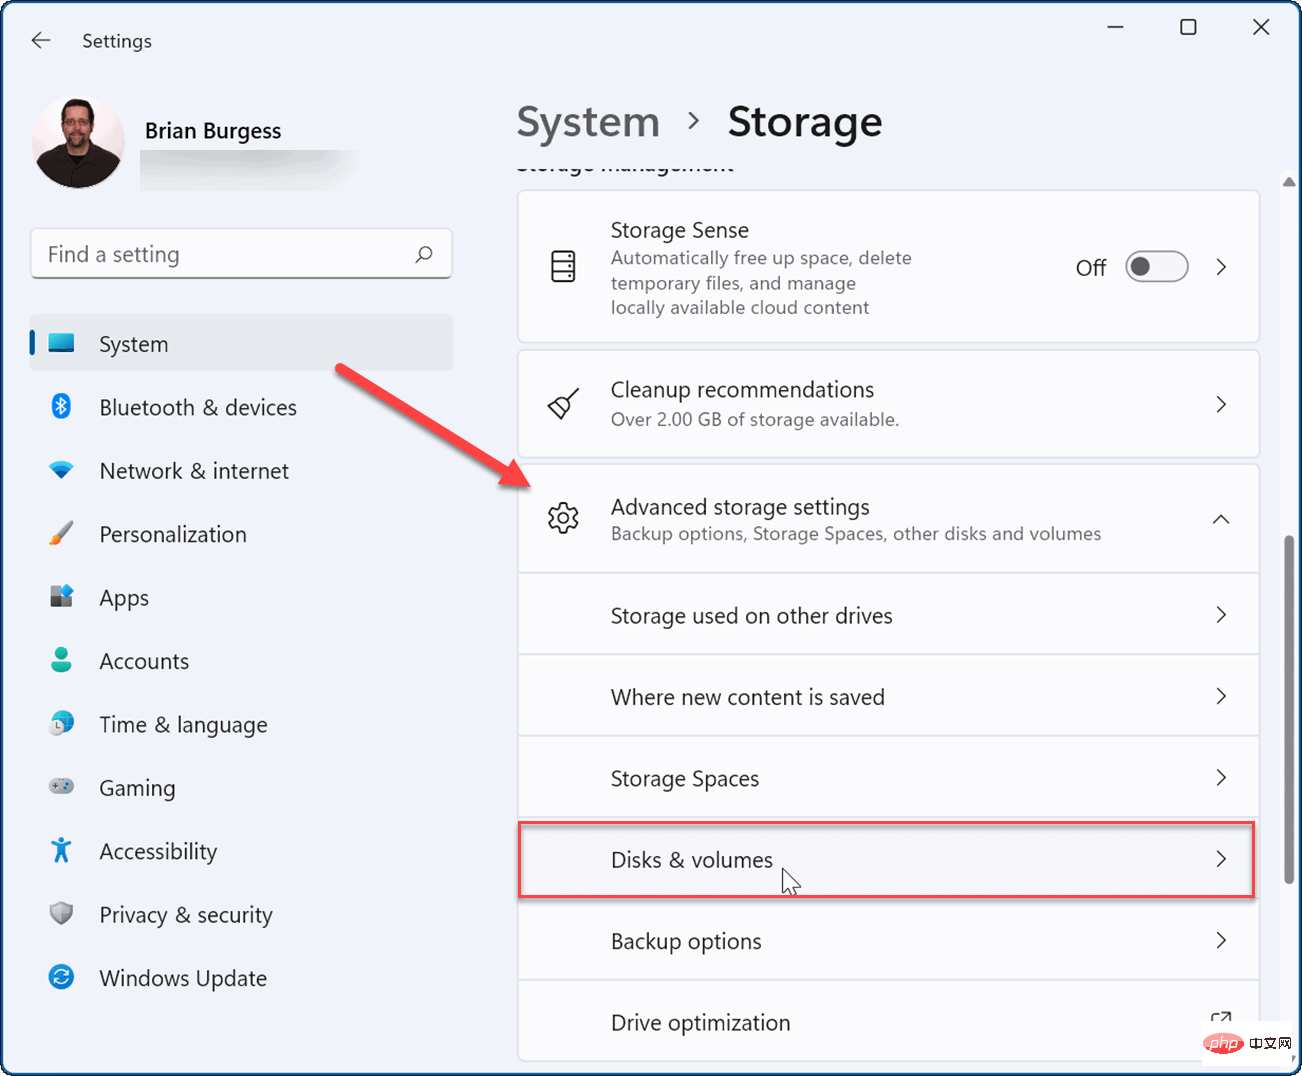
- Scroll down the Storage section, expand the Advanced Storage Settings option, and click Disks and Volumes.

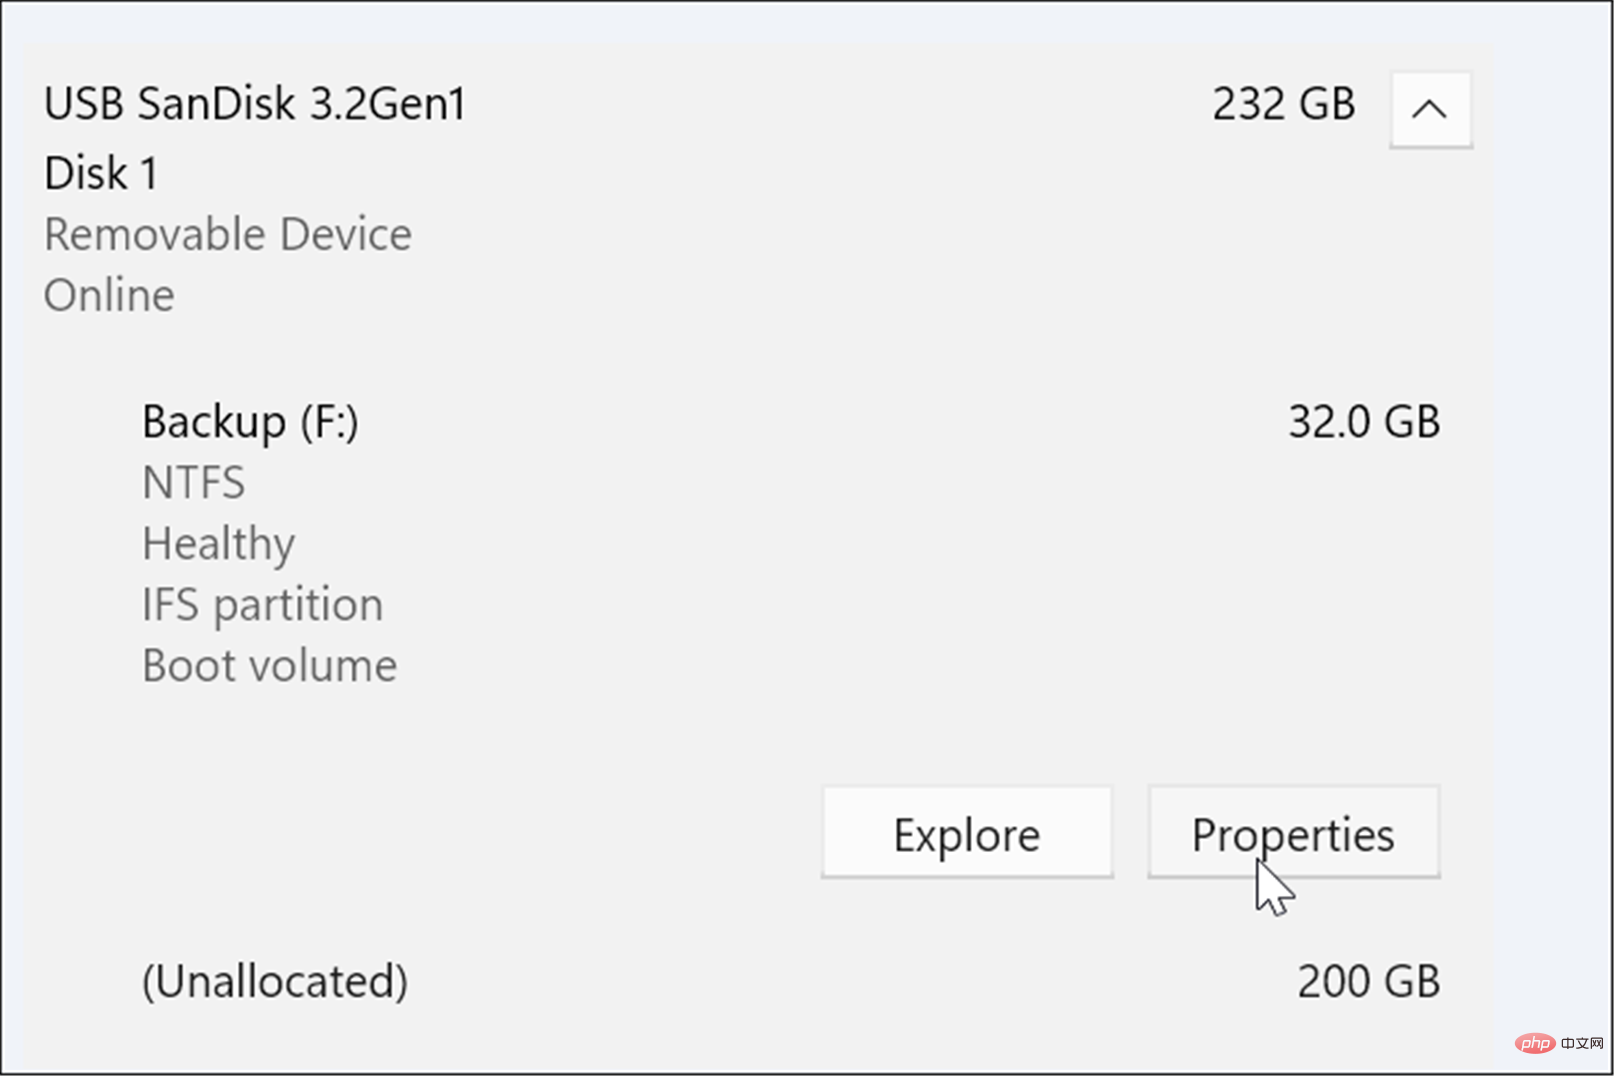
- In the Disks and Volumes section, scroll down and click the drive you want to change.
- Next, click the Properties button.

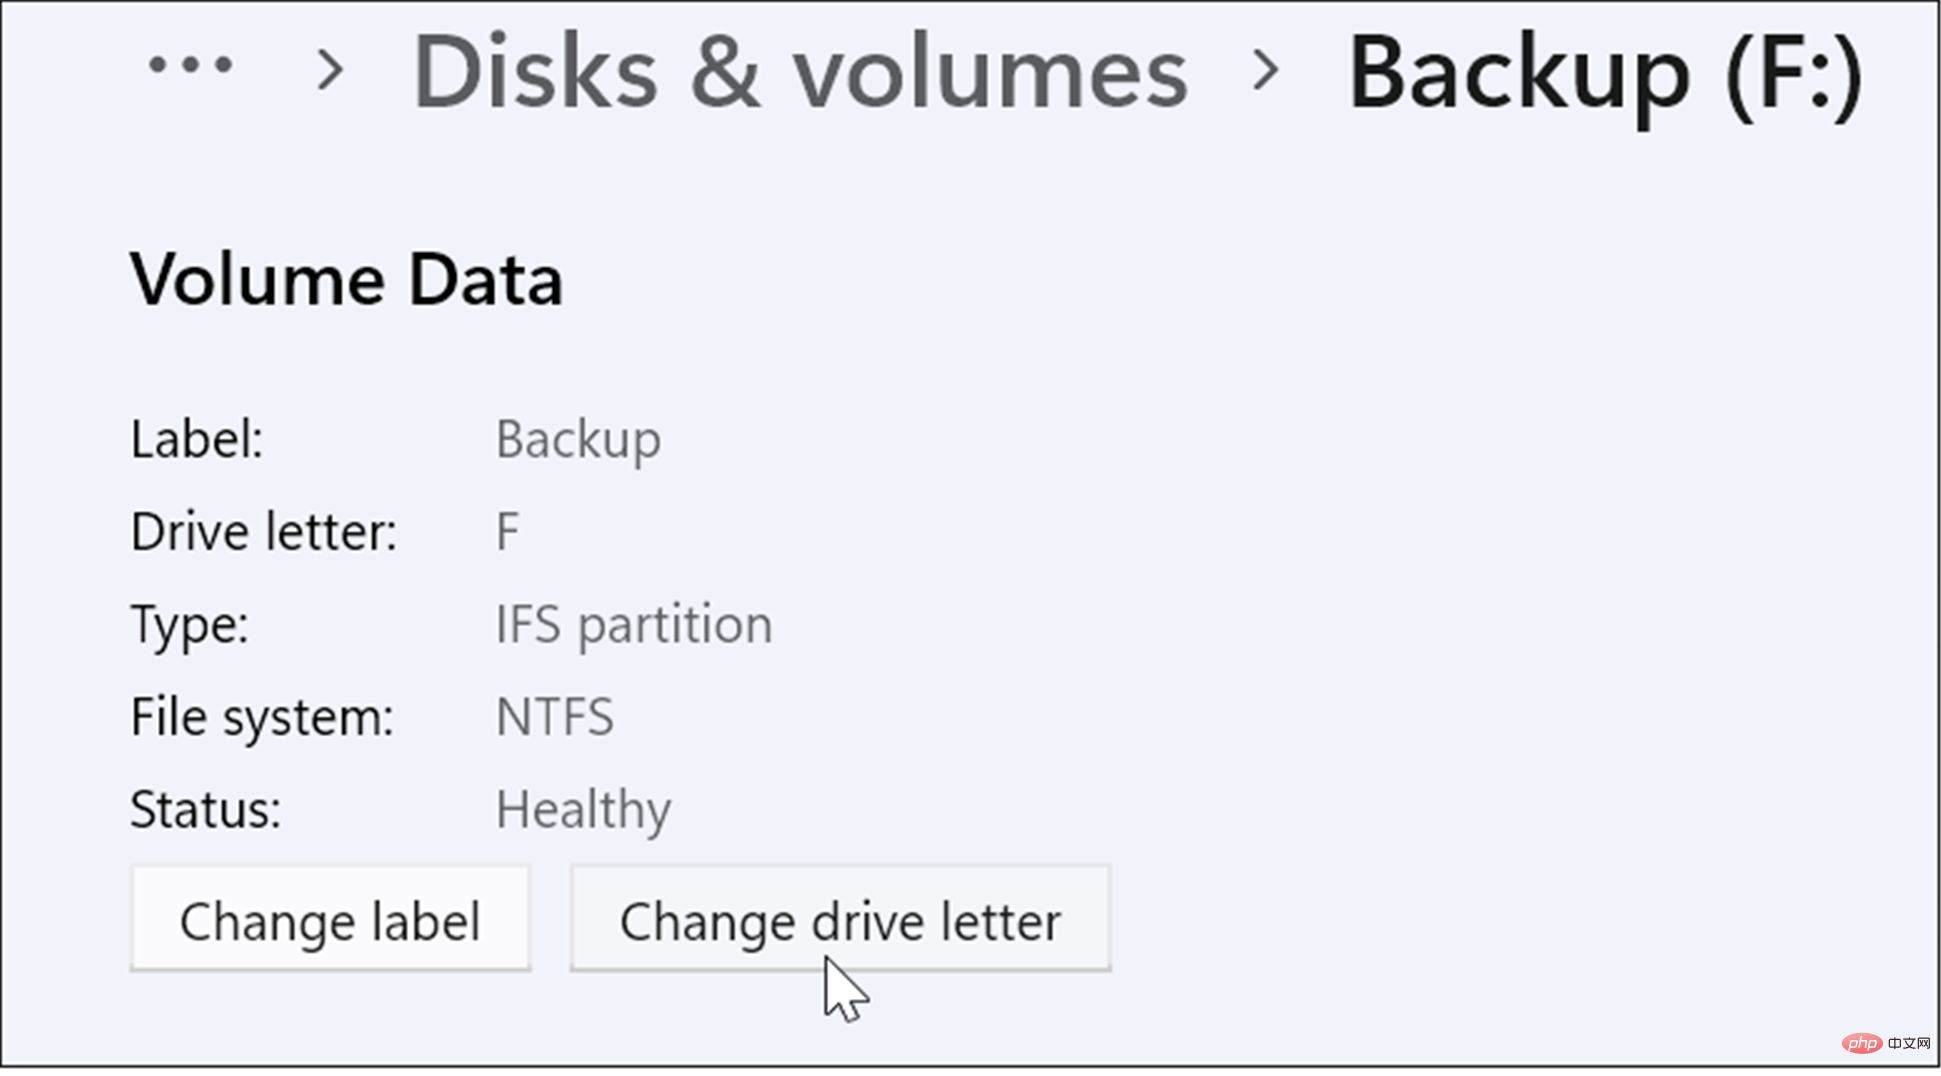
- Under the Volume Data section, click the Change Drive button.

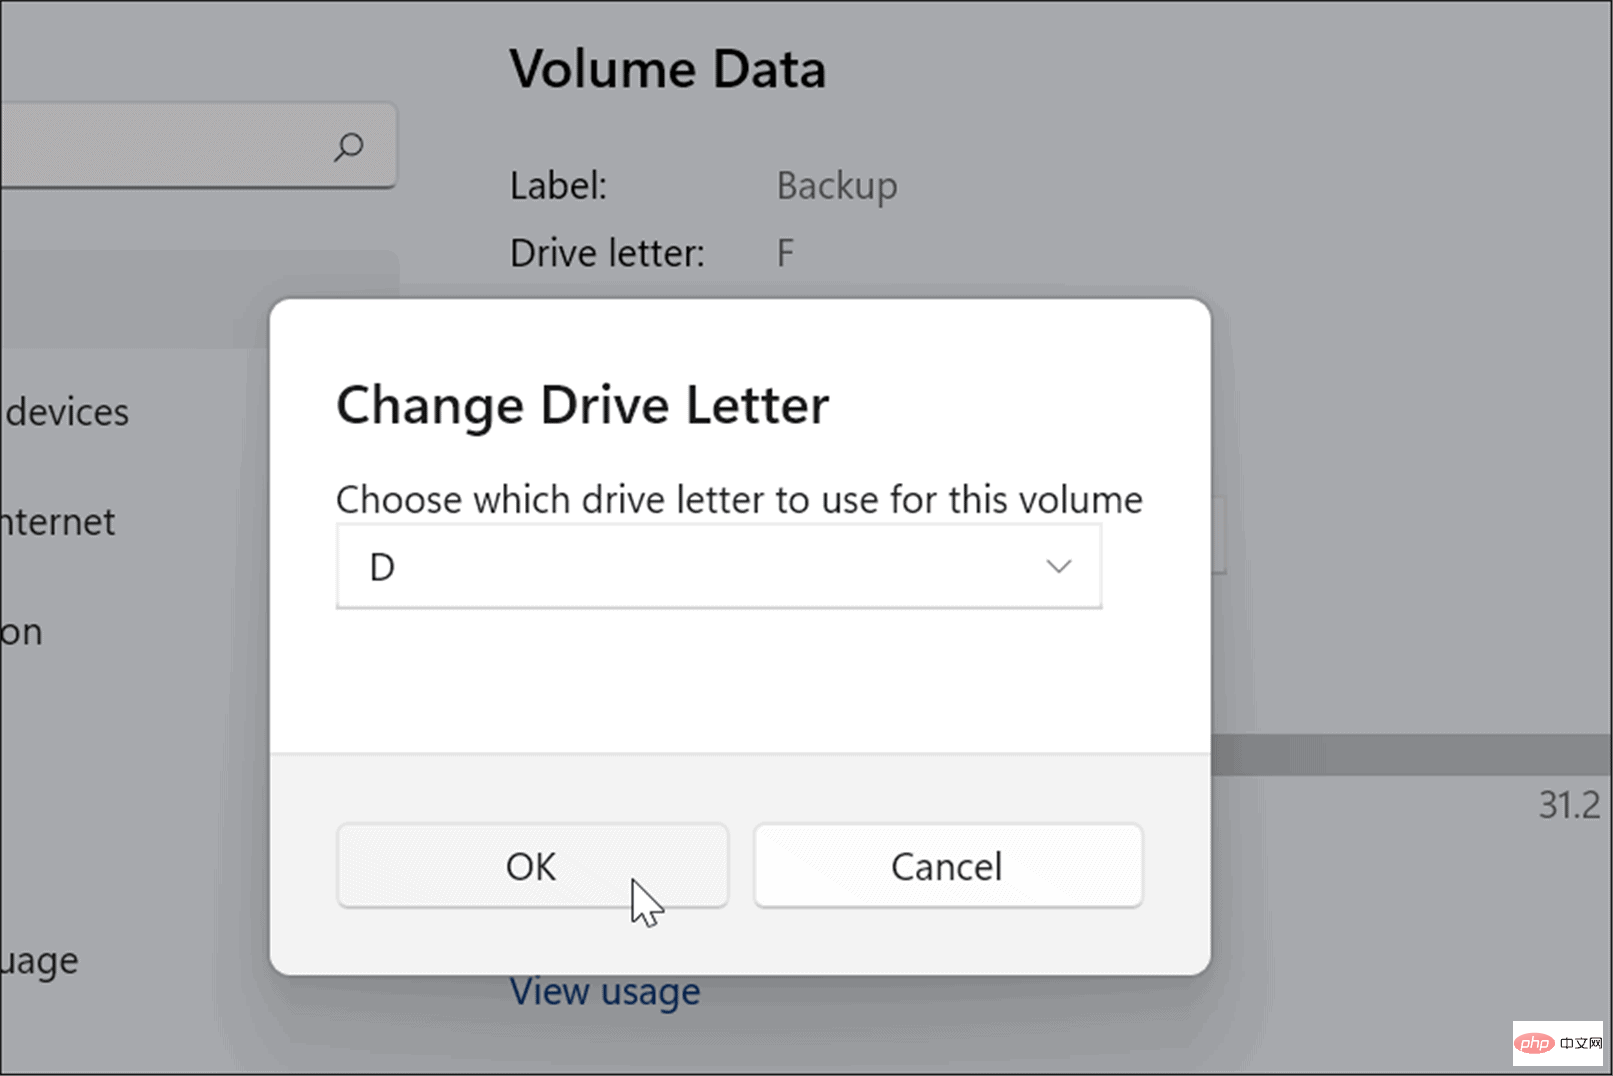
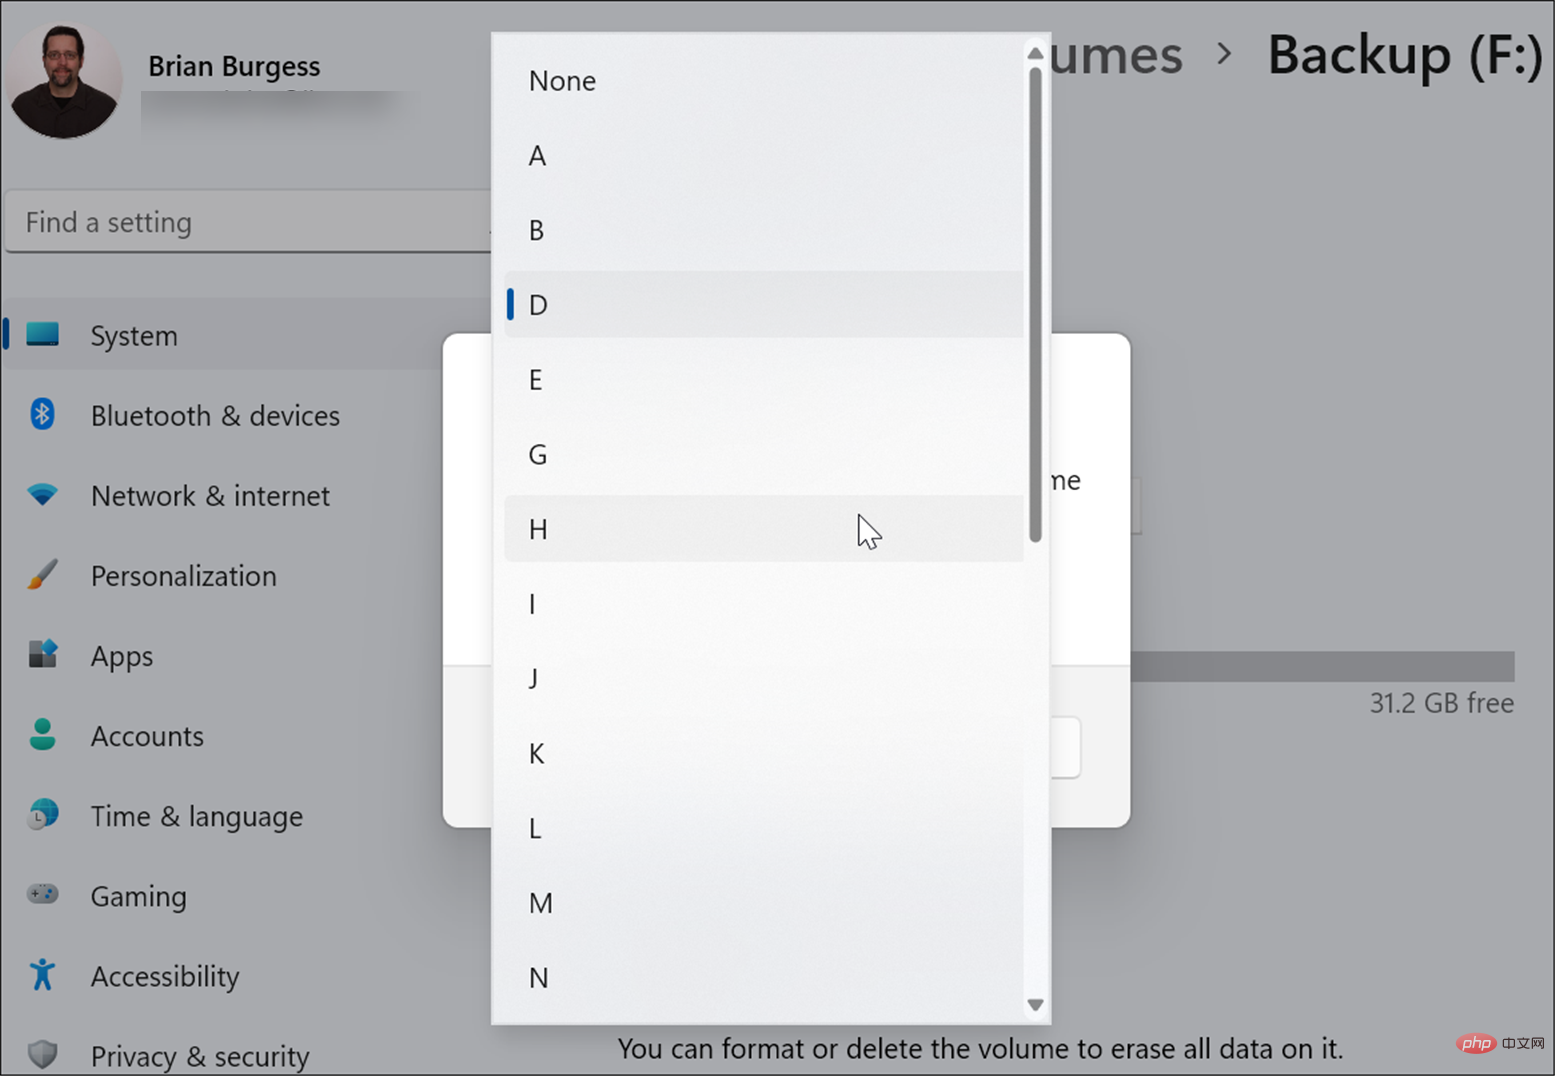
- When the Change Drive Letter window appears, click the drop-down menu.

- Select the letter you want to use from the menu and click OK. In this example, we change the external USB drive from F to D.

That’s all. The new drive letter will take effect and appear along with the letter you selected for it. Changes happen immediately and you'll see it in File Explorer and throughout your Windows 11 experience.
How to change the drive letter on Windows 10 and 11 using Disk Management
You can also change the drive letter using the Disk Management tool. This method works on Windows 10 and Windows 11 PCs.
To change the drive letter on Windows 11 or Windows 10 using Disk Management:
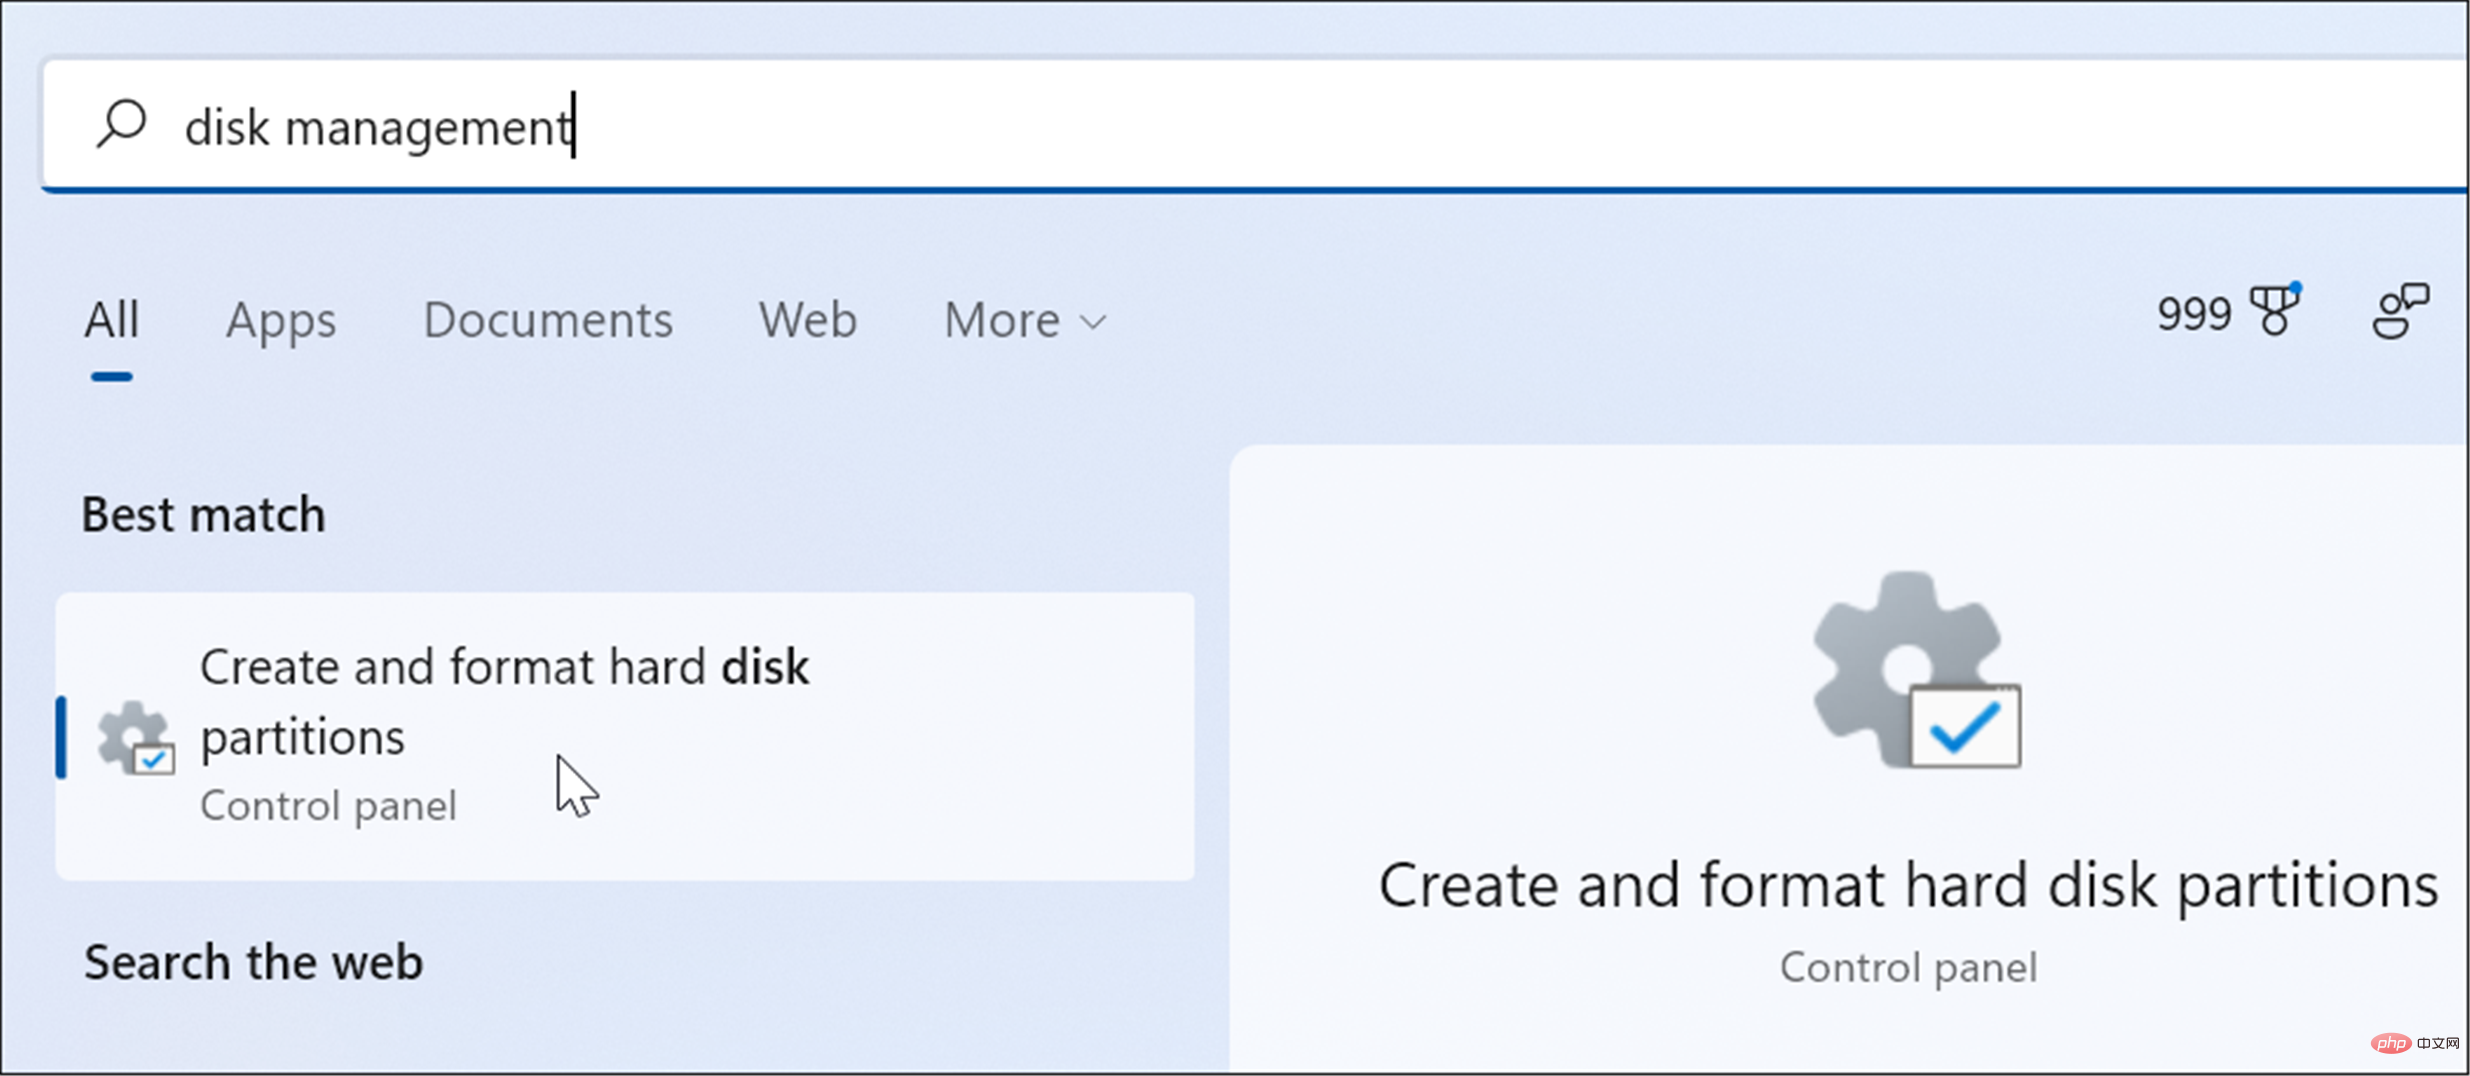
- Click the Start button or press the Windows key and type Disk Management.
- Select from the top results to create and format the hard drive partition.

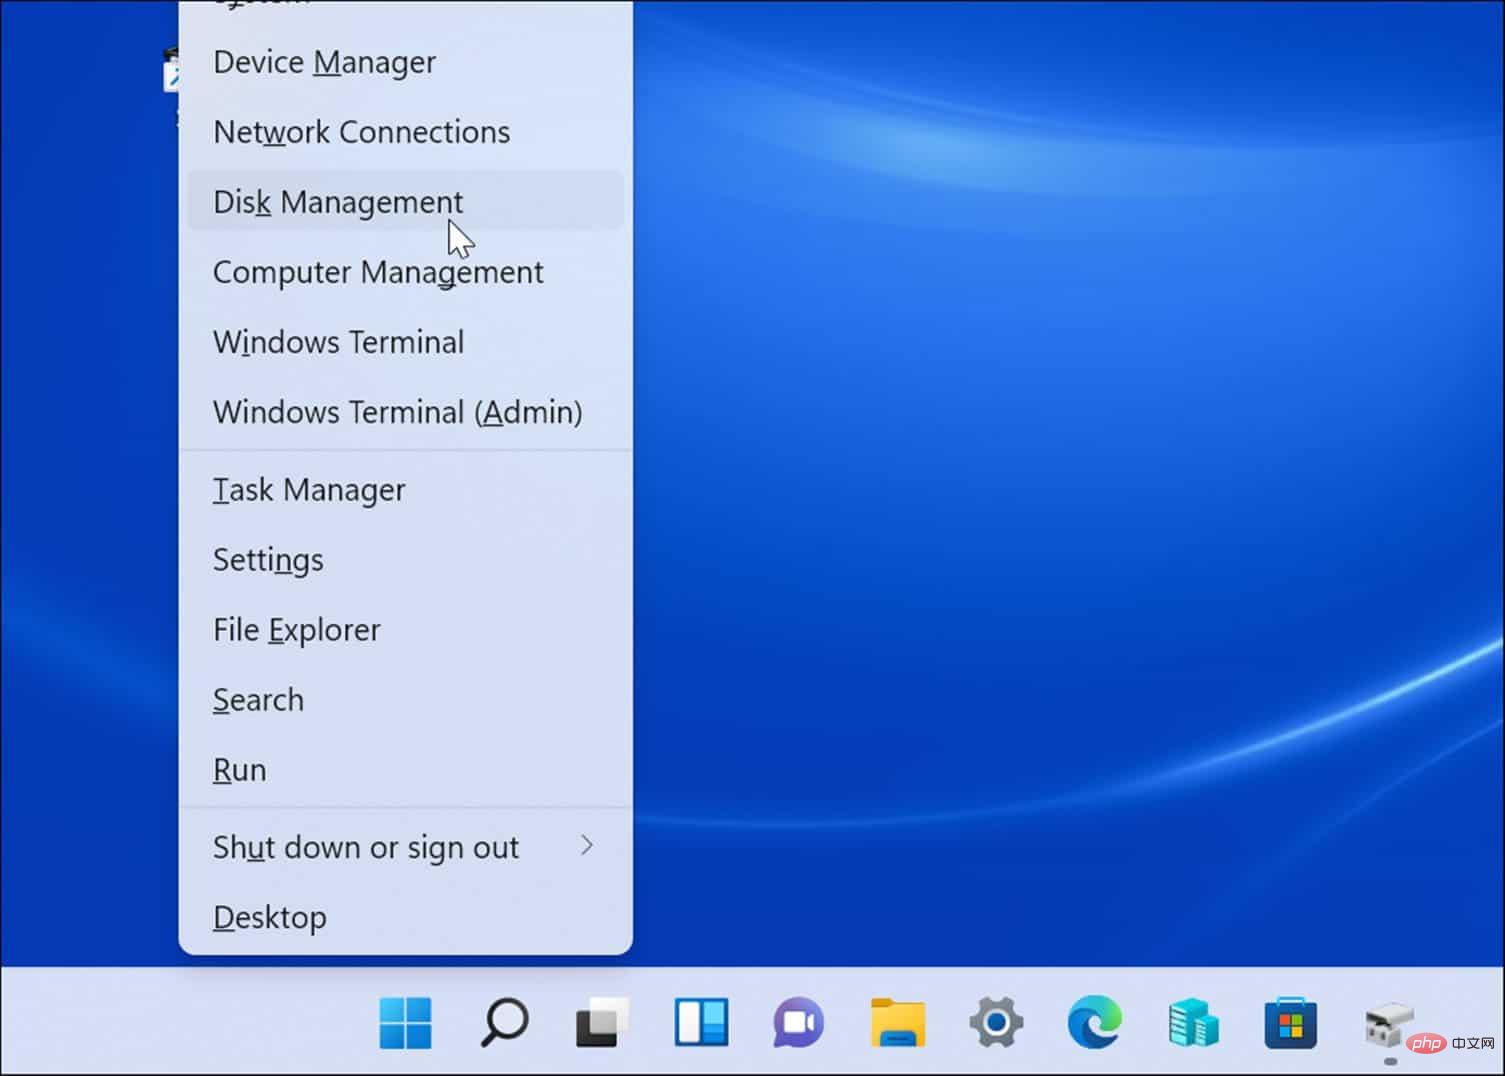
- Alternatively, you can right-click Start or press the Windows key X and select Disk Management from the menu.

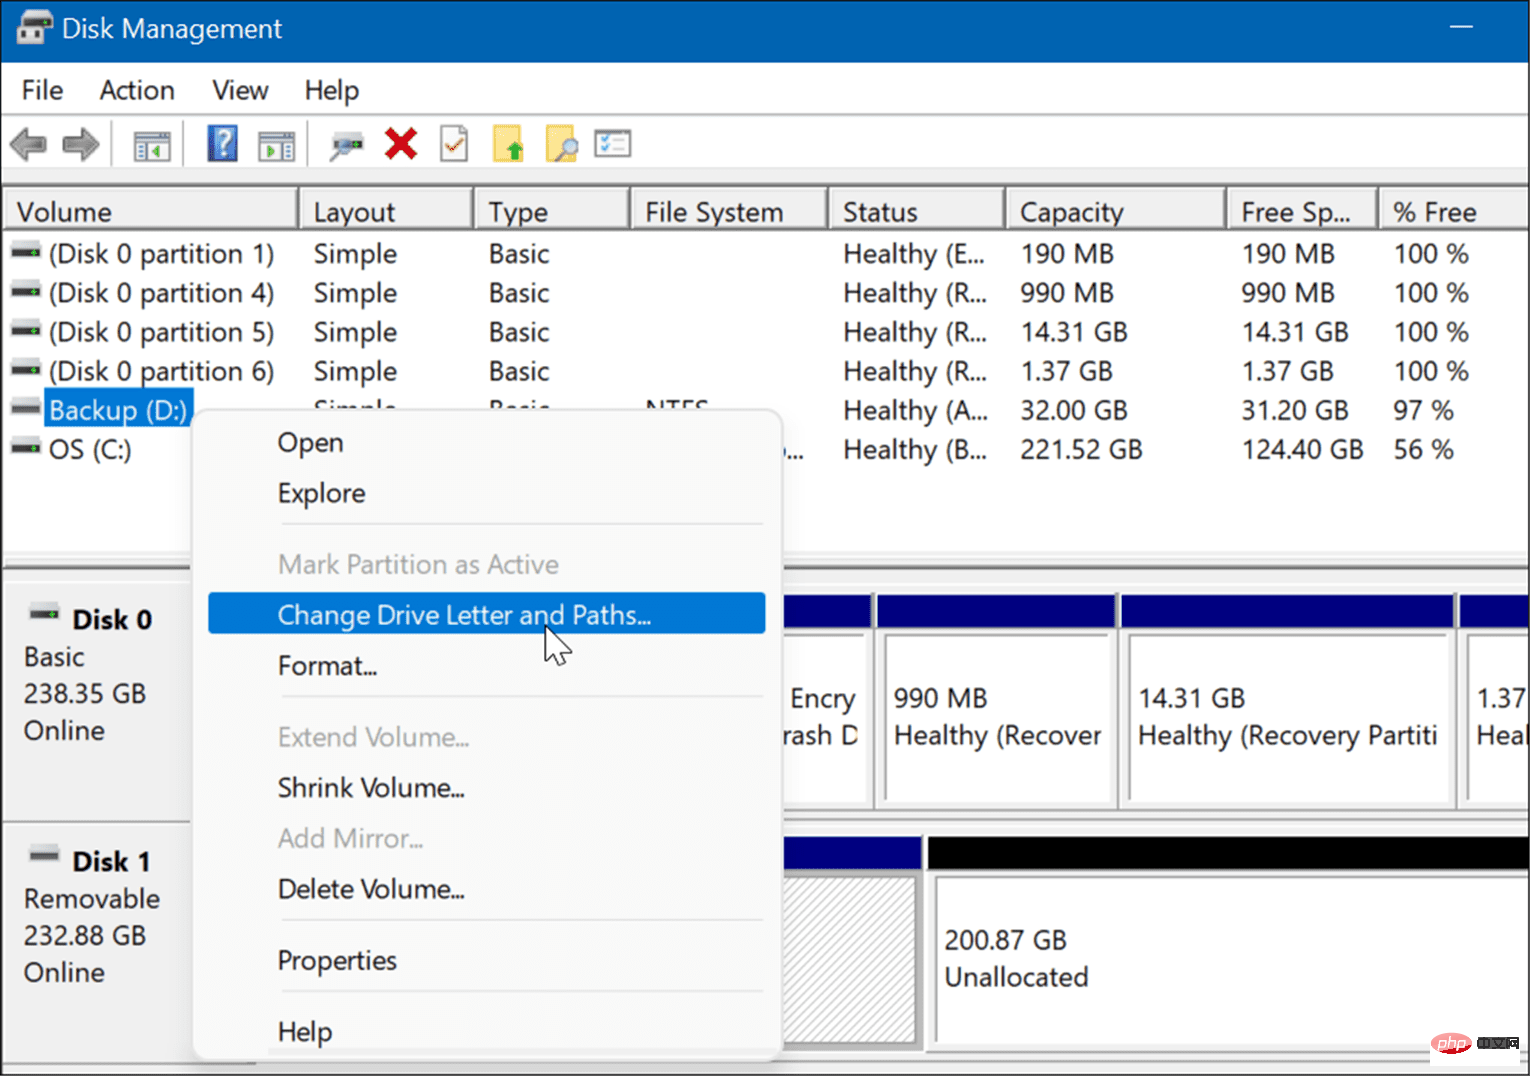
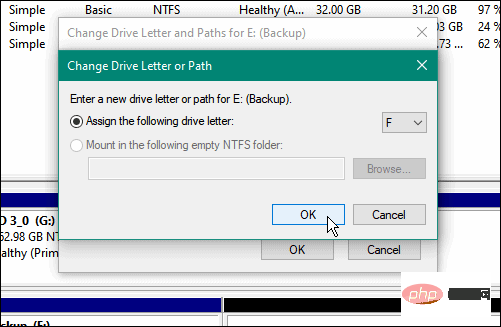
- When the Disk Management window opens, right-click the drive you want to change and select Change Drive Letter and Path from the menu. For example, we are changing the removable USB drive from D to F.

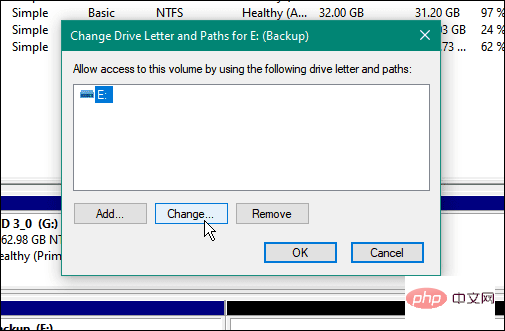
- Click the Change button on the window that appears.

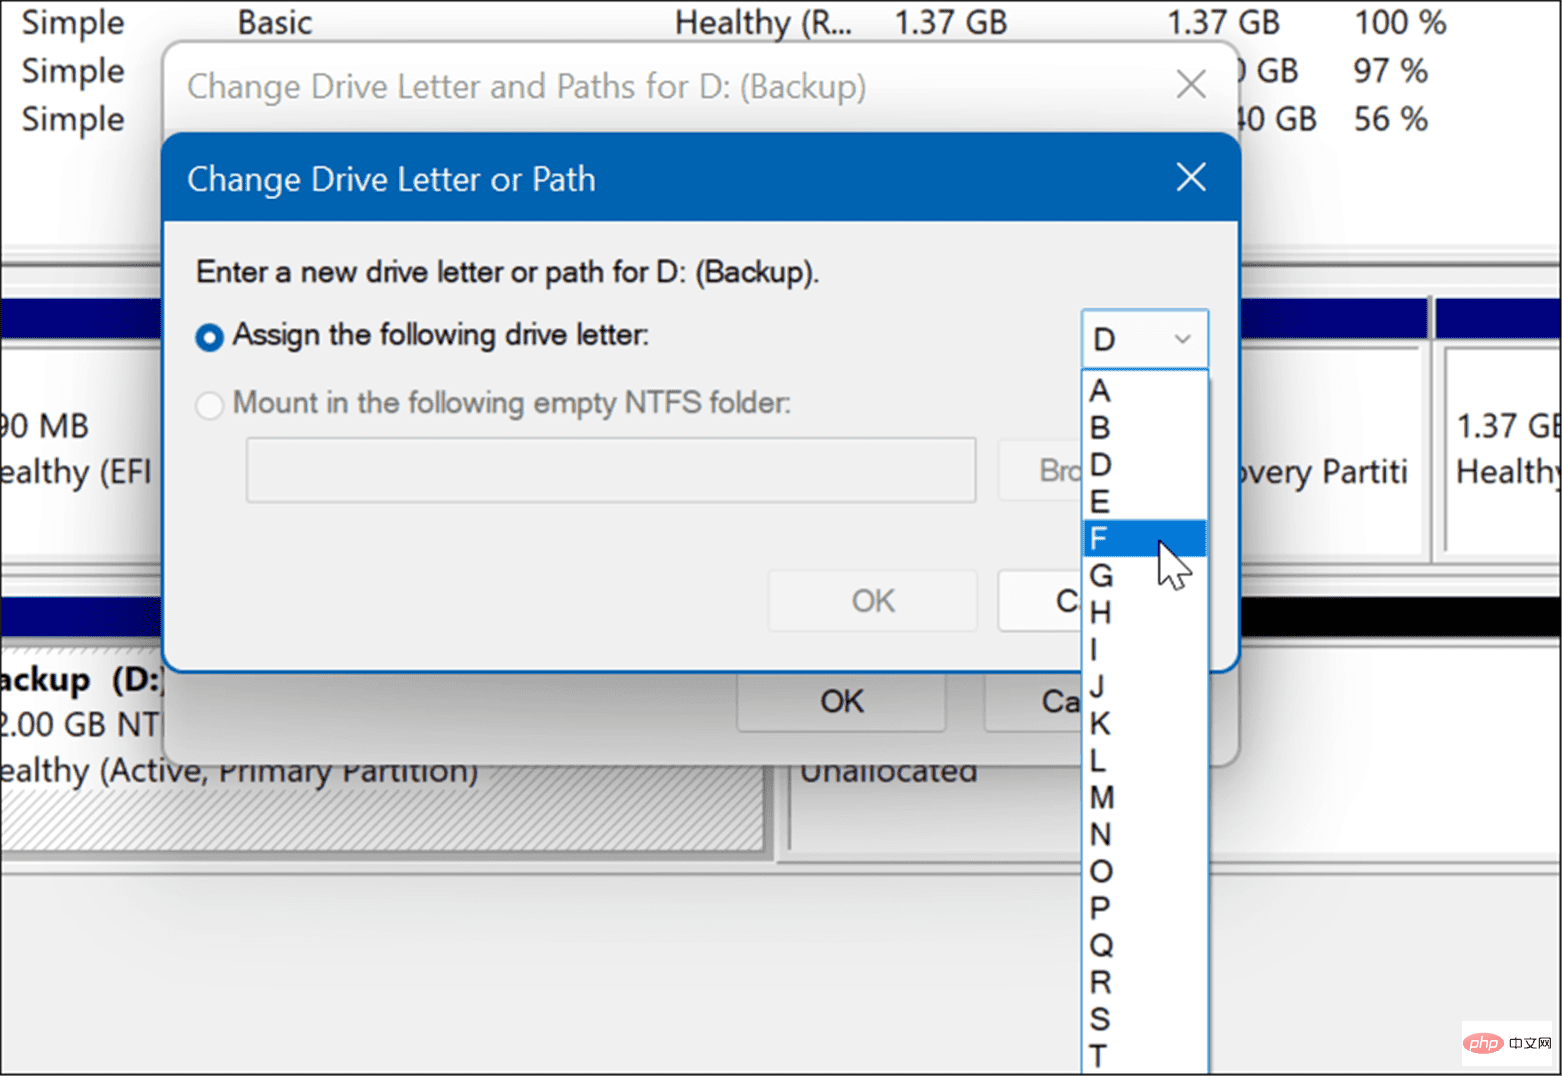
- Next, make sure Assign the following drive letter is selected and select the desired letter from the drop-down menu.

- After selecting the drive letter, click OK.

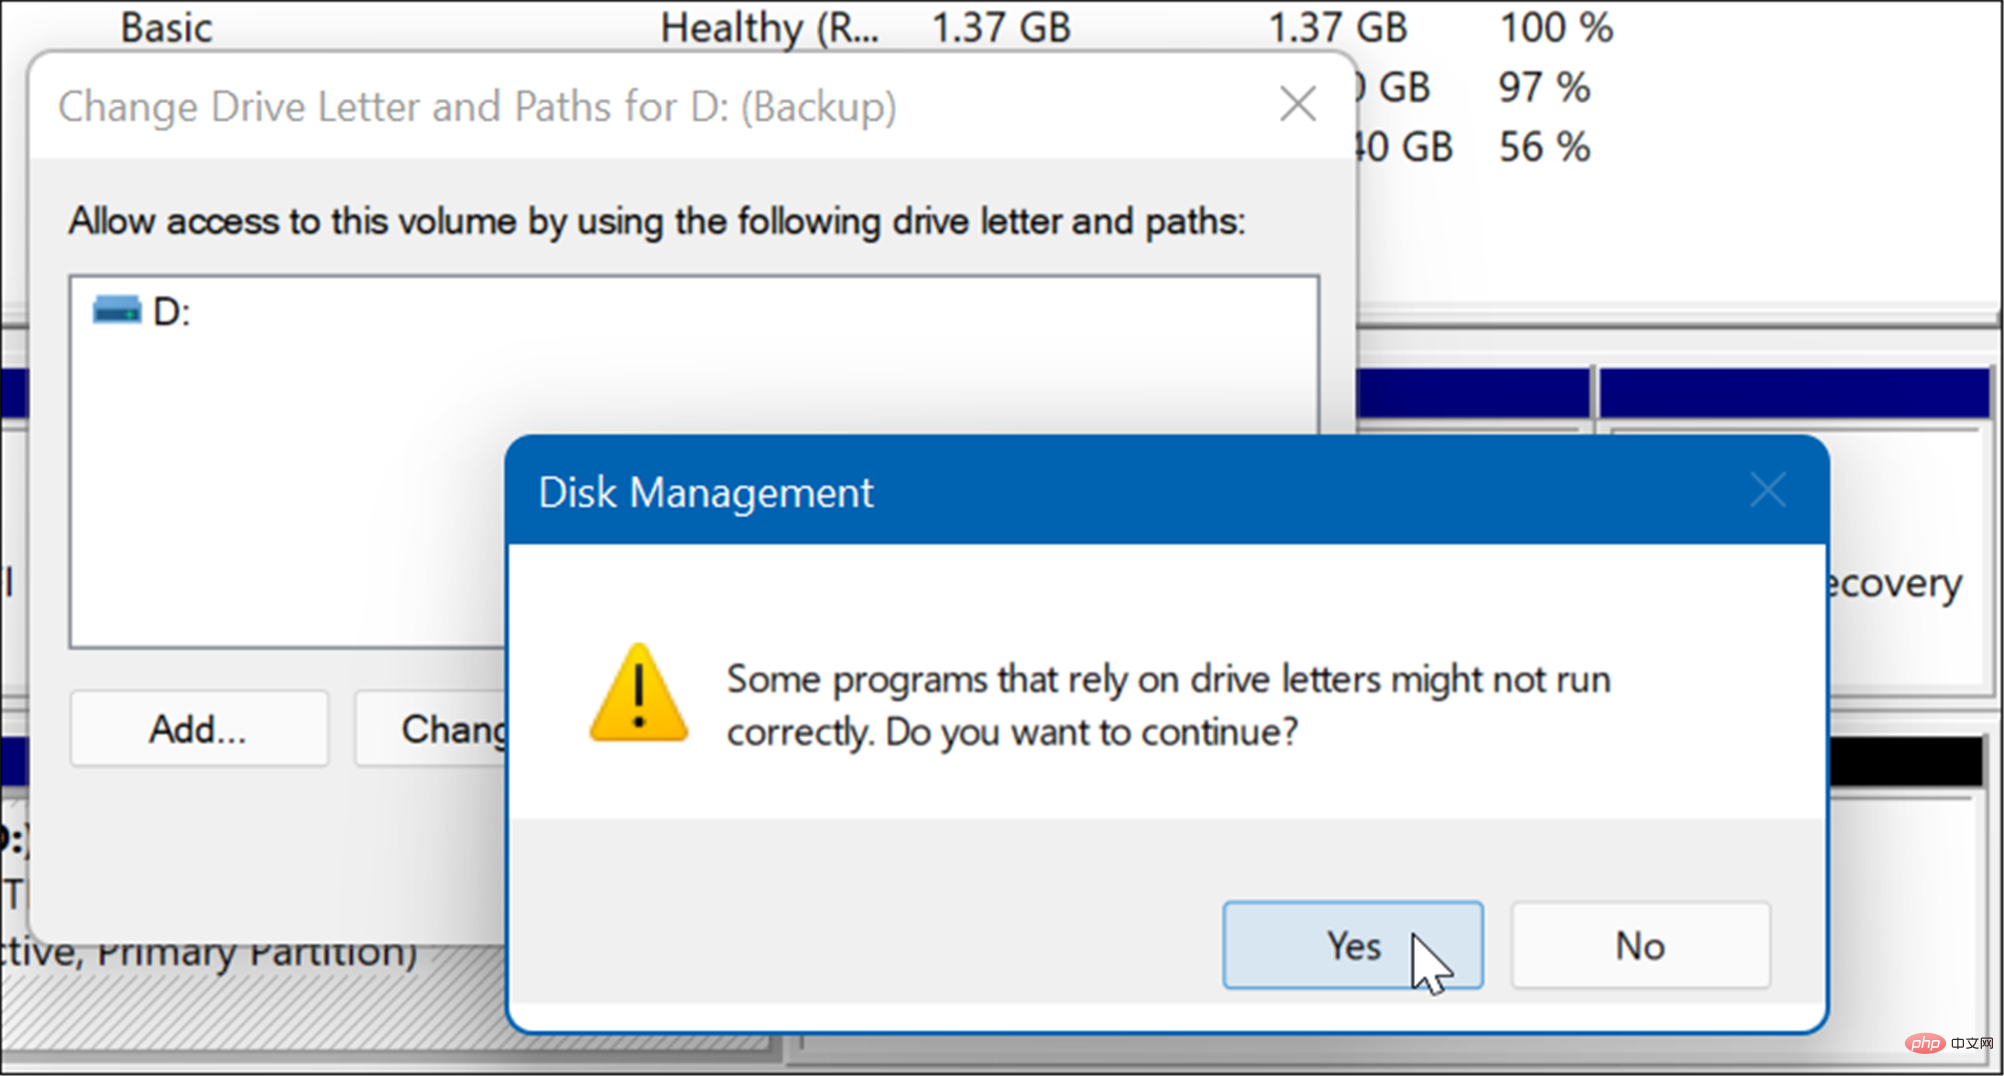
- Finally, click Yes on the warning message that appears.

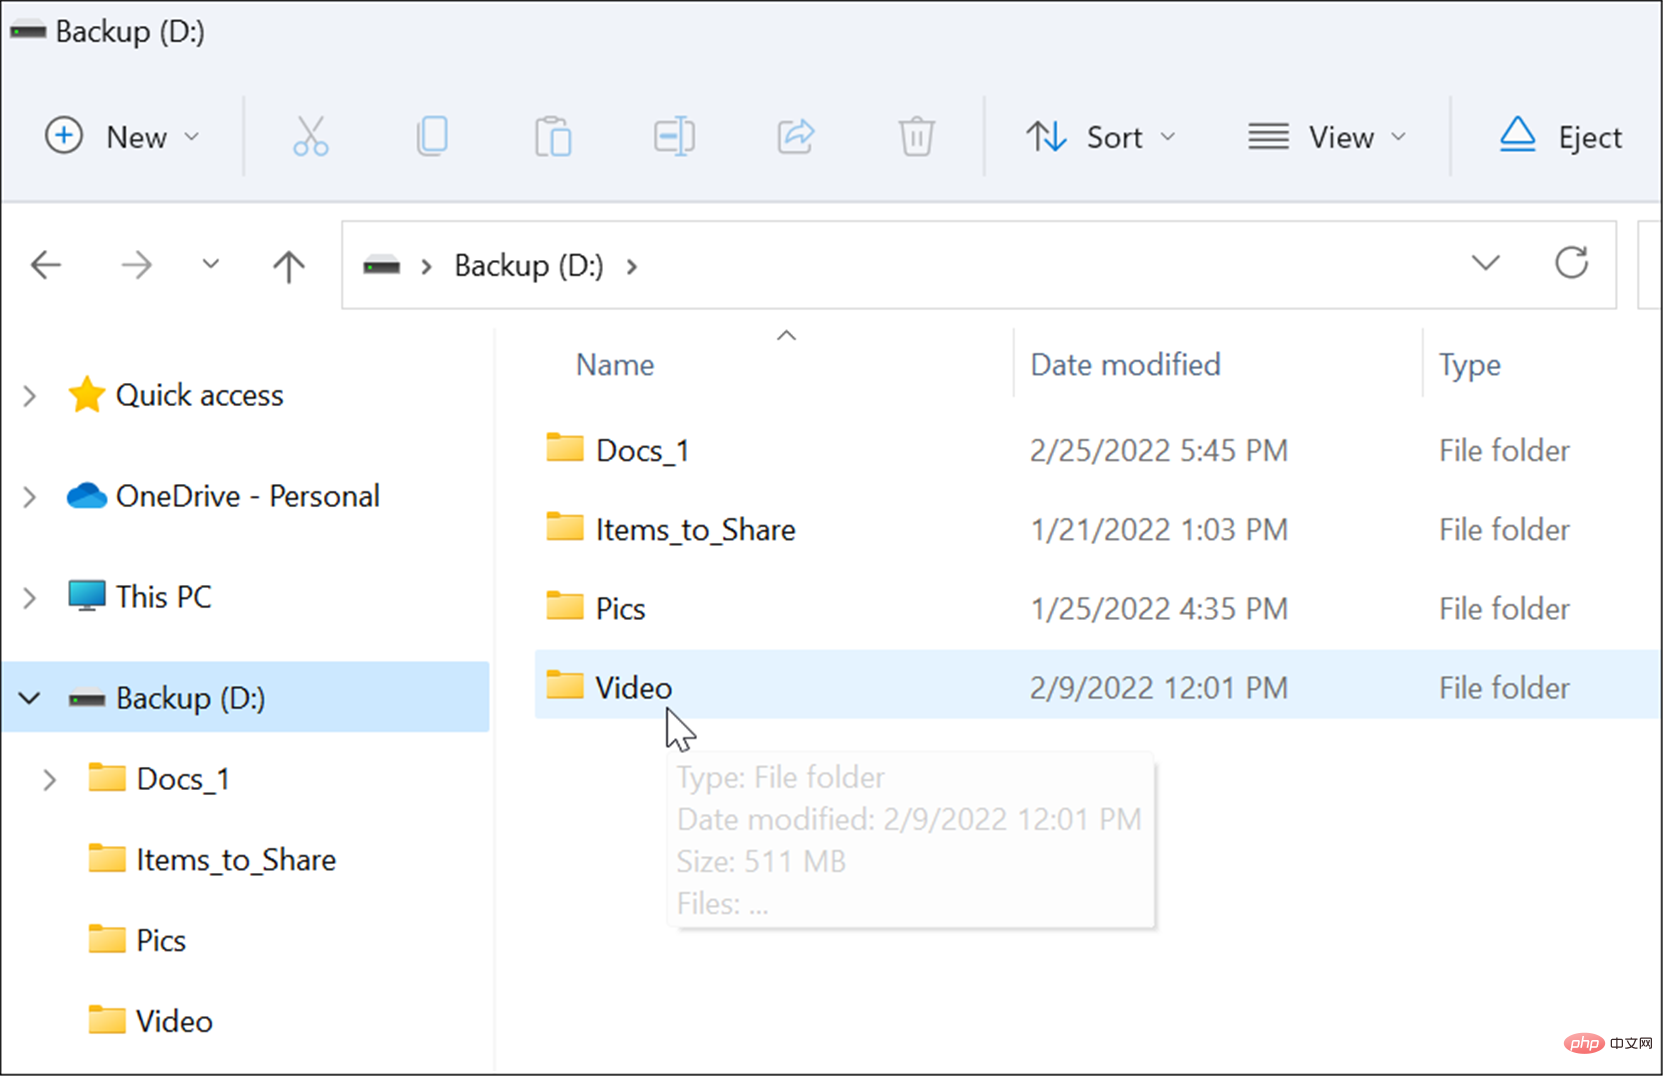
At this point, your drive's letter on Windows will change and it should be opened in File Explorer to view its contents. However, you may need to restart your PC for the changes to take effect.
The new drive letter will appear in Disk Management and anywhere else a drive letter appears, such as in This PC. 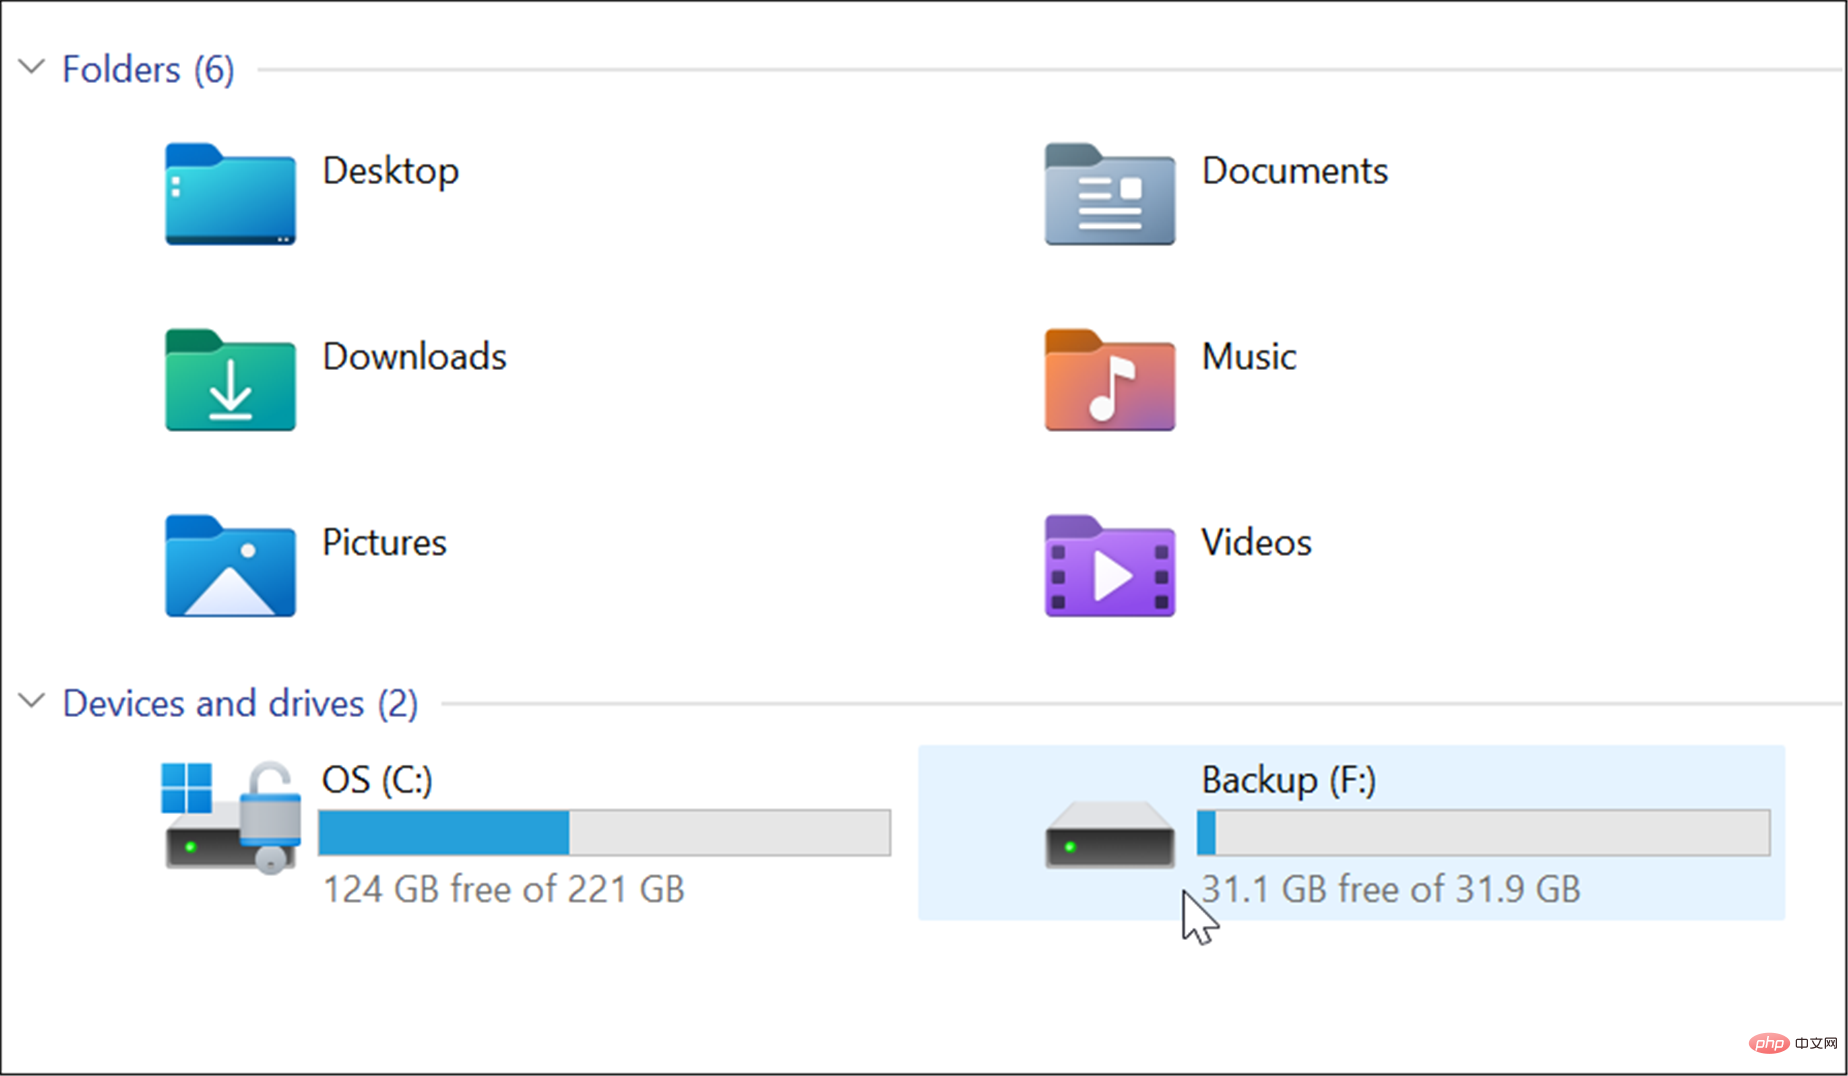
If you change the removable drive letter, it should remain the same on the computer where you changed it. For example, if you take it to another computer, Windows will assign it a different letter than the one you gave it. After renaming the drive, if you plug in other external drives in a different order, it will most likely be assigned a new letter.
Manage Disk Space on Windows
Windows 11 and 10 have some useful tools for managing drive space. For example, you can limit the disk space used by the Recycle Bin or free up space using cleaning suggestions on Windows 11. You may also want to configure Storage Sense on Windows 11.
The above is the detailed content of How to change disk drive letter in Windows 10 and 11?. For more information, please follow other related articles on the PHP Chinese website!

Hot AI Tools

Undresser.AI Undress
AI-powered app for creating realistic nude photos

AI Clothes Remover
Online AI tool for removing clothes from photos.

Undress AI Tool
Undress images for free

Clothoff.io
AI clothes remover

AI Hentai Generator
Generate AI Hentai for free.

Hot Article

Hot Tools

Notepad++7.3.1
Easy-to-use and free code editor

SublimeText3 Chinese version
Chinese version, very easy to use

Zend Studio 13.0.1
Powerful PHP integrated development environment

Dreamweaver CS6
Visual web development tools

SublimeText3 Mac version
God-level code editing software (SublimeText3)

Hot Topics
 deepseek web version official entrance
Mar 12, 2025 pm 01:42 PM
The domestic AI dark horse DeepSeek has risen strongly, shocking the global AI industry! This Chinese artificial intelligence company, which has only been established for a year and a half, has won wide praise from global users for its free and open source mockups, DeepSeek-V3 and DeepSeek-R1. DeepSeek-R1 is now fully launched, with performance comparable to the official version of OpenAIo1! You can experience its powerful functions on the web page, APP and API interface. Download method: Supports iOS and Android systems, users can download it through the app store; the web version has also been officially opened! DeepSeek web version official entrance: ht
 In-depth search deepseek official website entrance
Mar 12, 2025 pm 01:33 PM
At the beginning of 2025, domestic AI "deepseek" made a stunning debut! This free and open source AI model has a performance comparable to the official version of OpenAI's o1, and has been fully launched on the web side, APP and API, supporting multi-terminal use of iOS, Android and web versions. In-depth search of deepseek official website and usage guide: official website address: https://www.deepseek.com/Using steps for web version: Click the link above to enter deepseek official website. Click the "Start Conversation" button on the homepage. For the first use, you need to log in with your mobile phone verification code. After logging in, you can enter the dialogue interface. deepseek is powerful, can write code, read file, and create code
 How to solve the problem of busy servers for deepseek
Mar 12, 2025 pm 01:39 PM
DeepSeek: How to deal with the popular AI that is congested with servers? As a hot AI in 2025, DeepSeek is free and open source and has a performance comparable to the official version of OpenAIo1, which shows its popularity. However, high concurrency also brings the problem of server busyness. This article will analyze the reasons and provide coping strategies. DeepSeek web version entrance: https://www.deepseek.com/DeepSeek server busy reason: High concurrent access: DeepSeek's free and powerful features attract a large number of users to use at the same time, resulting in excessive server load. Cyber Attack: It is reported that DeepSeek has an impact on the US financial industry.


