How to fix time errors in Windows 11
Windows 11 will automatically update the date and time if it is not set to manual. It utilizes the time.windows.com server to get the exact date and time.
But several users have reported that for them, the date and time on their Windows 11 PC does not update automatically. They also don't have the settings set to manual.
Windows 11 users reported that the operating system does not update the time even after automatically changing the time and date.
Well, if you are one of these users, then you will face several issues with the software installed on your Windows 11 PC. In particular, the browser application throws multiple errors due to incorrect time and date.
This is nothing new, sometimes Windows can behave strangely. Windows Time service may stop without any reason and you will face Windows 11 not updating time error.
Thankfully, this tutorial is designed to help you as we have listed down some of the best and most effective solutions to help users fix Windows 11 not updating time error. Let's check it out.
What are the different ways to change the date and time on Windows 11?
1. Use the command prompt
- to open the Start menu.
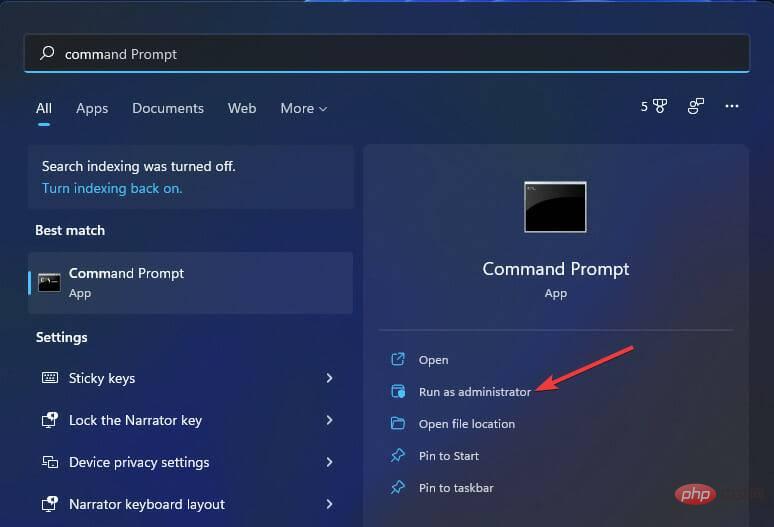
- Search for Command Prompt and open it as Administrator.

- Using the date formatdate dd/mm/yyyy, you can change the date of your PC.
- For example, if you wish to change the date to 12/April/2022, in the above format, you would enter 12/04/2022. Please note that the date format depends on the format set by your PC. If your date is in the format mm/dd/yyyy, then you would enter 04/12/2022. So the command would be:
date 12/04/2022ordate 04/12/2022
- For example, if you wish to change the date to 12/April/2022, in the above format, you would enter 12/04/2022. Please note that the date format depends on the format set by your PC. If your date is in the format mm/dd/yyyy, then you would enter 04/12/2022. So the command would be:
- To change the time, use the format Time HH:MM and press Enter.
- To change the time to 10:30 AM, you need to enter the time 10:30 in the above format. If you want to change the time to 10:30 PM, you need to enter the time 22:30. So the command would be:
time 10:30ortime 22:30.
- To change the time to 10:30 AM, you need to enter the time 10:30 in the above format. If you want to change the time to 10:30 PM, you need to enter the time 22:30. So the command would be:
- Exit CMD.
2. Use Powershell
- to open the Start menu.
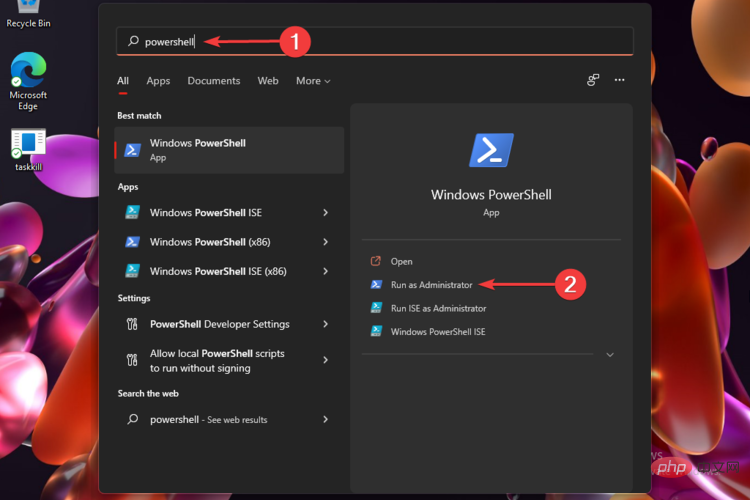
- Search for Windows Powershell and run it as Administrator.

- Type the following command and press Enter key once to change the date and time.
Set-Date -Date "dd/mm/yyyy HH:MM AM"orSet-Date -Date "dd/mm/yyyy HH:MM PM" - ExitWindows Powershell.
While you may already be familiar with other methods of changing date and time, namely from the taskbar widget panel or the Control Panel method, the above two methods add flexibility.
How to fix Windows 11 not updating time error?
1. Check whether the time setting is set to manual
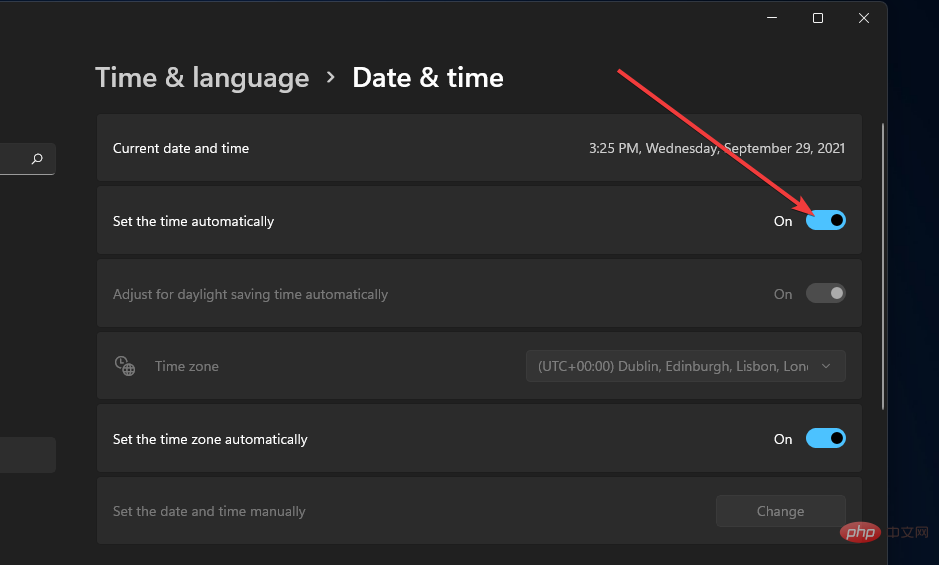
- Press the Win I key to open the settings menu.
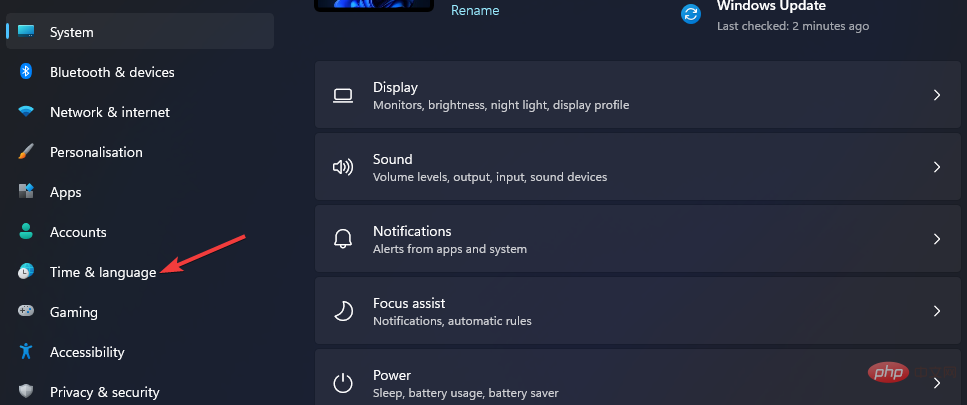
- ClickTime and Language.

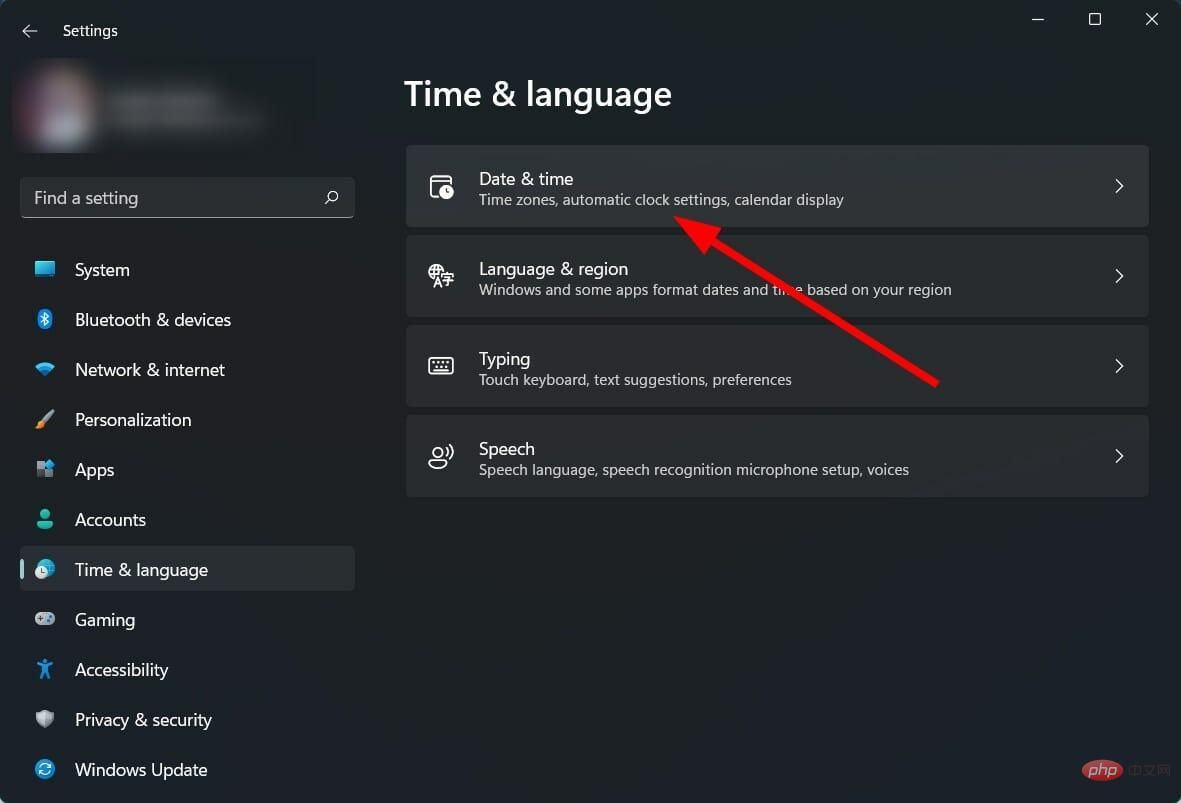
- Select Date and Time.

- Make sure to turn on the Automatically set time option if not already selected.

If the Automatically set time option is not selected, a problematic third-party application, virus, or malware on your PC may be adjusting the manual time settings will only cause you more trouble.
Because, the wrong time will not only deprive you of the right to receive the latest updates, but also cause some problems with your browser and virus definition updates.
2. Start the Windows Time Service
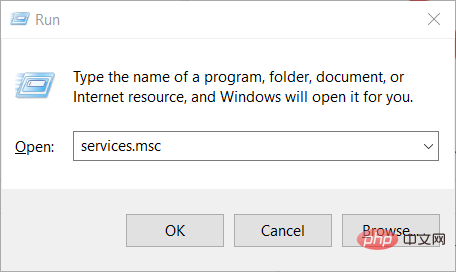
- Press the Win R key to open the Run dialog box.
- Type the following command and press Enter.
services.msc
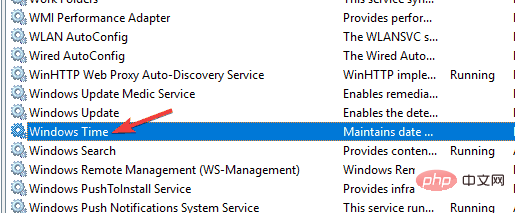
- On the right, search for Windows Time Services and double-click it.

- Under Startup type, select Automatic.
- Select the Start button.
- Click Apply and OK to save changes.
Your Windows 11 PC uses the Windows Time service to keep the time and date up to date.
Sometimes, due to external factors, this service does not function properly or function properly. This eventually leads to issues like Windows 11 not updating time error. Check if the service is running, if not then enable it and see if that solves the problem.
3. Use a different server
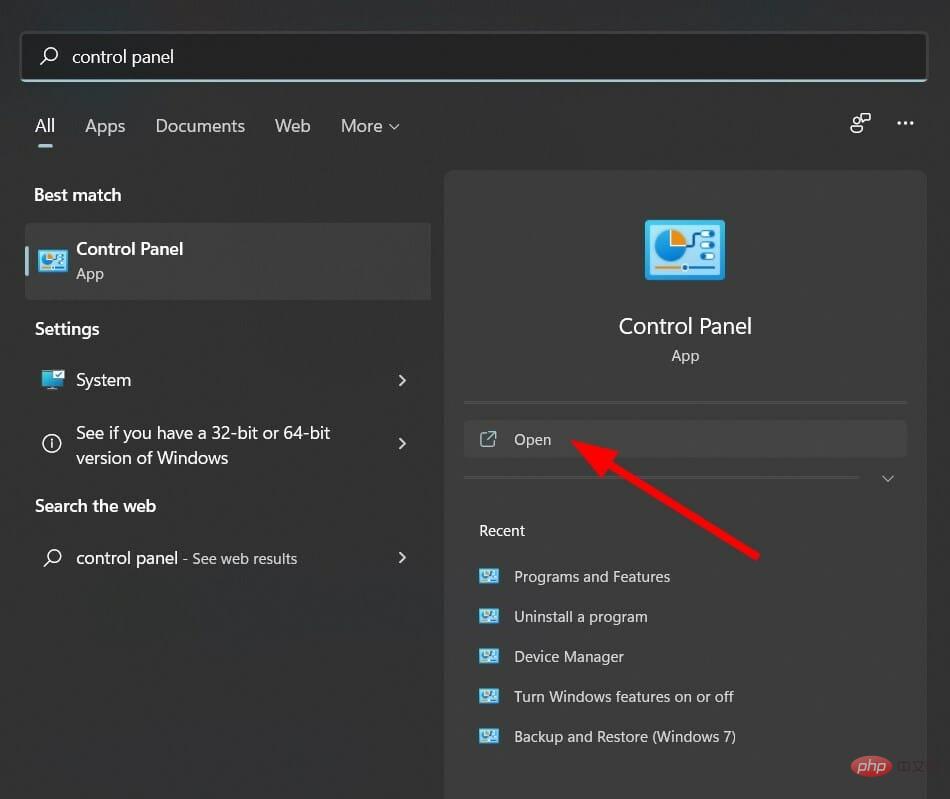
- Open the Start menu.
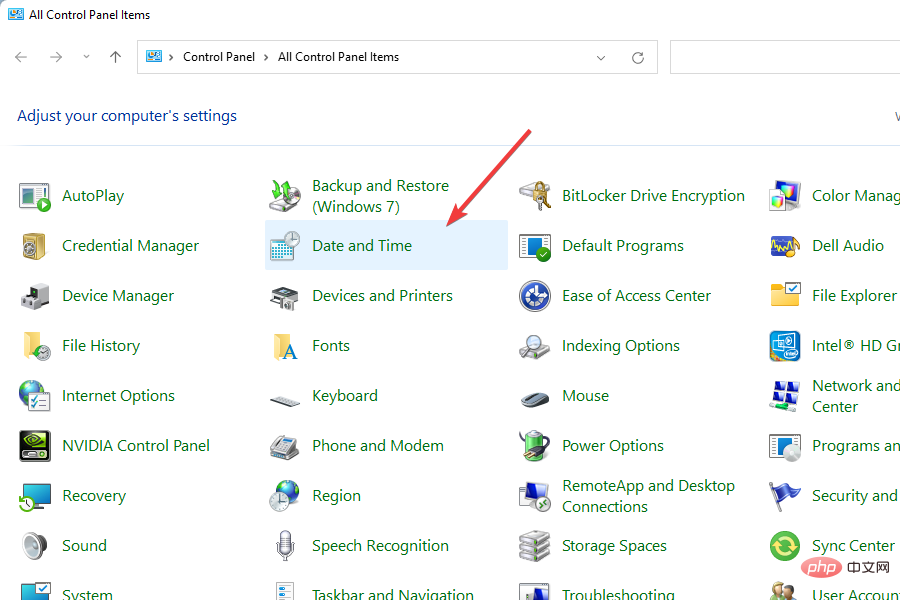
- Open Control Panel.

- Select Date and Time.

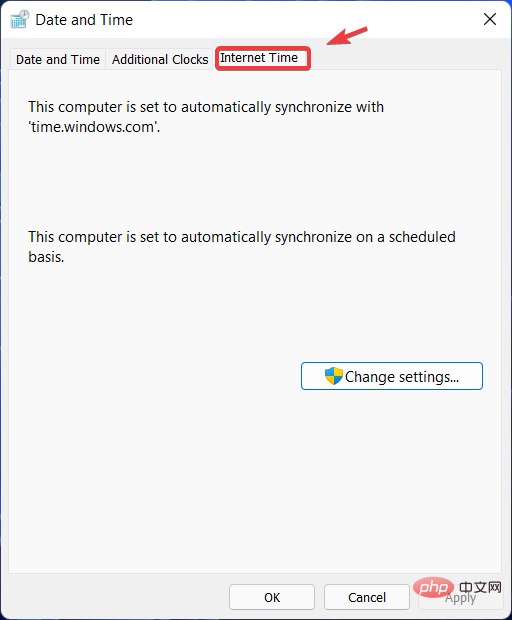
- Switch to Internet time.

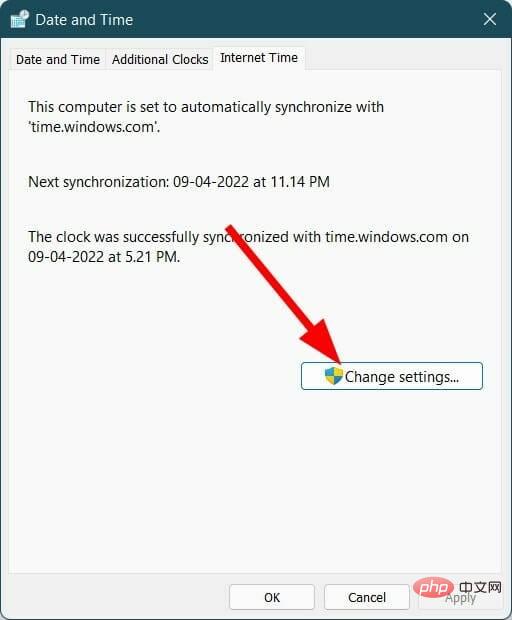
- Click Change Settings.

- Change the time server from the Server drop-down menu.
- Click the Update Now button.
Changing Time Server has helped some users keep their Windows 11 PC’s time updated. It is possible that the current time server you selected is facing some issues. You can also give it a try and hope it solves the problem.
4. Reset w32time.dll
- Open the Start menu.
- Search for Command Prompt and open it as Administrator.

- Execute the following commands.
regsvr32 w32time.dll - Close the command prompt and restart your PC.
Using the above command, you are basically re-registering the w3time.dll file on your PC. Check if this solves the problem.
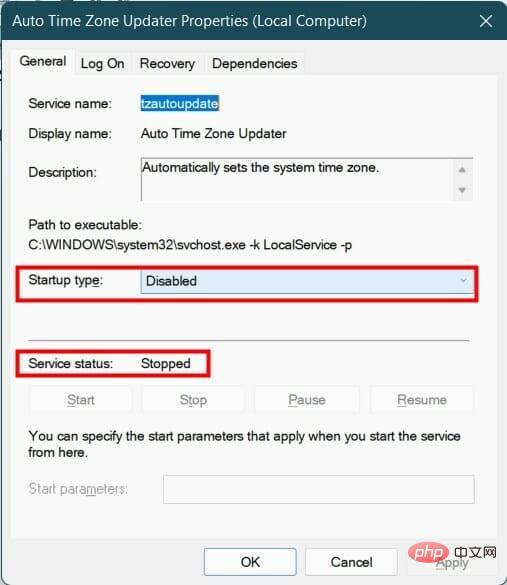
5. Disable and enable the automatic time zone update service
- Press the Win R key to open the Run dialog box .
- Type the following command and press Enter.
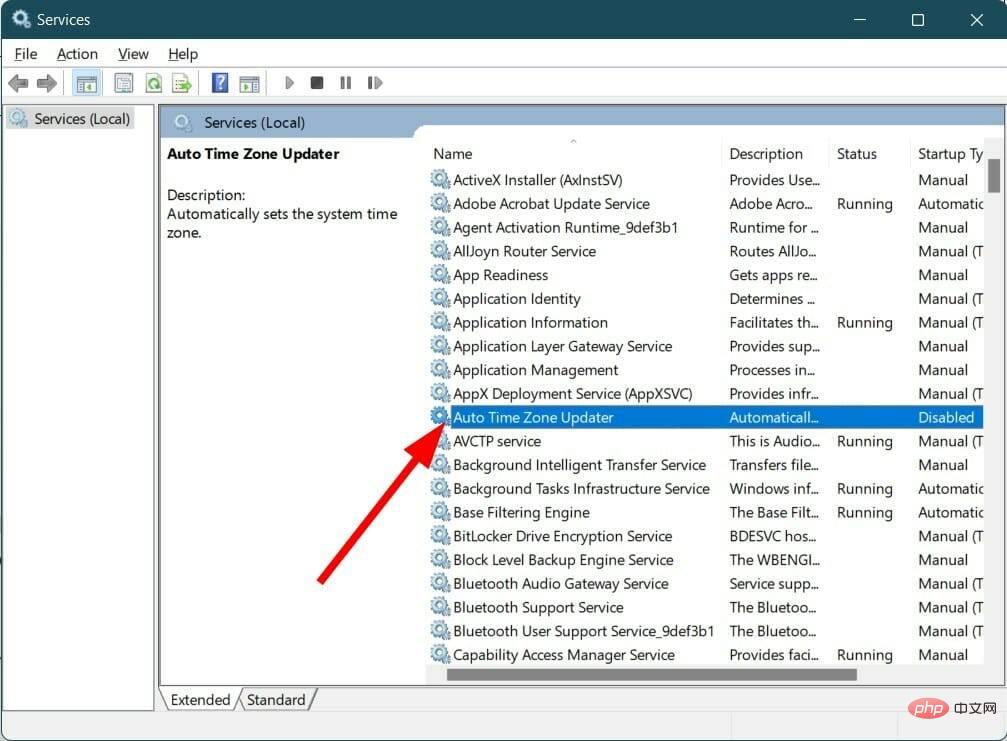
services.msc
- On the right, search for Automatic Time Zone Updater and double-click it.

- Double-click it and select Disabled under Startup type.
- Set the service status to Stop.

- Restart your computer.
6. Use the Registry Editor
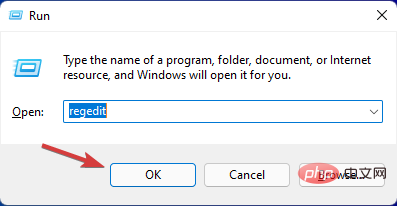
- Press the Win R key to open the Run dialog frame.
- Type the following command and press Enter.
regedit
- Go to the path below.
HKEY_LOCAL_MACHINE\SYSTEM\CurrentControlSet - Find ControlTimeZoneInformation in the left pane. If it does not exist, right click on the CurrentControlSet and create a new key.
- Name this newly created key ControlTimeZoneInformation.
- On the right side, right-click the empty space and select New > Dword (64 bit).
- Name it RealTimeIsUniversal.
- Double-click RealTimeIsUniversal.
- Change the numerical data to 1.
Before you proceed to adjust your PC's registry settings, it is important to back up the default registry settings so that you can always revert to them in case something goes wrong.
To make a backup, open Registry Editor and click File > Export. Select a location to save the Registry Editor backup and click Save.
6. Run System File Checker
- Click Start.
- Search Command Prompt.
- Open as administrator.
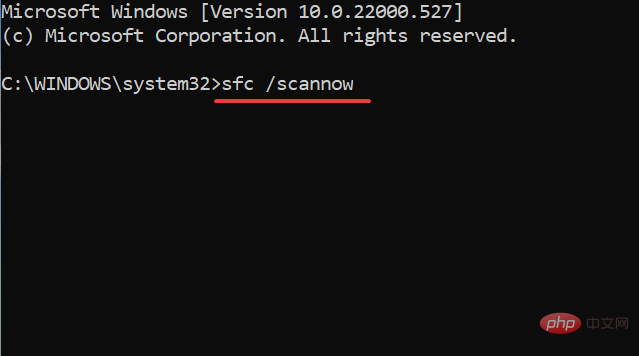
- Type the following command and press Enter.
sfc /scannow
- Restart your computer.
If corrupted system files are present on your PC, then it will interfere with the smooth running of all system processes.
System File Checker is an efficient Windows 11 tool that, in addition to detecting corrupt files, can also repair them. All this is done automatically by executing commands.
Alternatively, there is a reliable third-party software called Restoro which can help you resolve several system-related issues caused by corrupted system files.
⇒ Get Recovery
What else can I do to fix Windows 11 not updating time error?
If none of the above solutions help you solve the problem, there is a way (at least a temporary solution) that can help you get the correct date and time on your Windows 11 PC.
We are discussing setting the time and date manually on a Windows 11 PC. Here are the steps to follow to set the time manually.
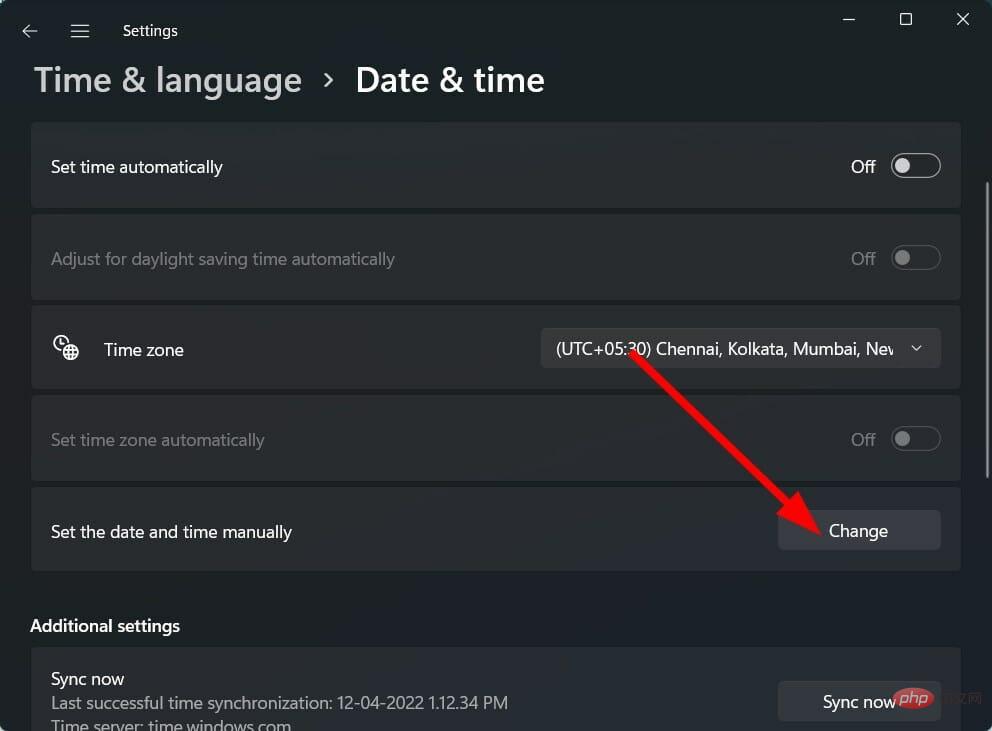
- Press the Win I key to open the Settings menu.
- ClickTime and Language.

- Select Date and Time.

- Turn off Automatically set time option if it is turned on.

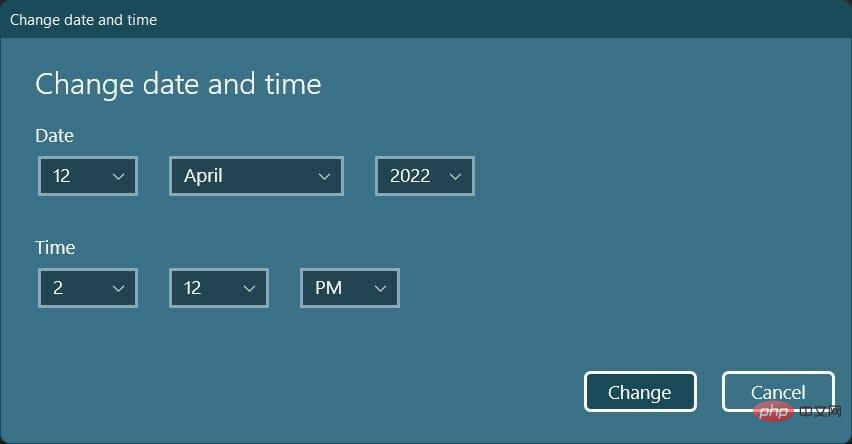
- Click the Change button for manually setting the date and time option.

- A new window will appear where you can manually set the date and time.
- Click the Change button after setting the correct date and time.

The solutions above and the tips at the end should be enough to help you fix the Windows 11 not updating time issue.
However, if nothing works, you can start over by resetting your Windows 11 PC or reinstalling Windows 11 on your PC.
The above is the detailed content of How to fix time errors in Windows 11. For more information, please follow other related articles on the PHP Chinese website!

Hot AI Tools

Undresser.AI Undress
AI-powered app for creating realistic nude photos

AI Clothes Remover
Online AI tool for removing clothes from photos.

Undress AI Tool
Undress images for free

Clothoff.io
AI clothes remover

AI Hentai Generator
Generate AI Hentai for free.

Hot Article

Hot Tools

Notepad++7.3.1
Easy-to-use and free code editor

SublimeText3 Chinese version
Chinese version, very easy to use

Zend Studio 13.0.1
Powerful PHP integrated development environment

Dreamweaver CS6
Visual web development tools

SublimeText3 Mac version
God-level code editing software (SublimeText3)

Hot Topics
 How to run a JAR file on Windows 11 or 10
May 12, 2023 pm 06:34 PM
Windows 11 is capable of running a large number of file types with or without external third-party applications. Not only does it allow you to perform numerous tasks from the comfort of your PC, but it also ensures that you can take advantage of your PC's raw capabilities. Today, we'll take a look at a complex file type—jar—and tell you how to open it on your Windows 11 or Windows 10 PC. What is a jar file? jar is an archive package format that may or may not contain an executable Java program. These archives can contain Java applications or source code, which can then be used to compile and run applications without having to write separate code for each application. You can use various methods
 How to install CAB files on Windows 11
Apr 30, 2023 pm 10:10 PM
What is a CAB file? The extension of CAB file is .cab, which is the abbreviation of WindowsCabinet file. This is a compressed file typically used to compress software installation packages such as device drivers or update files. CAB files support lossless compression, which makes the format ideal for compressing files where it is critical that the files can be extracted accurately, such as drivers and other updates. How to Install a CAB File on Windows 11 Using Command Prompt There are multiple ways to install a CAB file on Windows 11. One of the methods is to use command prompt to extract and install the files. You can also use the newer Windows PowerShell
 7 Ways to Fix Printer Access Denied Error in Windows 11
May 10, 2023 pm 03:43 PM
Connecting your Windows computer to external devices such as printers can make things easier for you. However, you may encounter several problems when trying to collect computers from external devices such as printers. Users complain about Windows 11 printer access denied error. Many situations can cause this issue, including hardware issues, driver issues, and more. Therefore, this article will discuss the cause of the problem and how to solve it. Windows 11 printer access denied error prevents you from using the printer to perform any action on your computer. This indicates that there is not a good connection between the computer and the printer. Likewise, printer errors may cause Windows to be unable to connect to the printer Access Denied error 0x0000011b.
 How to safely set high priority for apps in Windows 11?
May 06, 2023 pm 06:28 PM
Windows does a great job of allocating system resources to the processes and programs that need it most by assigning priorities to them. Most applications you install will run perfectly fine at the default "normal" priority level. Sometimes, however, you may need to run a program, such as a game, at a higher level than the default normal level to improve its performance. But this comes at a cost, and it's a deal worth pondering. What happens when you set an app to high priority? Windows has a total of six priority levels for running different processes and programs - low, below normal, normal, above normal, high and real-time. Windows will rank and queue applications based on their priority. The higher the priority, the application
 Fix: Snipping Tool notification missing in Windows 11, 10
May 16, 2023 pm 06:34 PM
Snip&Sketch is an excellent Windows screenshot tool. Microsoft has added tons of new cool features and shortcuts to make this tool almost indispensable for users. However, you may have noticed an issue after taking the screenshot, the preview notification does not appear in the notification panel! There are many reasons that could be the source of the problem. So, no need to waste more time, just follow these solutions to find a quick solution. Fix 1 – Check notification settings You may have blocked Snip & Sketch notification settings. 1. You have to open settings. So, press Windows key + I key at the same time. 2. Now, go to “System” from the left pane. 3. On the right side, click All Options
 3 Ways to Open System 32 Folder on Windows 11 or 10
May 04, 2023 pm 10:01 PM
What is the System32 folder? System32 is one of the main folders used by Windows. During Windows installation, all necessary files and folders that are critical for the proper functioning of Windows are copied to this folder. These include important system files, related executable files used by Windows utilities, dynamic link libraries (DLLs), and even some software files are copied to this folder. However, don't be fooled by the name System32. This is true for both 32-bit and 64-bit computers. In a 64-bit machine, the System32 folder hosts the 64-bit files, while the 32-bit files are located in
 How to fix DISM 87 error in Windows 11?
May 09, 2023 am 09:31 AM
Windows 11 users are facing issues dealing with many error codes caused by different issues. DISM error 87 is a command line error. DISM means DeploymentImageServicingManagement, and its main job is to help organize virtual disks. It manages split Windows Image Format (WIM) files, all-flash utility files, virtual hard disks (VHD) and more. You can access the tool on Command Prompt or Windows PowerShell. We use this tool to repair Windows image issues. This article will introduce how to fix the problem in Windows 11
 7 Ways to Fix Unable to Enumerate Objects in Containers
May 12, 2023 pm 01:43 PM
While trying to change the permissions of a file or folder, you may often encounter the error - Unable to enumerate objects in container Access is denied. Although as an administrator you can change the access rights, sometimes even an administrator may encounter the same error message. This is a common mistake that is usually made by users on different forums. In this case, even the administrator cannot change the permissions of a specific user or other user groups when access is denied on Windows 10/11. Additionally, many users also face an issue of not being able to enumerate objects during Azure file sharing, which can apparently be solved by assigning the appropriate RBAC role (the elevated participant role for SMB shares that store file data). In this article we


