

How to change the time on Windows 11: 3 easy steps

With Windows 11 in the spotlight, it's natural to ask questions. In our opinion, more is better! One specific topic raised by users is how to change the time on Windows 11.
Despite the massive overhaul, the operating system is still based on the same familiar, dare we say coherent infrastructure we all know and love in Windows 10.
So adjusting the time parameters is fairly intuitive and very similar to the old Windows 10. So, without further ado, let’s dive into what you need to do to change the time on Windows 11.
How to change the time on Windows 11?
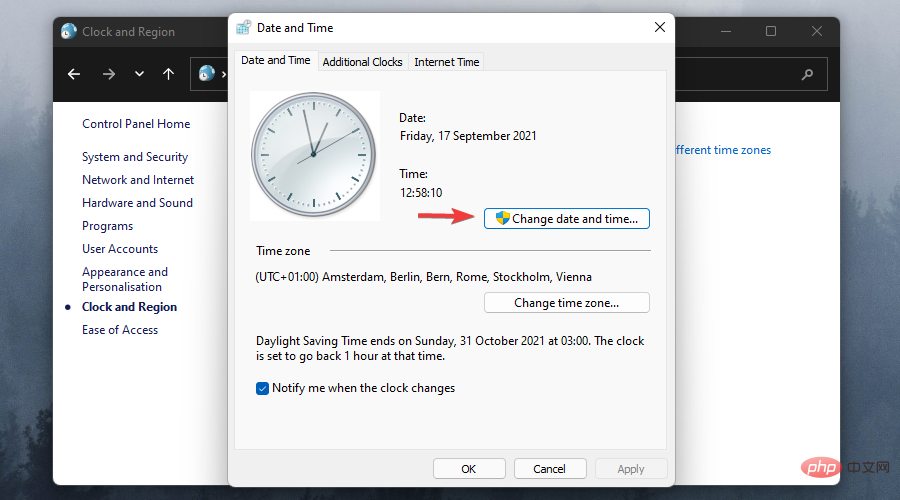
1. Change the time settings through the control panel
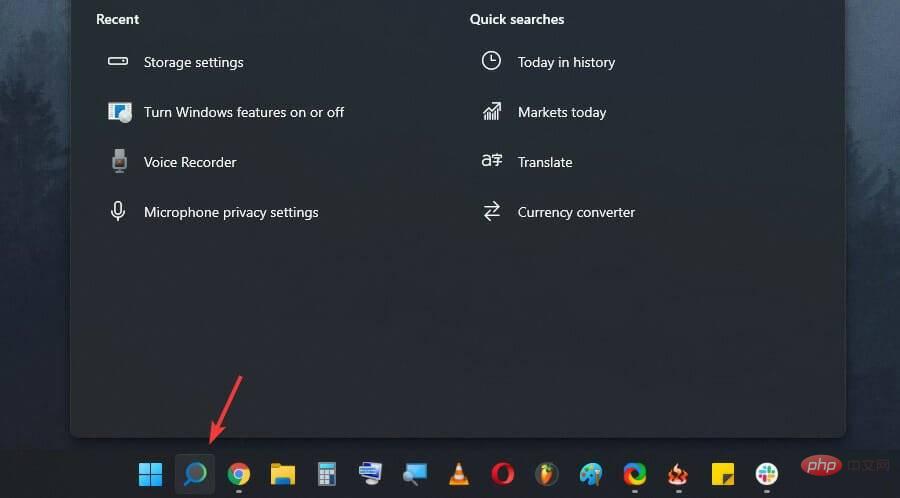
- Click the Search button on the taskbar.

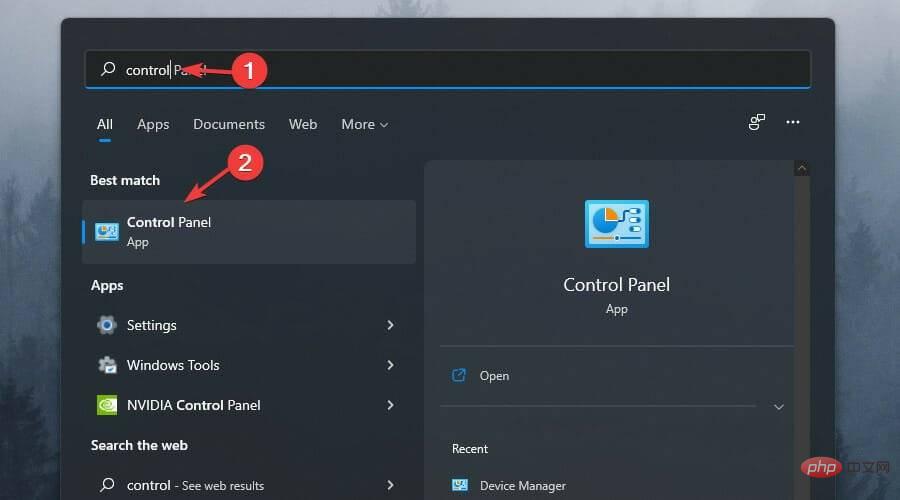
- Type control and select Control Panel from the list of results.
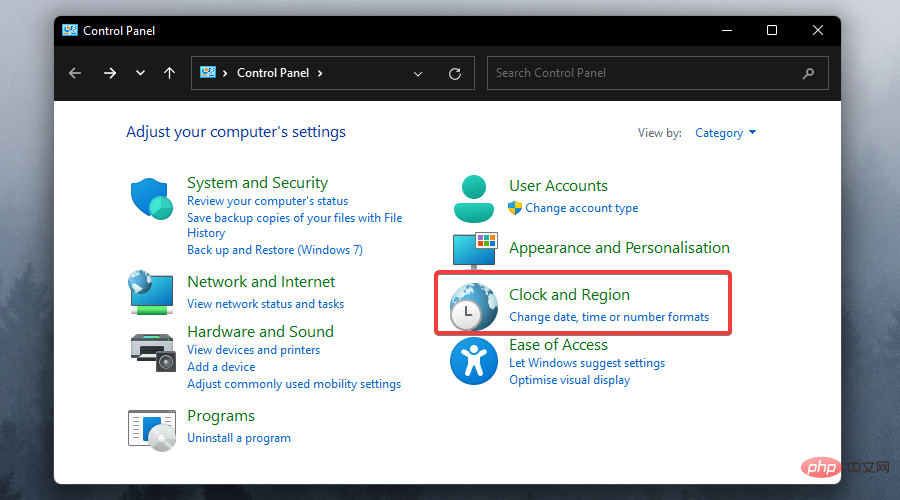
- Then, click on the Clock and Zone option.
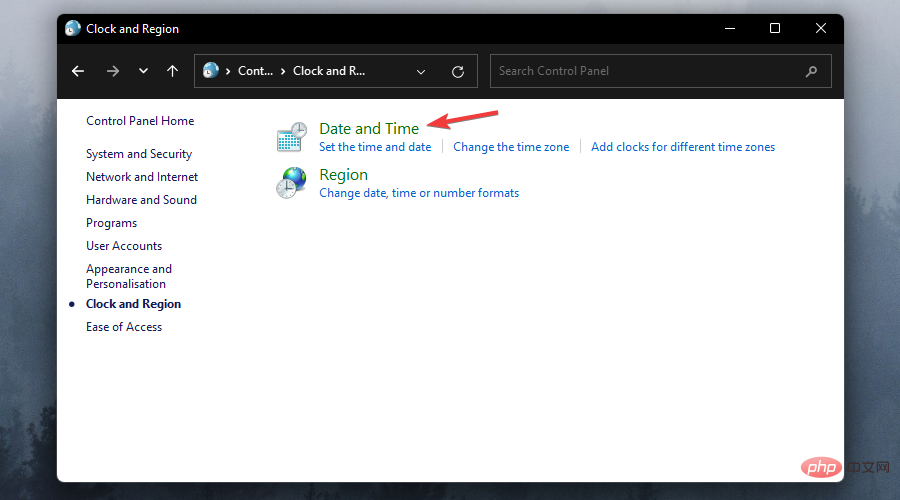
- Select Date and Time.
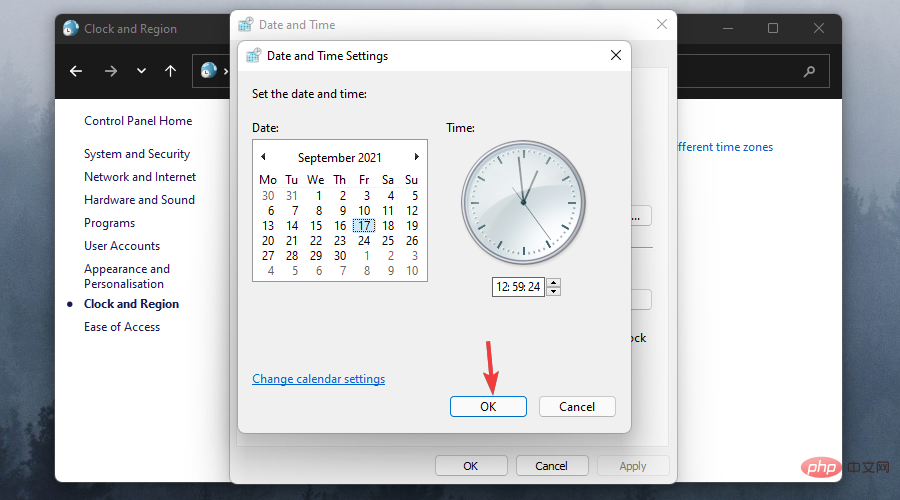
- Click the Change date, time.. button.
- You can now adjust this parameter to your liking.
- Finally, don’t forget to click the OK button when finished to confirm and apply the changes.

This is the traditional way to change the time on Windows 11. As you can see, the process is as intuitive and straightforward as ever, and works pretty much the same as in Windows 10.
Now, we all know that evolution works in some mysterious way - to some extent - and as a direct result of the Redmond giant's decision to drop many of the features it deemed unsuitable for the new operating system Function.
As you can see, Control Panel is still going strong and you can rely on it for many years to come. Unless a completely new breakthrough comes along and Microsoft decides to fundamentally shake up our world, that is.
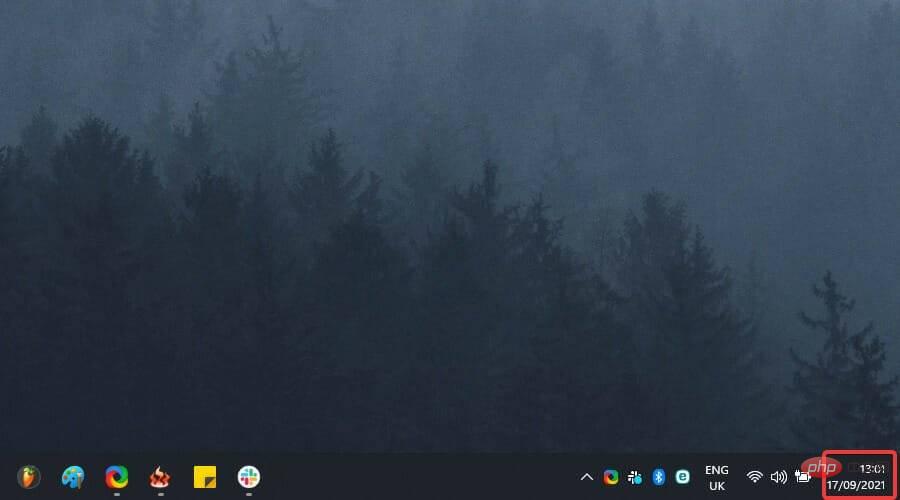
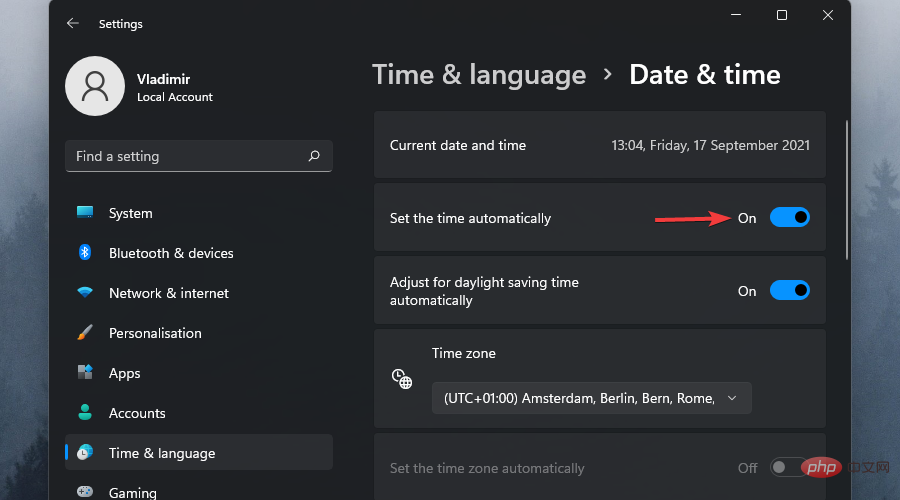
2. Explore the Widget Panel
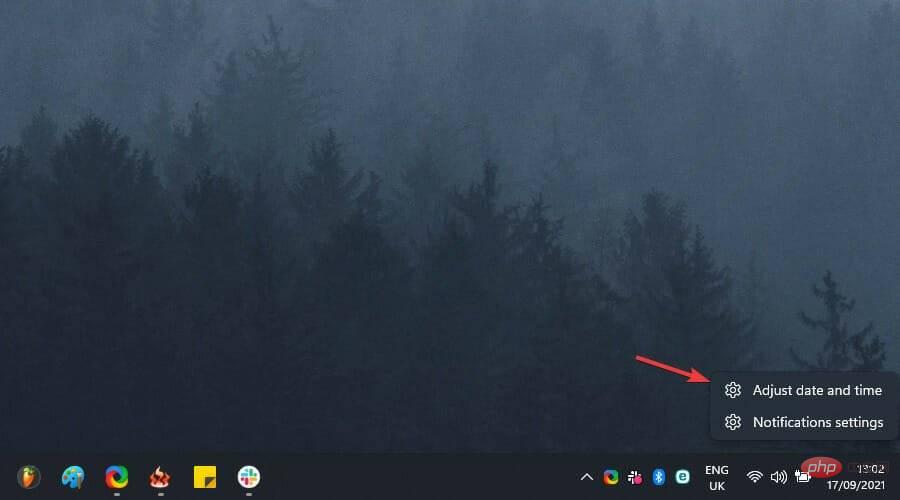
- Right-click the Time and Date widget on the Windows 11 desktop taskbar.
- Select Adjust Date/Time from the list, which will take you to the familiar date and time settings screen.
- Now, make sure the Automatically set time option is switched to off.
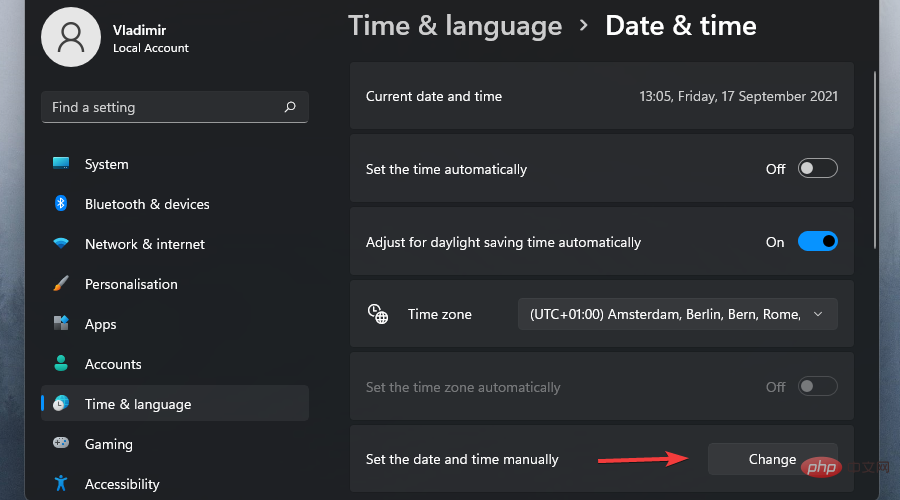
- The next step is to click the Changebutton under the Manually Set Date and Time section.
- Here you can make all the modifications you want.
- As always, don't forget to click the Change button to verify your custom settings.
Easy, right? When you want to change the time on Windows 11, there's one more thing you might also be interested in: formatting.
Suppose you are not happy with a specific format or even the calendar settings on a brand new operating system.
You can also set this parameter to reflect your style and needs from the Date, Time, and Zone Format screens located in the same widget.
Check out these quick steps to do just that:
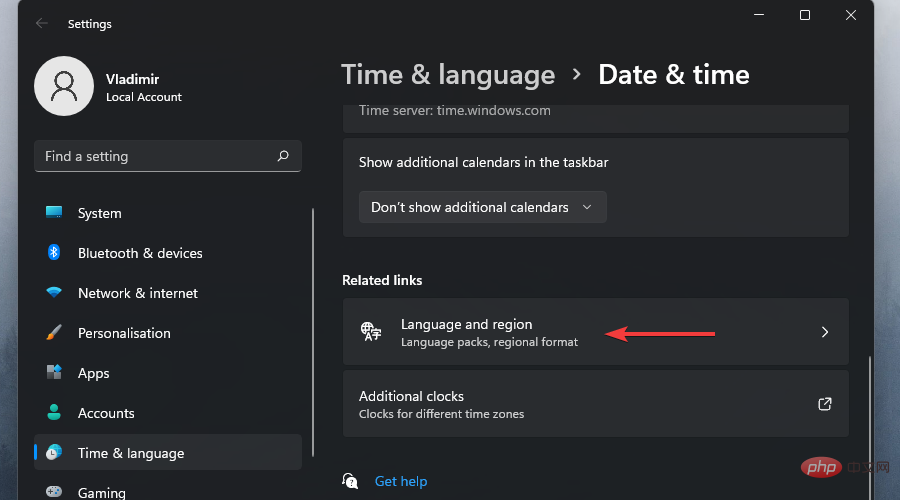
- Open the Time and Date widget and click Adjust Date/Time options as shown above.
- Click on the Language and Region option.
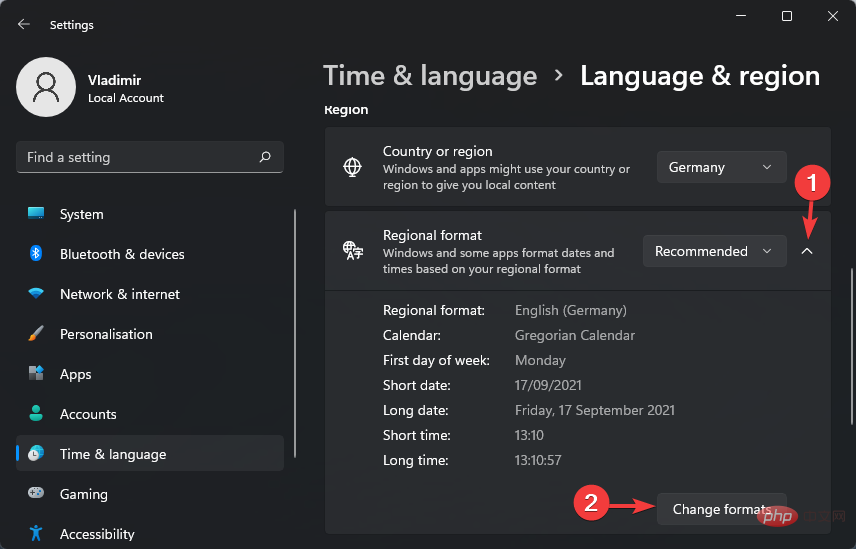
-
Select the drop-down menu from the Region Format option and click Change Format.

The new operating system not only brings new functions. While some features didn't make it, others were restored to their former glory. Such is the case with widgets making a huge comeback in the new Windows 11.
The Widgets feature now replaces the old live Tiles with considerable perks and enjoys a dedicated panel with numerous customization options.
As you can see, the steps are very similar to how they work in Windows 10. Speaking of which, you might want to check out this comprehensive Windows 10 and Windows 11 side-by-side.
The above is the detailed content of How to change the time on Windows 11: 3 easy steps. For more information, please follow other related articles on the PHP Chinese website!

Hot AI Tools

Undresser.AI Undress
AI-powered app for creating realistic nude photos

AI Clothes Remover
Online AI tool for removing clothes from photos.

Undress AI Tool
Undress images for free

Clothoff.io
AI clothes remover

AI Hentai Generator
Generate AI Hentai for free.

Hot Article
Hot Tools

Notepad++7.3.1
Easy-to-use and free code editor

SublimeText3 Chinese version
Chinese version, very easy to use

Zend Studio 13.0.1
Powerful PHP integrated development environment

Dreamweaver CS6
Visual web development tools

SublimeText3 Mac version
God-level code editing software (SublimeText3)
Hot Topics
 1385
1385
 52
52

 7 Ways to Fix Printer Access Denied Error in Windows 11
May 10, 2023 pm 03:43 PM
7 Ways to Fix Printer Access Denied Error in Windows 11
May 10, 2023 pm 03:43 PM
Connecting your Windows computer to external devices such as printers can make things easier for you. However, you may encounter several problems when trying to collect computers from external devices such as printers. Users complain about Windows 11 printer access denied error. Many situations can cause this issue, including hardware issues, driver issues, and more. Therefore, this article will discuss the cause of the problem and how to solve it. Windows 11 printer access denied error prevents you from using the printer to perform any action on your computer. This indicates that there is not a good connection between the computer and the printer. Likewise, printer errors may cause Windows to be unable to connect to the printer Access Denied error 0x0000011b.
 How to fix preview pane not working in Windows 11
Apr 24, 2023 pm 06:46 PM
How to fix preview pane not working in Windows 11
Apr 24, 2023 pm 06:46 PM
One of the features that comes with Windows File Explorer is the preview pane, which displays a preview of the file you selected. This means you can view the contents of the file before opening it. The preview pane of File Explorer provides previews for different types of files such as Office-related documents, PDFs, text files, images, and videos. It usually works fine, but sometimes the file preview isn't available. Recently, many Windows 11 users have raised the issue that File Explorer’s preview pane is not working and they are unable to view file previews. Are you facing the issue of preview pane not working on your Windows computer? Then, continue reading this article. Here we have compiled a list of fixes that can help you fix
 Fix: Snipping Tool notification missing in Windows 11, 10
May 16, 2023 pm 06:34 PM
Fix: Snipping Tool notification missing in Windows 11, 10
May 16, 2023 pm 06:34 PM
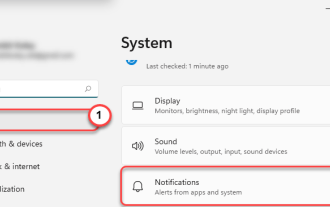
Snip&Sketch is an excellent Windows screenshot tool. Microsoft has added tons of new cool features and shortcuts to make this tool almost indispensable for users. However, you may have noticed an issue after taking the screenshot, the preview notification does not appear in the notification panel! There are many reasons that could be the source of the problem. So, no need to waste more time, just follow these solutions to find a quick solution. Fix 1 – Check notification settings You may have blocked Snip & Sketch notification settings. 1. You have to open settings. So, press Windows key + I key at the same time. 2. Now, go to “System” from the left pane. 3. On the right side, click All Options
 3 Ways to Fix Error 740 When Adding a Printer in Windows 11
Apr 22, 2023 pm 12:04 PM
3 Ways to Fix Error 740 When Adding a Printer in Windows 11
Apr 22, 2023 pm 12:04 PM
Can't add printer on Windows 11? If you encounter error 740 when adding a printer to your Windows 11 PC, you are not alone. It often leaves you wondering, will your printer work with Windows 11? This is a common error and the message reads – This doesn’t work. We cannot install this printer at this time. Please try again later or contact your network administrator for assistance. Bug: #740. But, to your relief, this just means that you need to have the required administrator rights to add the printer. Additionally, you may see the message – The requested operation requires elevation: Error 740. This error prevents you from running applications or accessing files on your storage device
 Ghost Specter Windows 11 Superlite: Download and Installation Guide
May 05, 2023 am 09:10 AM
Ghost Specter Windows 11 Superlite: Download and Installation Guide
May 05, 2023 am 09:10 AM
Updating the operating system to the latest Windows 11 poses a challenge for many PCs due to insufficient system requirements. Therefore, Microsoft released a modified version, GhostSpectreWindows11Superlite, compatible with every PC. Therefore, we will discuss how to download and install it. Likewise, if your PC meets the Windows 11 system requirements, you can read further about obtaining a Windows 11 custom ISO. What is Ghost Windows 11? GhostSpectreWindows11 is a modified version called LightWindows11. This is because of the installed
 How to enable developer mode in Windows 11
Apr 25, 2023 pm 10:58 PM
How to enable developer mode in Windows 11
Apr 25, 2023 pm 10:58 PM
Microsoft has announced a new feature alongside Windows 10 called Developer Mode, which is also present in Windows 11. This is very important for all developers who code software development on Windows PC and want to deploy it to other devices. To improve the coding environment, users must enable developer mode on Windows systems, which allows users to benefit from enhanced assistance in writing, testing, and deploying code. Users must ensure that developer mode is enabled not only on the Windows machine where coding is done, but also on the device where it is deployed and tested. If you are new to coding and want to make the most of this feature, continue reading this article which will guide you how
 Fix issue where Windows 11 display language cannot be changed
May 07, 2023 am 10:10 AM
Fix issue where Windows 11 display language cannot be changed
May 07, 2023 am 10:10 AM
The display language is the front-end language in which users can read and view system screen content. Windows 11 releases updated versions regularly, but sometimes this causes some unexpected things to change. Many Windows users have noticed a change in Windows 11 systems where they cannot change their display language. They're not sure why this is happening. We suspect this may be due to a recent Windows version being installed on the system or having sync settings enabled to remember preferences for different devices. Don't worry if you encounter such problems when changing the display language. In this article, we have explained below some solutions that will help users to resolve this issue and be able to change the display language. build
 Windows 11 doesn't recognize Bootrec? Apply this simple fix
May 20, 2023 pm 01:50 PM
Windows 11 doesn't recognize Bootrec? Apply this simple fix
May 20, 2023 pm 01:50 PM
The boot sector is a critical part of the drive that takes over shortly after the computer boots. When you have a problem, bootrec is here to help. But what should you do if bootrec is not recognized in Windows 11? The boot sector contains the MBR or Master Boot Record, which helps locate the operating system on the drive and load it. Moreover, its issues may prevent you from booting Windows 11 efficiently or at all. Speaking of issues, many are reporting Bootrec/Fixboot access denied messages and we have detailed this issue in a separate tutorial. In this case, it is recommended that you run the bootrec command to eliminate this issue. If you encounter when running the command