

How to Improve Your Snapchat Score Quickly: 4 Effective Methods

If you think the iPhone or MacBook are Apple's greatest products, think again. While all of the Cupertino company's products are considered next-gen and stand out in their respective segments, it's the ecosystem that connects all its devices that is Apple's most valuable thing. By tying all your Apple devices together with a single thread, the ecosystem provides a unique experience that allows you to access the same data from any device you may own, or pick up where you left off from one device Go to another device. But what if you don’t want your Mac and iPhone to coexist? Can you use these devices without relying on the Apple ecosystem? Technically, yes, you can disconnect your Mac and iPhone from sharing or syncing your user data, in this post we will guide you through all the ways to disconnect Mac from iPhone and vice versa Yes.
Disconnect Mac from iPhone: Let’s first see how they are connected
Before learning how to disconnect these two devices, you should first understand how Mac and iPhone are connected to each other. The most basic way to connect the two devices is through iCloud, which happens when you initially set up your Mac and iPhone. When you add your iPhone and Mac to your Apple account, they will connect immediately. Using iCloud, you can sync the content of apps on your Mac and iPhone with each other, back up pictures from your iPhone to be visible on your Mac, and other files you may have backed up using iCloud Drive. There are also traditional methods of connecting two devices. You can use a USB to Lightning cable to transfer files from your Mac to your iPhone or otherwise. Apple also offers AirDrop functionality, which allows people to move files between two devices via Wi-Fi and Bluetooth without relying on a physical connection. In addition to iCloud sync, users can also enable Handoff and Continuity features, which when set up correctly, allow them to launch something on their Mac and get it on their iPhone, and vice versa. This feature also allows you to copy text and content from one device and paste them seamlessly onto another Apple device. Apple's Continuity Camera allows users to scan something from their iPhone and insert it directly into an email, web page, or app on their Mac. Other ways to connect your Mac and iPhone include iPhone calling on your Mac, SMS forwarding from iPhone to Mac, connecting your Mac to your iPhone's Personal Hotspot, and pairing the two devices via Bluetooth.How to Disconnect Mac from iPhone
There are many ways to disconnect Mac from iPhone, and you can follow these methods to remove Mac directly from iPhone.
Method #1: Remove Mac from Your Apple ID
The basis for pairing two or more Apple devices revolves around the company's iCloud network. To use and benefit from iCloud and its sync features, all of your Apple devices must be signed in to the same Apple account. So, if you want to completely separate your Mac from your iPhone, the best way is to delete the macOS device directly from your Apple account.
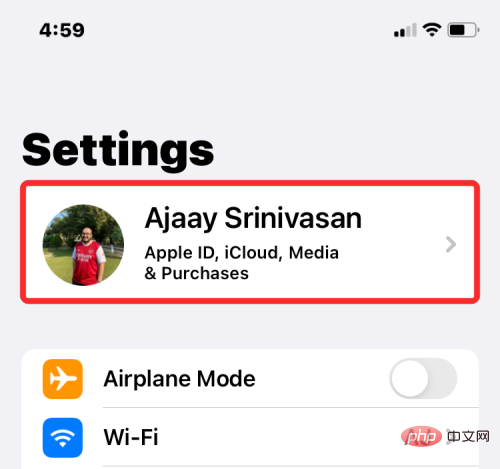
To remove your Mac from your Apple ID, open the Settings app and click the Apple ID card at the top.
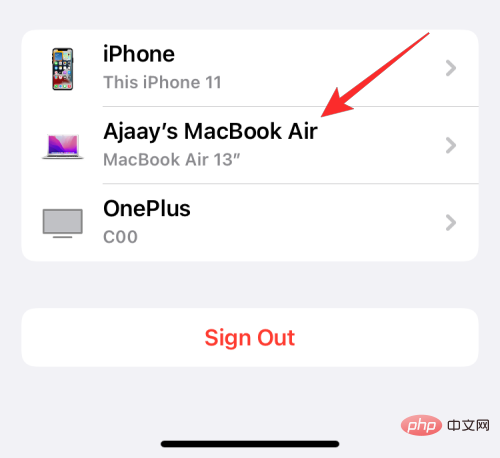
#Now, scroll down and find your Mac or MacBook from the list of devices at the bottom.
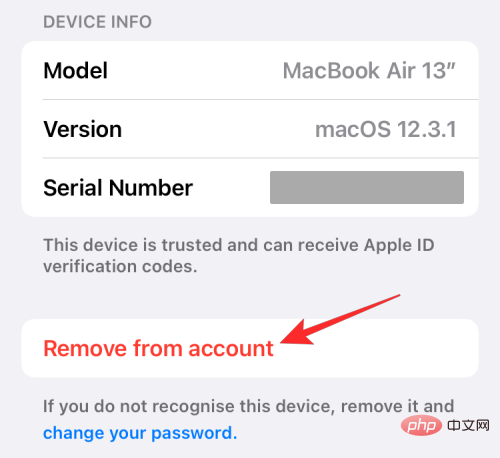
In Device Information, click Remove from account.
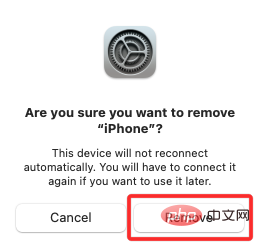
You will now see a prompt on the screen asking you to confirm. Click to delete in this prompt.

#Apple will now remove your Mac from your account and it will no longer pair with your iPhone.
If you don’t want to completely remove your Mac from your Apple account, but want to unpair certain aspects of your iPhone, here’s how you can do it.
Method #2: Disconnect from your Mac via Bluetooth
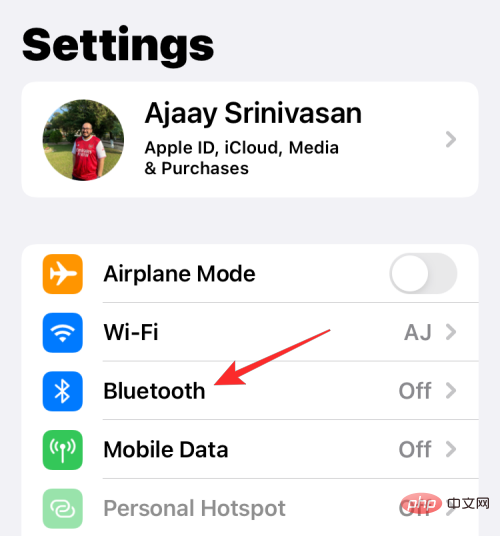
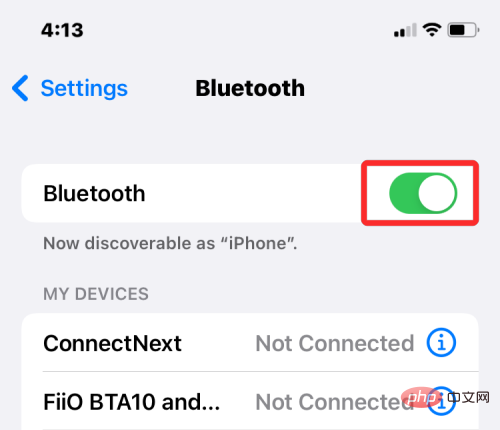
To disconnect from your Mac via Bluetooth, open the Settings app on iOS and select Bluetooth" .
Bluetooth switch at the top.
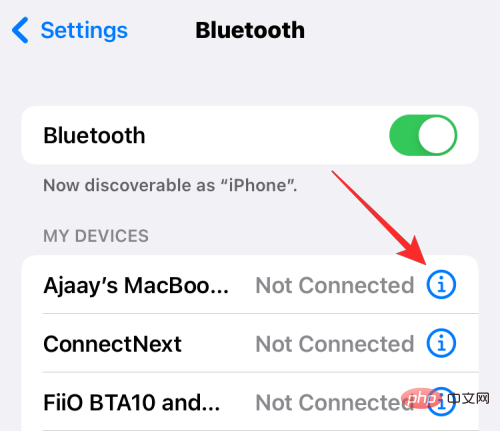
i icon next to it.
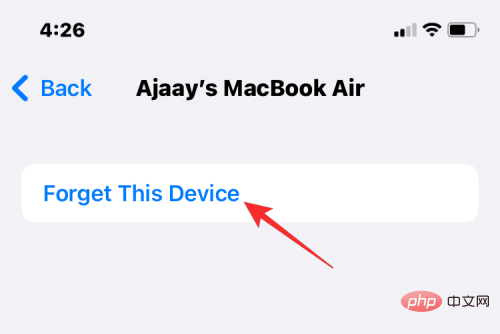
On the next screen, tap Forget this device.
#To confirm, click Forget device in the prompt that appears at the bottom.
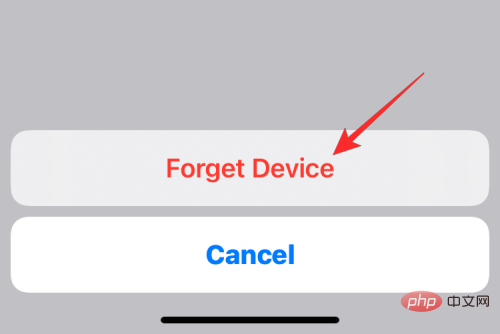
#Your Mac will now be removed from the list of previously paired Bluetooth devices on your iPhone.
Method #3: Disable Phone Calls on Mac
Apple allows users to make and receive calls from their iPhone directly on their Mac. While this works if your iPhone and Mac share the same Apple ID, you can disable this feature individually if you don't want to remove either of these devices from your Apple account like method #1.
To prevent phone calls from reaching your Mac, open the Settings app and select Phone.
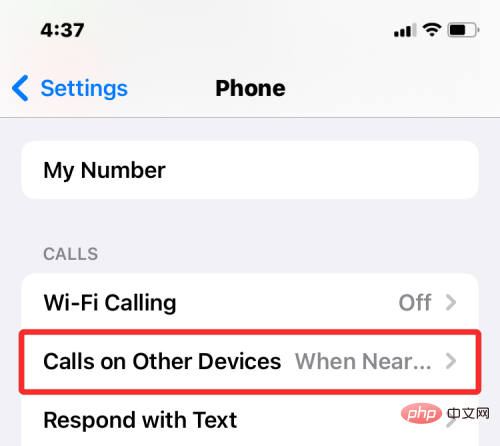
In the phone, tap Call on other devices.
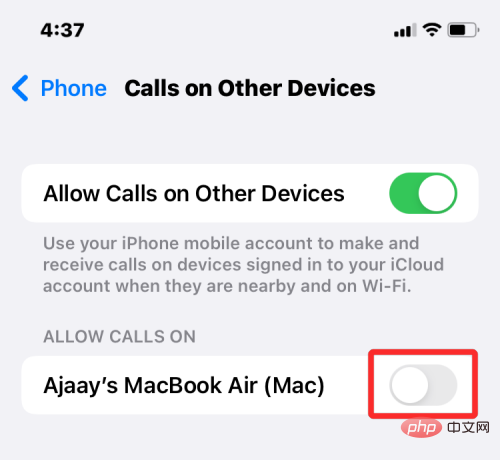
On the next screen, turn off the switch next to Mac under "Allow Calls" to disable call forwarding on the selected device. You may still be able to make and receive calls on other devices enabled on this list.
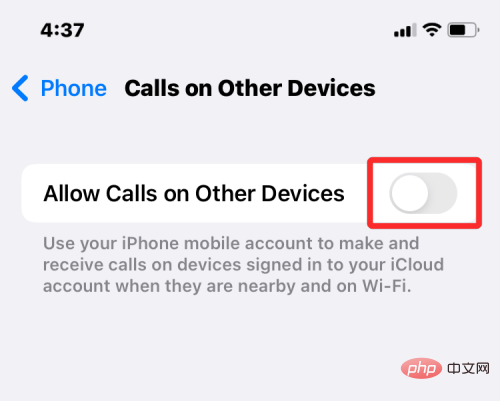
If you want your calls to be answered only on your iPhone, you can disable the Allow calls on other devices toggle at the top.
Method #4: Turn off SMS forwarding to your Mac
Apple allows users to configure their Mac’s Messages app so they can directly Receive every SMS and iMessages from iPhone on your Mac. If you want to disconnect your Mac and prevent it from receiving text messages, you can do so by disabling text message forwarding on your iPhone.
To disable text message forwarding, open the Settings app on your iPhone and select "Messages".
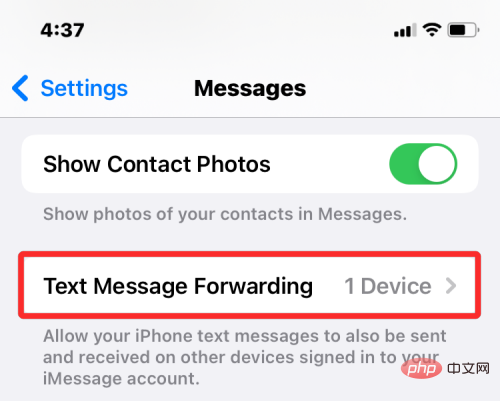
In a message, scroll down and tap SMS Forwarding.
On this screen, turn off the toggle switch next to Mac.
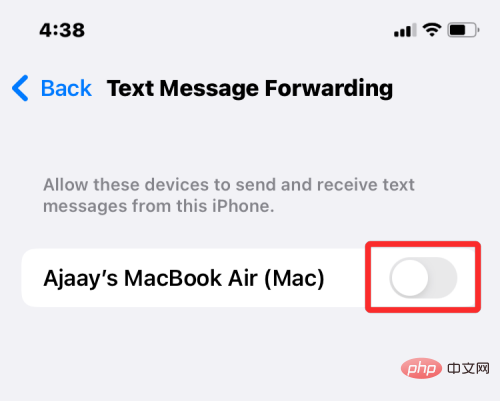
This should prevent your Mac from receiving SMS messages delivered on your iPhone.
Method #5: Enable Notes to Save Locally on iPhone
If you use the same Apple account on your iPhone and Mac and have iCloud turned on for all apps and services on your devices, Then all notes you create on your Mac will also be copied to your iPhone, and vice versa. If you want to keep your iPhone notes on the device itself without syncing them to your Mac, you'll need to save them locally on iOS.
To disable syncing notes to your Mac, open the Settings app and select Notes.
#In Notes, open the On My iPhone account switch.
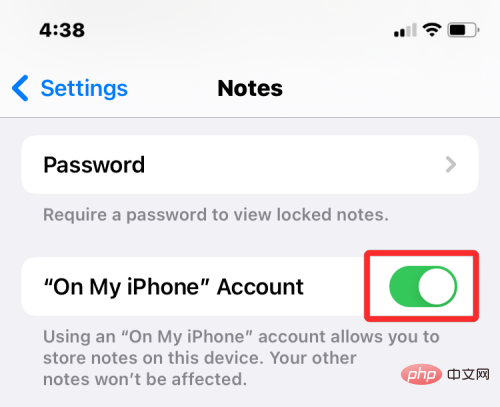
#This should ensure that all notes you create on your iPhone are saved on this device and inaccessible on any other device, including your Mac.
Method #6: Disable Handoff on iOS
To allow users to use their devices for multitasking, Apple provides the Handoff feature. As the name suggests, Handoff lets you start a task on your iPhone and continue it on your Mac, and vice versa. However, if you don’t like this feature and don’t want your Mac to display ongoing tasks or content from your iPhone, you can disable Handoff on iOS.
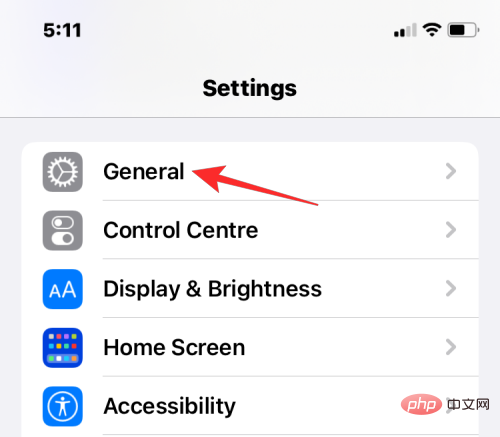
To turn off Handoff on iPhone, open the Settings app and select General.
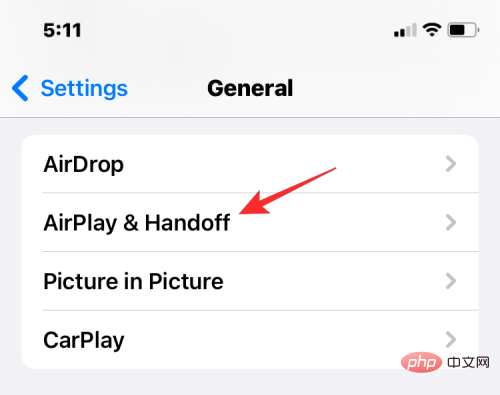
In General, click AirPlay & Handoff.
On the next screen, turn off the Handoff toggle.
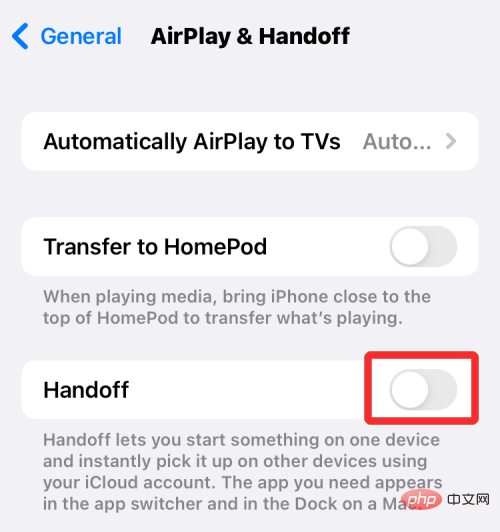
You will no longer see the Handoff banner on this iPhone, nor will you see the Handoff icon on your Mac on this specific iPhone.
Method #7: Turn off AirDrop to prevent your iPhone from showing up on Mac
AirDrop is an excellent feature designed to move between iPhone, iPad, and Mac over Wi-Fi and Bluetooth Send and receive files and content instantly. You can use AirDrop to share files, photos, videos, audio, links, text, documents, contacts, locations, voice notes, and items available in apps on your Mac or iPhone. If you don't use Airdrop and don't want your iPhone to appear on your Mac when you share files, you can turn it off.
To prevent your iPhone from appearing in the Airdrop window on your Mac, launch Control Center and click and hold the Wi-Fi icon or Bluetooth icon .
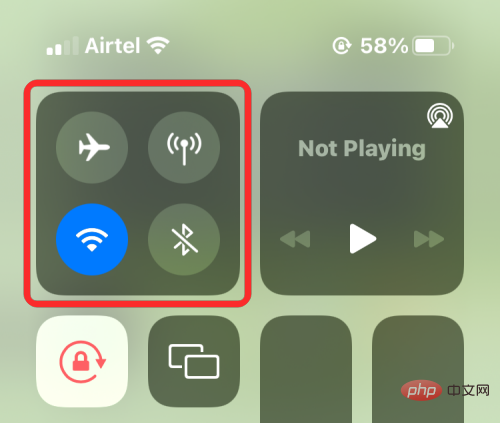
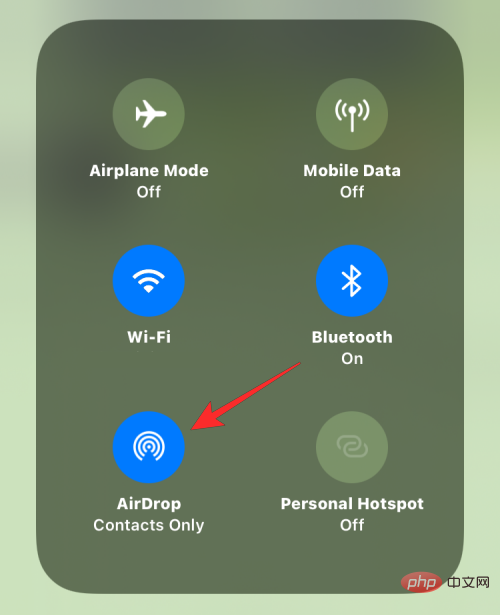
#This should expand the Network menu within Control Center, which will now display more options. If the AirDrop icon is blue, it means it is enabled for receiving from other devices. To disable Airdrop, click the Airdrop icon.
In the overflow menu that appears, select Receiving off.
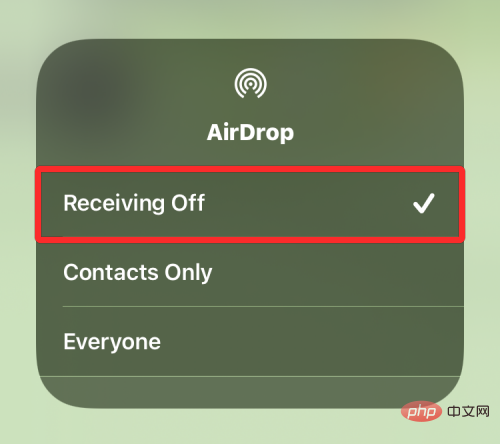
You have successfully disabled AirDrop on your iPhone and it will no longer show up in the Finder app or Airdrop window on your Mac.
How to Disconnect iPhone from Mac
In the previous section, we explained everything you need to do to disconnect your Mac and iPhone on iOS. If you want to unpair two devices on macOS, here's how you can do it.
Method 1: Disconnect the USB cable from your iPhone
Perhaps the most obvious way to disconnect your iPhone from your Mac is to physically separate the two devices from the connecting cable. If you've connected your iPhone to your Mac using a USB to Lightning cable, you'll need to eject your iPhone from your computer before disconnecting the two devices. To eject your iPhone from your Mac, open the Finder app on macOS and find your iPhone under "Locations" in the left sidebar. To remove an iPhone, hover over your iPhone and click the Eject icon (marked with a horizontal line and an upward arrow above).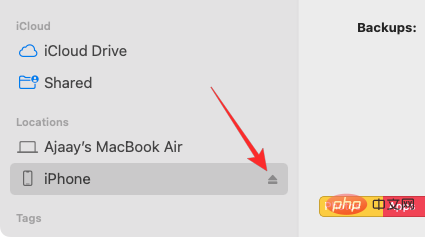 When your iPhone successfully ejects, it will disappear from the Finder's sidebar. Now, you can disconnect the cables connecting the two devices to completely disconnect them.
 Method #2: Disable iPhone Visibility over Wi-Fi
If your iPhone still appears in the Finder app even after unplugging the cable from your Mac, then it's likely that both of your devices are visible over Wi-Fi -Fi connection. To prevent your iPhone from showing up on your Mac without a physical connection, open the Finder app and select your iPhone from the left sidebar. When your iPhone appears, scroll down the screen within the General tab and uncheck the Show this iPhone on Wi-Fi box. Once completed, click Apply in the lower right corner.
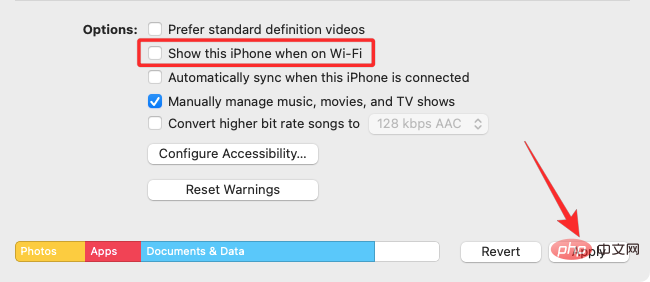
Your iPhone should not show up in the Finder app on your Mac unless both devices are connected using a USB to Lightning cable.
Method #3: Stop Apple from syncing data to iCloud
Just like on your iPhone, Apple syncs everything you do on your Mac to iCloud. If you sync apps from your iPhone and Mac to iCloud, both devices will be connected through iCloud because anything you do on a specific app on your iPhone will be visible and accessible on the Mac version of the app , and vice versa. If you turn off iCloud for this app, its data will only be saved on the device and will not be synced between devices. Therefore, to disconnect your iPhone and Mac and prevent data synchronization between the two devices, you need to turn off iCloud for all/some apps on your Mac. To prevent Apple from syncing to iCloud on your Mac, go to Apple ()Menu>System Preferences.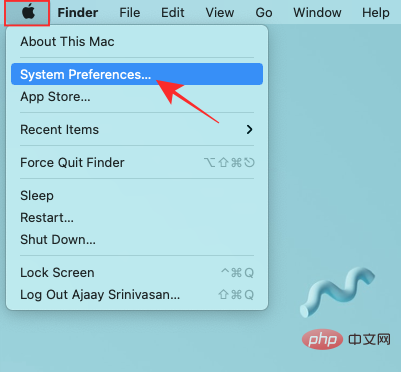
In System Preferences, select Apple ID.
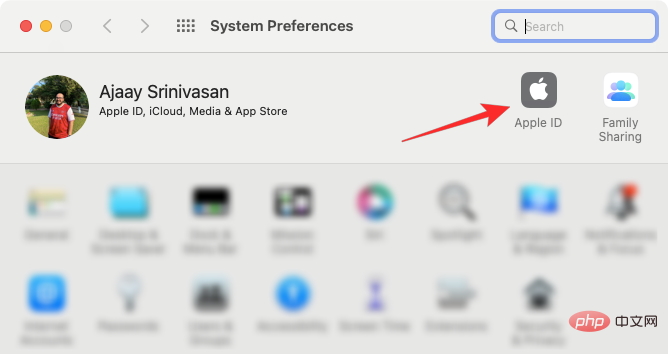
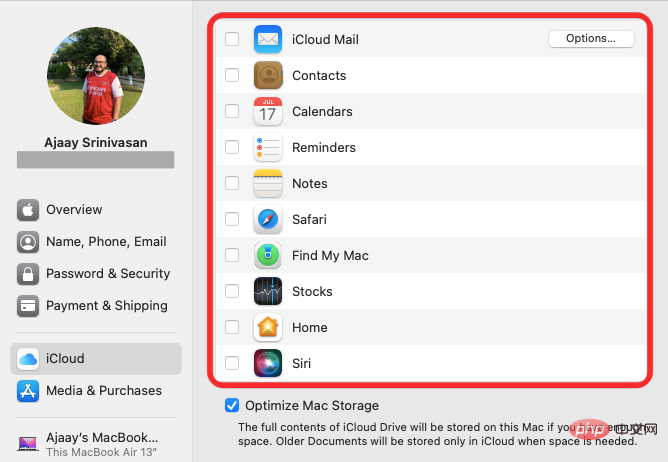
When your Apple account loads, click the iCloud tab in the left sidebar.

On the right panel, you should see a list of services that can be synced via iCloud. Here, uncheck the checkboxes next to the services you don’t want iCloud to sync data from your Mac.
When you disable iCloud for an app,
Method #4: Turn off Handoff on Mac
Also like on iPhone Disable Handoff functionality on Mac. When disabled, your Mac will no longer show any ongoing tasks you might be working on on your iPhone, and no activity from your Mac will show up on your iPhone. To turn off Handoff on your Mac, go to Apple ()Icon>System Preferences. You can also open System Preferences from the Dock, Launchpad, or Finder.In System Preferences, select General.
At the bottom of the window, uncheck the Allow switching between this Mac and your iCloud devices box.

This should disable Handoff on your Mac.
Method #5: Disable Calls from iPhone on Mac
If you previously configured your Mac to make and receive iPhone calls, you can disable that feature so that iPhone calls don’t pop up on your Mac. To disable iPhone calling on your Mac, open the FaceTime app on macOS and go to FaceTime >Preferences from the top menu bar.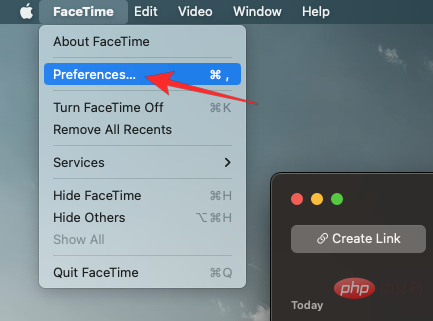
When the Preferences window opens, select the Settings tab at the top and uncheck the Calls from iPhone box.
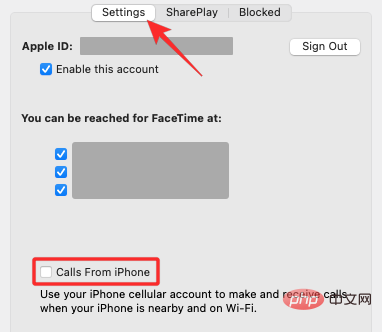
This should prevent your iPhone from forwarding calls on your Mac.
Method #6: Disable text messages from your iPhone from the Messages app
By default, your Mac’s Messages app only displays texts, photos, and files you receive via iMessage. If you see SMS messages from your iPhone appearing in this app, you may have enabled SMS forwarding, which allows you to receive and send SMS messages on your Mac. To disable text message forwarding on your Mac, open the Messages app on your Mac and go to Messages > Preferences from the top menu bar.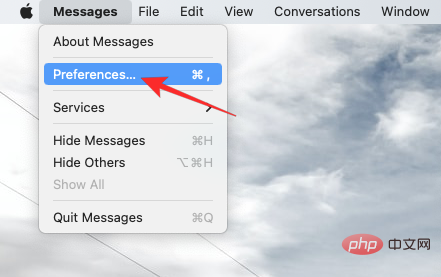
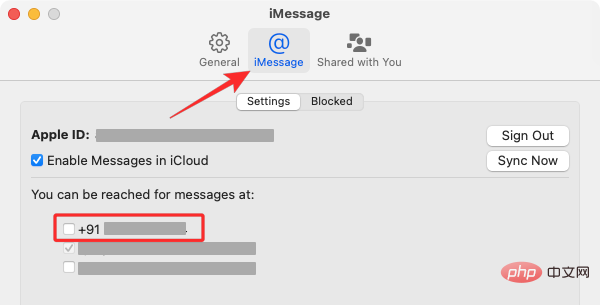
Now, in the Preferences window, click on the iMessage tab at the top. To turn on SMS messages on Mac, uncheck all phone numbers under "You can get messages via."
 ##
##
To ensure that messages you send from your Mac are sent from your Apple ID, select an iCloud address instead of a phone number in the Start New Conversation menu.

#When you do this, any SMS messages from your iPhone won’t show up on your Mac.
Method #7: Disconnect Mac from iPhone Mobile Hotspot
Like any modern smartphone, the iPhone has a personal hotspot feature that allows users to broadcast cellular data to other devices over Wi-Fi. Share Internet connection. If you've connected your Mac to your iPhone's Personal Hotspot, you can disconnect it by clicking the Personal Hotspot icon in the menu bar. This will open the Wi-Fi menu at the top. If you are currently connected to your iPhone's hotspot, the Personal Hotspot icon next to this device will be blue. To disconnect your Mac from a hotspot on your iPhone, click the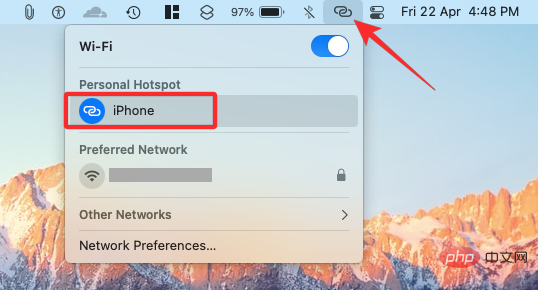 hotspot icon to the left of your iPhone in the Wi-Fi menu, or click on another available wireless network nearby. If you no longer plan to connect to your iPhone's Personal Hotspot, click
  Network Preferences in the same Wi-Fi menu. In the network window that appears, click
  Advanced in the lower right corner. On the next screen, select your iPhone from the Preferred Network box and click the
 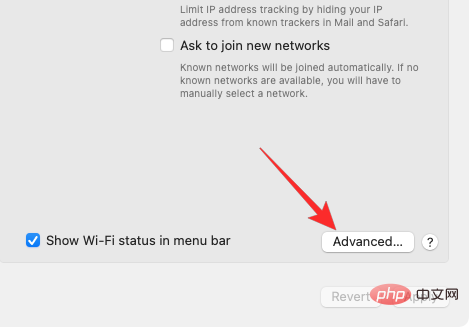 –icon. In the dialog box that appears next, select
 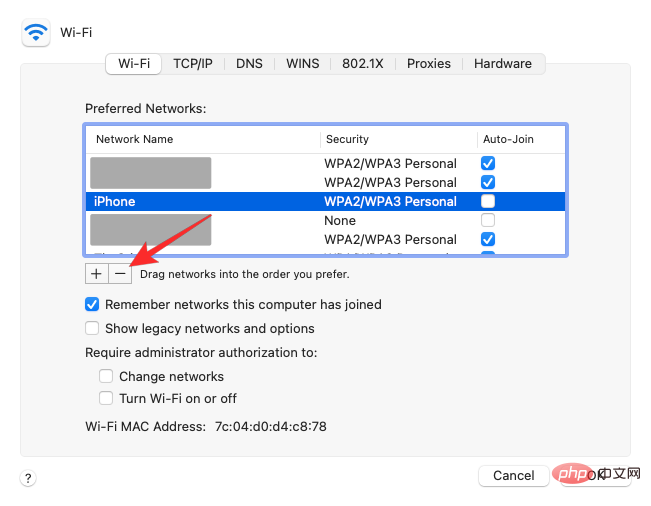 Remove. The iPhone’s Personal Hotspot network will now be removed from your Mac.
 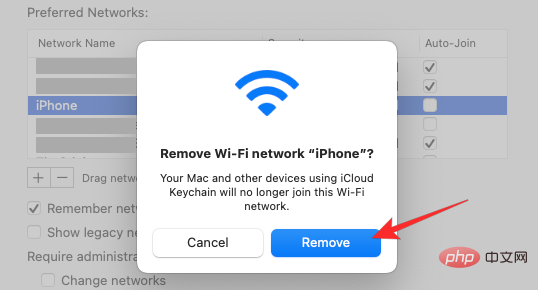 Method #8: Unpair your iPhone via Bluetooth
If you connected your Mac to your iPhone via Bluetooth, you can unpair it just like you would any other Bluetooth device on macOS. To do this, go to
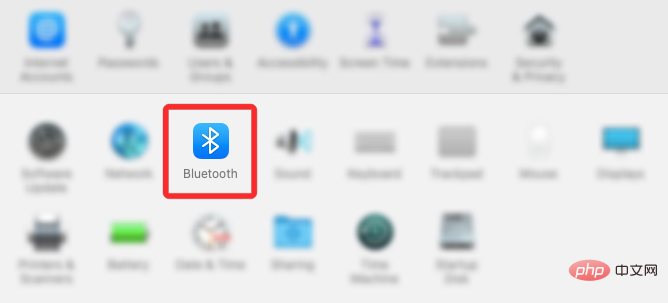
Apple ()Icon>System Preferences. You can also open System Preferences from the Dock, Launchpad, or Finder.In System Preferences, select Bluetooth.
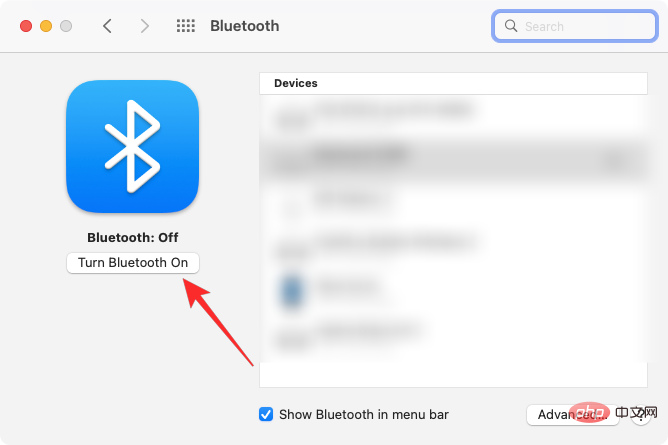
to turn on Bluetooth if it is not already enabled.
x icon next to iPhone in Devices.
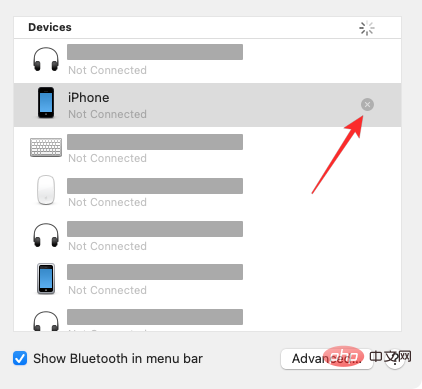
Remove to unpair your iPhone from your Mac.
Apple’s AirDrop feature allows Macs and iPhones to instantly share files and content between each other using Bluetooth and Wi-Fi. If you don't frequently transfer files from iPhone to Mac, you can turn off AirDrop's receive mode, which should stop your Mac from showing up as one of the available devices on your iPhone's Share menu. To prevent your Mac from appearing on AirDrop, click the
Control Center icon in the top menu bar. If AirDrop is turned on, its icon will appear blue. If so, click on this blue airdrop icon and wait for it to turn gray. You will now know that AirDrop is disabled on your Mac.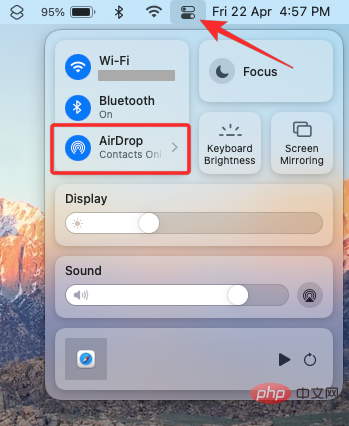 Another way to disable Airdrop is to open the
 Finder app and click the Airdrop tab on the left sidebar.

In the AirDrop window, click the menu next to "Allow me to be discovered:" and select No One.

Method #10: Remove iPhone from Apple ID using System Preferences
If you don’t want your Mac to remain paired with your iPhone, and you want to continue using your Current Apple ID uses it, you may need to remove your iPhone from that Apple ID. This should completely disconnect your iPhone from your Mac, and then you may have to set up your iPhone with another Apple account after disconnecting. To remove iPhone from your Apple ID on Mac, go to Apple ()Menu>System Preferences.In System Preferences, select Apple ID.
#In the next window, select the iPhone you want to delete from the left sidebar.
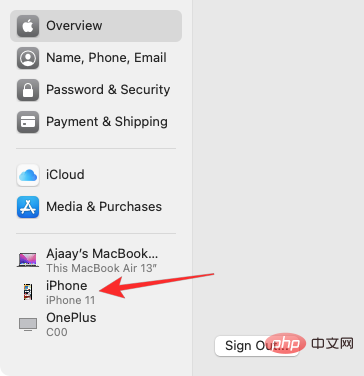
When the right pane loads, click at the bottom to remove from account.

In the prompt that appears, click Delete to confirm your decision.
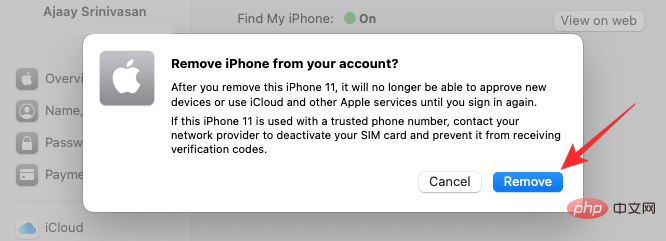
#The selected iPhone will now be disconnected from your Mac and removed from your Apple account. If you want to use this iPhone, you may have to log in with another Apple account.
FAQ
How to transfer data from Mac to iPhone before disconnecting?
To move files from Mac to iPhone, you can use a USB to Lightning cable or AirDrop, but you should prefer the latter to get the job done quickly and instantly.
Why does my iPhone disconnect itself when connected?
If the two devices are connected via a USB to Lightning cable, then the actual cause is that the cable does not fit properly or there is dirt in the Mac or iPhone port. You can try cleaning this cable/port to see if it's ok, if not you can replace the cable with a new one.
What is the purpose of removing a device from Apple ID?
Deleting your iPhone or Mac will detach them from your Apple account, which in turn will prevent content on either device from syncing with each other. When disconnected, the two devices will have different identities and all continuity functionality will be lost.
How do I reconnect my Mac from iPhone?
You need to get your MacBook and log in with the same Apple ID as your iPhone. Apple's iCloud will then automatically relink those devices and start reflecting them on your iPhone.
How to stop Safari from syncing data between iPhone and Mac?
You can follow the relevant methods above to turn off the Handoff function on your iPhone or Mac.
How do I check where my Apple ID is used?
When you visit the Settings app on iPhone or System Preferences on Mac, you can check your Apple ID and see all the devices connected to the same account.
The above is the detailed content of How to Improve Your Snapchat Score Quickly: 4 Effective Methods. For more information, please follow other related articles on the PHP Chinese website!

Hot AI Tools

Undresser.AI Undress
AI-powered app for creating realistic nude photos

AI Clothes Remover
Online AI tool for removing clothes from photos.

Undress AI Tool
Undress images for free

Clothoff.io
AI clothes remover

AI Hentai Generator
Generate AI Hentai for free.

Hot Article
Hot Tools

Notepad++7.3.1
Easy-to-use and free code editor

SublimeText3 Chinese version
Chinese version, very easy to use

Zend Studio 13.0.1
Powerful PHP integrated development environment

Dreamweaver CS6
Visual web development tools

SublimeText3 Mac version
God-level code editing software (SublimeText3)
Hot Topics


 iPhone 16 Pro and iPhone 16 Pro Max official with new cameras, A18 Pro SoC and larger screens
Sep 10, 2024 am 06:50 AM
iPhone 16 Pro and iPhone 16 Pro Max official with new cameras, A18 Pro SoC and larger screens
Sep 10, 2024 am 06:50 AM
Apple has finally lifted the covers off its new high-end iPhone models. The iPhone 16 Pro and iPhone 16 Pro Max now come with larger screens compared to their last-gen counterparts (6.3-in on the Pro, 6.9-in on Pro Max). They get an enhanced Apple A1
 iPhone parts Activation Lock spotted in iOS 18 RC — may be Apple\'s latest blow to right to repair sold under the guise of user protection
Sep 14, 2024 am 06:29 AM
iPhone parts Activation Lock spotted in iOS 18 RC — may be Apple\'s latest blow to right to repair sold under the guise of user protection
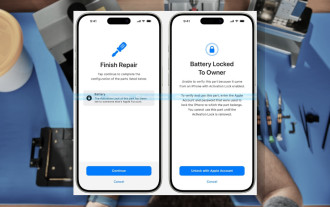
Sep 14, 2024 am 06:29 AM
Earlier this year, Apple announced that it would be expanding its Activation Lock feature to iPhone components. This effectively links individual iPhone components, like the battery, display, FaceID assembly, and camera hardware to an iCloud account,
 iPhone parts Activation Lock may be Apple\'s latest blow to right to repair sold under the guise of user protection
Sep 13, 2024 pm 06:17 PM
iPhone parts Activation Lock may be Apple\'s latest blow to right to repair sold under the guise of user protection
Sep 13, 2024 pm 06:17 PM
Earlier this year, Apple announced that it would be expanding its Activation Lock feature to iPhone components. This effectively links individual iPhone components, like the battery, display, FaceID assembly, and camera hardware to an iCloud account,
 Gate.io trading platform official app download and installation address
Feb 13, 2025 pm 07:33 PM
Gate.io trading platform official app download and installation address
Feb 13, 2025 pm 07:33 PM
This article details the steps to register and download the latest app on the official website of Gate.io. First, the registration process is introduced, including filling in the registration information, verifying the email/mobile phone number, and completing the registration. Secondly, it explains how to download the Gate.io App on iOS devices and Android devices. Finally, security tips are emphasized, such as verifying the authenticity of the official website, enabling two-step verification, and being alert to phishing risks to ensure the safety of user accounts and assets.
 LCD iPhone becomes history! Apple will be completely abandoned: the end of an era
Sep 03, 2024 pm 09:38 PM
LCD iPhone becomes history! Apple will be completely abandoned: the end of an era
Sep 03, 2024 pm 09:38 PM
According to media reports citing sources, Apple will completely abandon the use of LCD (liquid crystal display) screens in iPhones, and all iPhones sold next year and beyond will use OLED (organic light-emitting diode) displays. Apple first used OLED displays on iPhoneX in 2017. Since then, Apple has popularized OLED displays in mid-to-high-end models, but the iPhone SE series still uses LCD screens. However, iPhones with LCD screens are about to become history. People familiar with the matter said that Apple has begun ordering OLED displays from BOE and LG for the new generation iPhone SE. Samsung currently holds about half of the iPhone OLED display market, LG
 Download link of Ouyi iOS version installation package
Feb 21, 2025 pm 07:42 PM
Download link of Ouyi iOS version installation package
Feb 21, 2025 pm 07:42 PM
Ouyi is a world-leading cryptocurrency exchange with its official iOS app that provides users with a convenient and secure digital asset management experience. Users can download the Ouyi iOS version installation package for free through the download link provided in this article, and enjoy the following main functions: Convenient trading platform: Users can easily buy and sell hundreds of cryptocurrencies on the Ouyi iOS app, including Bitcoin and Ethereum. and Dogecoin. Safe and reliable storage: Ouyi adopts advanced security technology to provide users with safe and reliable digital asset storage. 2FA, biometric authentication and other security measures ensure that user assets are not infringed. Real-time market data: Ouyi iOS app provides real-time market data and charts, allowing users to grasp encryption at any time
 Anbi app official download v2.96.2 latest version installation Anbi official Android version
Mar 04, 2025 pm 01:06 PM
Anbi app official download v2.96.2 latest version installation Anbi official Android version
Mar 04, 2025 pm 01:06 PM
Binance App official installation steps: Android needs to visit the official website to find the download link, choose the Android version to download and install; iOS search for "Binance" on the App Store. All should pay attention to the agreement through official channels.
 How to install and register an app for buying virtual coins?
Feb 21, 2025 pm 06:00 PM
How to install and register an app for buying virtual coins?
Feb 21, 2025 pm 06:00 PM
Abstract: This article aims to guide users on how to install and register a virtual currency trading application on Apple devices. Apple has strict regulations on virtual currency applications, so users need to take special steps to complete the installation process. This article will elaborate on the steps required, including downloading the application, creating an account, and verifying your identity. Following this article's guide, users can easily set up a virtual currency trading app on their Apple devices and start trading.