When Microsoft launched Windows 11, it brought a lot of changes. One of the changes is an increase in the number of user interface animations. Some users want to change the way things appear, and they have to find a way to do it. Having animations makes it feel better and more user-friendly.
Animation uses visual effects to make the computer look more attractive and responsive. Some of them include sliding menus after a few seconds or minutes.
There are many animations on your computer that can affect PC performance, slow it down, and interfere with your work. In this case you have to turn off animation.
This article will introduce several ways that users can improve the speed of their animations on PC. You can apply the changes using Registry Editor or a custom file you run.
How to increase the speed of Windows 11 animations?
1. Edit the registry
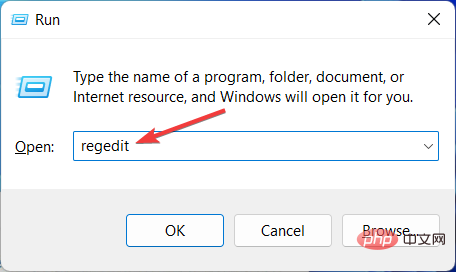
- Press Windows R to open a new run box and type regedit# in it ##. Then press Enter.

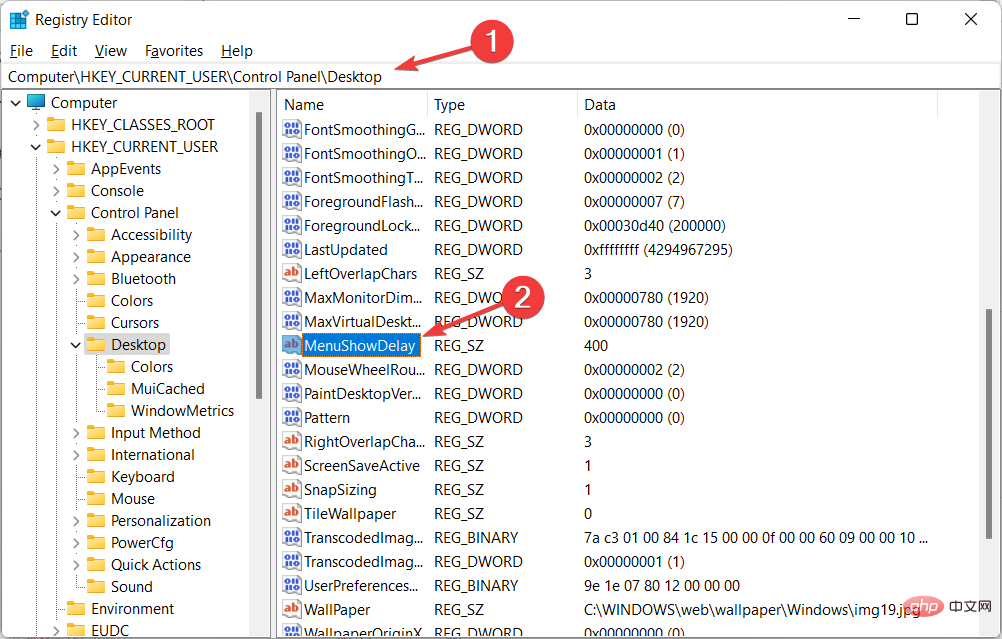
Enter the following path in the search bar and find - MenuShowDelay on the right:
Computer\HKEY_CURRENT_USER\Control Panel\Desktop<strong></strong>
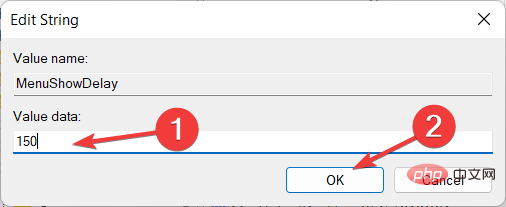
Double click on the - MenuShowDelay option and change the Value data option to any option between 0 and 4000. To speed up the animation, enter a small value between 0 and 150. Click the OK button to apply the changes and restart your PC.

Please be very careful while performing this process as it can affect your computer and cause issues like file system corruption. This is a simple method that anyone can implement. If you want to get back to the original speed, you can repeat the same process and change the numbers again.
2. Use one-click registry hacker
to download these two files and unzip them. You will have two files in the folder called Reduce Menu Animation to 200.reg and - Restore Menu Animation to 400.reg.

Double-click Reduce Menu Animation to 200.reg to run it and change the animation speed to 200. -
This method is mainly suitable for those who don’t want to use the Registry Editor because they find it complicated or difficult to understand. If you want to restore the speed to the default value, you can use the Restore Menu Animation to 400.reg file.
Both steps are easy to implement and take less than three minutes to complete. However, some users don't like animations and they prefer to disable them, considering them as a non-essential part of their PC.
How to delete animations in Windows 11?
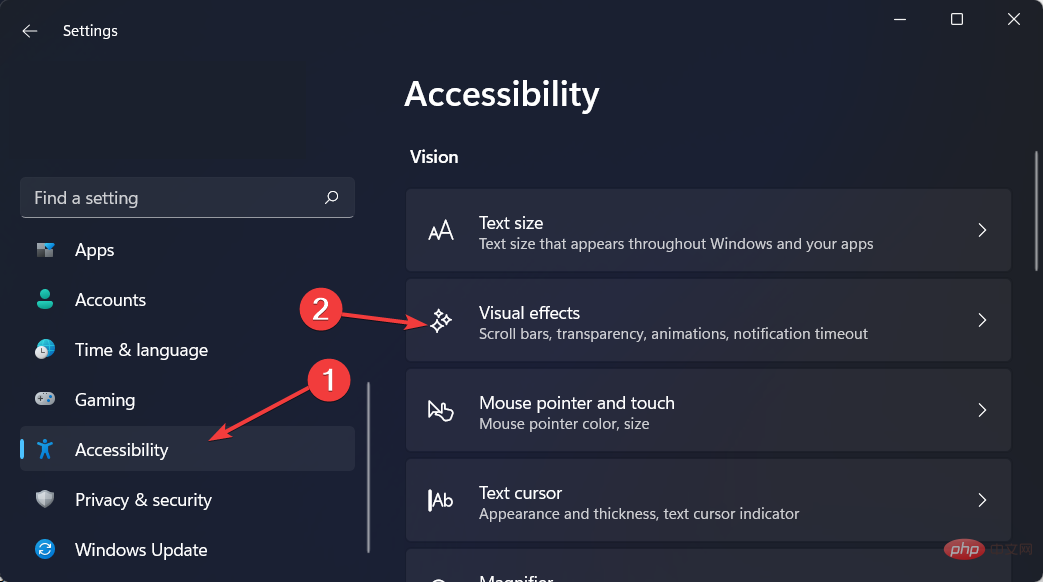
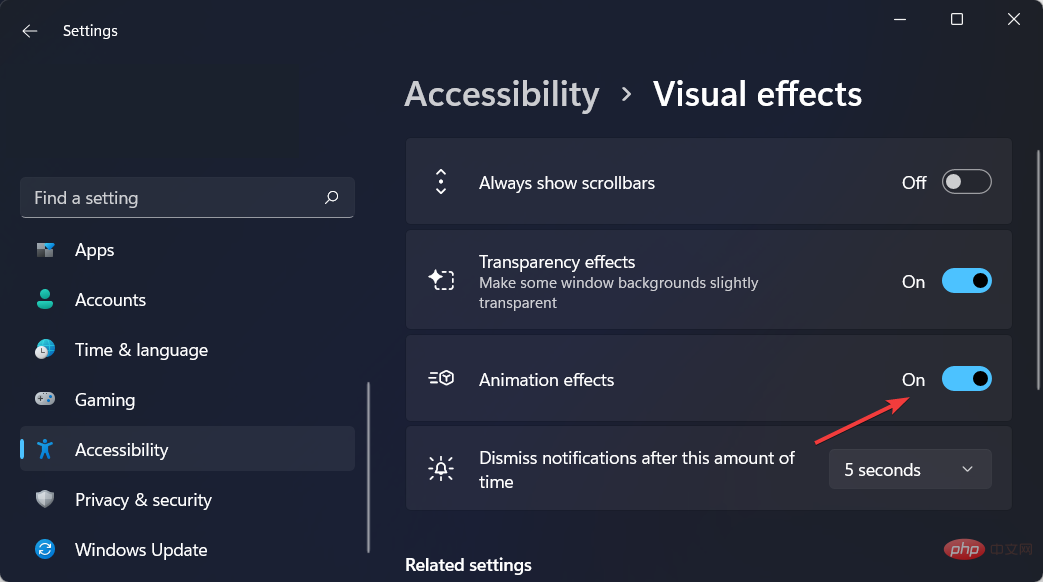
If your Windows 11 animations are not smooth, you can disable them from the open Settings app by holding - Windows and I together Navigate to Accessibility and then to Visual Effects.

Next, turn off the switch next to Animation effects. If you want to turn them back on, just turn the toggle back on. Changes will be applied automatically. 
Although Windows 11’s animations and fade effects are visually pleasing, some users may find that they cause their computer to look sluggish, as they add additional lag to certain operations. There was a little delay.
This is because these features force certain processes to take slightly longer to complete. To provide a more responsive user experience, disabling animations is simple.
For more ways to adjust animation settings, check out our dedicated post on how to disable animations in Windows 11.
Or, check out our article to learn how to use advanced system settings to enjoy faster Windows 11 and optimize your PC.
The above is the detailed content of How to speed up animation effects in Windows 11: 2 methods explained. For more information, please follow other related articles on the PHP Chinese website!


 Regular expression usage of arbitrary characters
 How to buy and sell Bitcoin on Binance
 Is wifi signal amplifier useful?
 The difference between c drive and d drive
 ASUS f83se
 Build an Internet server
 What are the applications of the Internet of Things?
 How to switch between full-width and half-width


