This version brings the following new features:
JEP 350, Dynamic CDS Archives: Extends Application Classes - Data Sharing to allow dynamic archiving of classes at the end of Java application execution. The archived classes will include all loaded application and library classes that are not present in the default base layer CDS (class data-sharing) archive.
JEP 351, ZGC: Uncommit Unused Memory: Enhance ZGC to return unused heap memory to the operating system.
JEP 353, Reimplement the Legacy Socket API: Replaces the underlying implementation used by the java.net.Socket and java.net.ServerSocket APIs with a simpler, more modern implementation that is easy to maintain and debug.
JEP 354, Switch Expressions (Preview): Switch expressions that can be used in production environments, a beta version implementation will be brought in JDK 13. The switch expression extends the switch statement so that it can be used not only as a statement but also as an expression, and both writing methods can use the traditional switch syntax, or use the simplified "case L ->" Pattern matching syntax operates on different scopes and controls the flow of execution. These changes will simplify daily coding tasks and prepare you for pattern matching in switch (JEP 305).
JEP 355, Text Blocks (Preview): Add text blocks to the Java language. A text block is a multiline string literal that avoids the need for most escape sequences, automatically formats strings in a predictable manner, and gives the developer control over formatting when needed.
The download address of JDK 13 is .
Taking the Windows environment as an example, you can install it through jdk-13_windows-x64_bin.exe or jdk-13_windows-x64_bin.zip. The installation method of .exe file is relatively simple, just click "Next" according to the interface prompts.
The following demonstrates the .zip installation method.
Extract the jdk-13_windows-x64_bin.zip file to the specified directory. For example, this example is placed in the D:\Program Files\jdk-13 location.
Create the system variable "JAVA_HOME", whose value points to the JDK installation directory.

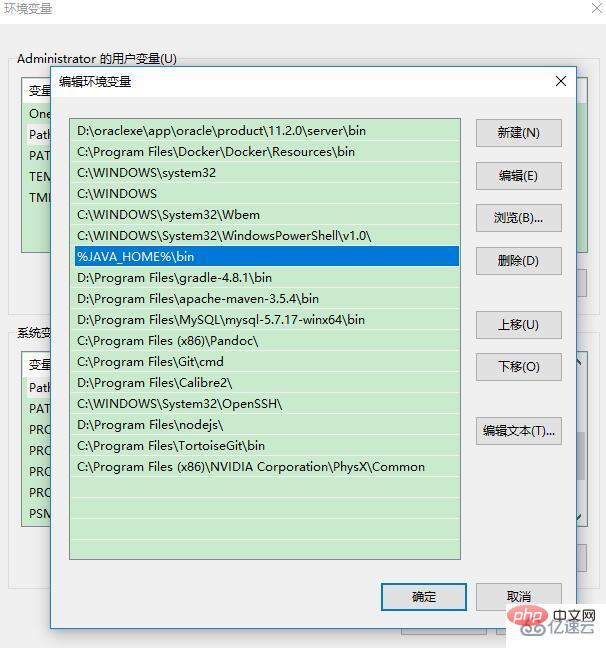
In the user variable "Path", add "%JAVA_HOME%\bin".

Note: JDK13 no longer requires the installation of JRE, and there is no need to set CLASSPATH when setting environment variables.
Execute the "java -version" command to verify the installation:
$ java -version
java version "13" 2019-09-17
Java(TM) SE Runtime Environment (build 13+33)
Java HotSpot(TM) 64-Bit Server VM (build 13+33, mixed mode, sharing)
If the above information is displayed, it means that the JDK has been installed.
If the displayed content is still the old JDK version before installation, you can follow the steps below to solve the problem.
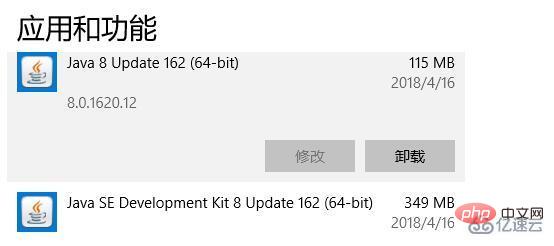
First, uninstall the old version of JDK

Secondly, enter the following instructions on the command line to set JAVA_HOM and Path:
>SET JAVA_HOME=D:\Program Files\jdk-13

>SET Path=%JAVA_HOME%\bin
Eclipse IDE 2019-09 was released on September 19, 2019, two days after Java 13 was released. Eclipse IDE 2019-09 claims to support Java 13. Next, we will demonstrate how to use Eclipse IDE 2019-09 to write Java 13 examples.
This example uses Eclipse version 4.14.
The following is how the original Switch expression is written:
switch (day) {
    case MONDAY:
    case FRIDAY:
    case SUNDAY:
        System.out.println(6);
        break;
    case TUESDAY:
        System.out.println(7);
        break;
    case THURSDAY:
    case SATURDAY:
        System.out.println(8);
        break;
    case WEDNESDAY:
        System.out.println(9);
        break;
}In Java 12, the Switch expression can be written as follows:
switch (day) {
    case MONDAY, FRIDAY, SUNDAY -> System.out.println(6);
    case TUESDAY                -> System.out.println(7);
    case THURSDAY, SATURDAY     -> System.out.println(8);
    case WEDNESDAY              -> System.out.println(9);
}It also supports returning values in expressions:
int numLetters = switch (day) {
    case MONDAY, FRIDAY, SUNDAY -> 6;
    case TUESDAY                -> 7;
    case THURSDAY, SATURDAY     -> 8;
    case WEDNESDAY              -> 9;
};In Java 13, the Switch expression can be written as follows:
int date = switch (day) {
    case MONDAY, FRIDAY, SUNDAY : yield 6;
    case TUESDAY                : yield 7;
    case THURSDAY, SATURDAY     : yield 8;
    case WEDNESDAY              : yield 9;
    default                     : yield 1; // default条件是必须的
};

System.out.println(date);It should be noted that when using yield, there must be a default condition.
Starting with Java 13, Text Blocks are supported.
Here is an example of how text blocks were handled before Java 13:
String html = "\n" +
                  "    \n" +
                  "        <p>Hello, world</p>\n" +
                  "    \n" +
                  "\n";

System.out.println(html);
In the above example, because the text block needs to be wrapped, a lot of splicing and escaping of this article occurs.
Here is an example of a text block in Java 13:
String html2 = """


                          <p>Hello, world</p>


                  """;

System.out.println(html2);
In the above example, processing text blocks becomes concise and natural.
The above two examples have the same output content on the console, and the effect is as follows:
<p>Hello, world</p>
The above is the detailed content of How to install and use Java13. For more information, please follow other related articles on the PHP Chinese website!


