

How to clear cache on Windows 11: Detailed tutorial with pictures

What is cache?
A cache (pronounced ka· shay) is a specialized high-speed hardware or software component used to store frequently requested data and instructions that can be used faster to load websites, applications, services and other parts of the system efficiently. Caching makes the most frequently accessed data readily available.
Cache files are different from cache memory. Cache files are frequently required files such as PNGs, icons, logos, shaders, etc. that may be required by multiple programs. These files are stored in your physical drive space and are usually hidden.
Cache memory, on the other hand, is a type of memory that is faster than main memory and/or RAM. It greatly reduces data access time since it is closer to the CPU and faster compared to RAM. Cache helps speed up your processor's calculations, making your PC faster.
Cache is a relatively small type of storage that is further divided into 3 levels:
- Level 1 (L1): L1 is the smallest ( Typically between 8KB and 64KB) and the fastest cache.
- Level 2 (L2) and Level 2 (L3): L2 and L3 are larger and slower caches compared to L1.
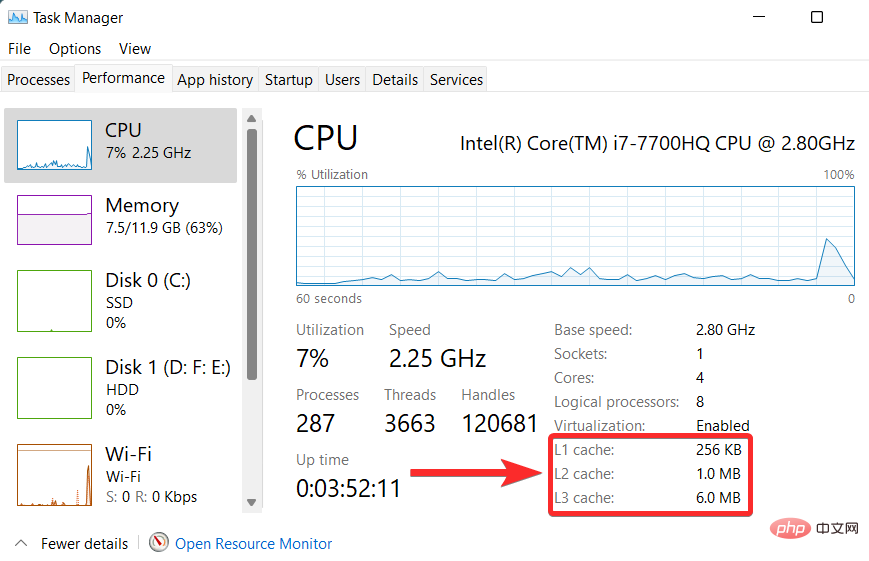
You can view the cache size on your system from Windows Task Manager.
Why you should clear the cache on Windows 11
- The cache may be corrupted:Corrupted cache files may cause The application or your system performs poorly or even crashes in the worst case scenario. Therefore, it is recommended that you delete these corrupt cache files before continuing to use your PC.
- Clear Storage Space: While cache files are usually small, accumulating a large number of such files over a long period of time may take up more free space on your system than you expect. The solution is to delete this large chunk of cache files and restore the free space on your device.
- Performance: The growing size of cache files will directly affect the overall performance of the system. Filling up cache storage can cause your system to run slower than you would normally expect.
- Outdated Information: Sometimes older cache files may prevent you from accessing the latest version of an application or website on your system. You can resolve this issue by clearing cache files.
Is it safe to clear cache?
Clearing cache is safe. This is because clearing cache is not a permanent solution if you plan to revisit the app or website in question. At some point, these websites and applications will re-cache data on your system again.
In any case, the cache stores non-essential files and deleting them will not affect the general functionality of the related application or website. However, it can affect the loading speed of these apps or websites. To be clear, these load times will decrease once the app or website recreates the cache on your system again.
How to clear the cache on Windows 11 in 14 ways
Clearing the cache on Windows 11 takes a lot less time than you think. However, cache files on Windows 11 can be of various types depending on the source from which they originate. This also results in cache files being spread out across the system.
Follow the step-by-step tutorial below to learn about the specific type of cache you wish to remove from your PC.
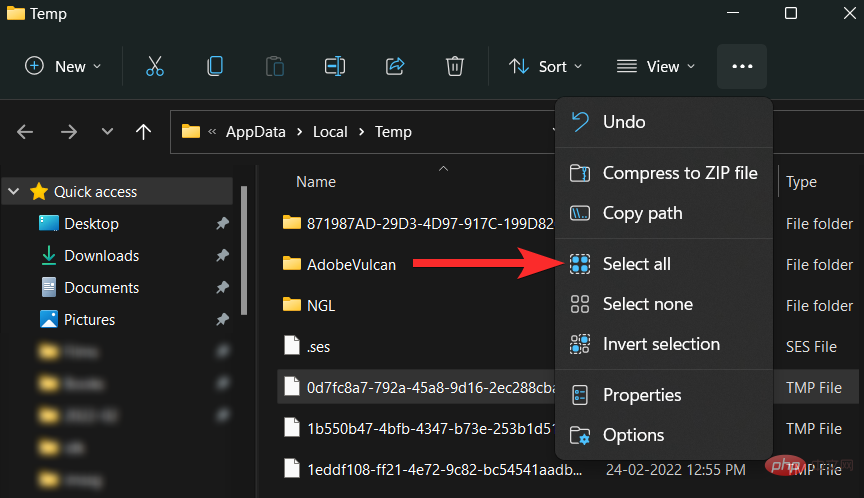
Method 1: Delete temporary cache files [%temp%]
Press Windows R on the keyboard to start the run command.

Enter '%temp%' and press 'Enter' on the keyboard.

Now click on the Three Dots menu icon.

Click "Select All".
Click the trash can icon.

If you see the following prompt, check "Do this for all current projects" and click "Continue."
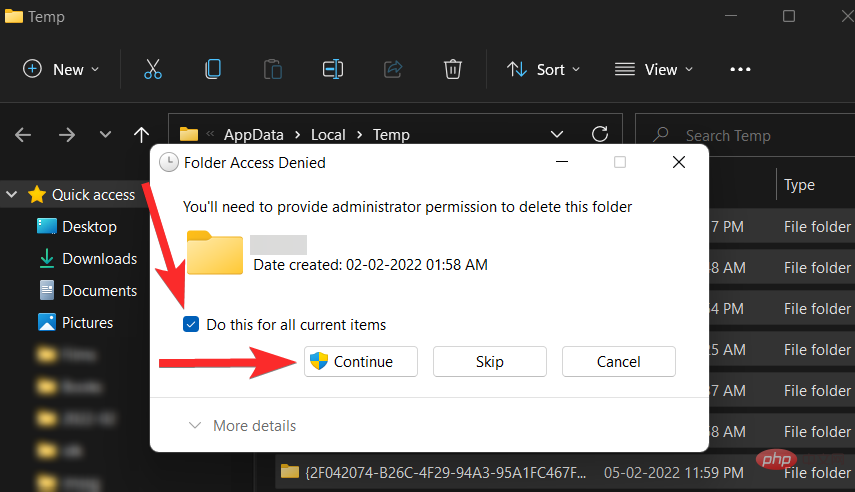
If you see the following prompt, select the "Do this for all current projects" checkbox and click "Skip."

That’s all. The cache files in the Temp folder will now be deleted.
Clear temporary files in system storage
Some cache files may not exist in a certain location, such as the Temp folder. Follow the step-by-step tutorial below to remove these scattered system cache files from your setup.
Press the Windows keys on your keyboard to open the Start menu.

In the Start menu, search for "Storage Settings" and click on the same from the search results.

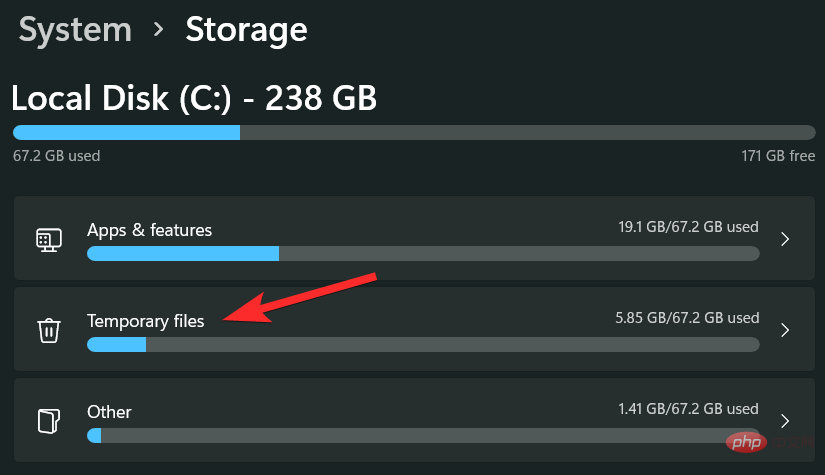
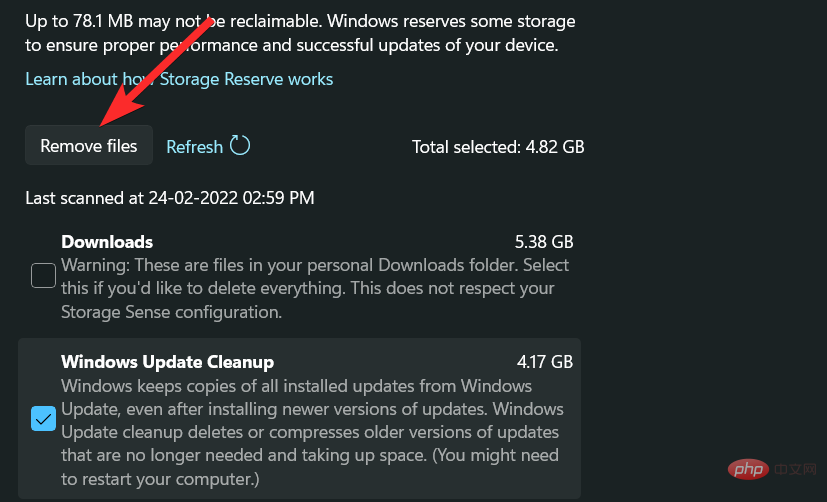
Click "Temporary Files".
Scroll down and click the checkbox next to the specific file you want to delete.
Note: There is a brief description after each file type. Please read this instruction before adding a file type to the removal list.
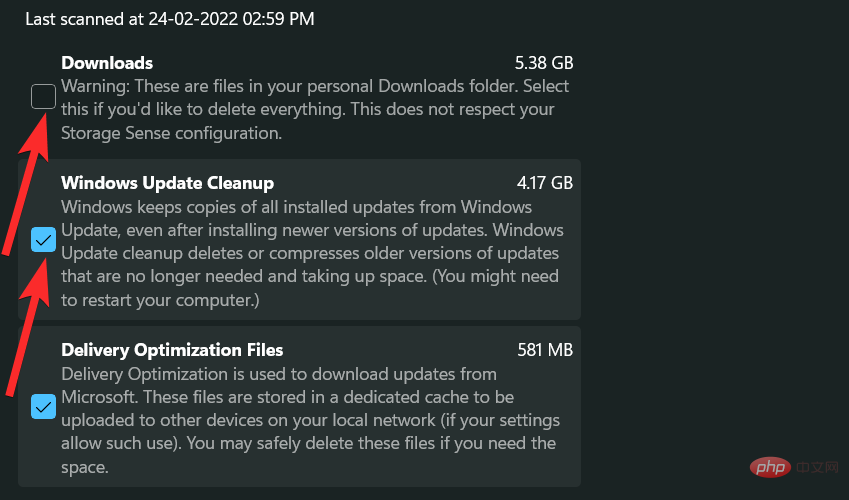
Now click on “Delete File”.
Click "Continue" to confirm your choice.

The selected files will now be deleted from your device.
Disk Cleanup
Microsoft's Disk Cleanup is a built-in tool that scans caches and other temporary files on your system. This includes DirectX shader caching, delivery optimization files, Windows error reporting, and more.
Let’s see how to use the disk cleanup tool.
Press the Windows keys on your keyboard to open the Start menu.
In the Start menu, search for “Disk Cleanup” and click on the same from the search results.

Click the drop-down menu.

Now click on the drive you want to clean.

Scroll down and click the checkbox next to the specific file you want to delete.
Note: There is a brief description after each file type. Please read this instruction before adding a file type to the removal list.
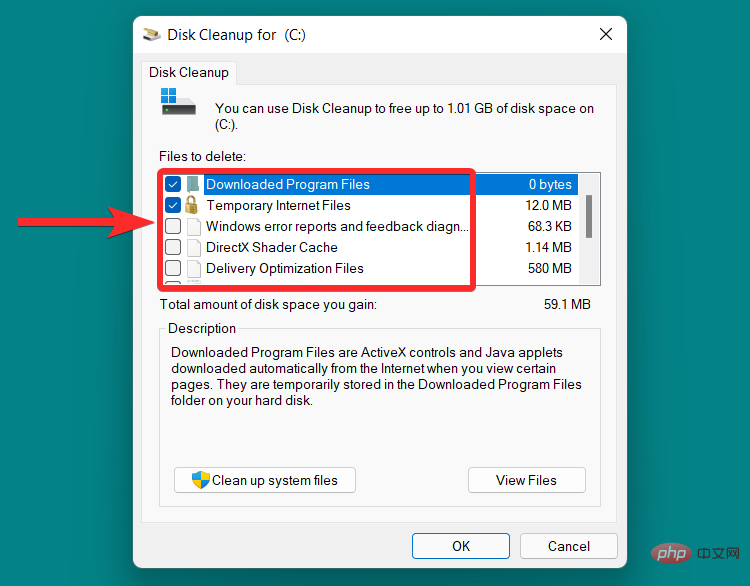
Click "OK".
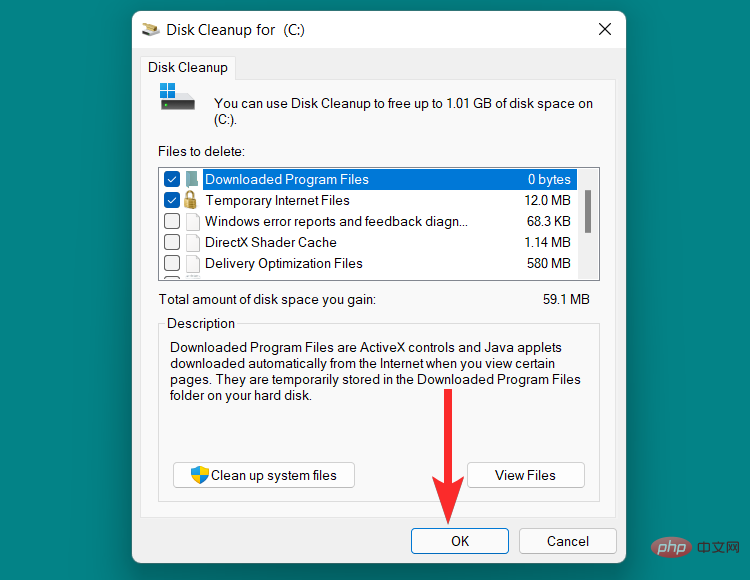
Click "Delete File".
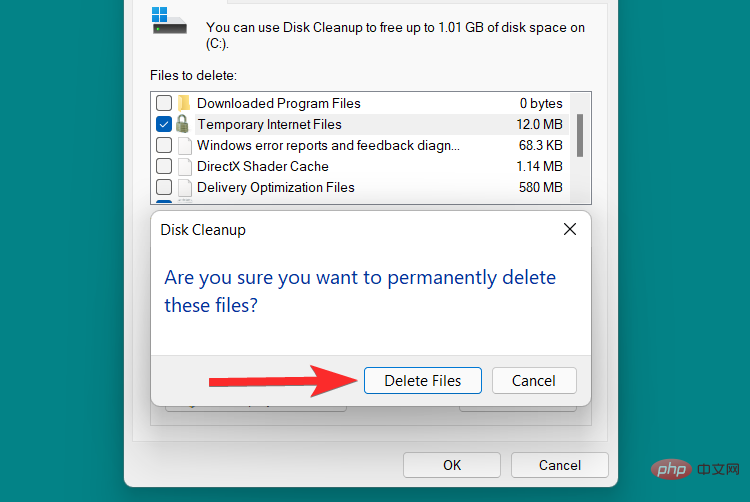
If you see the following prompt, select the "Do this for all current projects" checkbox and click Continue.

Wait for the cleanup process to complete.
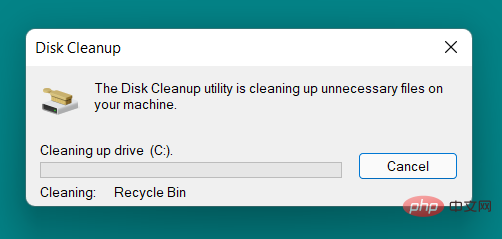
The file you selected has now been removed from the system.
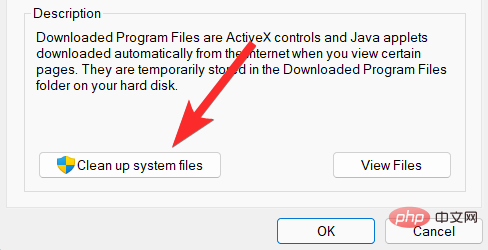
You can also use the Disk Cleanup tool to clean up system files. To clear system files, follow the steps below.
In the Disk Cleanup tool, click the "Clean System Files" option.
Select the drive containing the system files. On most systems this will be labeled the "C" drive.

Scroll down and click the checkbox next to the specific file you want to delete.
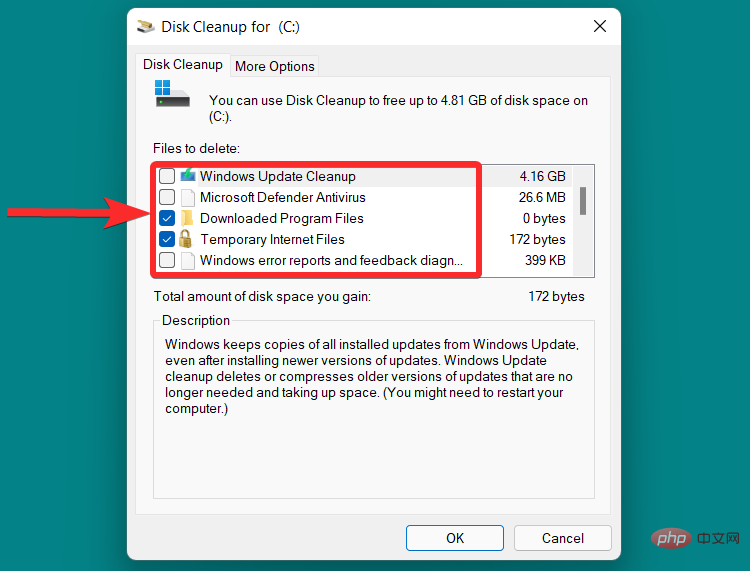
Click "OK".

Click "Delete File".

The system files you selected will now be deleted.
Refresh DNS [Get Rid of DNS Cache Poisoning]
The Domain Name System (DNS) is like a phone book for the websites you visit on your computer. Specifically, DNS converts a domain name (such as www.google.com) into an IP address (8.8.8.8).
While DNS caching allows your computer to load websites easily, the number of these cache files can grow over time. In a worse case scenario, you may also encounter DNS cache poisoning, an event where a malicious proxy attacks and changes the IP addresses of these stores. In this case, it makes sense to flush the DNS. So, let's see how you do it.
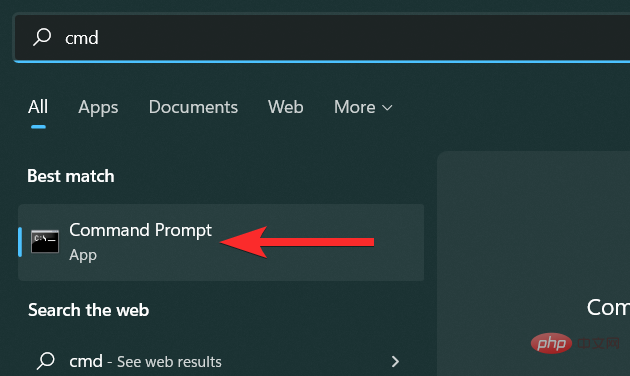
Press the Windows keys on your keyboard to open the Start menu.
In the Start menu, search for "cmd" and click it when it appears in the search results.
In the command prompt, type the following command and Enterpress the keyboard when finished.
ipconfig /flushdns

The DNS cache has now been cleared.

Clear Microsoft Store cache
Like other applications on your system, Microsoft Store also stores cache data on your PC, in addition , you can also use the wssreset.exe file to delete these files. This can help you if you have purchasing issues, download issues, or the Store app simply won't load. Use the following steps to help you clear your Microsoft Store cache.
Press Windows R on your keyboard to open the "Run" command window.
Enter "wsreset.exe" and press "Enter" on your keyboard.

The wsreset.exe file will clear the Microsoft cache without asking you for any permissions and then close automatically.

Clear Browser Cache
Web browsers store "static assets" of web pages you visit frequently on your PC so that you can access them later Access these sites faster when you visit. To be precise, "static assets" are assets of a website that remain more or less unchanged each time it is visited.
However, the version of website cache data stored on your PC may be an outdated version. This may further cause problems every time you try to access this particular website. In this case, clearing your browser cache might be the perfect solution.
Let’s see how to clear the cache of the 2 most popular web browsers used on PC: “Google Chrome” and “Mozilla Firefox”.
Google Chrome
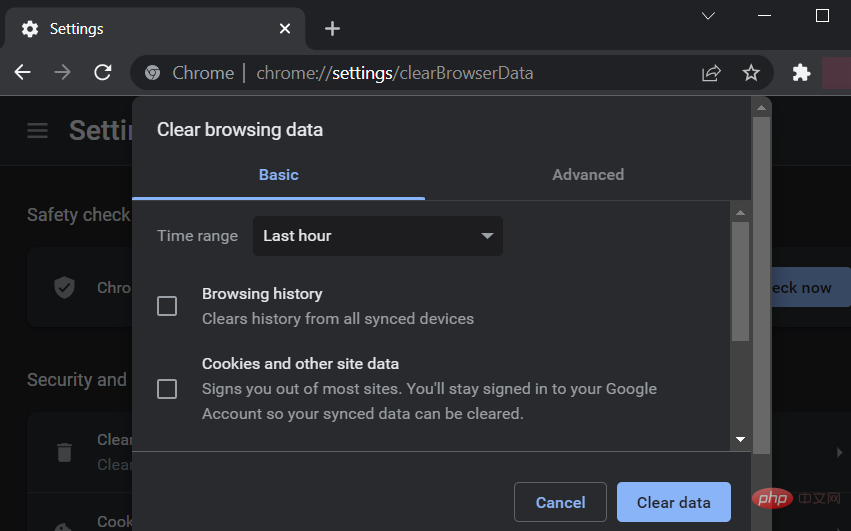
Open Google Chrome on your PC and press Ctrl Shift Delete on your keyboard. This will open the Clear browsing data setting.
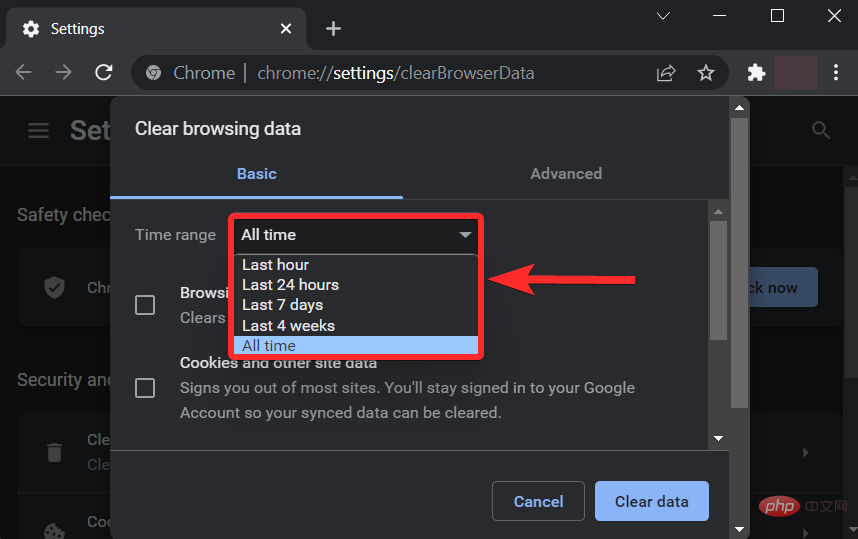
Click "Time Range" and select the time range in which you want to delete Google Chrome cache.
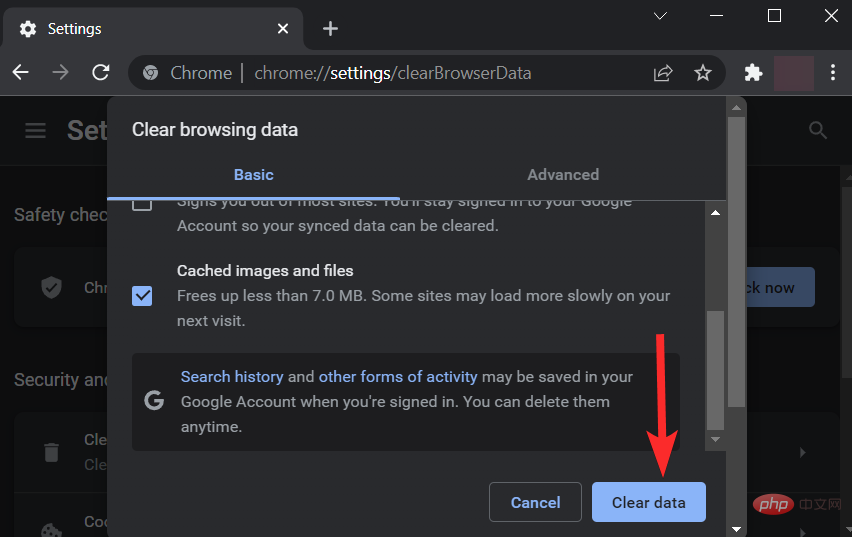
#Scroll down and make sure only the "Cached Images and Files" checkbox is selected.

Click "Clear Data".
Your Google Chrome cache is now deleted.
Firefox
Open "Firefox" from your PC and press the Ctrl Shift Delete keyboard. This will open the "Clear recent history" setting.

#Click the Clear Time Range option and select the time range in which you want to delete the Firefox browser cache.
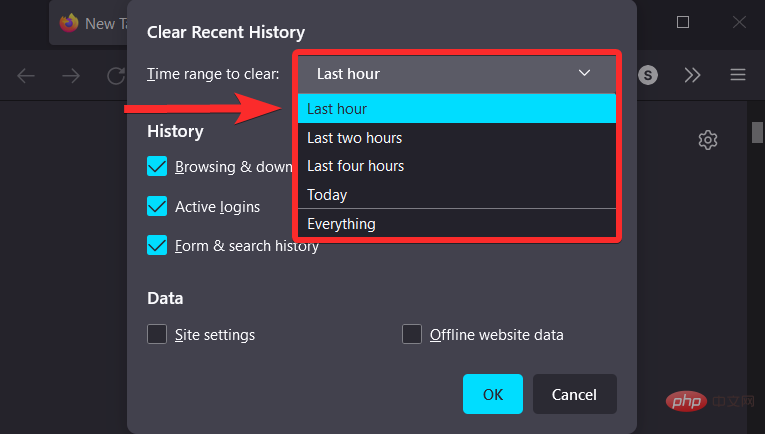
Make sure only the "Cache" checkbox is checked.

Click "OK".

#This is how you can clear your browser cache on your PC!
Clear Location Cache
Your location history is stored as cache files on your Windows PC. To delete these files, follow the steps below.
Press the Windows i keyboard to open settings.
Click "Privacy & Security" in the left sidebar.
Scroll down on the right side and click on the "Location" option under the "App Permissions" section.

Now scroll down to find the Location History option. Click "Clear" next to it to clear the same.

The location cache is now cleared from your PC.
Clear your activity
Windows uses your activity history to personalize your experience. Activity history can be data like the websites you visit, or even how you use different apps and services on your PC. This activity history is associated with your Microsoft account.
However, if you want to delete your activity history, please follow the tutorial below to help you with the process.
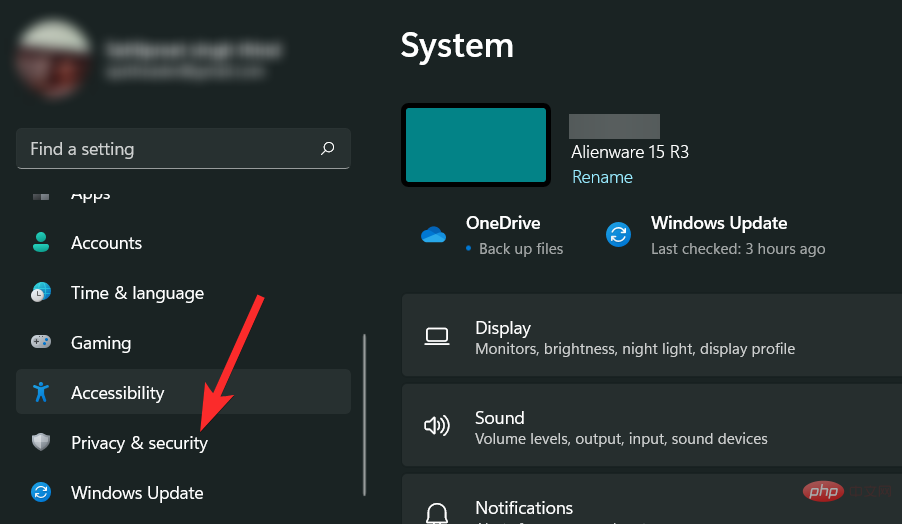
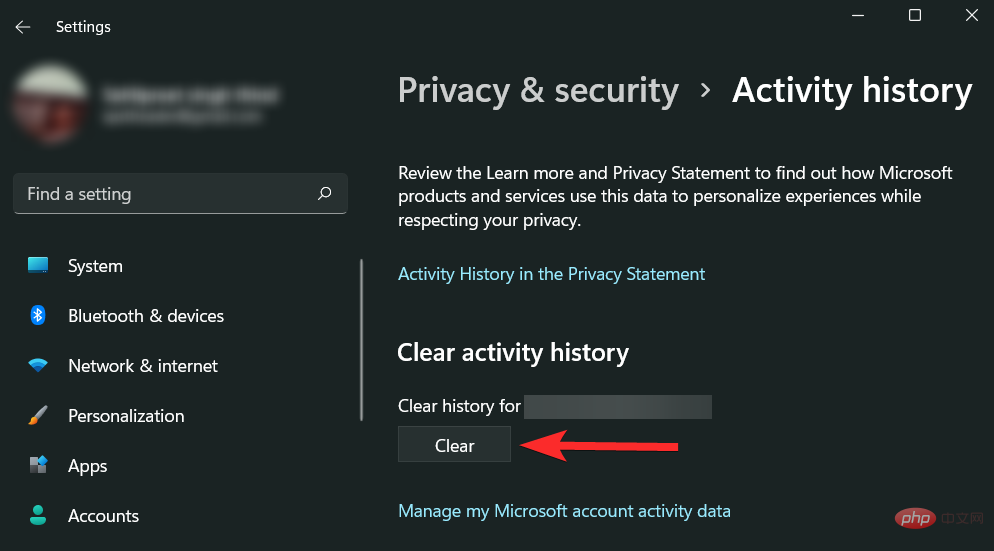
Press Windows i keyboard to open settings.
Click "Privacy and Security".
Scroll down on the right side and click Clear under Clear Activity History.
You can also prevent Microsoft from storing your activity history on your device by making sure the checkbox shown below is unchecked.

Remove Prefetch Files
Prefetch files were first introduced in Windows XP to reduce the time required to boot a Windows PC. If your system is infected with malware and you're having trouble booting your system, it's entirely possible that you'll want to delete the prefetch files.
Note: Remember that prefetch files are used to reduce system startup time. Removing them will have an impact on your subsequent boot times.
So, with that in mind, let’s see how to clear prefetch files in Windows 11.
Press Windows R on your keyboard to open the "Run" command window.
Enter prefetch to run the command and press ENTER on the keyboard. This will automatically delete the prefetched files.

However, this also opens the prefetch folder. In this case, select all files by pressing Ctrl A on your keyboard and then press Delete to delete the prefetched files.
Clear File Explorer Cache
File Explorer remembers files and addresses that you use frequently on your system. The quick access menu is a good example.
Like other applications, Windows also allows you to delete cache files that store this data. Let's see how you do it.
Press the Windows keys on your keyboard to open the Start menu.
In the Start menu, search for "File Explorer" and click it when it appears in the search results.

Click the 3-dot icon near the top of the File Explorer window.

Click "Options". This will open the folder options.

Click on the Clear option in the Privacy section.

Clear System Restore Cache
Deleting a system restore point in Windows 11 will automatically delete the cache files associated with it. However, we recommend that you be careful as this method involves deleting restore points, which will prevent you from restoring Windows in case you encounter BSOD in the future. Please follow the steps below to help you through the process.
Press the Windows keys on your keyboard to open the Start menu.
In the Start menu, search for "File Explorer" and click it when it appears in the search results.
In System Properties, click Configure.

In the system protection options, click Remove.

Click "Continue".
NOTE: Remember, this will delete the restore point. Therefore, please proceed with caution.

The restore point and the cache files associated with it have now been deleted.
Use Storage Sense to automatically delete caches
If you don’t want to individually delete various types of cache on your computer, Windows 11 provides you with a built-in feature. This feature is called Storage Sense and can be used to automatically clear the cache on a regular basis.
Let’s see how to automatically delete cache using Storage Sense on Windows 11.
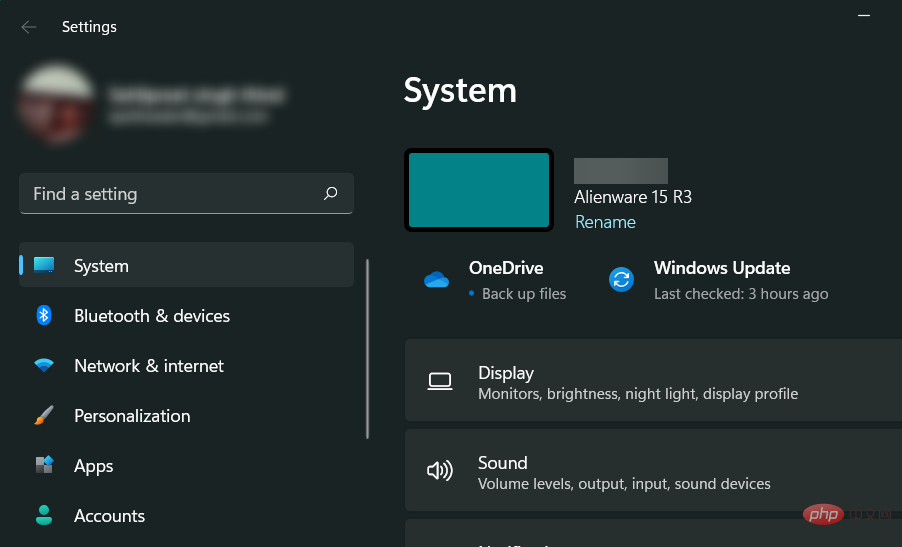
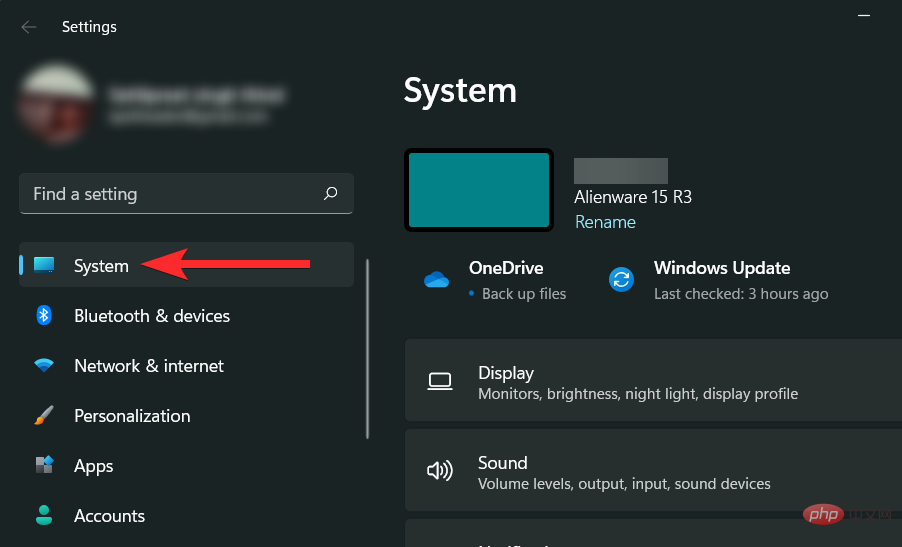
Press Windows ikeyboard to open Settings and click "System".
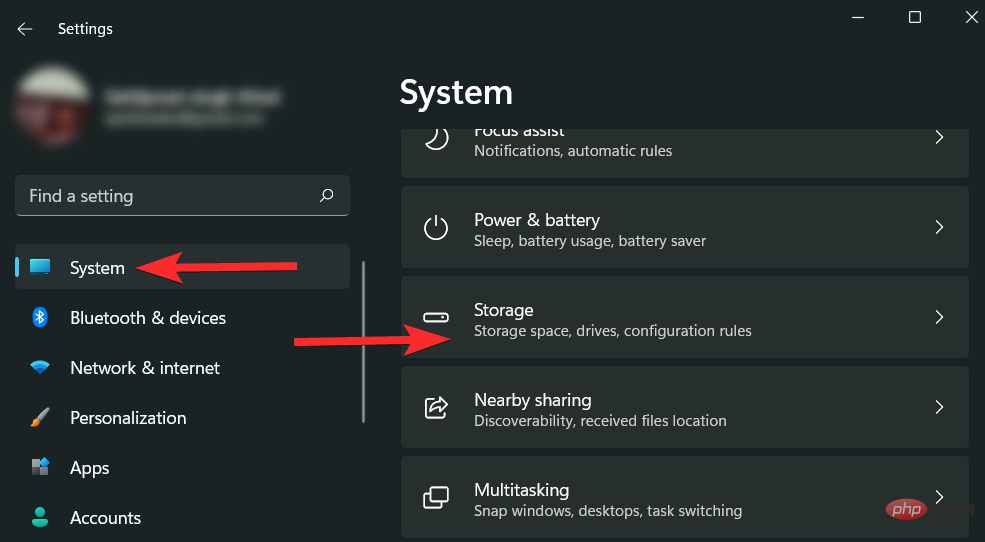
Scroll down on the right side and click "Storage".
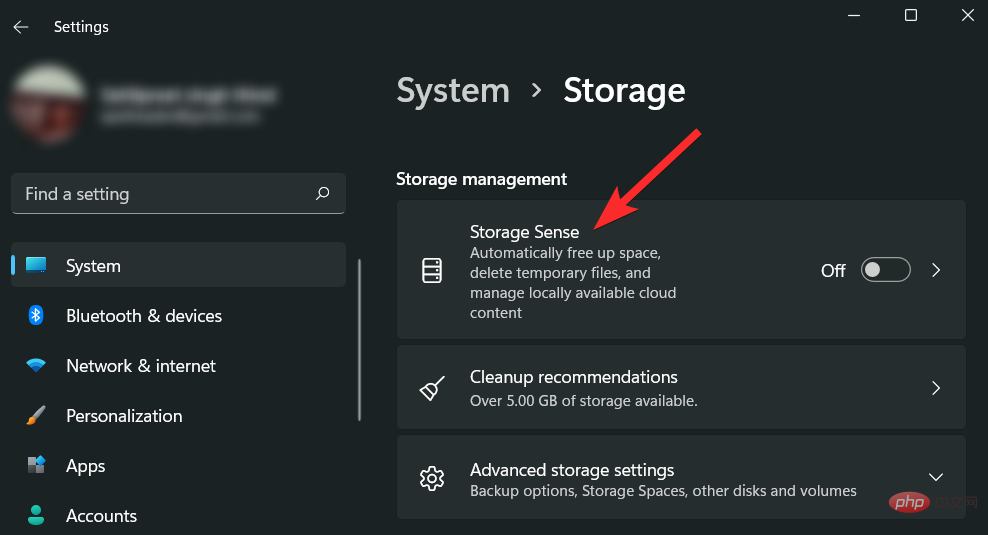
Scroll down and click Storage Sense.
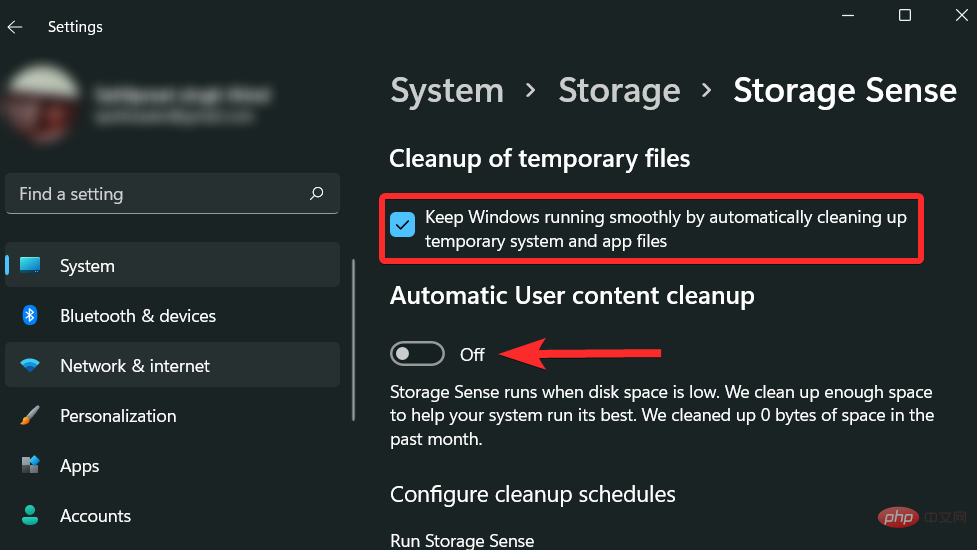
Make sure the checkbox under "Clean temporary files" is selected. Then, click and turn on the toggle under the Automatic User Content Cleaning section to enable Storage Sense.
Click the Run Storage Sense option and select the period of time you want Storage Sense to run regularly.
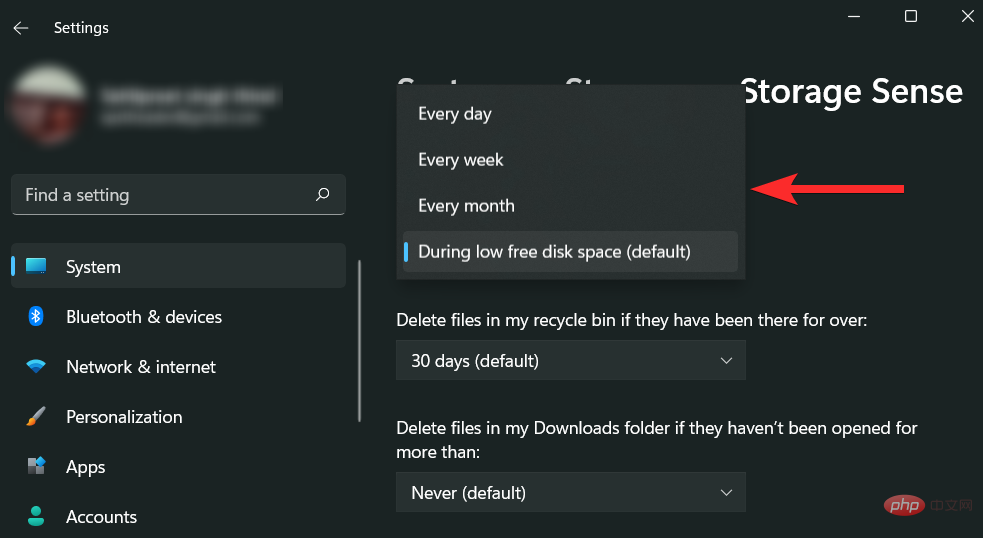
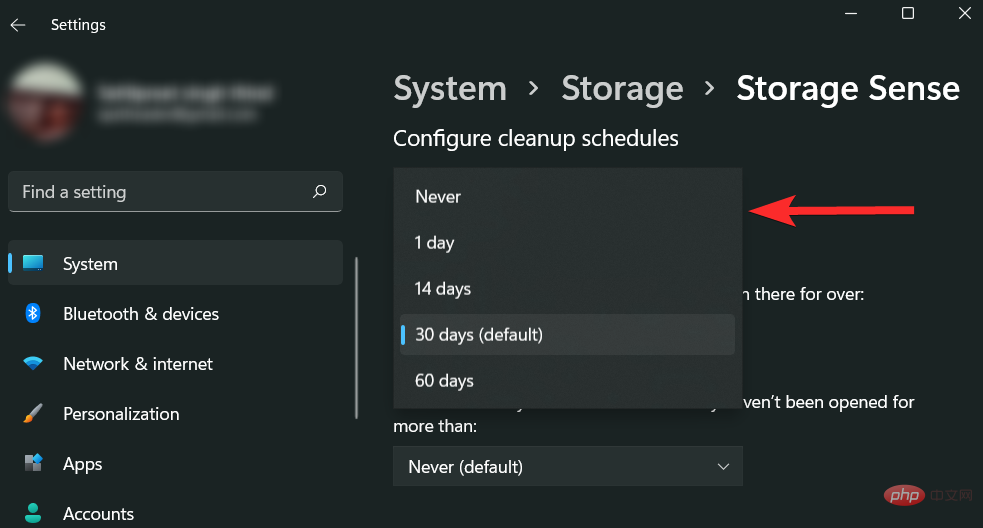
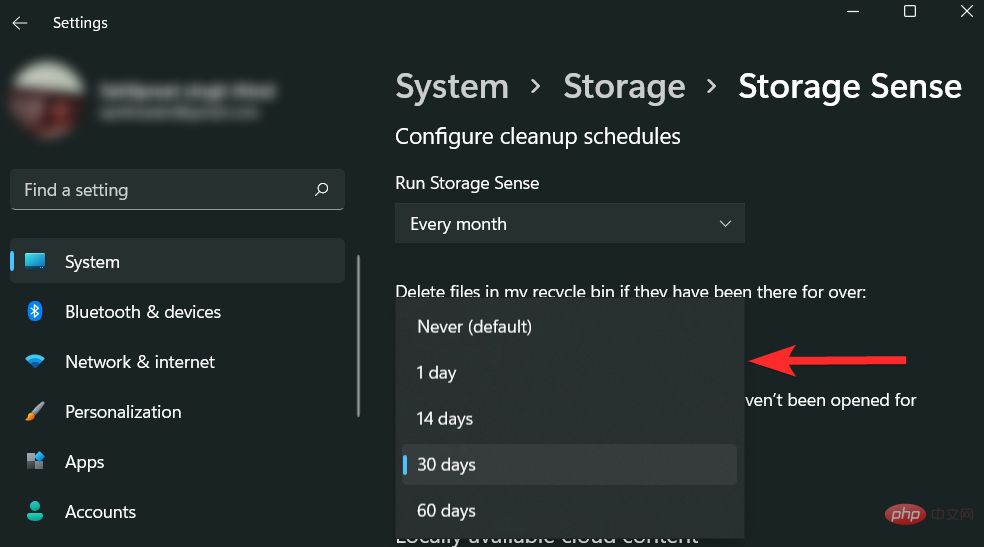
Similarly, select an appropriate time for the "Delete files in my Recycle Bin if they are already there" option.
Finally, select a suitable time for the "Delete files in my downloads folder if they have not been opened longer than" option.
That’s all. Storage Sense is now active and will run according to the time period you set.
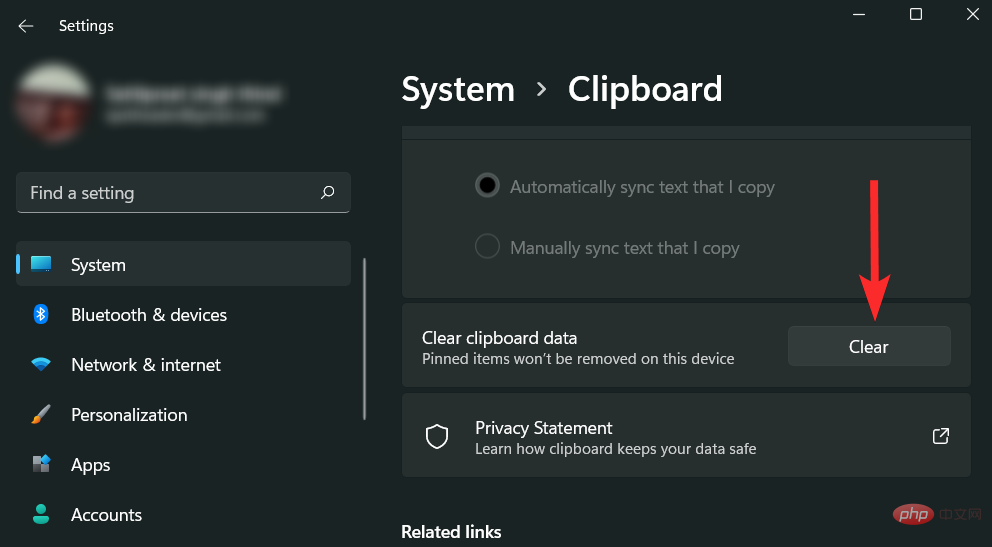
Clear Clipboard Cache
Windows 11 allows you to delete the clipboard cache in a few clicks. Let's see how you do it.
Press the Windows keys on your keyboard to open the Start menu.
Search for "Clipboard Settings" and click on the best match.

In the right panel, scroll down and find the "Clear Clipboard Data" option. Click on the "Clear" option next to it.
Clear the display cache
The display cache on Windows 11 is used to store information related to your system's display. This data can be anything from the last resolution you used to the color mode. However, display caching is not without the problems that arise with other forms of caching. Additionally, if you are experiencing system display issues, you may just want to clear your display cache and reset your display settings.
Let's see how you do it.
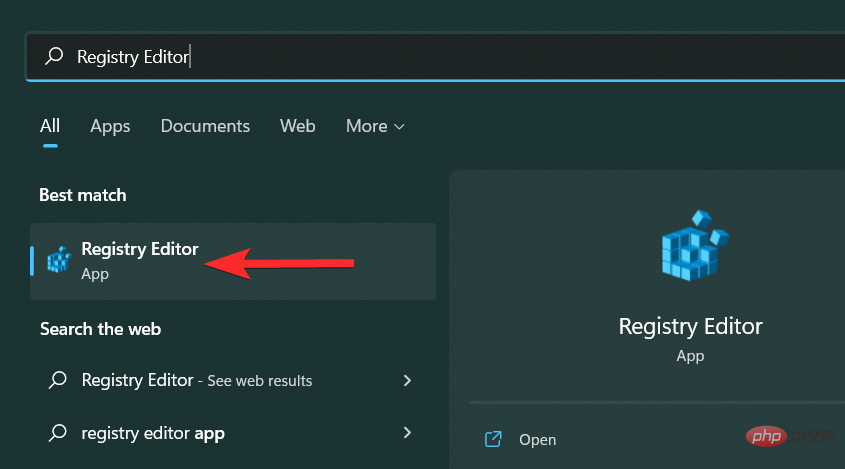
Press the Windows keys on your keyboard to open the Start menu.
Search for "Registry Editor" and click on it from the search results.
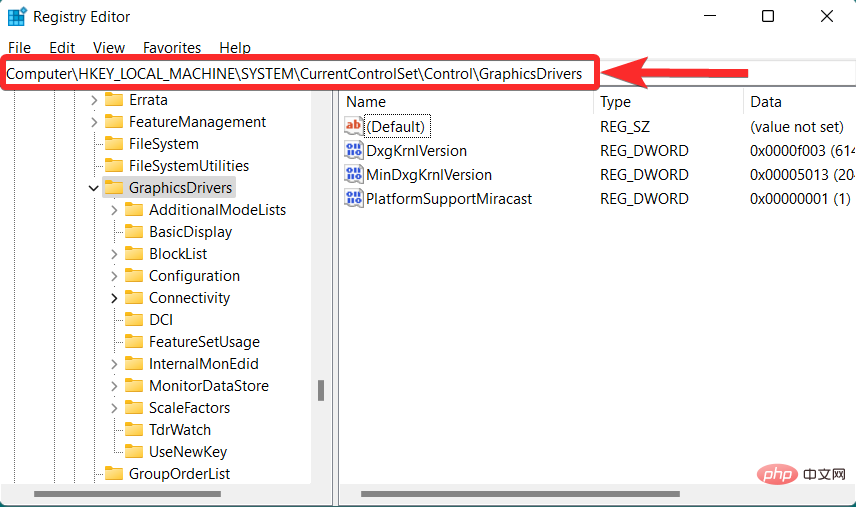
Navigate to the following path. You can also copy-paste the same content in the address bar at the top.
HKEY_LOCAL_MACHINE\SYSTEM\CurrentControlSet\Control\GraphicsDrivers
##Note: Before proceeding, it is recommended that you create a restore point.
FAQ
What is the difference between cache and cookies on a web browser?
Browser cache saves information such as images, files, and HTML data for a specific website so that the same website can load faster on subsequent visits.
However, cookies are used to store relatively small data, such as username, email, login data, shopping cart data, etc.
What is the file type of cached files?
On most web browsers, the .cache extension is used to store cached data. While this extension isn't exactly a file format, it does tell the user the file's primary function.
How to open cache files?
In order to open cache files, you need software that can open Snac-1.3 VDA files. However, you can also use online websites such as fileproinfo to analyze cache files and view the text stored in them.
Is caching fast?
Yes. Cache is one of the fastest types of memory on your PC. It's even faster than RAM.
This is because the cache is usually a very small piece of physical storage located very close to the CPU. Therefore, very few clock cycles (a unit of time in the CPU) are required for data to be transferred from the cache to the CPU.
What happens after you delete the cache on your web browser?
After deleting cache from your web browser, you will notice that some settings on specific websites have been removed. Some websites may also load slower.
The above is the detailed content of How to clear cache on Windows 11: Detailed tutorial with pictures. For more information, please follow other related articles on the PHP Chinese website!

Hot AI Tools

Undresser.AI Undress
AI-powered app for creating realistic nude photos

AI Clothes Remover
Online AI tool for removing clothes from photos.

Undress AI Tool
Undress images for free

Clothoff.io
AI clothes remover

AI Hentai Generator
Generate AI Hentai for free.

Hot Article
Hot Tools

Notepad++7.3.1
Easy-to-use and free code editor

SublimeText3 Chinese version
Chinese version, very easy to use

Zend Studio 13.0.1
Powerful PHP integrated development environment

Dreamweaver CS6
Visual web development tools

SublimeText3 Mac version
God-level code editing software (SublimeText3)
Hot Topics
 1376
1376
 52
52

 CUDA's universal matrix multiplication: from entry to proficiency!
Mar 25, 2024 pm 12:30 PM
CUDA's universal matrix multiplication: from entry to proficiency!
Mar 25, 2024 pm 12:30 PM
General Matrix Multiplication (GEMM) is a vital part of many applications and algorithms, and is also one of the important indicators for evaluating computer hardware performance. In-depth research and optimization of the implementation of GEMM can help us better understand high-performance computing and the relationship between software and hardware systems. In computer science, effective optimization of GEMM can increase computing speed and save resources, which is crucial to improving the overall performance of a computer system. An in-depth understanding of the working principle and optimization method of GEMM will help us better utilize the potential of modern computing hardware and provide more efficient solutions for various complex computing tasks. By optimizing the performance of GEMM
 Huawei's Qiankun ADS3.0 intelligent driving system will be launched in August and will be launched on Xiangjie S9 for the first time
Jul 30, 2024 pm 02:17 PM
Huawei's Qiankun ADS3.0 intelligent driving system will be launched in August and will be launched on Xiangjie S9 for the first time
Jul 30, 2024 pm 02:17 PM
On July 29, at the roll-off ceremony of AITO Wenjie's 400,000th new car, Yu Chengdong, Huawei's Managing Director, Chairman of Terminal BG, and Chairman of Smart Car Solutions BU, attended and delivered a speech and announced that Wenjie series models will be launched this year In August, Huawei Qiankun ADS 3.0 version was launched, and it is planned to successively push upgrades from August to September. The Xiangjie S9, which will be released on August 6, will debut Huawei’s ADS3.0 intelligent driving system. With the assistance of lidar, Huawei Qiankun ADS3.0 version will greatly improve its intelligent driving capabilities, have end-to-end integrated capabilities, and adopt a new end-to-end architecture of GOD (general obstacle identification)/PDP (predictive decision-making and control) , providing the NCA function of smart driving from parking space to parking space, and upgrading CAS3.0
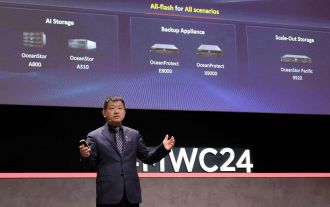 Huawei will launch innovative MED storage products next year: rack capacity exceeds 10 PB and power consumption is less than 2 kW
Mar 07, 2024 pm 10:43 PM
Huawei will launch innovative MED storage products next year: rack capacity exceeds 10 PB and power consumption is less than 2 kW
Mar 07, 2024 pm 10:43 PM
This website reported on March 7 that Dr. Zhou Yuefeng, President of Huawei's Data Storage Product Line, recently attended the MWC2024 conference and specifically demonstrated the new generation OceanStorArctic magnetoelectric storage solution designed for warm data (WarmData) and cold data (ColdData). Zhou Yuefeng, President of Huawei's data storage product line, released a series of innovative solutions. Image source: Huawei's official press release attached to this site is as follows: The cost of this solution is 20% lower than that of magnetic tape, and its power consumption is 90% lower than that of hard disks. According to foreign technology media blocksandfiles, a Huawei spokesperson also revealed information about the magnetoelectric storage solution: Huawei's magnetoelectronic disk (MED) is a major innovation in magnetic storage media. First generation ME
 Which version of Apple 16 system is the best?
Mar 08, 2024 pm 05:16 PM
Which version of Apple 16 system is the best?
Mar 08, 2024 pm 05:16 PM
The best version of the Apple 16 system is iOS16.1.4. The best version of the iOS16 system may vary from person to person. The additions and improvements in daily use experience have also been praised by many users. Which version of the Apple 16 system is the best? Answer: iOS16.1.4 The best version of the iOS 16 system may vary from person to person. According to public information, iOS16, launched in 2022, is considered a very stable and performant version, and users are quite satisfied with its overall experience. In addition, the addition of new features and improvements in daily use experience in iOS16 have also been well received by many users. Especially in terms of updated battery life, signal performance and heating control, user feedback has been relatively positive. However, considering iPhone14
 How to view and refresh dns cache in Linux
Mar 07, 2024 am 08:43 AM
How to view and refresh dns cache in Linux
Mar 07, 2024 am 08:43 AM
DNS (DomainNameSystem) is a system used on the Internet to convert domain names into corresponding IP addresses. In Linux systems, DNS caching is a mechanism that stores the mapping relationship between domain names and IP addresses locally, which can increase the speed of domain name resolution and reduce the burden on the DNS server. DNS caching allows the system to quickly retrieve the IP address when subsequently accessing the same domain name without having to issue a query request to the DNS server each time, thereby improving network performance and efficiency. This article will discuss with you how to view and refresh the DNS cache on Linux, as well as related details and sample code. Importance of DNS Caching In Linux systems, DNS caching plays a key role. its existence
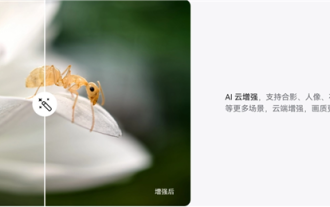 Always new! Huawei Mate60 series upgrades to HarmonyOS 4.2: AI cloud enhancement, Xiaoyi Dialect is so easy to use
Jun 02, 2024 pm 02:58 PM
Always new! Huawei Mate60 series upgrades to HarmonyOS 4.2: AI cloud enhancement, Xiaoyi Dialect is so easy to use
Jun 02, 2024 pm 02:58 PM
On April 11, Huawei officially announced the HarmonyOS 4.2 100-machine upgrade plan for the first time. This time, more than 180 devices will participate in the upgrade, covering mobile phones, tablets, watches, headphones, smart screens and other devices. In the past month, with the steady progress of the HarmonyOS4.2 100-machine upgrade plan, many popular models including Huawei Pocket2, Huawei MateX5 series, nova12 series, Huawei Pura series, etc. have also started to upgrade and adapt, which means that there will be More Huawei model users can enjoy the common and often new experience brought by HarmonyOS. Judging from user feedback, the experience of Huawei Mate60 series models has improved in all aspects after upgrading HarmonyOS4.2. Especially Huawei M
 Detailed explanation of how to modify system date in Oracle database
Mar 09, 2024 am 10:21 AM
Detailed explanation of how to modify system date in Oracle database
Mar 09, 2024 am 10:21 AM
Detailed explanation of the method of modifying the system date in the Oracle database. In the Oracle database, the method of modifying the system date mainly involves modifying the NLS_DATE_FORMAT parameter and using the SYSDATE function. This article will introduce these two methods and their specific code examples in detail to help readers better understand and master the operation of modifying the system date in the Oracle database. 1. Modify NLS_DATE_FORMAT parameter method NLS_DATE_FORMAT is Oracle data
 Differences and similarities of cmd commands in Linux and Windows systems
Mar 15, 2024 am 08:12 AM
Differences and similarities of cmd commands in Linux and Windows systems
Mar 15, 2024 am 08:12 AM
Linux and Windows are two common operating systems, representing the open source Linux system and the commercial Windows system respectively. In both operating systems, there is a command line interface for users to interact with the operating system. In Linux systems, users use the Shell command line, while in Windows systems, users use the cmd command line. The Shell command line in Linux system is a very powerful tool that can complete almost all system management tasks.