

How to install tomcat and deploy Java web projects on CentOS

1. Preparation
a. Download the tomcat linux package, address:, the version we downloaded is 8.0, the download method is as shown in the figure: 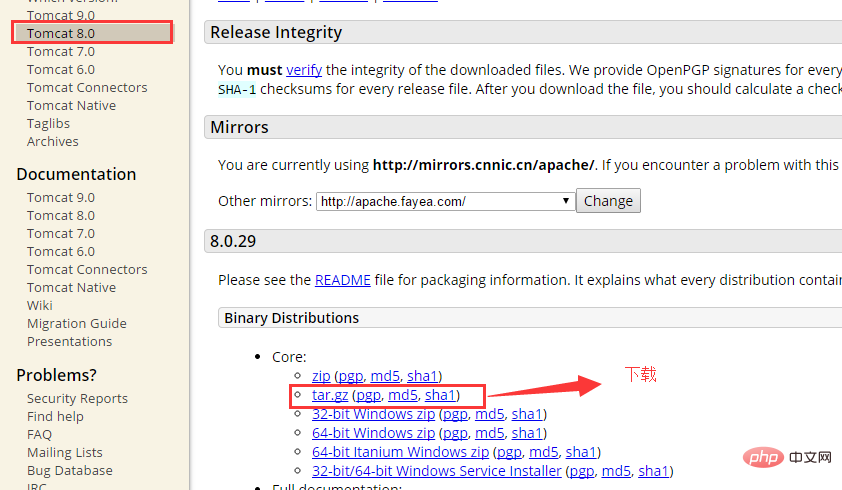
b. Because the installation of tomcat depends on java jdk, we need to determine whether jdk is installed under the linux system
b.1 Use (xshell) to connect to the linux system
b.2 Enter the command: java -version. If the jdk version number is displayed, it proves that it has been installed. If it is not displayed, it proves that it is not installed. If it is not installed, please refer to the following address to install it: //www .jb51.net/os/redhat/73016.html, as shown in the figure: 
c. The software and systems required for operation are as follows: virtual machine (vmware), installed in the virtual machine centos system, xshell, xftp, tomcat8.0, webdemo developed by myeclipse, apache-tomcat-8.0.29.tar.gz.
2. Install tomcat8.0 under linux
a. After the above preparations, we now have an environment that can be installed and released. If not, Please inquire and install yourself.
b. Then use the command in xshell to jump to the creator’s own folder under local: kencery
b.1 cd usr/local/ mkdir kencery cd kencery/
c. Then use xftp to copy tomcat to the kencery folder, as shown in the figure: 
d. Unzip the uploaded tomcat8.0 and unzip it Then rename it to tomcat, as shown in the figure:
d.1 tar -zxv -f apache-tomcat-8.0.29.tar.gz
d. 2 mv apache-tomcat-8.0.29 tomcat
d.3 cd tomcat
e. After the analysis is completed, you can start tomcat and check whether the installation is successful. , the command is as follows, as shown in the figure:
/usr/local/kencery/tomcat/bin/startup.sh
The information as shown in the figure appears, It means the startup is successful. At this time, we can access it under Windows. If the tomcat homepage can be displayed, it means that no operation is required. If it cannot be displayed, port 8080 of the firewall needs to be opened in Linux.
f. To open port 8080 in the firewall under Linux, use the following command:
f.1 vim /etc/sysconfig/iptables
f.2 After opening, press the keyboard (i) to enter the editing mode and write to the development port 8080, as shown in the figure: 
f.3 After writing, we press the keyboard ( esc) button to exit, then press (:wq) to save and close vim.
g. Then restart the firewall, the command is as follows:
service iptables restart
h. Then enter it in the browser again. If you see the tomcat system interface, it means the installation is successful. You can proceed as follows One step away.
i. The command to stop tomcat is: /usr/local/tomcat/bin/shutdown.sh
3. Set up tomcat server startup in linux and close
a. As shown in 2, we have completed the installation of tomcat and can deploy the project after parsing it. However, there is a problem here, that is, the Linux system and restarting us every time All need to connect the path and execute the command, then we can set up the horizontal service form to achieve this function.
b. Execute the command: vim /etc/rc.d/init.d/tomcat, create a script file, write the following code in the file, save and exit
linux
c. Add permissions to the file so that the script file can be executed. The command is chmod 755 /etc/rc.d/init.d/tomcat
d. Add it to the service. The command is chkconfig --add /etc/rc.d/init.d/tomcat
e. Then add the following configuration file to the end of the catalina.sh file in tomcat, the command It is:
vim /usr/local/kencery/tomcat/bin/catalina.sh
    export java_home=/usr/local/kencery/javajdk  #javajdk的安装路径,使用echo $java_home命令可以读取
    export catalina_home=/usr/local/kencery/tomcat
    export catalina_base=/usr/local/kencery/tomcat
    export catalina_tmpdir=/usr/local/kencery/tomcat/temp
f. If all the above work goes smoothly and an error is reported, the configuration is complete. You can enter the commands service tomcat start and service tomcat stop to verify (please experiment by yourself).
4. Set up tomcat startup in linux
a. Through the settings in the third step, we can easily set up and shut down tomcat. But there is a problem here, that is, when the server is shut down and restarted, the service cannot start by itself when the computer starts. Then we can set the tomcat service to start at boot.
b. Open the file that opens the linux settings and write the following configuration file to the end of the file. The command is:
vim /etc/rc.d/rc.local
    export java_home=/usr/local/kencery/javajdk
    export classpath=.:$java_home/jre/lib/rt.jar:$java_home/lib/dt.jar:$java_home/lib/tools.jar
    export path=$path:$java_home/bin
    export catalina_home=/usr/local/kencery/tomcat/
    #tomcat自启动
    /usr/local/kencery/tomcat/bin/startup.
c.tomcat depends on java's jdk. So when setting up, jdk is also imported synchronously.
d.完成上面的步骤之后我们就可以将centos关机重启检查一番。
5.给tomcat设置用户名和密码登录
a.当tomcat安装完成之后,访问即可以看到tomcat发布的网站,这时候需要管理我们发布网站,就需要登录tomcat,那么在centos中如何设置登录名和密码。
b.在tomcat安装包下面的conf文件下含有一个tomcat-user.xml文件,修改此文件即可,命令为:vim tomcat-users.xml
c.在打开的xml配置文件最后面写入下面这段配置文件之后保存并且退出即可。
    <role rolename="admin-gui"/>
    <role rolename="manager-gui"/>
    <user username="tomcat" password="tomcat" roles="manager-gui,admin-gui"/>
d.在这里会出现一个问题,因为tomcat-users.xml里面有注释的用户设置的信息,取消注释,用文件提供的用户名和密码去访问的时候,会出现403错误,什么原因呢?这是因为我们没有指定用户所拥有的权限的原因,如我们现在想访问tomcat中图形化管理应用的功能,也就是manager app,就需要指定manager-gui的权限,如果想访问host manager就必须指定admin-gui权限,故而如c所示的配置。
e.配置完用户名密码之后,需要重新启动tomcat,命令如下:
 service tomcat stop
service tomcat startf. 重启服务之后,检测是否登录成功,如果登录进入系统,则说明登录成功。
6.使用myeclipse打包java web项目
a.以上所有工作完成之后,我们需要一个简单的项目来打包发布,那么在myeclipse中如何打包项目呢
b.随便创建一个javaweb项目,如图所示: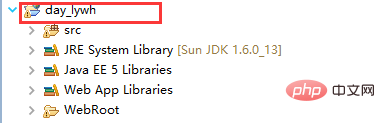
c.在项目上单击右键选择export-选择javaee文件夹-选择war file(myeclipse),单击next>如图所示,选择存放打包程序的地址,单击finish完成,即实现了打包,在完成之后可以去你打包的地方看一下是否打包成功。

d.myeclipse10.7打包程序的时候当选择war file(myeclipse),单击next>的时候ide奔溃的解决办法。
d.1 此错误可能是在破解的时候没有破解的很干净,所以需要执行下面步骤
d.2 下载文件com.genuitec.eclipse.export.wizard_9.0.0.me201211011550.jar
d.3 找到myeclipse安装环境的地址,我的安装坏境是:d:\program files\myeclipse\common\plugins,将下载下来的文件解析之后替换到plugins中的同名文件(替换后,最好将jar文件改成.txt文件结尾,然后重启myeclipse10,然后关闭,再将jar改回.jar为扩展名的状态,重启后即可)。
d.4 已测试,没任何问题,完美实现,如果大家遇到,则按照这种思路解决即可。
7.将java web项目发布到tomcat8.0下面并且访问展示
a.以上所有工作都完成之后,我们就可以将打包的javaweb程序发布到tomcat下即可。
b.tomcat默认的发布web项目的目录是:webapps
c.将导出的war包直接使用xftp上传到webapps根目录下,随着tomcat的启动,war包可以自动被解析。
d.然后调用路径查询是否安装成功,如图所示:则表示安装成功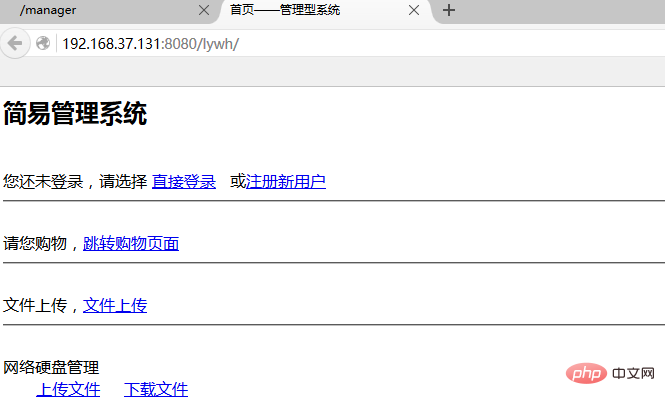
The above is the detailed content of How to install tomcat and deploy Java web projects on CentOS. For more information, please follow other related articles on the PHP Chinese website!

Hot AI Tools

Undresser.AI Undress
AI-powered app for creating realistic nude photos

AI Clothes Remover
Online AI tool for removing clothes from photos.

Undress AI Tool
Undress images for free

Clothoff.io
AI clothes remover

AI Hentai Generator
Generate AI Hentai for free.

Hot Article
Hot Tools

Notepad++7.3.1
Easy-to-use and free code editor

SublimeText3 Chinese version
Chinese version, very easy to use

Zend Studio 13.0.1
Powerful PHP integrated development environment

Dreamweaver CS6
Visual web development tools

SublimeText3 Mac version
God-level code editing software (SublimeText3)
Hot Topics
 1384
1384
 52
52

 How to optimize CentOS HDFS configuration
Apr 14, 2025 pm 07:15 PM
How to optimize CentOS HDFS configuration
Apr 14, 2025 pm 07:15 PM
Improve HDFS performance on CentOS: A comprehensive optimization guide to optimize HDFS (Hadoop distributed file system) on CentOS requires comprehensive consideration of hardware, system configuration and network settings. This article provides a series of optimization strategies to help you improve HDFS performance. 1. Hardware upgrade and selection resource expansion: Increase the CPU, memory and storage capacity of the server as much as possible. High-performance hardware: adopts high-performance network cards and switches to improve network throughput. 2. System configuration fine-tuning kernel parameter adjustment: Modify /etc/sysctl.conf file to optimize kernel parameters such as TCP connection number, file handle number and memory management. For example, adjust TCP connection status and buffer size
 Centos stops maintenance 2024
Apr 14, 2025 pm 08:39 PM
Centos stops maintenance 2024
Apr 14, 2025 pm 08:39 PM
CentOS will be shut down in 2024 because its upstream distribution, RHEL 8, has been shut down. This shutdown will affect the CentOS 8 system, preventing it from continuing to receive updates. Users should plan for migration, and recommended options include CentOS Stream, AlmaLinux, and Rocky Linux to keep the system safe and stable.
 Centos shutdown command line
Apr 14, 2025 pm 09:12 PM
Centos shutdown command line
Apr 14, 2025 pm 09:12 PM
The CentOS shutdown command is shutdown, and the syntax is shutdown [Options] Time [Information]. Options include: -h Stop the system immediately; -P Turn off the power after shutdown; -r restart; -t Waiting time. Times can be specified as immediate (now), minutes ( minutes), or a specific time (hh:mm). Added information can be displayed in system messages.
 Difference between centos and ubuntu
Apr 14, 2025 pm 09:09 PM
Difference between centos and ubuntu
Apr 14, 2025 pm 09:09 PM
The key differences between CentOS and Ubuntu are: origin (CentOS originates from Red Hat, for enterprises; Ubuntu originates from Debian, for individuals), package management (CentOS uses yum, focusing on stability; Ubuntu uses apt, for high update frequency), support cycle (CentOS provides 10 years of support, Ubuntu provides 5 years of LTS support), community support (CentOS focuses on stability, Ubuntu provides a wide range of tutorials and documents), uses (CentOS is biased towards servers, Ubuntu is suitable for servers and desktops), other differences include installation simplicity (CentOS is thin)
 What are the backup methods for GitLab on CentOS
Apr 14, 2025 pm 05:33 PM
What are the backup methods for GitLab on CentOS
Apr 14, 2025 pm 05:33 PM
Backup and Recovery Policy of GitLab under CentOS System In order to ensure data security and recoverability, GitLab on CentOS provides a variety of backup methods. This article will introduce several common backup methods, configuration parameters and recovery processes in detail to help you establish a complete GitLab backup and recovery strategy. 1. Manual backup Use the gitlab-rakegitlab:backup:create command to execute manual backup. This command backs up key information such as GitLab repository, database, users, user groups, keys, and permissions. The default backup file is stored in the /var/opt/gitlab/backups directory. You can modify /etc/gitlab
 How to check CentOS HDFS configuration
Apr 14, 2025 pm 07:21 PM
How to check CentOS HDFS configuration
Apr 14, 2025 pm 07:21 PM
Complete Guide to Checking HDFS Configuration in CentOS Systems This article will guide you how to effectively check the configuration and running status of HDFS on CentOS systems. The following steps will help you fully understand the setup and operation of HDFS. Verify Hadoop environment variable: First, make sure the Hadoop environment variable is set correctly. In the terminal, execute the following command to verify that Hadoop is installed and configured correctly: hadoopversion Check HDFS configuration file: The core configuration file of HDFS is located in the /etc/hadoop/conf/ directory, where core-site.xml and hdfs-site.xml are crucial. use
 Centos configuration IP address
Apr 14, 2025 pm 09:06 PM
Centos configuration IP address
Apr 14, 2025 pm 09:06 PM
Steps to configure IP address in CentOS: View the current network configuration: ip addr Edit the network configuration file: sudo vi /etc/sysconfig/network-scripts/ifcfg-eth0 Change IP address: Edit IPADDR= Line changes the subnet mask and gateway (optional): Edit NETMASK= and GATEWAY= Lines Restart the network service: sudo systemctl restart network verification IP address: ip addr
 What files do you need to modify in HDFS configuration CentOS?
Apr 14, 2025 pm 07:27 PM
What files do you need to modify in HDFS configuration CentOS?
Apr 14, 2025 pm 07:27 PM
When configuring Hadoop Distributed File System (HDFS) on CentOS, the following key configuration files need to be modified: core-site.xml: fs.defaultFS: Specifies the default file system address of HDFS, such as hdfs://localhost:9000. hadoop.tmp.dir: Specifies the storage directory for Hadoop temporary files. hadoop.proxyuser.root.hosts and hadoop.proxyuser.ro
