
When updating Windows 11 or upgrading from Windows 10 to Windows 11, you may encounter the error We could not update system reserved partition.
This may be accompanied by error code 0xc1900104, 0x800f0922, or 0xc1900201.
This may be caused by a full System Reserved Partition (SRP) that can no longer be written to.
Additionally, some third-party security and antivirus applications write to the SRP and can fill it up quickly. Dual booting with Linux can also be the cause of this error.
Additionally, if you are running a new legacy installation, bypassing Windows 11 requirements, your System Reserved partition may only be 50 MB, which is too small.
SRP is a hidden partition in the system drive that contains important startup and system recovery information.
The data includes boot manager code and boot configuration data as well as boot files used for BitLocker drive encryption. In Windows 10, recovery environment data is also stored in this partition.
Notes Tampering with the system reserved partition may require advanced skills using the command line. Any incorrectly entered command may result in the device not booting and potential data loss.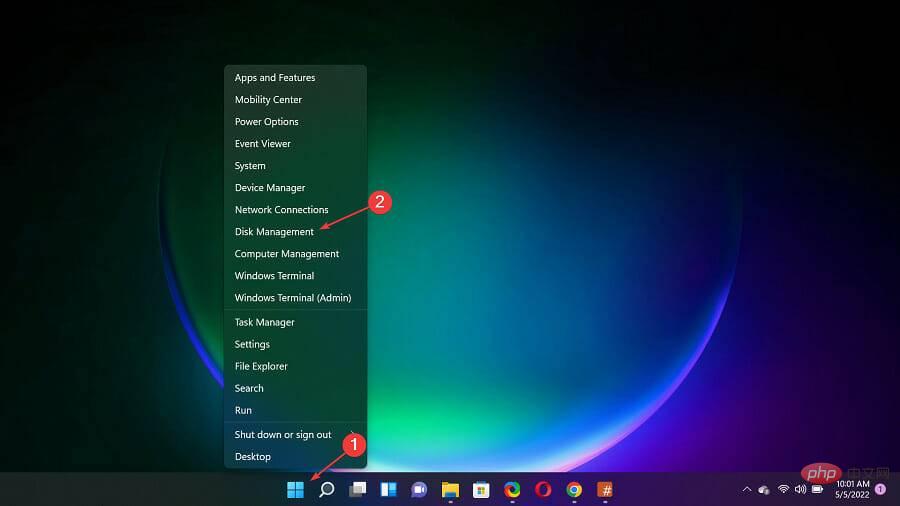
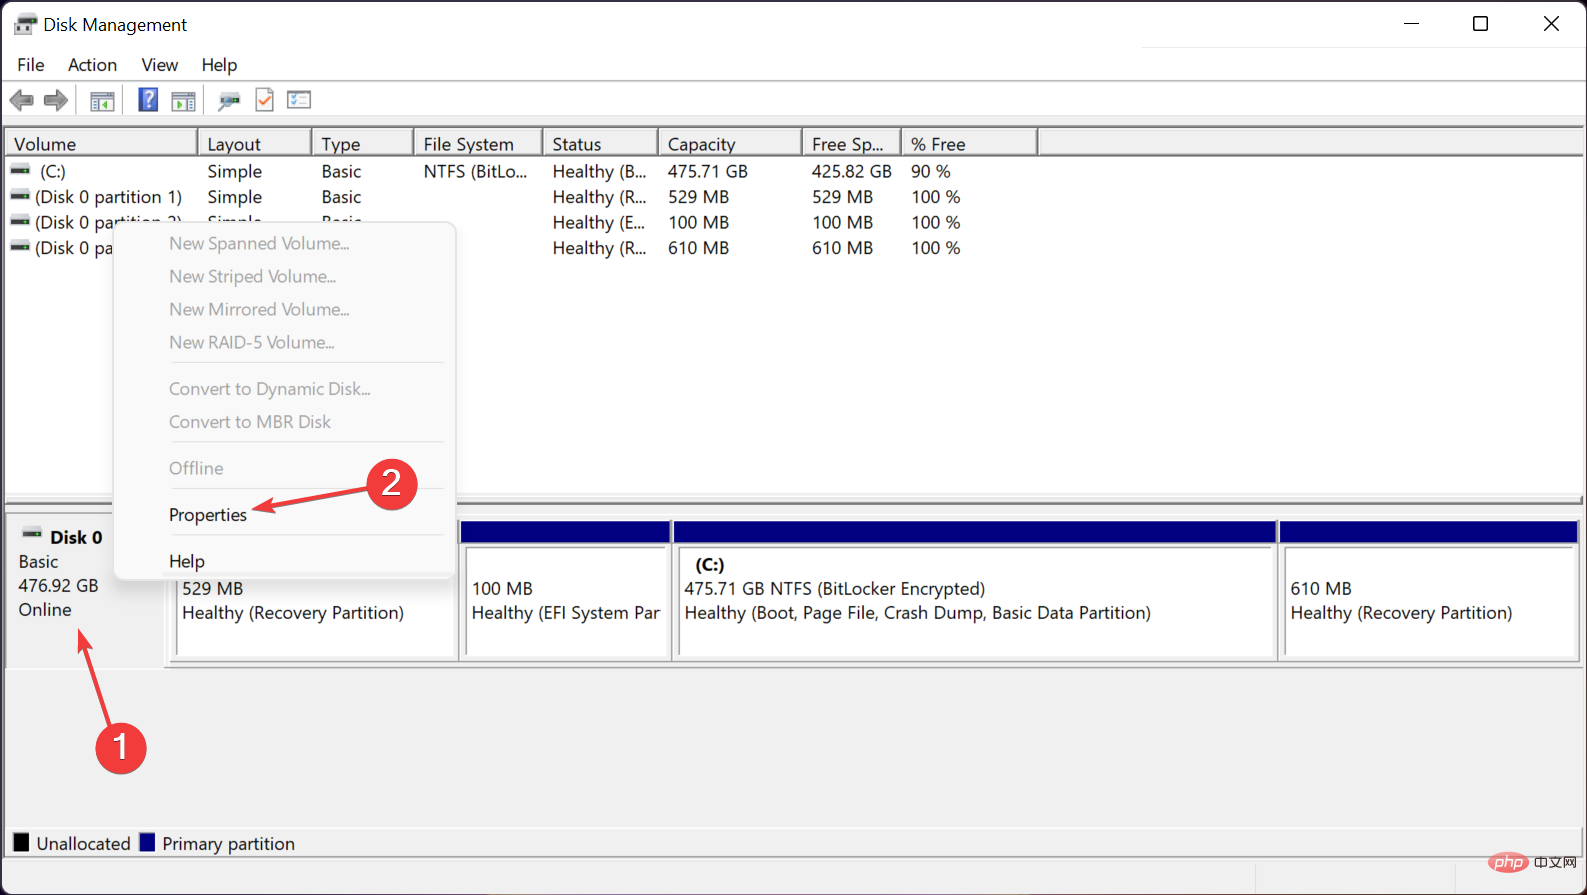
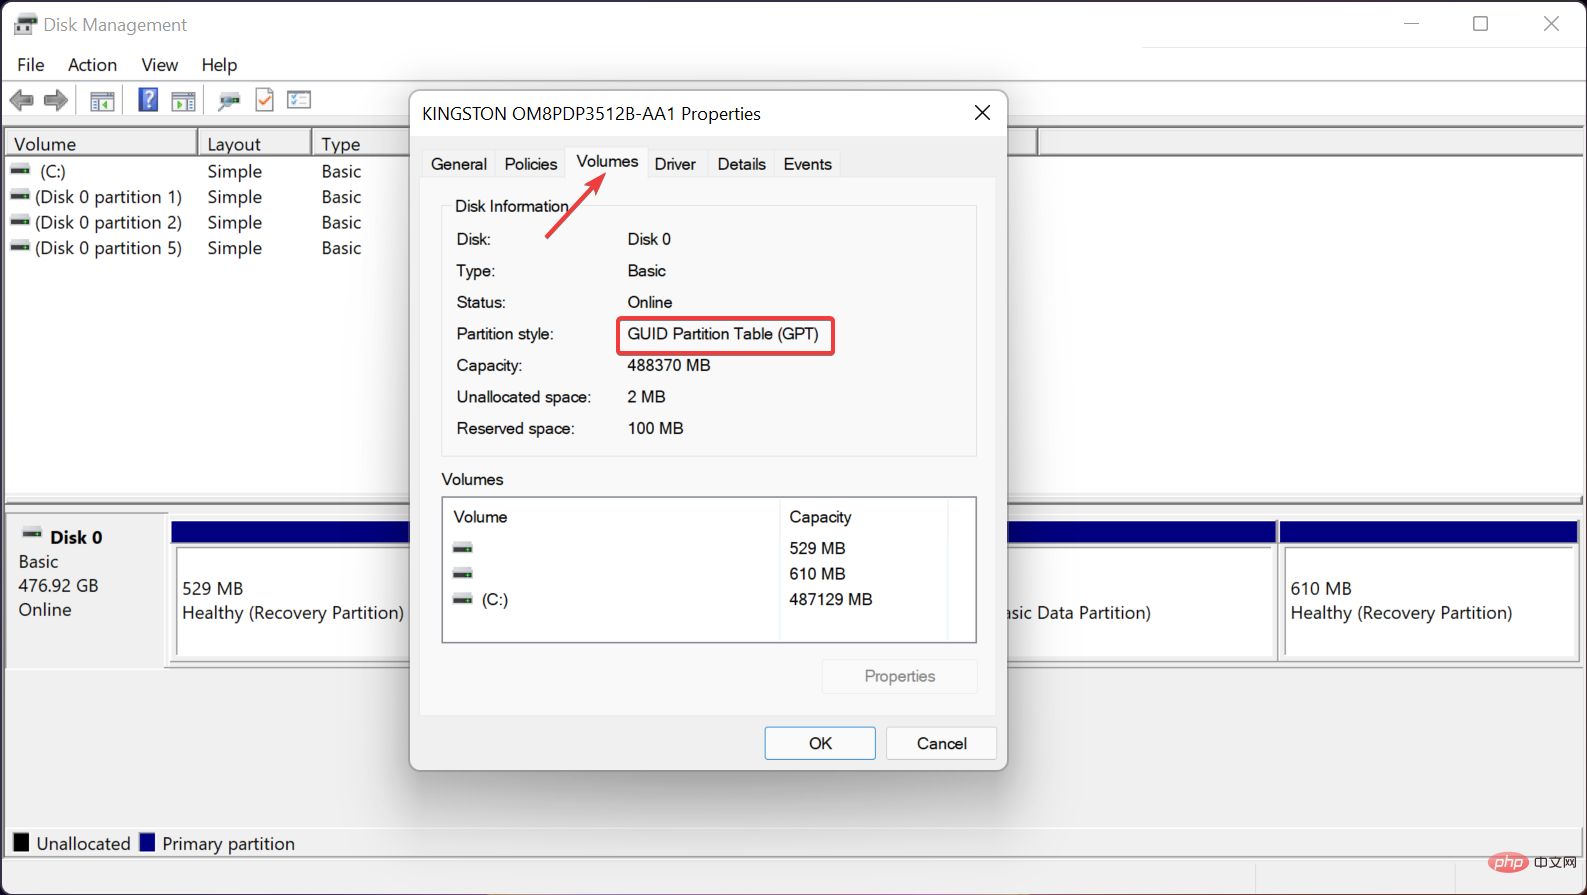
Although you can typically only install Windows 11 on a GUID Partition Table (GPT), you can do this on an MBR.
That's why we first need to check what we're dealing with, as the solutions for the two cases are slightly different.
2.1 For GUID Partition Table (GPT)
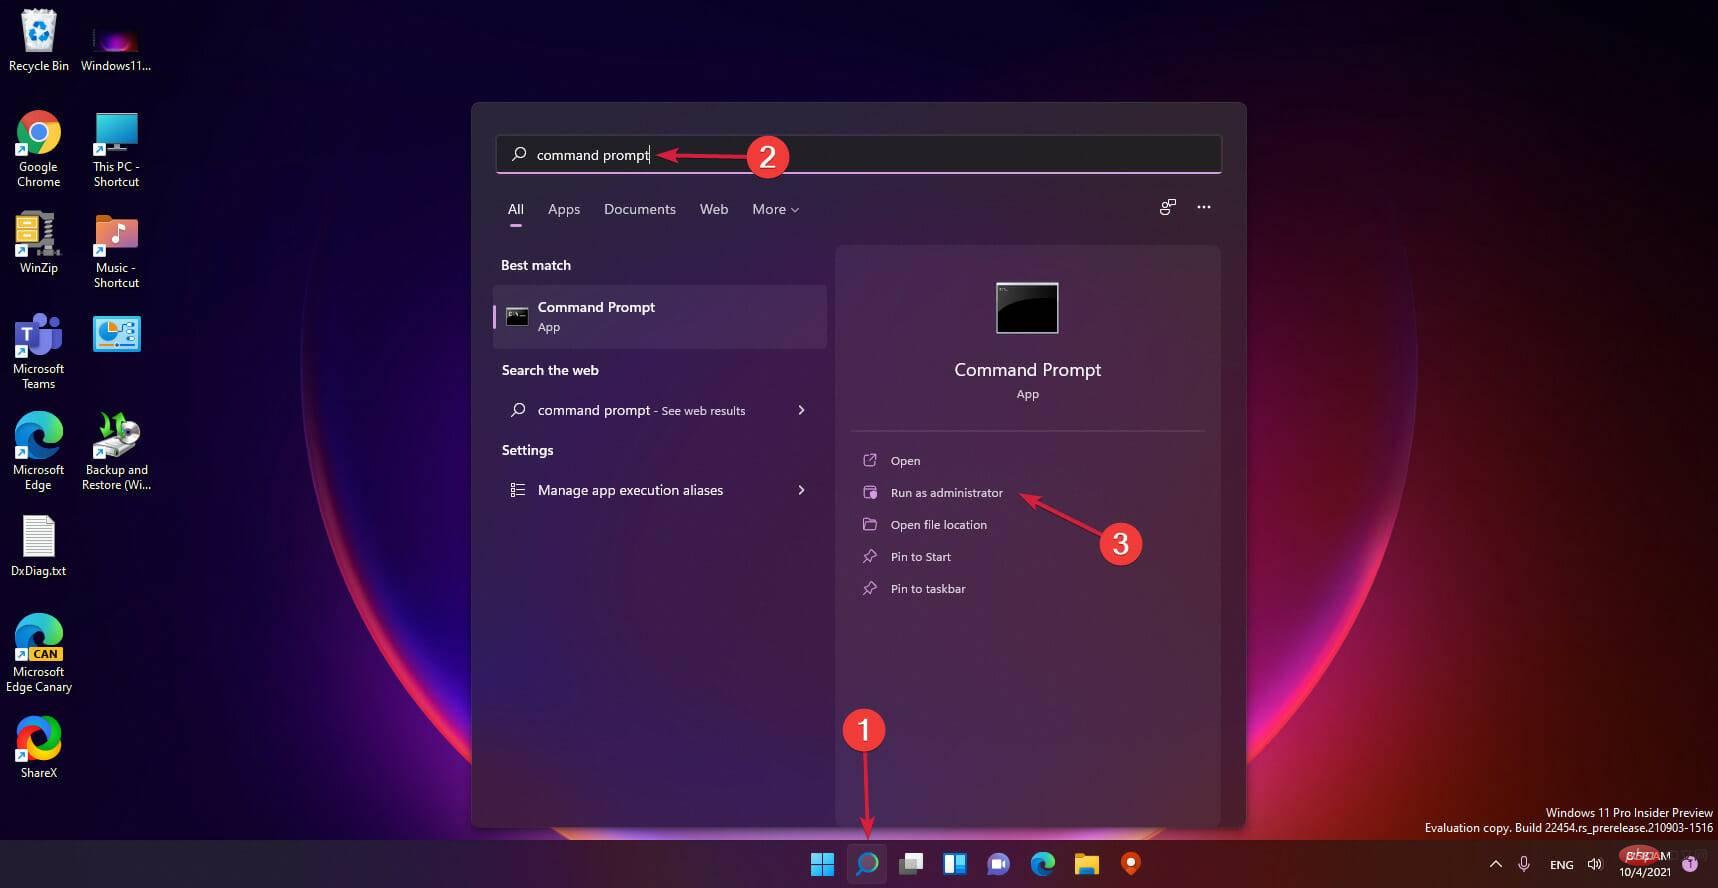
<strong>mountvol y: / s</strong>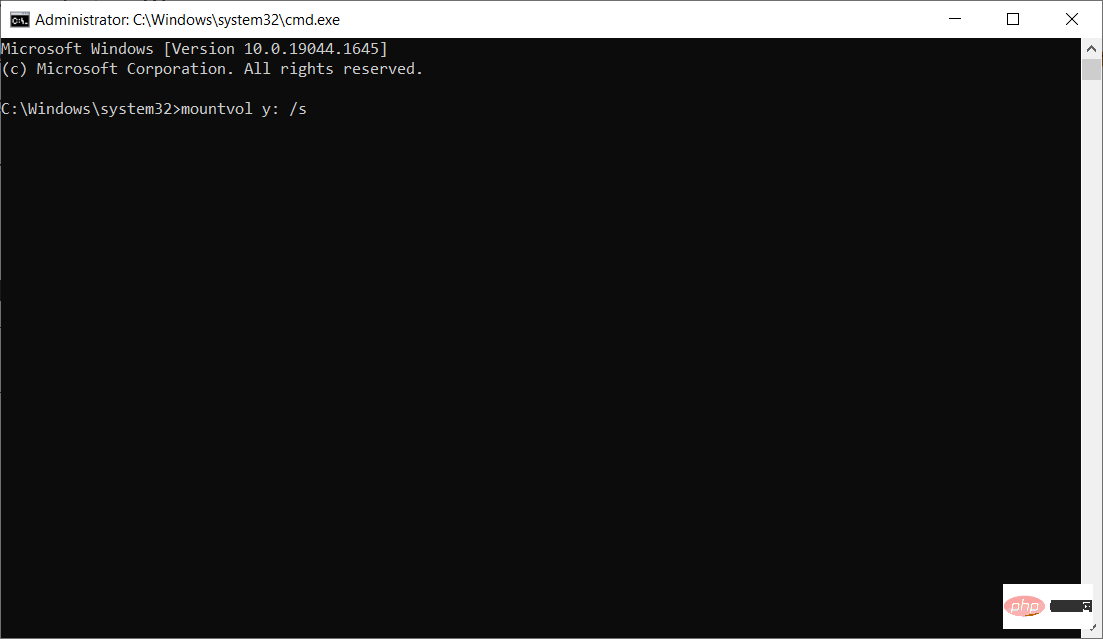
<strong>cd EFI\Microsoft\Boot\Fonts</strong>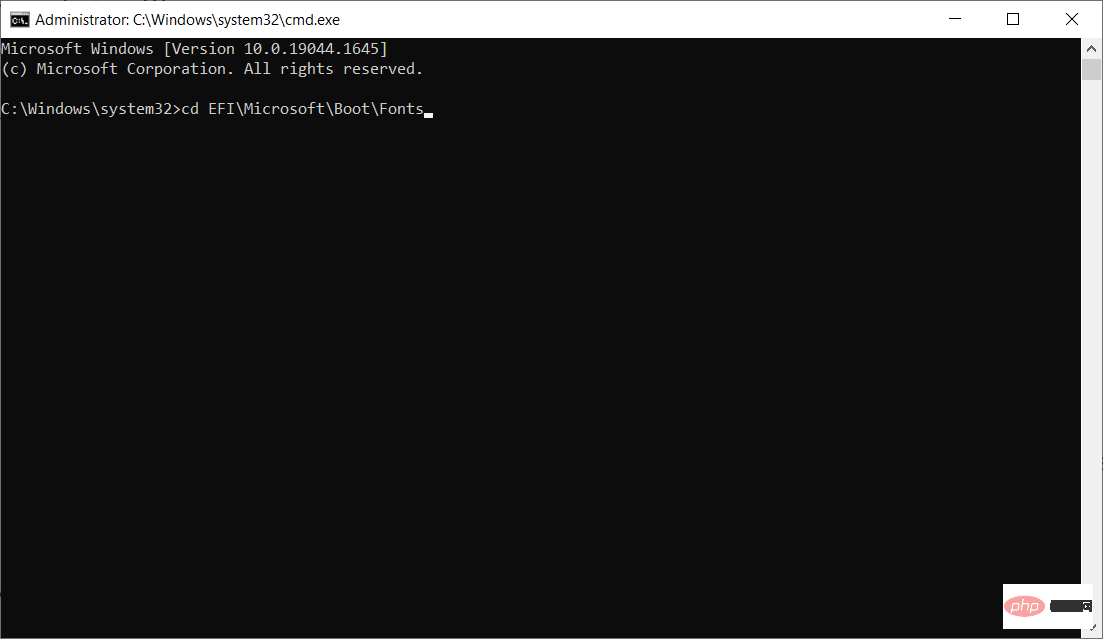
<strong>del *.*</strong>
2.2 For MBR (BIOS)

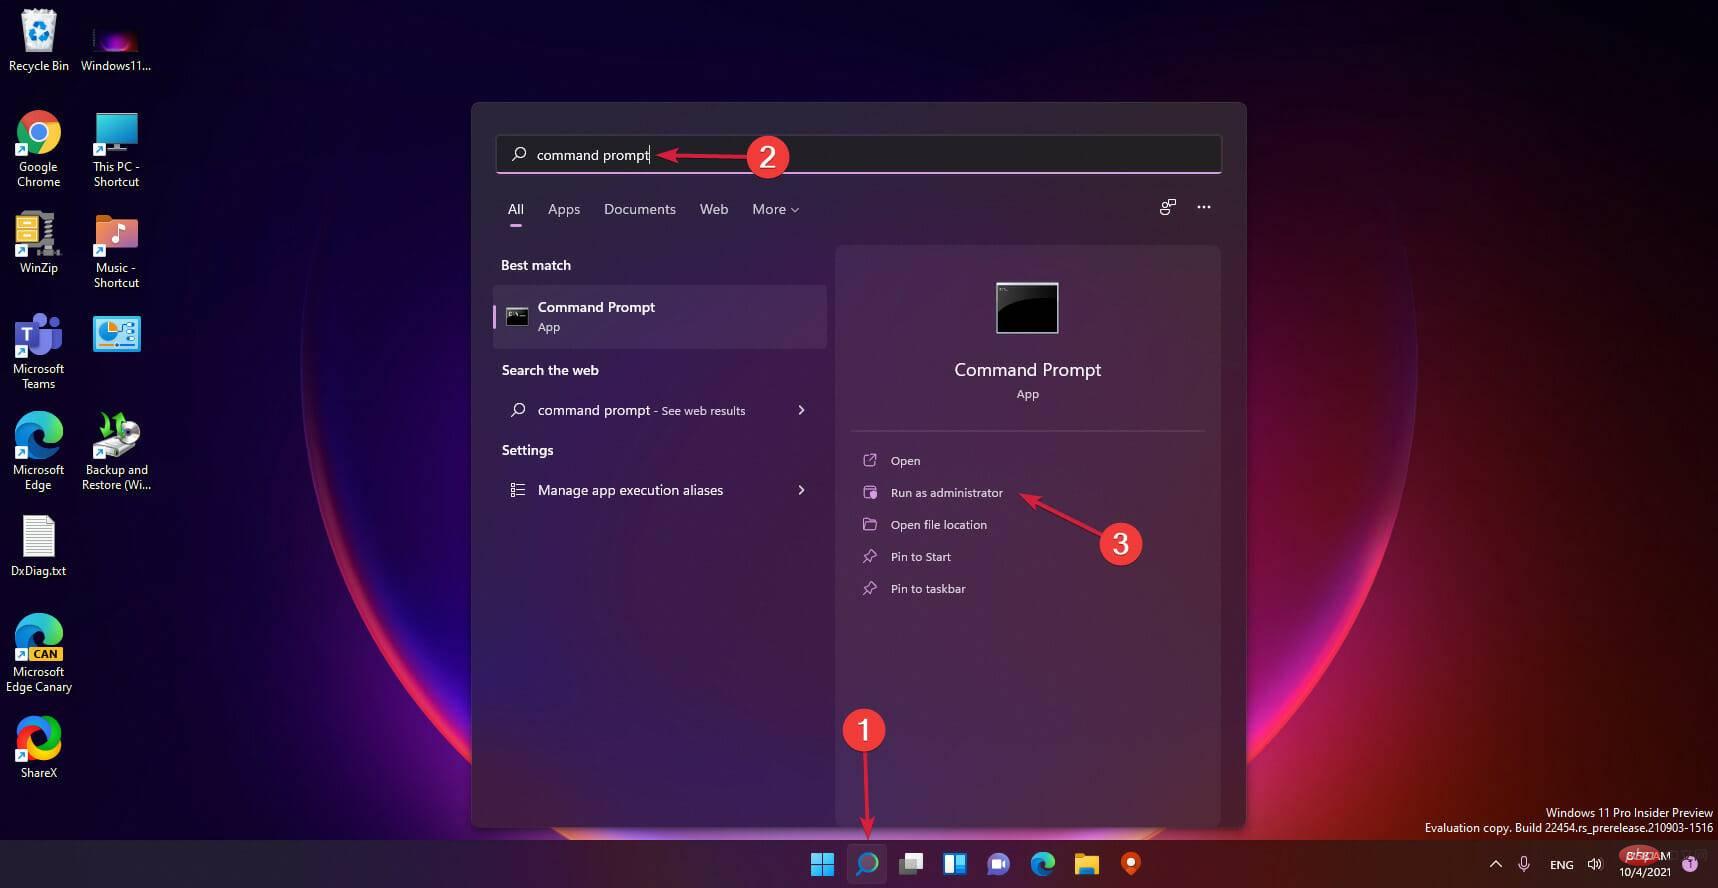
<strong>cd Boot\Fonts</strong>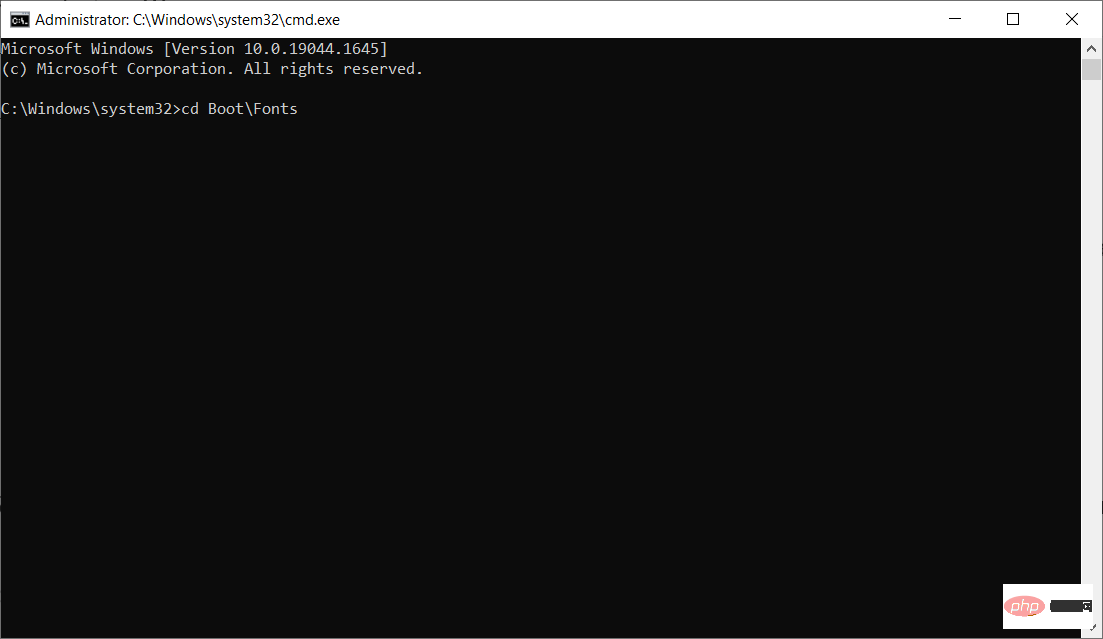
<strong>takeown /d y /r /f</strong>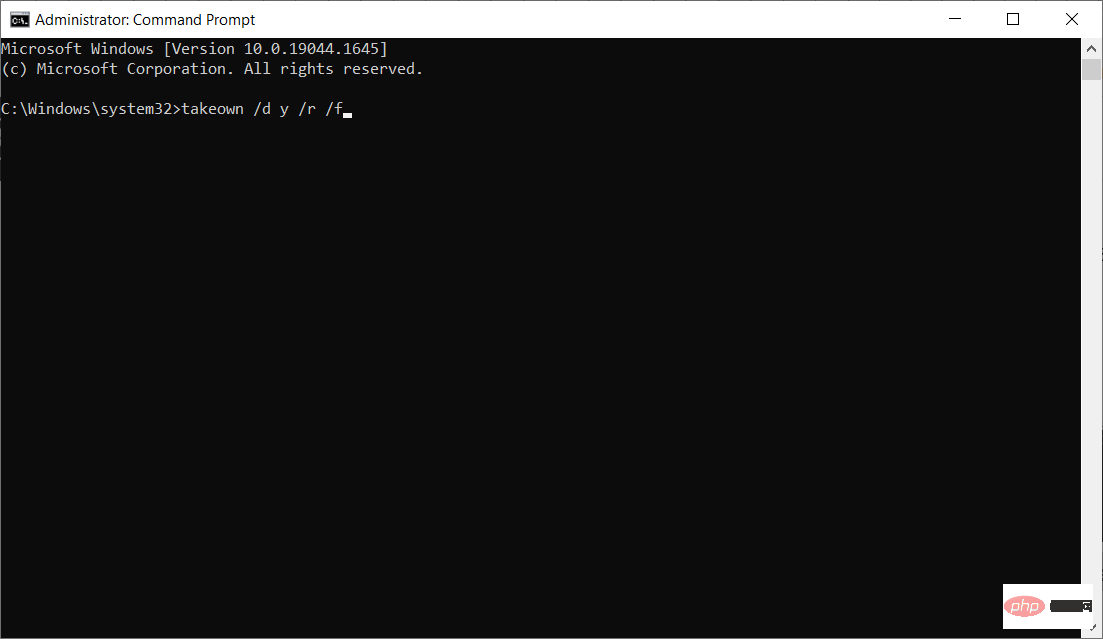
<strong>icacls Y:\* /save %systemdrive%\NTFSp.txt /c /t</strong>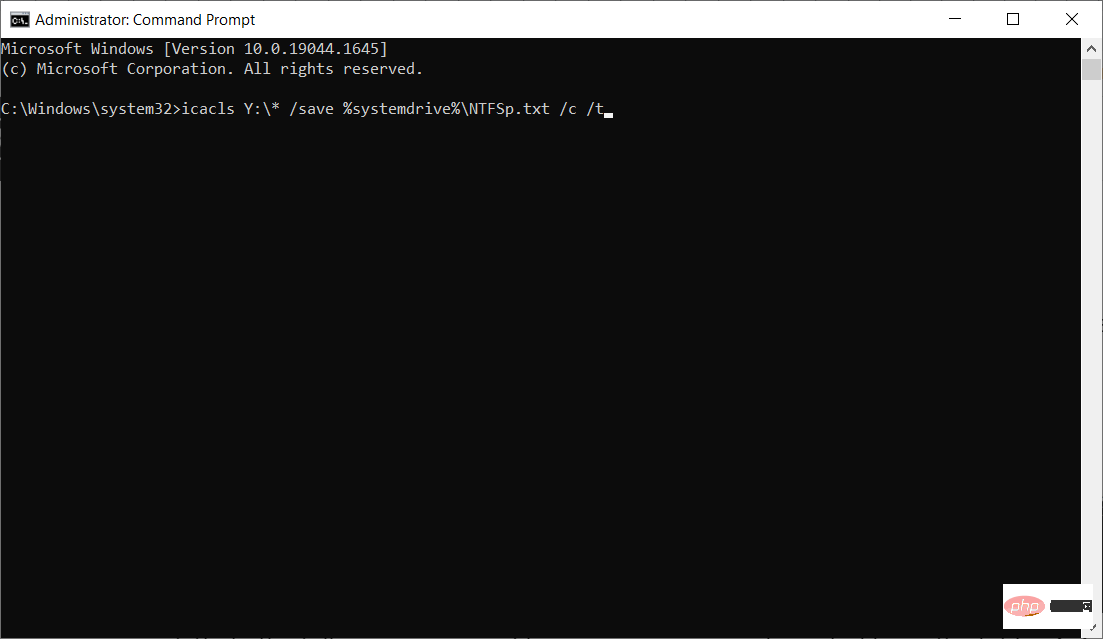
<strong>icacls . /grant</strong> <strong><the username you got from whoami>:F /t</the></strong>
<strong>del *.*</strong>
<strong>icacls Y:\ /restore %systemdrive%\NTFSp.txt /c /t</strong>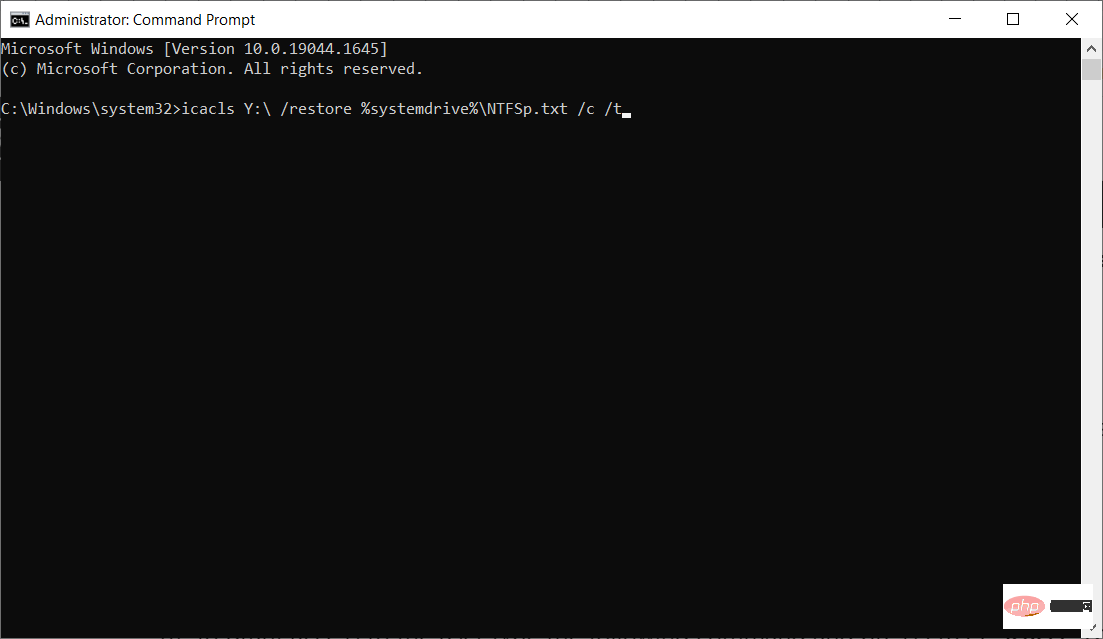
<strong>icacls . /grant system: f /t</strong>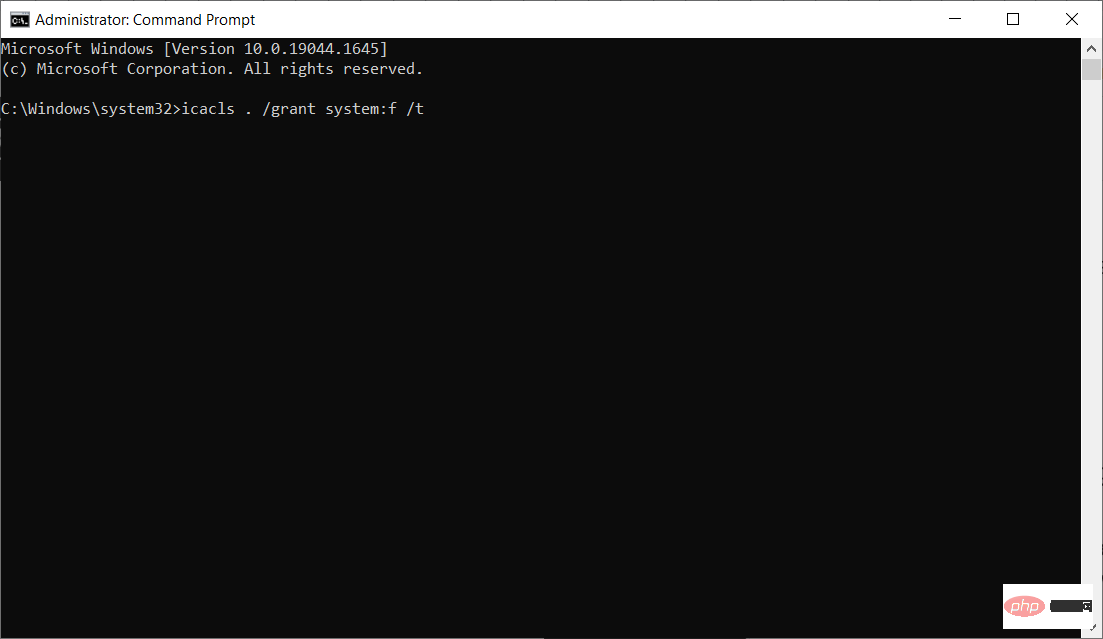
<strong>icacls Y: /setowner “SYSTEM” /t /c</strong>
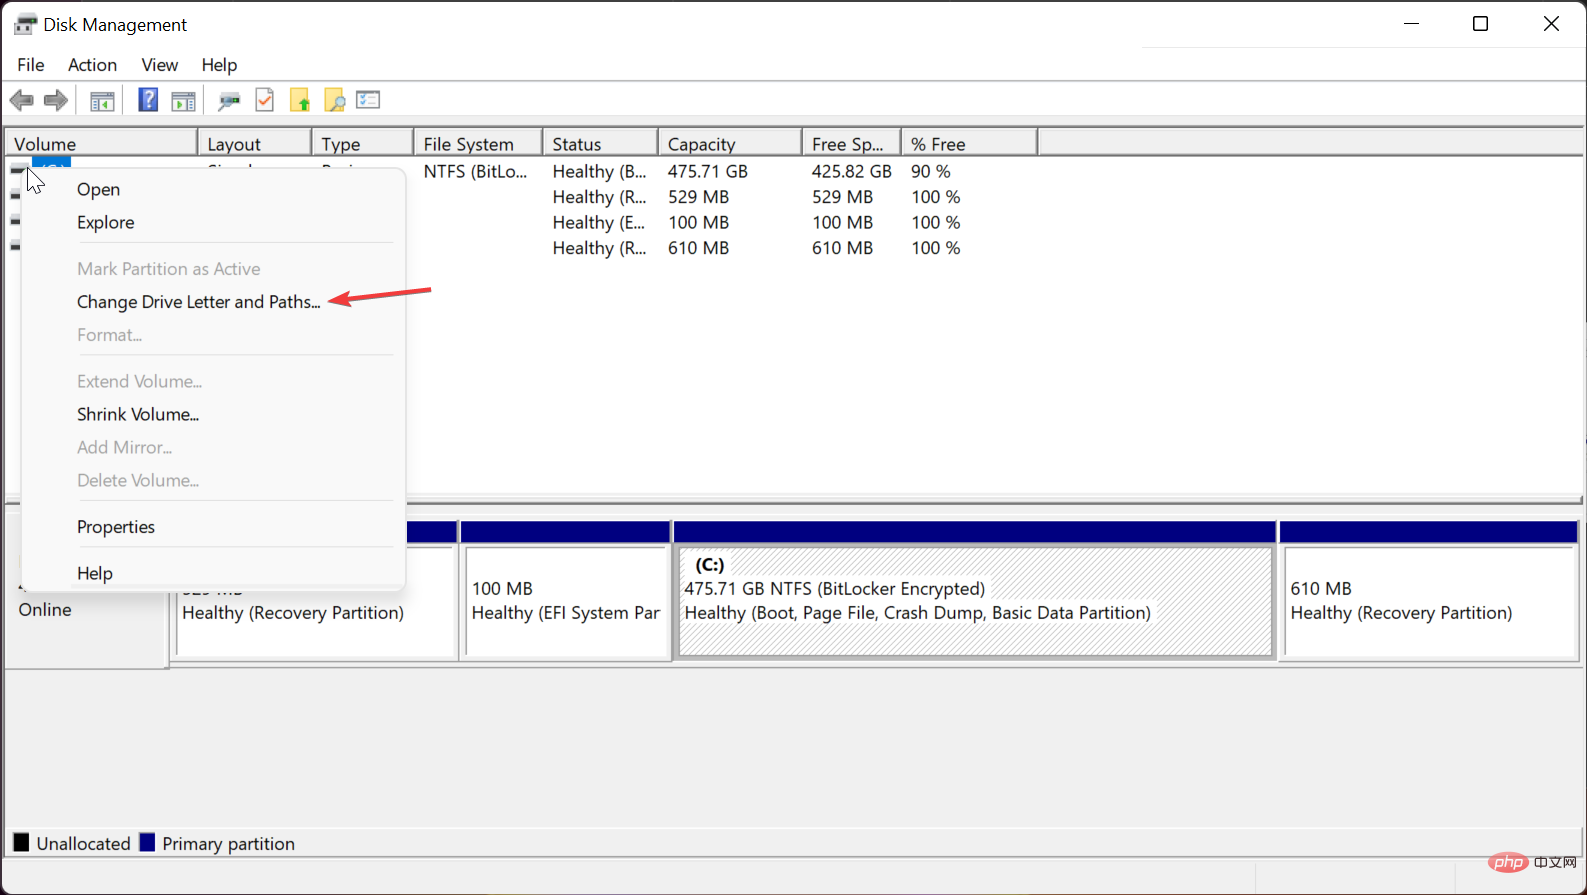
The system reserved partition should now have more free space. You can confirm this by checking the Disk Management console and then you should proceed to delete the drive letter.
To remove the Y drive letter, right-click the System Reserved Partition in the Disk Management tool and select Change Drive Letter and Path as you did in Solve as done in the program.
But this time, select the Y: drive, then select Remove and click OK to save the changes.
Restart your computer (if necessary) and continue with the upgrade or update. The error that we cannot update the system reserved partition should be gone.
Read more about this topicIf you feel The above method is daunting, then third-party tools like Gadget Partition Wizard and AOMEI's Diskpart can help you solve the problem.
Tools like this utilize a graphical interface and near one-click operation to perform various repairs.
In particular, the Mini Tool Partition Wizard clearly displays the partition style and other related properties of each partition.
Whether it is a GPT or MBR disk, the software includes intuitive tools to help you expand or shrink partitions. Be sure to follow their documentation.
Notes On some third-party partition management tools, GPT disks may appear as EFI System Partition (ESP).In short, these tools help you shrink your main C: drive and extend the system reserved partition using the resulting unallocated space.
As a last resort, you may want to consider performing a clean installation of the affected version of Windows.
Essentially, a clean installation resets the hard drive and creates a new system reserved partition outside of the main system drive. Remember to back up all data before doing a fresh installation.
The above is the detailed content of Windows 11 can't update the system reserved partition: 3 tips. For more information, please follow other related articles on the PHP Chinese website!
 How to turn off win10 upgrade prompt
 The difference between lightweight application servers and cloud servers
 CMD close port command
 The difference between external screen and internal screen broken
 How to jump with parameters in vue.js
 Cell sum
 How to intercept harassing calls
 virtual digital currency


