First of all, what is a distributed transaction? For example, when we execute a business logic, we have two steps to operate data source A and data source B respectively. When we execute data in data source A After the change, a runtime exception occurs when B data source is executed, then we must roll back the operation of B data source and roll back the operation of A data source; this situation often occurs in payment services; such as buying tickets If the business fails to pay at the end, all previous operations must be rolled back. If the previous operations are distributed among multiple data sources, then this is a typical distributed transaction rollback;
Understand what distributed is Transactions, the solution for distributed transactions in Java is JTA (Java Transaction API); springboot officially provides solution ideas for Atomikos or Bitronix;
In fact, in most cases, many companies use message queues way to implement distributed transactions.
This article focuses on integrating Atomikos mysql mybatis tomcat/jetty in the springboot environment;
pom. Add the springboot related dependencies of atomikos in xml:
<!--分布式事务-->
<dependency>
<groupId>org.springframework.boot</groupId>
<artifactId>spring-boot-starter-jta-atomikos</artifactId>
</dependency>
Click in and you will find that it is integrated: transactions-jms, transactions-jta, transactions-jdbc、javax.transaction-api
Extract the relevant configuration items of the data source into one In application.yml:
Note:
This time our spring.datasource.type is com.alibaba.druid.pool.xa.DruidXADataSource; The value of
##spring.jta.transaction-manager-id is in your It is the only one in the computer. Please read the official documentation for details;

spring:
datasource:
type: com.alibaba.druid.pool.xa.DruidXADataSource
druid:

systemDB:
name: systemDB
url: jdbc:mysql://localhost:3306/springboot-mybatis?useUnicode=true&characterEncoding=utf-8
username: root
password: root
# 下面为连接池的补充设置,应用到上面所有数据源中
# 初始化大小,最小,最大
initialSize: 5
minIdle: 5
maxActive: 20
# 配置获取连接等待超时的时间
maxWait: 60000
# 配置间隔多久才进行一次检测,检测需要关闭的空闲连接,单位是毫秒
timeBetweenEvictionRunsMillis: 60000
# 配置一个连接在池中最小生存的时间,单位是毫秒
minEvictableIdleTimeMillis: 30
validationQuery: SELECT 1
validationQueryTimeout: 10000
testWhileIdle: true
testOnBorrow: false
testOnReturn: false
# 打开PSCache,并且指定每个连接上PSCache的大小
poolPreparedStatements: true
maxPoolPreparedStatementPerConnectionSize: 20
filters: stat,wall
# 通过connectProperties属性来打开mergeSql功能;慢SQL记录
connectionProperties: druid.stat.mergeSql=true;druid.stat.slowSqlMillis=5000
# 合并多个DruidDataSource的监控数据
useGlobalDataSourceStat: true

businessDB:
name: businessDB

url: jdbc:mysql://localhost:3306/springboot-mybatis2?useUnicode=true&characterEncoding=utf-8
username: root
password: root
# 下面为连接池的补充设置,应用到上面所有数据源中
# 初始化大小,最小,最大
initialSize: 5
minIdle: 5
maxActive: 20
# 配置获取连接等待超时的时间
maxWait: 60000
# 配置间隔多久才进行一次检测,检测需要关闭的空闲连接,单位是毫秒
timeBetweenEvictionRunsMillis: 60000
# 配置一个连接在池中最小生存的时间,单位是毫秒
minEvictableIdleTimeMillis: 30
validationQuery: SELECT 1
validationQueryTimeout: 10000
testWhileIdle: true
testOnBorrow: false
testOnReturn: false
# 打开PSCache,并且指定每个连接上PSCache的大小
poolPreparedStatements: true
maxPoolPreparedStatementPerConnectionSize: 20
filters: stat,wall
# 通过connectProperties属性来打开mergeSql功能;慢SQL记录
connectionProperties: druid.stat.mergeSql=true;druid.stat.slowSqlMillis=5000
# 合并多个DruidDataSource的监控数据
useGlobalDataSourceStat: true
#jta相关参数配置
jta:
log-dir: classpath:tx-logs
transaction-manager-id: txManager
package com.zjt.config;
import com.alibaba.druid.filter.stat.StatFilter;
import com.alibaba.druid.support.http.StatViewServlet;
import com.alibaba.druid.support.http.WebStatFilter;
import com.alibaba.druid.wall.WallConfig;
import com.alibaba.druid.wall.WallFilter;
import com.atomikos.icatch.jta.UserTransactionImp;
import com.atomikos.icatch.jta.UserTransactionManager;
import org.springframework.beans.factory.annotation.Autowired;
import org.springframework.boot.jta.atomikos.AtomikosDataSourceBean;
import org.springframework.boot.web.servlet.FilterRegistrationBean;
import org.springframework.boot.web.servlet.ServletRegistrationBean;
import org.springframework.context.annotation.Bean;
import org.springframework.context.annotation.Configuration;
import org.springframework.context.annotation.Primary;
import org.springframework.core.env.Environment;
import org.springframework.transaction.jta.JtaTransactionManager;
import javax.sql.DataSource;
import javax.transaction.UserTransaction;
import java.util.Properties;
/**
* Druid配置
*
*
*/
@Configuration
public class DruidConfig {
@Bean(name = "systemDataSource")
@Primary
@Autowired
public DataSource systemDataSource(Environment env){
AtomikosDataSourceBean ds = new AtomikosDataSourceBean();
Properties prop = build(env, "spring.datasource.druid.systemDB.");
ds.setXaDataSourceClassName("com.alibaba.druid.pool.xa.DruidXADataSource");
ds.setUniqueResourceName("systemDB");
ds.setPoolSize(5);
ds.setXaProperties(prop);
return ds;

}
@Autowired
@Bean(name = "businessDataSource")
public AtomikosDataSourceBean businessDataSource(Environment env){

AtomikosDataSourceBean ds = new AtomikosDataSourceBean();
Properties prop = build(env, "spring.datasource.druid.businessDB.");
ds.setXaDataSourceClassName("com.alibaba.druid.pool.xa.DruidXADataSource");
ds.setUniqueResourceName("businessDB");
ds.setPoolSize(5);
ds.setXaProperties(prop);

return ds;
}
/**
* 注入事物管理器
* @return
*/
@Bean(name = "xatx")
public JtaTransactionManager regTransactionManager (){
UserTransactionManager userTransactionManager = new UserTransactionManager();
UserTransaction userTransaction = new UserTransactionImp();
return new JtaTransactionManager(userTransaction, userTransactionManager);
}
private Properties build(Environment env, String prefix){
Properties prop = new Properties();
prop.put("url", env.getProperty(prefix + "url"));
prop.put("username", env.getProperty(prefix + "username"));
prop.put("password", env.getProperty(prefix + "password"));
prop.put("driverClassName", env.getProperty(prefix + "driverClassName", ""));
prop.put("initialSize", env.getProperty(prefix + "initialSize", Integer.class));
prop.put("maxActive", env.getProperty(prefix + "maxActive", Integer.class));
prop.put("minIdle", env.getProperty(prefix + "minIdle", Integer.class));
prop.put("maxWait", env.getProperty(prefix + "maxWait", Integer.class));
prop.put("poolPreparedStatements", env.getProperty(prefix + "poolPreparedStatements", Boolean.class));
prop.put("maxPoolPreparedStatementPerConnectionSize",
env.getProperty(prefix + "maxPoolPreparedStatementPerConnectionSize", Integer.class));
prop.put("maxPoolPreparedStatementPerConnectionSize",
env.getProperty(prefix + "maxPoolPreparedStatementPerConnectionSize", Integer.class));
prop.put("validationQuery", env.getProperty(prefix + "validationQuery"));
prop.put("validationQueryTimeout", env.getProperty(prefix + "validationQueryTimeout", Integer.class));
prop.put("testOnBorrow", env.getProperty(prefix + "testOnBorrow", Boolean.class));
prop.put("testOnReturn", env.getProperty(prefix + "testOnReturn", Boolean.class));
prop.put("testWhileIdle", env.getProperty(prefix + "testWhileIdle", Boolean.class));
prop.put("timeBetweenEvictionRunsMillis",
env.getProperty(prefix + "timeBetweenEvictionRunsMillis", Integer.class));
prop.put("minEvictableIdleTimeMillis", env.getProperty(prefix + "minEvictableIdleTimeMillis", Integer.class));
prop.put("filters", env.getProperty(prefix + "filters"));

return prop;
}
@Bean
public ServletRegistrationBean druidServlet(){
ServletRegistrationBean servletRegistrationBean = new ServletRegistrationBean(new StatViewServlet(), "/druid/*");
//控制台管理用户,加入下面2行 进入druid后台就需要登录
//servletRegistrationBean.addInitParameter("loginUsername", "admin");
//servletRegistrationBean.addInitParameter("loginPassword", "admin");
return servletRegistrationBean;
}
@Bean
public FilterRegistrationBean filterRegistrationBean(){
FilterRegistrationBean filterRegistrationBean = new FilterRegistrationBean();
filterRegistrationBean.setFilter(new WebStatFilter());
filterRegistrationBean.addUrlPatterns("/*");
filterRegistrationBean.addInitParameter("exclusions", "*.js,*.gif,*.jpg,*.png,*.css,*.ico,/druid/*");
filterRegistrationBean.addInitParameter("profileEnable", "true");
return filterRegistrationBean;
}
@Bean
public StatFilter statFilter(){
StatFilter statFilter = new StatFilter();
statFilter.setLogSlowSql(true); //slowSqlMillis用来配置SQL慢的标准,执行时间超过slowSqlMillis的就是慢。
statFilter.setMergeSql(true); //SQL合并配置
statFilter.setSlowSqlMillis(1000);//slowSqlMillis的缺省值为3000,也就是3秒。
return statFilter;
}
@Bean
public WallFilter wallFilter(){
WallFilter wallFilter = new WallFilter();
//允许执行多条SQL
WallConfig config = new WallConfig();
config.setMultiStatementAllow(true);
wallFilter.setConfig(config);
return wallFilter;
}

}4. Configuration data The sqlSessionFactory corresponding to the source
Configure the sqlSessionFactory corresponding to each data source and the package scanned by MapperScanMybatisDatasourceConfig.java
package com.zjt.config;
import com.zjt.util.MyMapper;
import org.apache.ibatis.session.SqlSessionFactory;
import org.mybatis.spring.SqlSessionFactoryBean;
import org.mybatis.spring.SqlSessionTemplate;
import org.mybatis.spring.annotation.MapperScan;
import org.springframework.beans.factory.annotation.Autowired;
import org.springframework.beans.factory.annotation.Qualifier;
import org.springframework.context.annotation.Bean;
import org.springframework.context.annotation.Configuration;
import org.springframework.core.io.support.PathMatchingResourcePatternResolver;
import org.springframework.core.io.support.ResourcePatternResolver;
import javax.sql.DataSource;
/**
*
* @description
*/
@Configuration
// 精确到 mapper 目录,以便跟其他数据源隔离
@MapperScan(basePackages = "com.zjt.mapper", markerInterface = MyMapper.class, sqlSessionFactoryRef = "sqlSessionFactory")
public class MybatisDatasourceConfig {
@Autowired
@Qualifier("systemDataSource")
private DataSource ds;
@Bean
public SqlSessionFactory sqlSessionFactory() throws Exception {
SqlSessionFactoryBean factoryBean = new SqlSessionFactoryBean();
factoryBean.setDataSource(ds);
//指定mapper xml目录
ResourcePatternResolver resolver = new PathMatchingResourcePatternResolver();
factoryBean.setMapperLocations(resolver.getResources("classpath:mapper/*.xml"));
return factoryBean.getObject();
}
@Bean
public SqlSessionTemplate sqlSessionTemplate() throws Exception {
SqlSessionTemplate template = new SqlSessionTemplate(sqlSessionFactory()); // 使用上面配置的Factory
return template;
}

//关于事务管理器,不管是JPA还是JDBC等都实现自接口 PlatformTransactionManager
// 如果你添加的是 spring-boot-starter-jdbc 依赖,框架会默认注入 DataSourceTransactionManager 实例。
//在Spring容器中,我们手工注解@Bean 将被优先加载,框架不会重新实例化其他的 PlatformTransactionManager 实现类。
/*@Bean(name = "transactionManager")
@Primary
public DataSourceTransactionManager masterTransactionManager() {
//MyBatis自动参与到spring事务管理中,无需额外配置,只要org.mybatis.spring.SqlSessionFactoryBean引用的数据源
// 与DataSourceTransactionManager引用的数据源一致即可,否则事务管理会不起作用。
return new DataSourceTransactionManager(ds);
}*/
}
package com.zjt.config;
import com.zjt.util.MyMapper;
import org.apache.ibatis.session.SqlSessionFactory;
import org.mybatis.spring.SqlSessionFactoryBean;
import org.mybatis.spring.SqlSessionTemplate;
import org.mybatis.spring.annotation.MapperScan;
import org.springframework.beans.factory.annotation.Autowired;
import org.springframework.beans.factory.annotation.Qualifier;
import org.springframework.context.annotation.Bean;
import org.springframework.context.annotation.Configuration;
import org.springframework.core.io.support.PathMatchingResourcePatternResolver;
import org.springframework.core.io.support.ResourcePatternResolver;
import javax.sql.DataSource;
/**
*
* @description
*/
@Configuration
// 精确到 mapper 目录,以便跟其他数据源隔离
@MapperScan(basePackages = "com.zjt.mapper2", markerInterface = MyMapper.class, sqlSessionFactoryRef = "sqlSessionFactory2")
public class MybatisDatasource2Config {
@Autowired
@Qualifier("businessDataSource")
private DataSource ds;
@Bean
public SqlSessionFactory sqlSessionFactory2() throws Exception {
SqlSessionFactoryBean factoryBean = new SqlSessionFactoryBean();
factoryBean.setDataSource(ds);
//指定mapper xml目录
ResourcePatternResolver resolver = new PathMatchingResourcePatternResolver();
factoryBean.setMapperLocations(resolver.getResources("classpath:mapper2/*.xml"));
return factoryBean.getObject();

}
@Bean
public SqlSessionTemplate sqlSessionTemplate2() throws Exception {
SqlSessionTemplate template = new SqlSessionTemplate(sqlSessionFactory2()); // 使用上面配置的Factory
return template;
}
//关于事务管理器,不管是JPA还是JDBC等都实现自接口 PlatformTransactionManager
// 如果你添加的是 spring-boot-starter-jdbc 依赖,框架会默认注入 DataSourceTransactionManager 实例。
//在Spring容器中,我们手工注解@Bean 将被优先加载,框架不会重新实例化其他的 PlatformTransactionManager 实现类。
/*@Bean(name = "transactionManager2")
@Primary
public DataSourceTransactionManager masterTransactionManager() {
//MyBatis自动参与到spring事务管理中,无需额外配置,只要org.mybatis.spring.SqlSessionFactoryBean引用的数据源
// 与DataSourceTransactionManager引用的数据源一致即可,否则事务管理会不起作用。
return new DataSourceTransactionManager(ds);
}*/
}
and The transaction manager configured in TxAdvice2Interceptor.java; children's shoes in need can configure other transaction managers themselves; (see DruidConfig.java to view)5. Test interface
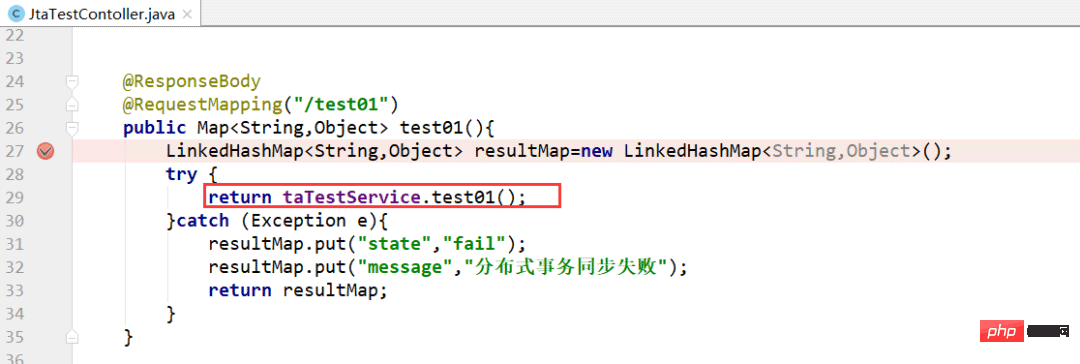
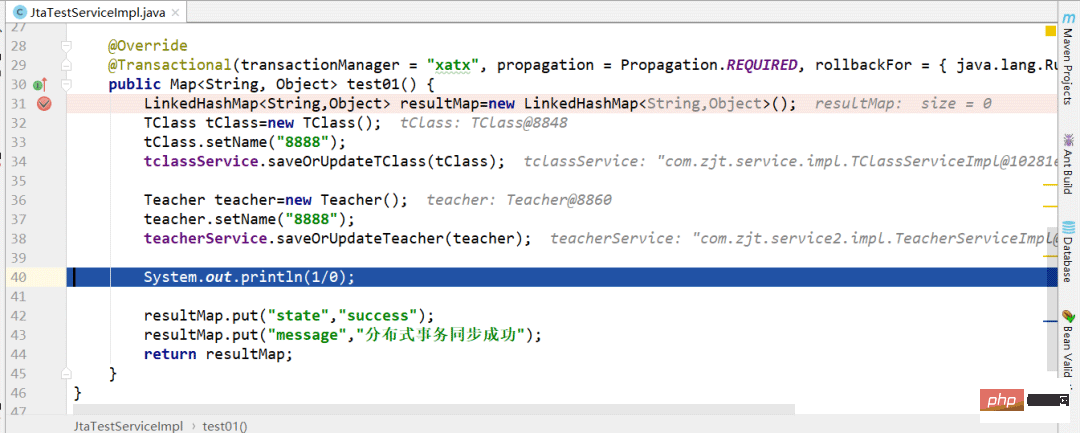
is actually a very simple test01() method, in which we callone after another. classService.saveOrUpdateTClass(tClass);
andteacherService.saveOrUpdateTeacher(teacher); realize the operation of two data sources one after another: then we can debug and track the submission timing of the transaction ourselves. In addition , you can also manually create a runtime exception after the two methods are fully executed to check whether all distributed transactions are rolled back;
In the method of implementing the class, I use:
@Transactional(transactionManager = "xatx", propagation = Propagation.REQUIRED, rollbackFor = { java.lang.RuntimeException.class })从而指定了使用哪个事务管理器,事务隔离级别(一般都用我这个默认的),回滚的条件(一般可以使用Exception),这三个可以自己根据业务实际修改;package com.zjt.service3;
import java.util.Map;
public interface JtaTestService {
public Map<String,Object> test01();
}package com.zjt.service3.impl;
import com.zjt.entity.TClass;
import com.zjt.entity.Teacher;
import com.zjt.service.TClassService;
import com.zjt.service2.TeacherService;
import com.zjt.service3.JtaTestService;
import org.springframework.beans.factory.annotation.Autowired;
import org.springframework.beans.factory.annotation.Qualifier;
import org.springframework.stereotype.Service;
import org.springframework.transaction.annotation.Propagation;
import org.springframework.transaction.annotation.Transactional;
import java.util.LinkedHashMap;
import java.util.Map;
@Service("jtaTestServiceImpl")
public class JtaTestServiceImpl implements JtaTestService{
@Autowired
@Qualifier("teacherServiceImpl")
private TeacherService teacherService;
@Autowired
@Qualifier("tclassServiceImpl")
private TClassService tclassService;
@Override
@Transactional(transactionManager = "xatx", propagation = Propagation.REQUIRED, rollbackFor = { java.lang.RuntimeException.class })
public Map<String, Object> test01() {
LinkedHashMap<String,Object> resultMap=new LinkedHashMap<String,Object>();
TClass tClass=new TClass();
tClass.setName("8888");
tclassService.saveOrUpdateTClass(tClass);
Teacher teacher=new Teacher();
teacher.setName("8888");
teacherService.saveOrUpdateTeacher(teacher);
System.out.println(1/0);
resultMap.put("state","success");
resultMap.put("message","分布式事务同步成功");
return resultMap;
}
}
7. Add a button to test.ftl to testpackage com.zjt.web; import com.zjt.service3.JtaTestService; import org.springframework.beans.factory.annotation.Autowired; import org.springframework.beans.factory.annotation.Qualifier; import org.springframework.stereotype.Controller; import org.springframework.web.bind.annotation.RequestMapping; import org.springframework.web.bind.annotation.ResponseBody; import java.util.LinkedHashMap; import java.util.Map; @Controller @RequestMapping("/jtaTest") public class JtaTestContoller { @Autowired @Qualifier("jtaTestServiceImpl") private JtaTestService taTestService; @ResponseBody @RequestMapping("/test01") public Map<String,Object> test01(){ LinkedHashMap<String,Object> resultMap=new LinkedHashMap<String,Object>(); try { return taTestService.test01(); }catch (Exception e){ resultMap.put("state","fail"); resultMap.put("message","分布式事务同步失败"); return resultMap; } } }Copy after login
//分布式事务测试
$("#JTATest").click(function(){
$.ajax({
type: "POST",
url: "${basePath!}/jtaTest/test01",
data: {} ,
async: false,
error: function (request) {
layer.alert("与服务器连接失败/(ㄒoㄒ)/~~");
return false;
},
success: function (data) {
if (data.state == 'fail') {
layer.alert(data.message);
return false;
}else if(data.state == 'success'){
layer.alert(data.message);
}
}
});
});
<button class="layui-btn" id="JTATest">同时向班级和老师表插入名为8888的班级和老师</button>
 After the sql statement is executed normally, we can find that the database has not changed, because the transaction of the entire method We haven’t finished yet, when we reach step 1/0:

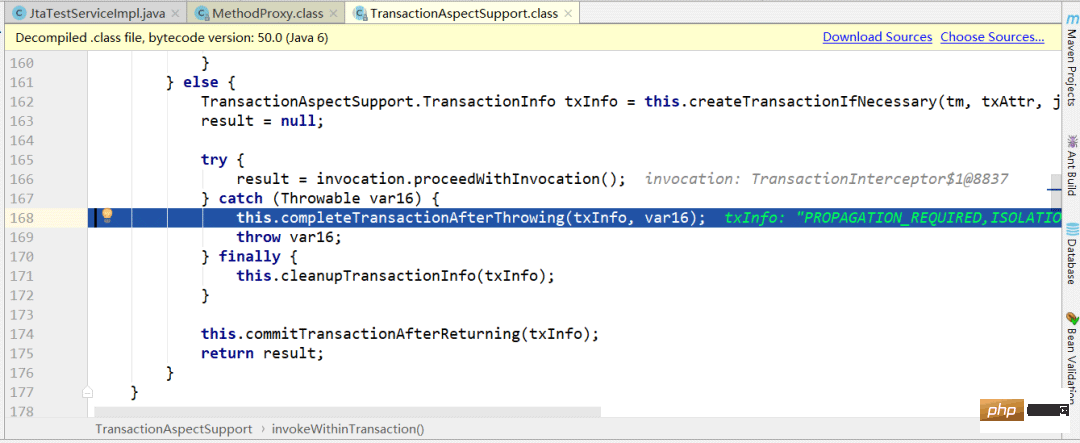
 All transactions will be rolled back in the
method:
At this time, When we open the database verification again, there is still no change, proving that the distributed transaction configuration is successful.
The above is the detailed content of How to implement Java Spring Boot distributed transactions?. For more information, please follow other related articles on the PHP Chinese website!


