

Touchpad not working on Chromebook: 9 fixes

Restart your Chromebook
Restarting your Chromebook can fix a variety of issues, from frozen apps to hardware issues like the touchpad not working.
Restarting your Chromebook is easy. Click the clock icon in the lower right corner of the taskbar to bring up the Quick Settings menu. Click the Power Button and your device will shut down immediately.
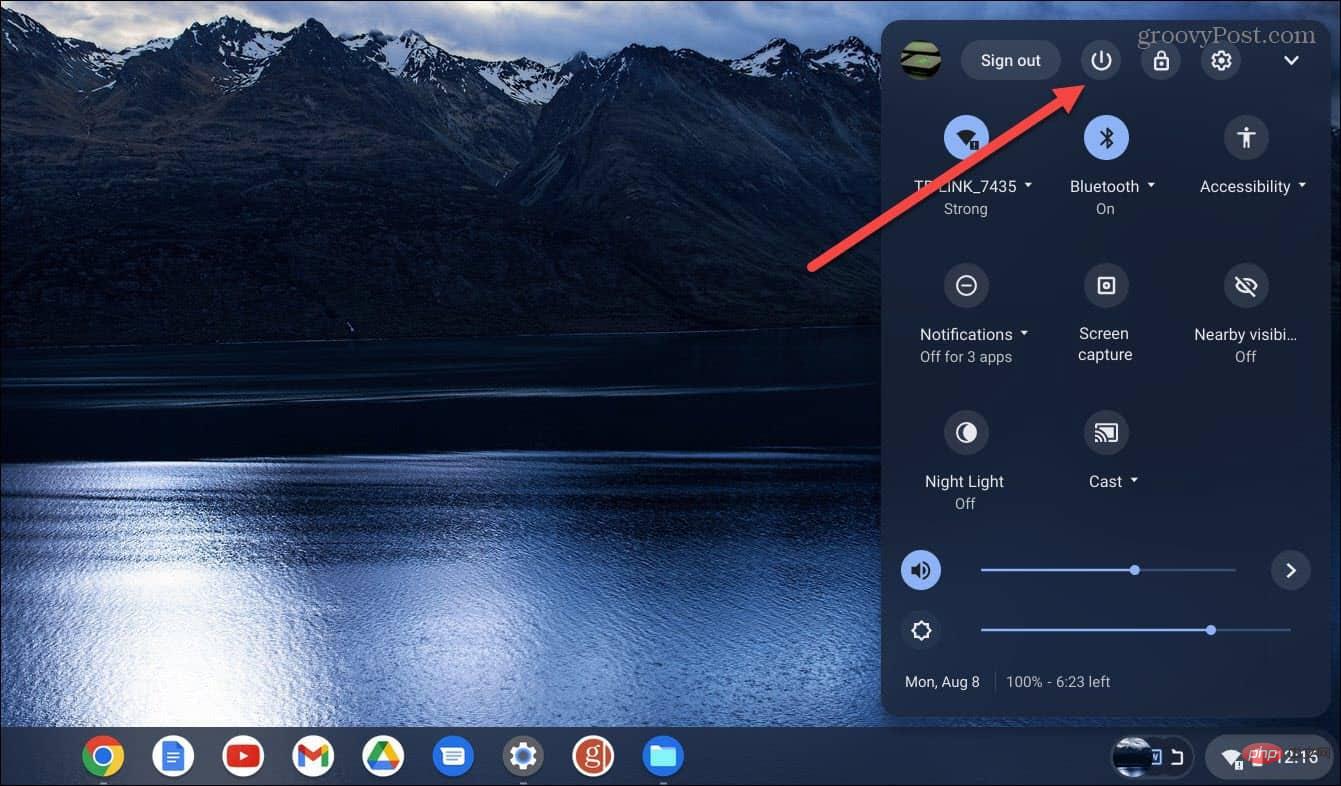
Wait about 30-60 seconds, reboot, and see if the touchpad is working properly.
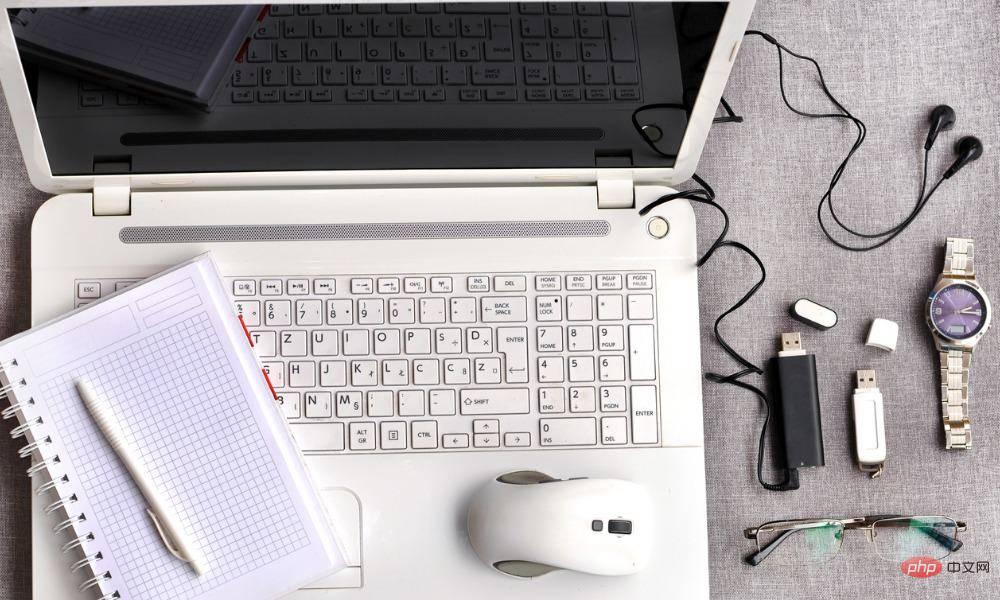
Remove peripherals and reboot.
If the above reboot doesn't work, the external device (i.e. the drive) may be causing a conflict with the internal hardware. So, make sure to disconnect all peripherals like printer, keyboard, USB thumb drive, speakers, etc.
Restart your Chromebook again and see if the touchpad is working properly.
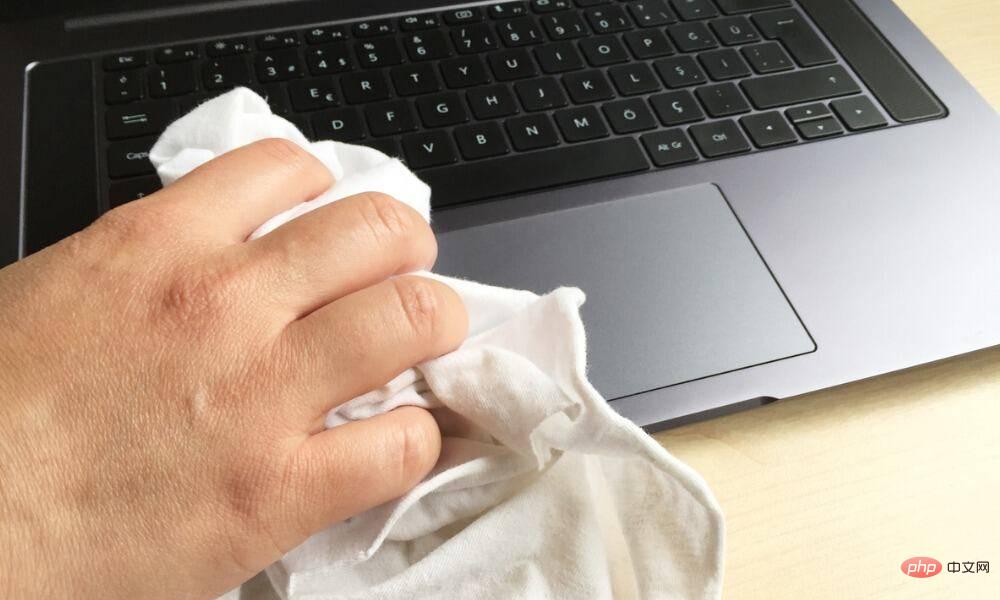
Cleaning the Touchpad
The touchpad may become sticky, or dust and debris may prevent it from working on your Chromebook. Sometimes, a small piece of debris prevents it from double-clicking or dragging objects on the screen.
If you haven't cleaned it recently, use a microfiber cloth to wipe away the dust, dirt, and debris that's causing your Chromebook's touchpad to stop working.
Additionally, you'll want to use a toothpick or a dry, soft-bristled brush to remove debris from the outer corners of the touchpad.
Once you have a clean touchpad, check that it is working as expected.
Adjust Touchpad Speed
If you can click items on the screen but move the cursor around the screen too slowly (or too quickly), you can adjust the settings for the touchpad.
To adjust the touchpad speed, use the following steps:
- Sign in to your Chromebook if you're not already logged in.
-
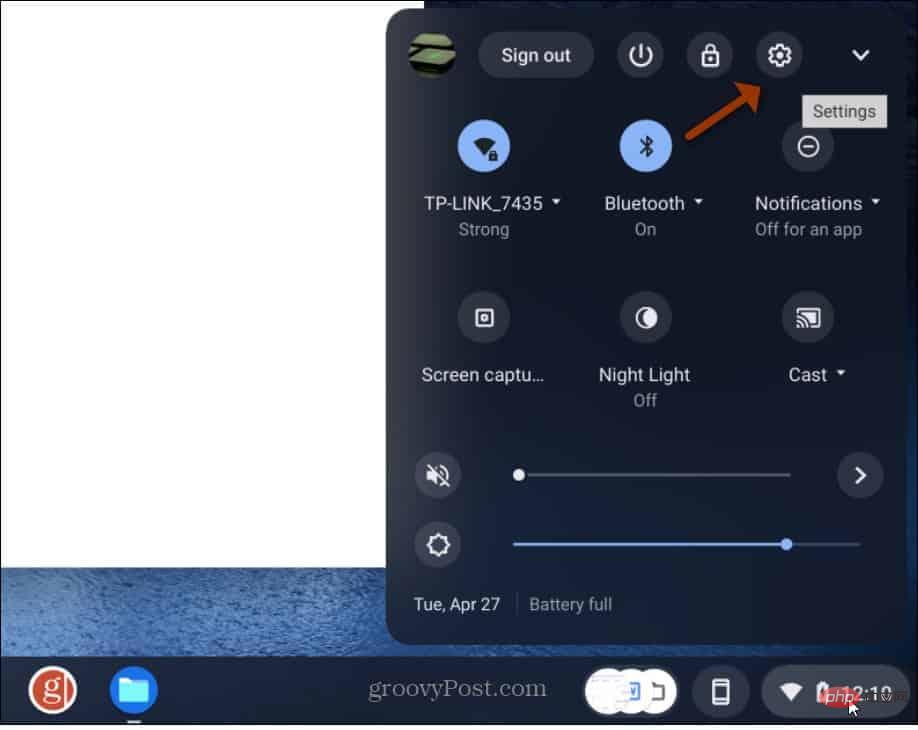
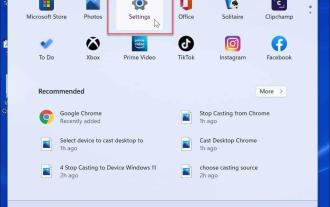
Select the "Settings" icon from the "Quick Settings" menu.

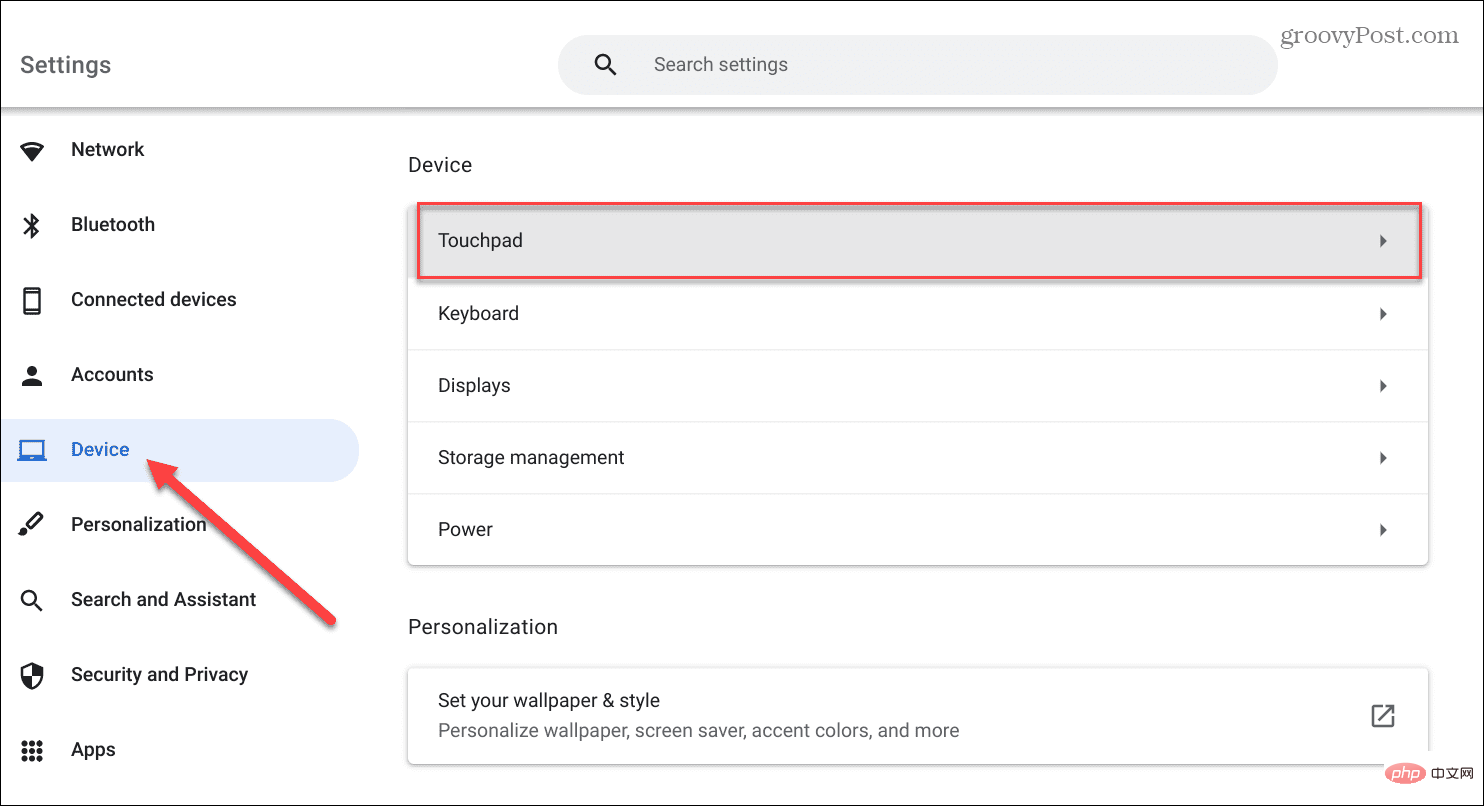
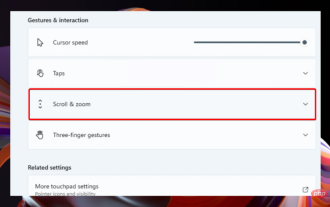
- When Settings opens, click "Devices" in the left column and select "Touchpad" from the options on the right.
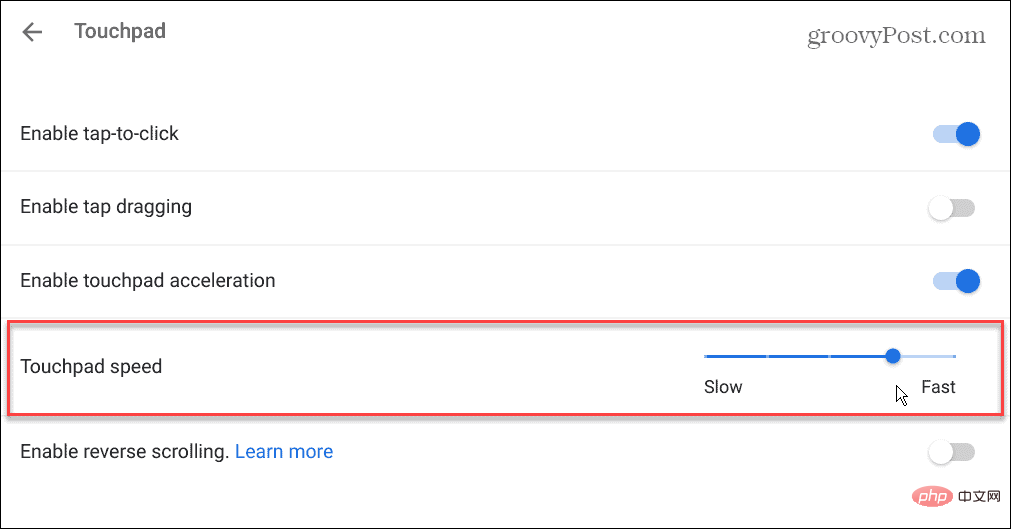
- Adjust the slider in the Touchpad Speed section up or down to your liking.
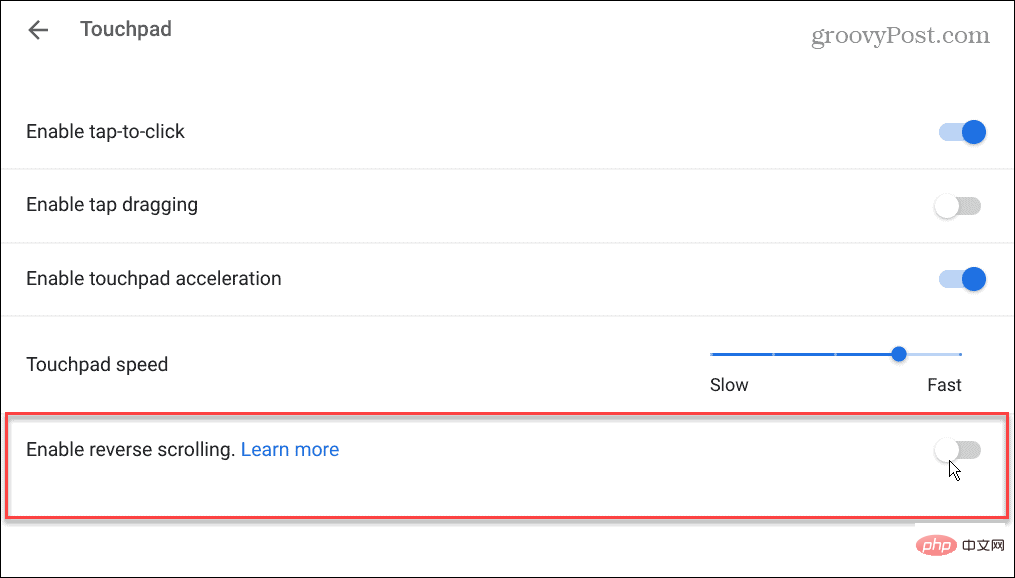
- It's important to note that if your touchpad scrolls in the wrong direction, you can also turn off the "Enable reverse scrolling" option in this section.
Enable Touchpad Acceleration
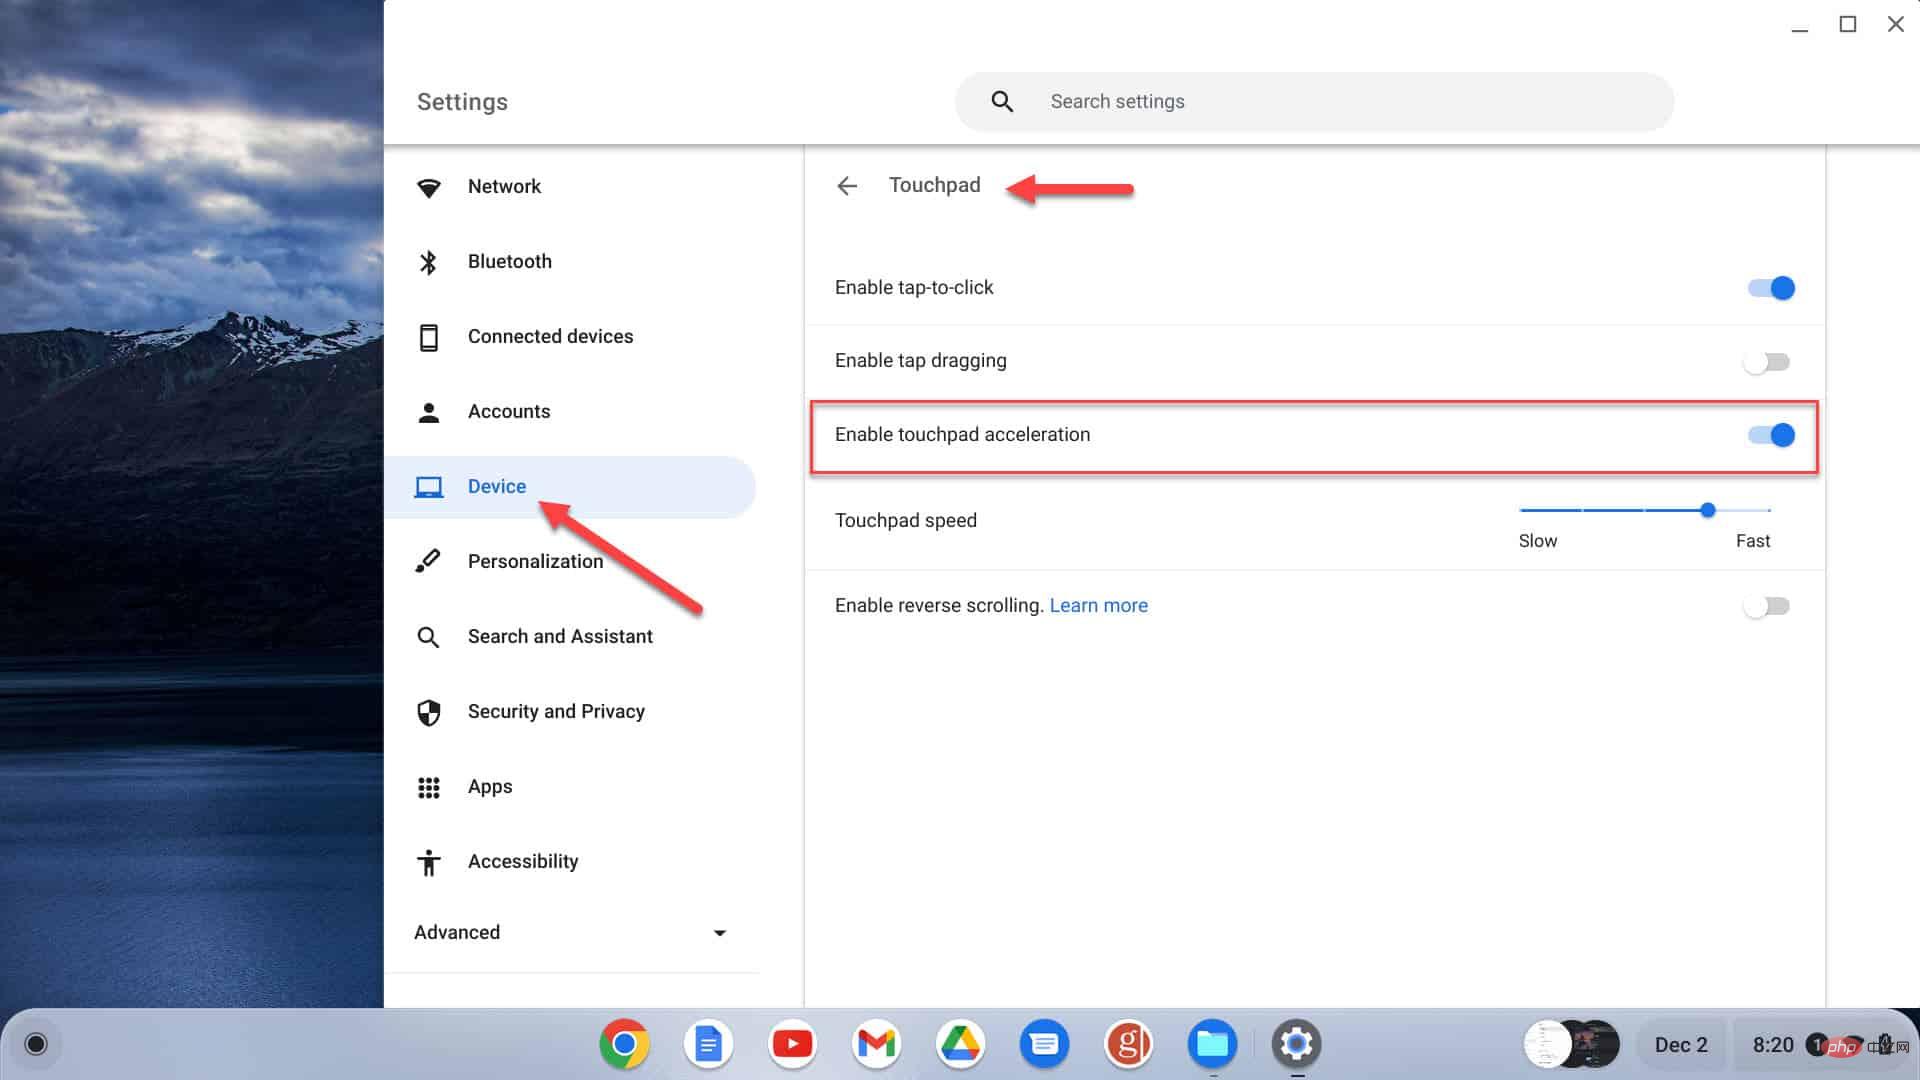
Speaking of cursor speed, you also need to make sure Touchpad Acceleration is turned on. The good news is that it can be easily checked and enabled.
Check touchpad acceleration:
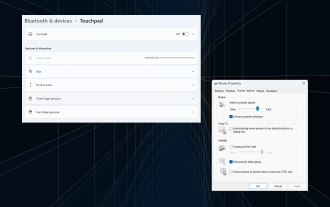
- Navigate to Settings > Devices > Touchpad.
- Open Enable touchpad acceleration
Make sure click-to-click is enabled
Another problem with the touchpad is the inability to double-click it Touchpad to click an item. In this case, the click functionality may be turned off.
To check click status:
Go to Settings > Devices > Touchpad to make sure the feature is enabled. Turn on Enable click switch.

If this option is disabled, you need to press the lower half of the trackpad to turn it on.
Update your Chromebook
If your touchpad isn't working on your Chromebook, make sure Chrome OS is up to date. This issue may be a bug and an update may fix it.
Your Chromebook should automatically check for updates and provide notifications. However, it doesn't always work and the best practice is to update Chrome OS manually.
This is not just for bug fixes and new features. You'll also get the latest security updates, which are crucial to keeping your data safe.
Updating Chrome OS is easy by going to Settings > Advanced > About Chrome OS and clicking the Check for Updates button .
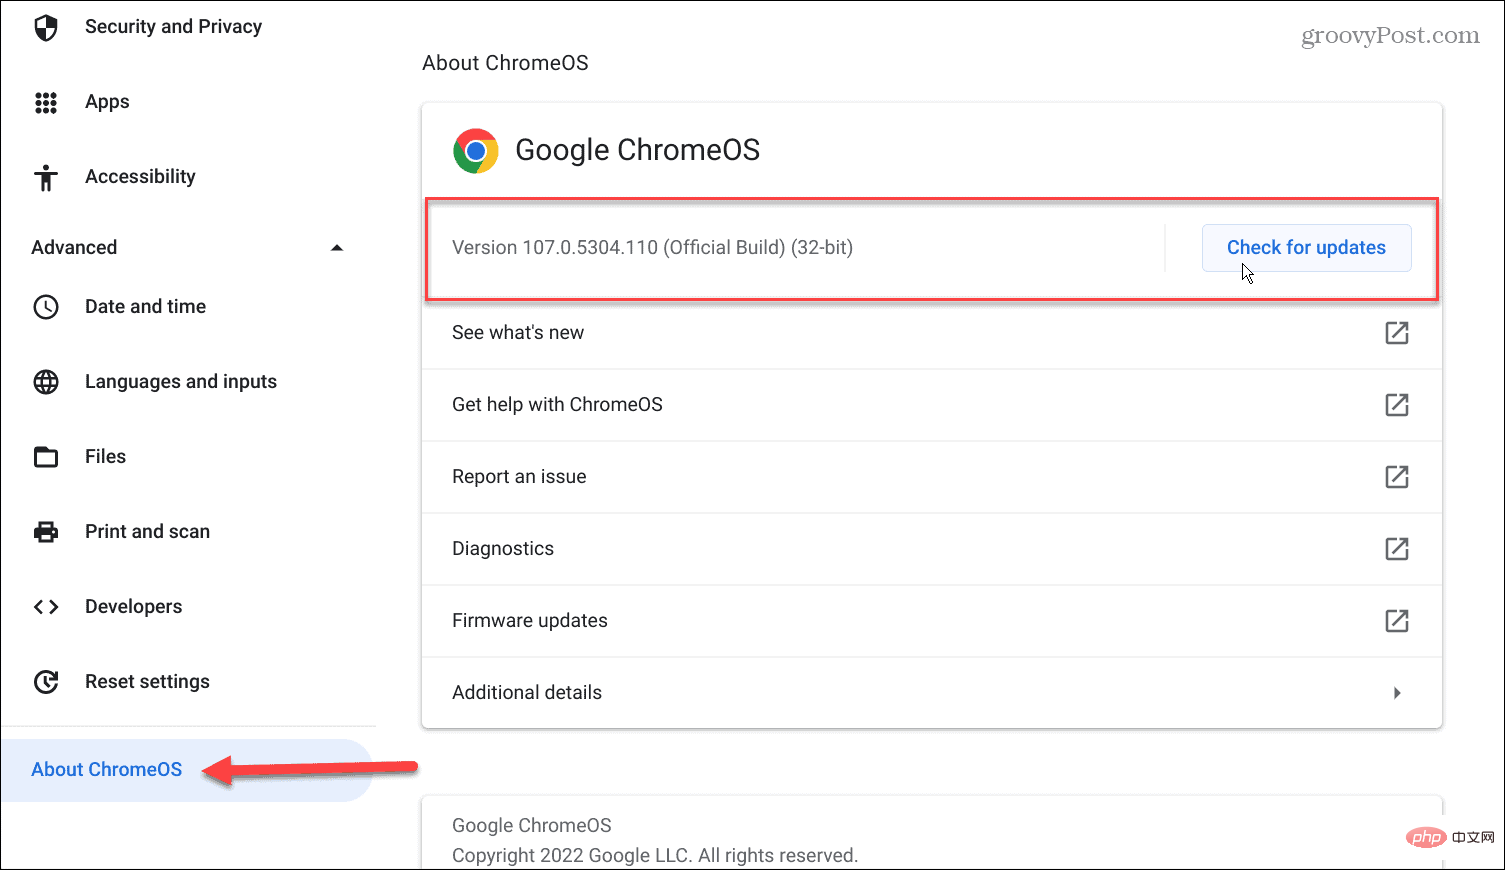
If an update is available, please wait for your system to download and install it.
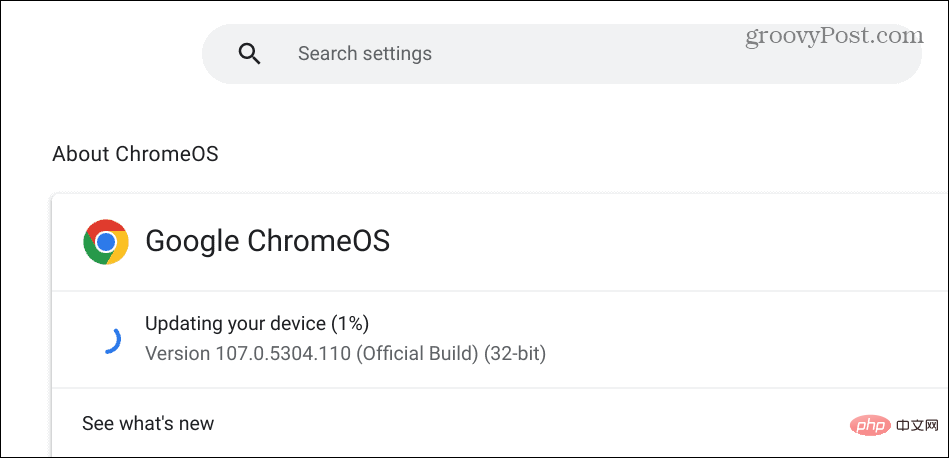
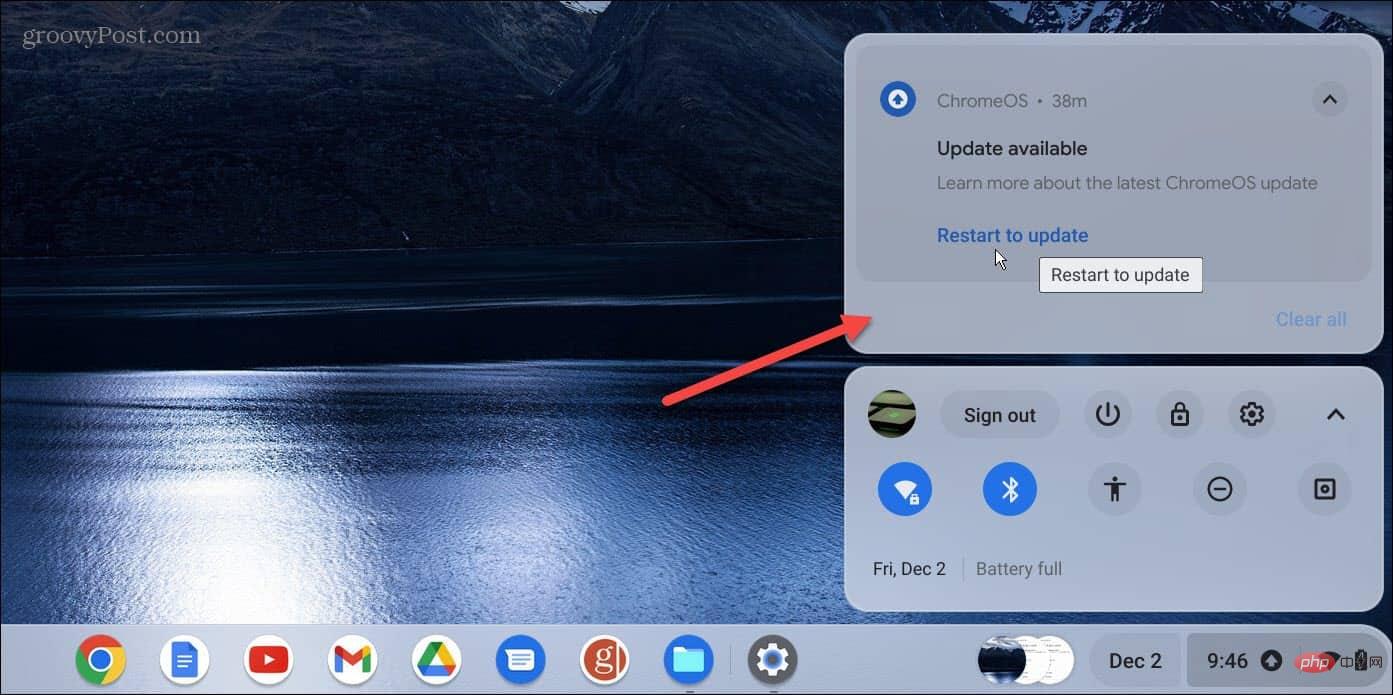
Please remember that a reboot is required to complete the update installation. Therefore, please back up all local files before restarting your Chromebook.
Make sure the touchpad is not disabled
If you use an external mouse, the touchpad and touchscreen on your Chromebook may be disabled. You can turn off the touchpad so the cursor doesn't fly around the screen when using your Chromebook's keyboard.
So, if you want to use it, you need to make sure the touchpad is not disabled. To turn the touchpad back on, press Search Shift P and it should work. To turn it back on, press the same key combination.
Perform a Hardware Reset
As a "last resort," you can reset your Chromebook. This option can fix touchpad issues but may delete files in the Downloads folder. Therefore, make sure to back up important local files.
To perform a hardware reset on your Chromebook:
- Disconnect all peripherals from your Chromebook—mouse, keyboard, headphones, and USB drives.
- Unplug the Chromebook's power cord until it turns off completely.
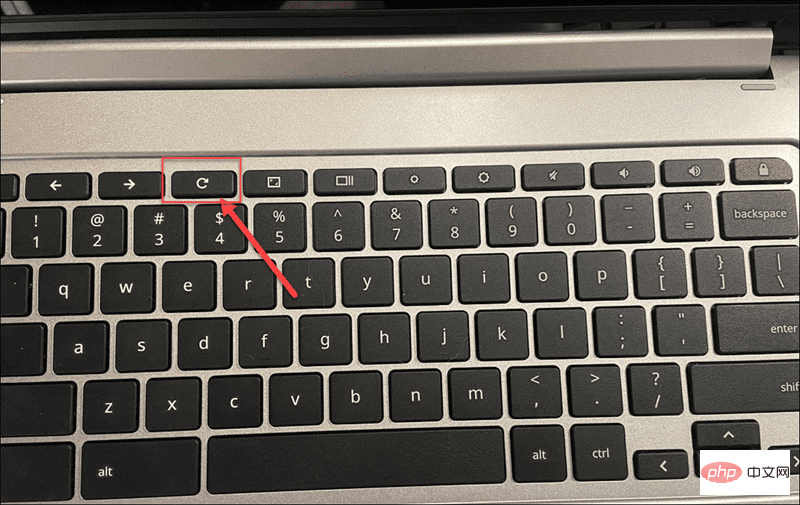
- Hold the Refresh key (above the 3 and 4 keys), continue holding those keys, and then press the Power button.
- Keep holding the Refresh key until Chrome OS starts.
Note: If the above options fail and a hardware reset doesn't resolve the issue, reset your Chromebook to factory settings. This will clear your settings and customizations, but you can get the touchpad working again. Therefore, make sure to back up your important data both locally and in the cloud before starting the Powerwash process.
Fix your Chromebook’s touchpad
If you’re having trouble with your touchpad not working on your Chromebook, that’s cause for concern. But don't panic. Following the above solutions, there are multiple ways to fix it.
Another solution worth considering is using an external mouse. Unfortunately, you may not have access to it, and there's no guarantee it will work, but it's worth trying in a pinch.
The above is the detailed content of Touchpad not working on Chromebook: 9 fixes. For more information, please follow other related articles on the PHP Chinese website!

Hot AI Tools

Undresser.AI Undress
AI-powered app for creating realistic nude photos

AI Clothes Remover
Online AI tool for removing clothes from photos.

Undress AI Tool
Undress images for free

Clothoff.io
AI clothes remover

Video Face Swap
Swap faces in any video effortlessly with our completely free AI face swap tool!

Hot Article
Hot Tools

Notepad++7.3.1
Easy-to-use and free code editor

SublimeText3 Chinese version
Chinese version, very easy to use

Zend Studio 13.0.1
Powerful PHP integrated development environment

Dreamweaver CS6
Visual web development tools

SublimeText3 Mac version
God-level code editing software (SublimeText3)
Hot Topics
 1387
1387
 52
52

 How to solve the problem of Asus trackpad not working in Windows 11? 3 easy ways!
Apr 25, 2023 pm 10:58 PM
How to solve the problem of Asus trackpad not working in Windows 11? 3 easy ways!
Apr 25, 2023 pm 10:58 PM
A touchpad is similar to a mouse and helps in controlling the cursor. It is preferred by many laptop users because it is built-in and is somehow more convenient. However, some users have reported that their Asus touchpads are not working in Windows 11. For most users, the problem appears out of the blue without any sign of confusion. But, don't worry! This is most likely not a hardware issue and can be easily fixed. Other users with different laptops are also facing issues with touchpad in Windows 11. To know all the reasons why Asus trackpad is not working in Windows 11 and the most relevant fixes, read the following section. Why Asus Touchpad Doesn't Work on Windows
 How to set up trackpad gestures in Windows 11?
May 09, 2023 am 09:22 AM
How to set up trackpad gestures in Windows 11?
May 09, 2023 am 09:22 AM
Windows 11 offers some powerful new features that are also easy to customize. Therefore, setting them according to your needs will create a more enjoyable and original digital environment. Among them, touchpad and touchscreen functions are very popular, and both require special attention. Because we want to always keep you informed, in today's article we'll look at how to personalize trackpad gestures in Windows 11. But before that, let’s take a look at which gestures are supported and why you should use them. What trackpad gestures does Windows 11 support? Tap Gestures Tap and swipe represent two common gestures mainly used on devices such as laptops or tablets. Tap gestures are used to detect a brief press of one or more fingers.
 How to customize touchpad gestures on Windows 11
Apr 15, 2023 pm 04:55 PM
How to customize touchpad gestures on Windows 11
Apr 15, 2023 pm 04:55 PM
Check for custom touchpad gesture support If you want to use custom touchpad gestures, you'll need to make sure you have the appropriate drivers to support them. Here's what you need to check: Check your touchpad driver. If you don't have a precision touchpad, the Settings app won't let you customize touchpad gestures on Windows 11. If you have something like BrydgeTrackpad, make sure to update its drivers. Install third-party software. If the trackpad has third-party software, the results will depend on how powerful the software is and the ability for application personalization. How to Customize Touchpad Gestures on Windows 11 Windows 11 Includes Apps for Windows Precision
 How to download Synaptics touchpad drivers on Windows 11
Apr 28, 2023 pm 10:58 PM
How to download Synaptics touchpad drivers on Windows 11
Apr 28, 2023 pm 10:58 PM
Laptop users may encounter the Synaptic touchpad driver when browsing Device Manager, or they may see the Synaptic name on the Windows system tray. It is the driver responsible for operating the laptop touchpad. Synaptic is the company that makes most laptop touchpads, so they're common in laptops. In this post, we’ll take a look at how to download the Synaptics touchpad driver on Windows 11 right after you find out if you need it. Follow! Do I need Synaptics touchpad drivers? For laptops equipped with touchpads made by Synaptic, the Syna
 How to solve the problem of touchpad failure after Lenovo win11 upgrade
Jan 05, 2024 pm 08:24 PM
How to solve the problem of touchpad failure after Lenovo win11 upgrade
Jan 05, 2024 pm 08:24 PM
Because win11 is the latest system, there may be some incompatibility, bugs and other problems after installation. For example, some Lenovo notebook users found that their touchpads failed after upgrading to win11. This may be caused by many reasons, such as drivers or You can solve system problems through the following methods. What to do if the touchpad fails after Lenovo upgrades to win11: Method 1: 1. First, we can check whether the touchpad is turned on. 2. The shortcut key for switching the touch pad on Lenovo notebook is "Fn+F6". Method 2: 1. After confirming that the touchpad is turned on, if it still fails, it may be a driver problem. 2. You can enter the Start menu, then search and open "Device Manager" 3. Then in the Device Manager
 Fixed: Cursor keeps moving to the left while typing on Windows 11
Sep 10, 2023 pm 09:29 PM
Fixed: Cursor keeps moving to the left while typing on Windows 11
Sep 10, 2023 pm 09:29 PM
Irregular or unintentional mouse movements can disrupt tasks and be irritating. In some cases, users find that the cursor keeps moving to the left while typing in Windows 11. It stands out even more when naming or renaming files. Surprisingly, according to reports on forums, this problem is quite common. But more often than not, it turns out to be a problem on the user side, although we can't rule out a problem with the operating system. Why does my cursor keep moving to the left? Mouse settings are configured incorrectly You keep tapping the touchpad, or your hand brushes against it. Outdated, corrupted, or incompatible mouse driver. Bug in the installed version of Windows 11. Third-party application triggering conflict. How to stop the cursor from jumping around while typing on Windows 11? before we enter
 How to turn off Palm Check in Windows 11/10
Feb 19, 2024 pm 09:45 PM
How to turn off Palm Check in Windows 11/10
Feb 19, 2024 pm 09:45 PM
This article will guide you to turn off the PalmCheck function on Windows 11/10 PC. PalmCheck is a feature designed to prevent accidental palm or other touches from being mistakenly recognized as input when typing on the keyboard. This is usually found in touchpad settings, especially on touch-enabled devices like laptops. Sometimes you may want to turn off PalmCheck or a similar feature to give you more flexibility in controlling input in situations where you need to use both the keyboard and touchpad. In this article, we will introduce how to disable PalmCheck function on Windows 11/10 PC, so that you can better cope with the needs when gaming or running applications. What is the P on the touchpad?
 Touchpad not working on Chromebook: 9 fixes
Apr 29, 2023 am 08:28 AM
Touchpad not working on Chromebook: 9 fixes
Apr 29, 2023 am 08:28 AM
Restarting your Chromebook Restarting your Chromebook can fix a variety of issues, from frozen apps to hardware issues like the touchpad not working. Restarting your Chromebook is very easy. Click the clock icon in the lower right corner of the taskbar to bring up the Quick Settings menu. Click the power button and your device will shut down immediately. Wait about 30-60 seconds, reboot, and see if the touchpad is working properly. Remove peripherals and reboot. If the above reboot doesn't work, the external device (i.e. the drive) may be causing a conflict with the internal hardware. Therefore, make sure to disconnect all peripherals like printer, keyboard, USB thumb drive, speakers, etc. Restart your C again