

How to manage junk email in Microsoft Outlook

The spam folder is a folder that contains spam emails. Outlook considers some messages as spam and moves them to the Junk Email folder. However, you may still find some emails in your inbox that you think are spam. So how do you move them out of your inbox? This is why Outlook has the feature to add filters/conditions to the email you consider to be junk so that next time you receive it directly in the junk folder or you can delete it permanently. You have different options to indicate that this specific email address is valid and should be in the inbox, while other invalid email addresses should not be seen in the inbox. You can even block email IDs, a feature similar to blocking contacts on phone only. In this article, let’s look at effective ways to manage junk emails in Outlook.
Manage junk email in Outlook
Step 1: Open Microsoft Outlook and selectEmails to be marked as spam.
Step 2: Right-click the email and click Spam from the list of options
Step 3: Different options appear like Block Sender, Never Block Sender, Spam options, etc.
Step 4: For example let us click on Block Sender.
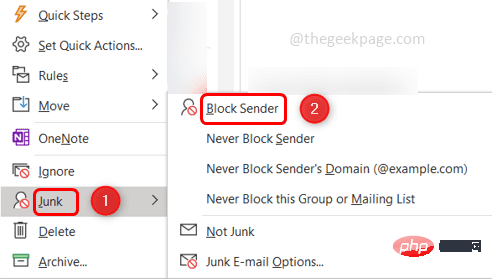
Step 5: Now this email will appear in the spam folder on the left and the email id will be blocked so that you can You will not receive any emails from that specific email address.
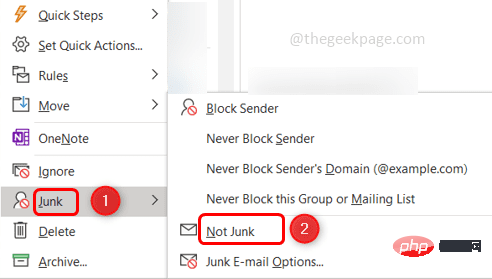
Step 6: Suppose you find some emails in the junk folder that are valid and should not be spam, thenright click on that emailin the junk folder
Step 6: Then select Trash from the list and click on Non-Trash
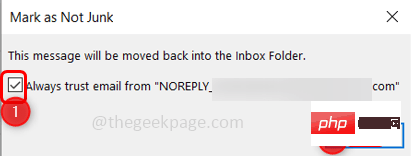
Step 7 Step: A pop-up window appears stating that this message will be moved to the Inbox folder, make sure check the checkbox below it and click OK
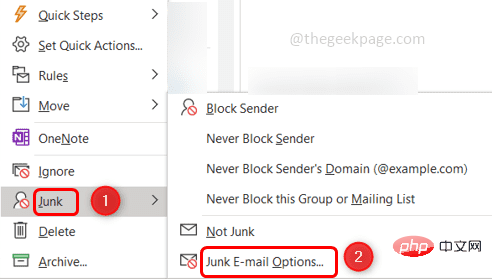
Step 8: Now we will look at the spam options. To do this, right-click on the email in your inbox and select Junkmail. Then click on Spam Options
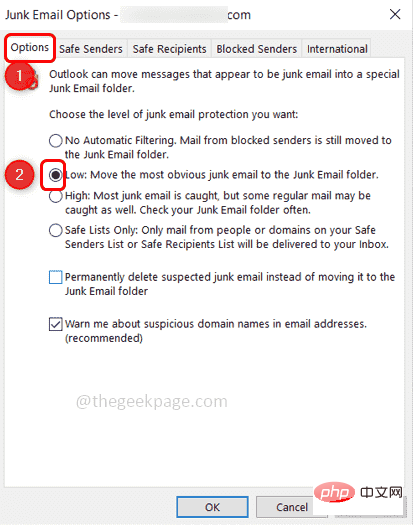
Step 9: In the window that appears there are several tabs. If you click on the "Options" tab, then there are different levels of spam protection like no filtering, low, high, permanent deletion, safelist only etc.
Step 10 : You can select any of them as per your requirement by clicking the radio button next to them. In the image below, I have selected low
Step 11: Next, click on the Safe Senders tab, which means the email specified here IDs are safe and will never be spam.
Step 12: You can add email addresses to the safe senders list by clicking the Add button.
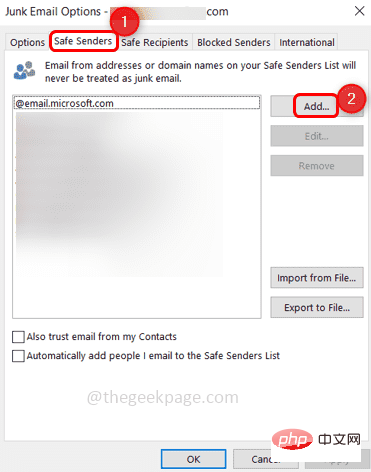
Step 13: Enter a valid email address and click OK

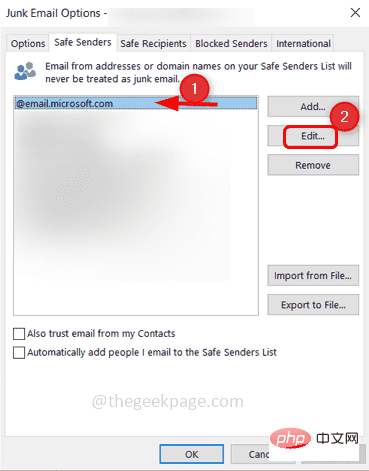
Step 14: Edit the added email address by selecting the email to be edited and then click on the "Edit" option to correct the email address
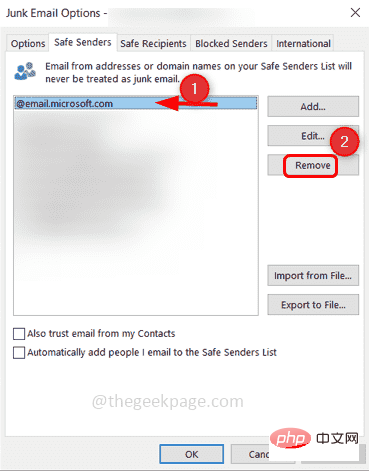
select the email and click Delete
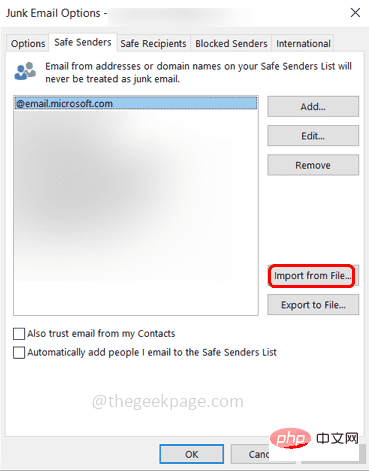
Step 16: If you have a list of email addresses that you want to add, importing them is a good option. Prepare all the email addresses in the text file and click the Import from file button
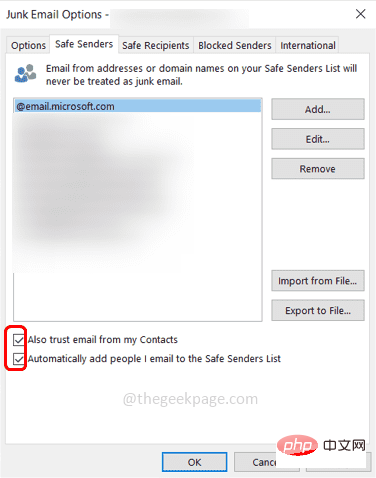
Step 17: If you also want to add Outlook Contact Please check the checkbox next to "
Also trust emails from my contacts" Step 18: There is another option "Automatically add people I mail to the safe senders list" which means anyone you mail will be considered a safe sender. But this may not always be true, there may be situations where you warn someone to stop sending emails. So be careful when selecting checkboxes.
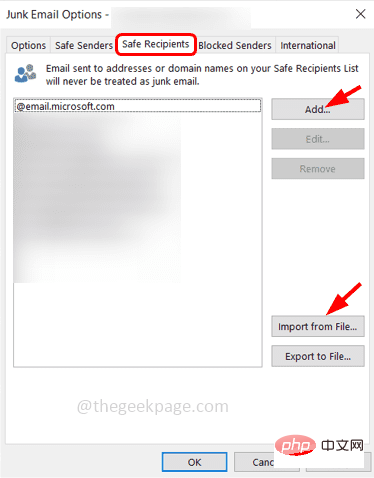
Step 19: The next tab is Safe Recipients, which means if you belong to a mailing list or distribution list, you can These IDs are added to your safe recipients list. Usually it is the recipient address, if you specify these ids here they will not be treated as spam.
Step 20: You can import an address list or click the Add button to add email addresses.
Step 21: The next option is Block Sender, the email IDs that you think are spam will be seen here. In other words, addresses from the spam folder will be reflected here. It also has the same features as safe sender i.e. add, edit, delete, import from file, export to file
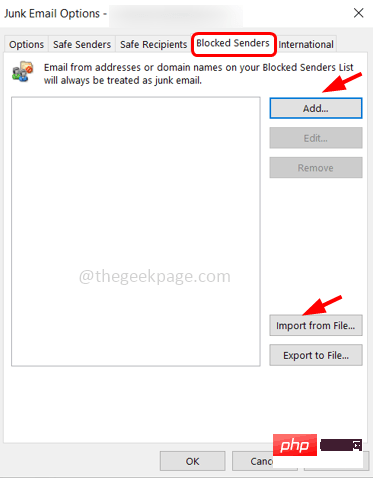
Note:If If you add the same email ID to the safe senders and blocked senders lists, then the safe senders lists are considered as priority and the emails from that particular sender will be in your inbox.
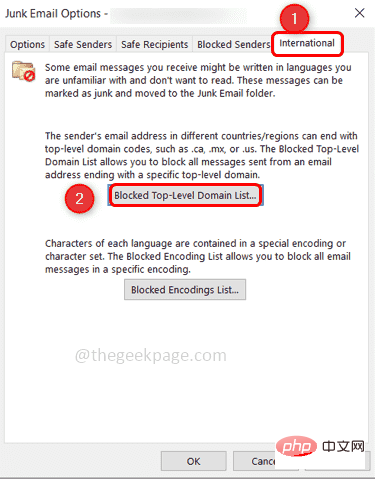
Step 22: The last tab is International. Here, you can block email addresses from different countries or even emails in unfamiliar languages.
Step 23: Click the "Blocked Top-Level Domain List" button.
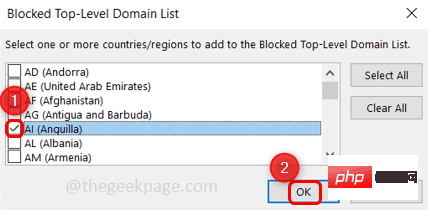
Step 24: A window with different country names will appear. For example, let's say you want to block emails from AL (Anguilla), then select the checkbox next to it and click ok.
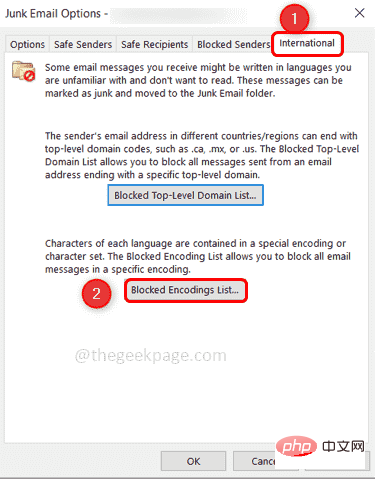
Step 25: If you want to block email encoding, click the "Blocked Encoding List" button.
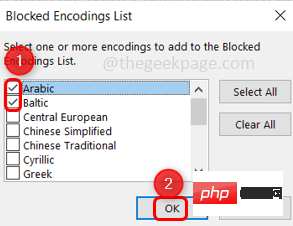
Step 26: A window will appear where you can check the box by clicking on the checkbox next to them and click OK to select the encoding. For example, I selected Arabic and Baltic encoding so that the next time an email using these two encodings does not appear in the inbox
########################## Step: When all conditions are specified, click Apply### to save the changes, then click ###ok### and you are done. Now you don't have to spend time checking your inbox for spam. ###
The above is the detailed content of How to manage junk email in Microsoft Outlook. For more information, please follow other related articles on the PHP Chinese website!

Hot AI Tools

Undresser.AI Undress
AI-powered app for creating realistic nude photos

AI Clothes Remover
Online AI tool for removing clothes from photos.

Undress AI Tool
Undress images for free

Clothoff.io
AI clothes remover

Video Face Swap
Swap faces in any video effortlessly with our completely free AI face swap tool!

Hot Article
Hot Tools

Notepad++7.3.1
Easy-to-use and free code editor

SublimeText3 Chinese version
Chinese version, very easy to use

Zend Studio 13.0.1
Powerful PHP integrated development environment

Dreamweaver CS6
Visual web development tools

SublimeText3 Mac version
God-level code editing software (SublimeText3)
Hot Topics
 1386
1386
 52
52

 How do I recover my Steam account (no username or password required)?
Apr 25, 2023 pm 07:13 PM
How do I recover my Steam account (no username or password required)?
Apr 25, 2023 pm 07:13 PM
During this time, you download many games to your Steam account, and one day when you log into Steam to play one of the games, you find that you have forgotten your username or password. Games downloaded through your account are at risk. No need to worry, you can follow the steps below to recover your Steam account and get back to your favorite games. Steps to recover your Steam account: 1- Go to the Steam login page https://store.steampowered.com/login from your desktop browser. 2-Click Forgot your password? Or the Support tab on the Steam login page. 3- Selecting the Support tab will take you to Steam Support
 How to set up Windows 11 without a Microsoft account
Apr 15, 2023 am 10:07 AM
How to set up Windows 11 without a Microsoft account
Apr 15, 2023 am 10:07 AM
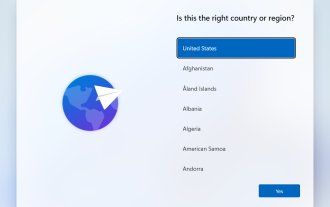
All of the options below to set up Windows 11 with a local account allow users to bypass Microsoft account creation or sign-in during the out-of-box experience. This is a wizard that guides the user through the final steps of setup after the operating system files have been copied to disk. Most PCs that come pre-installed with Windows 11 start at this stage. The first few steps of the out-of-box experience are always the same. Here they come: Step 1: Select a country or region. Step 2: Confirm or select the keyboard layout or input method. Step 3: Check for updates runs automatically Step 4: Name the device. This step is optional. Step 5: Choose whether the device is for personal use or should it be set up for work or school use. The next screen prompts the user to use
 How to remove autocomplete email addresses in Gmail
Apr 21, 2023 am 10:46 AM
How to remove autocomplete email addresses in Gmail
Apr 21, 2023 am 10:46 AM
Gmail is the most popular web-based email server from Google, and it comes with many powerful features that are helpful when browsing, editing, and sending emails. One such feature is the autocomplete list, which allows users to view a list of email addresses saved as contacts before finishing entering the full address. This feature is really useful but sometimes it may not be a good approach as there may be some email addresses that are no longer valid or may have been deleted by the user. For example, someone who leaves an organization no longer has access to a company email address. But there is a way to remove those email addresses that are highlighted in Gmail's autocomplete list. If you also want to remove emails from Gmail autocomplete list
 What is an email address? How to fill it in?
Jan 05, 2024 pm 02:33 PM
What is an email address? How to fill it in?
Jan 05, 2024 pm 02:33 PM
The email address is a fixed format created by Ray Tomlinson: user@mail.server.name, which is similar to the address of the recipient when mailing a regular letter. In the format, user is the recipient's user name, and mail.server.name is the recipient's email server name. It can also be a domain name or an IP address represented by a decimal number. Each user's email address on the Internet is unique, which makes sending and receiving emails more convenient and accurate.
 Bypass Microsoft account requirements when setting up Windows 11 over the Internet
Apr 28, 2023 pm 05:28 PM
Bypass Microsoft account requirements when setting up Windows 11 over the Internet
Apr 28, 2023 pm 05:28 PM
Microsoft seems to have made it available to power users recently, as the company has now blocked the ability to completely bypass setting up Windows 11 without a Microsoft Account (MSA), even in the Pro version. While there is still a workaround called OOBE\BYPASSNRO which will really allow you to continue setup without being connected to the internet, there is another easier and faster option that will allow you to create a local account instead of the required MSA, even You connect to the Internet during setup. When setup goes to the screen where you need to add your MSA, just add a fake email address but it must be formatted like an email address or it will be returned
 How to manage junk email in Microsoft Outlook
Apr 29, 2023 pm 05:04 PM
How to manage junk email in Microsoft Outlook
Apr 29, 2023 pm 05:04 PM
The spam folder is a folder that contains spam emails. Outlook considers some emails as spam and therefore moves them to the Junk Email folder. However, you may still find some emails in your inbox that you think are spam. So how do you move them out of your inbox? This is why Outlook has the feature to add filters/conditions to the email you consider to be junk so that next time you receive it directly in the junk folder or you can delete it permanently. You have different options to indicate that this specific email address is valid and should be in the inbox, while other invalid email addresses should not be seen in the inbox. You can even block email ids, the feature is similar to blocking only email ids on the phone
 How to send channel messages in Microsoft Teams via email on Windows 11/10
Apr 21, 2023 pm 04:31 PM
How to send channel messages in Microsoft Teams via email on Windows 11/10
Apr 21, 2023 pm 04:31 PM
Microsoft Teams is one such application that has revolutionized the concept of online communication between teams. While the concept is more common in the professional world, it's also gaining popularity in personal communications in the wake of the pandemic. However, the Teams app has proven to be more useful for businesses, especially during the Covid-19 pandemic when people are forced to work from home. The app is more popular than its competitors because of some useful features that help professionals improve their productivity and communication through smooth online collaboration. While it has a range of great features that help teams easily connect, communicate, send and share documents, it also has hidden features, like in Windows 11/
 How to use Hide My Email in iOS 15
May 14, 2023 pm 06:16 PM
How to use Hide My Email in iOS 15
May 14, 2023 pm 06:16 PM
For a very easy-to-use iOS 15 feature, Hide My Email offers a lot of options. Here's what you can - and, so far, can't - do. The new "Hide My Email" feature in iOS 15 isn't meant to replace SignIn with Apple, but it's clearly an evolution of the idea. Rather than giving a company your actual email address, give them an email address that works just fine—but that you can turn off if you need to. Maybe the company just keeps spamming you and sees "unsubscribe" as a challenge. Maybe they have sold your email address to another company and they are the ones sending you spam. Whatever the reason is, when you want to get rid of this problem,