

How to enable God Mode in Windows 11

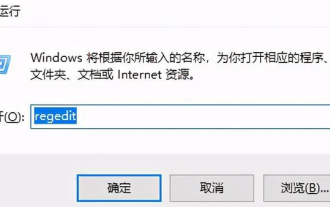
Windows 11 is a fairly complex system, and using certain apps and features can take a long time even for intermediate users. That's why our tutorials are increasingly detailed in their explanations so that all users can solve their problem or task as easily as possible. However, Windows 11 has a little wormhole called God Mode that gives you easier access to all your settings and apps. And, in a way, it's like in a video game where you can walk through walls, because when you use it, you go through all the steps to get to the final setup you need. Why do I need God Mode? This is a folder on your desktop, or anywhere you want to create one, that contains more than 200 settings, controls, and applications from your operating system, organized alphabetically into 33 categories. You can then double-click any of them to go directly to the settings you want to use without going through time-consuming steps and windows. Why do I need God Mode in Windows 11? you have not! However, if you have it and use it as we suggest further in the article, it will save you a lot of time and effort. For example, if you want to make a simple setting like changing your mouse settings, you'll need to follow these steps: Click the Start button and select Settings. Select Bluetooth & Devices from the left pane. Scroll down and click your mouse. Now select Additional mouse settings. If you want to go further, you will need to access the tabs. Well, you can easily get to the last step by double-clicking on the file after creating this folder. Just like Developer Mode in Windows 11, this feature needs to be enabled before you can use it, and in today's tutorial, we'll show you how to do that. What are the benefits of God Mode? The main benefit of this folder is the ability to quickly access certain settings. You no longer need to open multiple windows to find specific settings. With God Mode enabled on your W11, you can find all of these settings in just two clicks. You can access these settings faster by creating a shortcut on your desktop. Keep in mind that none of these settings are hidden and can be quickly accessed from search, but this folder groups and organizes them for quick and easy access. This isn't the only useful feature, and if you want to learn more, we recommend checking out our Windows 11 tips tutorial. How to enable God Mode in Windows 11? Create a God Mode Folder Right-click an empty area on your desktop, select New and select Folder. Paste the following line into the folder name and hit Enter: GodMode.{ED7BA470-8E54-465E-825C-99712043E01C} Right-click the free desktop space again and select Refresh. After refreshing, your folder will look like a Control Panel icon. As you can see, activating God Mode on Windows 11 is very easy and takes just a few seconds to complete. How to use god mode folder? Double-click the new God Mode folder. Now you have access to over 200 shortcuts, apps, and settings that are directly clickable. Just scroll down and double-click on the one you need. For example, to access the mouse settings we mentioned at the beginning of this article, type mouse in the search field in the upper right corner of the window, click the right arrow to search, and then double-click to change mouse settings. for you! You've reached the same window we told you about before. This is just one example we use to highlight how much time and effort God Mode on Windows 11 can help you save. However, if you need to be more efficient, drag and drop your most commonly used commands onto your desktop to make them more accessible. What's the most interesting hidden feature in Windows 11? Many of you have been asking about hidden features in Windows 11, and the straight answer is that there are no hidden features. Of course, there are some new features and some features that are present in Windows 10 but have been removed in the new operating system. If you want to learn more about them, we have a great comparison of the new features in Windows 11 and Windows 10. However, in this matter, there are some settings that you cannot make using the “God Mode” folder in Windows 11. For example, there's a new feature in Windows 11 that lets you disable network adapters by accessing Advanced network settings from the Network & Internet menu in Settings. You can quickly disable the adapter from Advanced Network Settings Well, there is no shortcut in the God Mode folder. In fact, we couldn't even find the Network and Internet shortcuts. So while this folder can help you a lot with helpful shortcuts to some of your most commonly used settings, this tool hasn't been updated with all the options in Windows 11. By the way, you can also use the exact same steps on Windows 10 as we described for the new operating system. Can I delete the god mode folder? Yes, you can delete this folder safely and easily. Remember, these are just shortcuts and therefore safe to delete. To remove it, just do the following: Find the God Mode folder. Right click on it. Select the delete icon from the menu. How to turn off Windows God Mode? This feature cannot be turned off, you can always create God Mode directories on your PC.However, there is a way to prevent users from accessing it. As you might have guessed, this involves deleting an entire directory, as we showed you in the previous section. We hope this tutorial helped you add and use God Mode folders on Windows 11 and now you have your most used shortcuts on your desktop.
The above is the detailed content of How to enable God Mode in Windows 11. For more information, please follow other related articles on the PHP Chinese website!

Hot AI Tools

Undresser.AI Undress
AI-powered app for creating realistic nude photos

AI Clothes Remover
Online AI tool for removing clothes from photos.

Undress AI Tool
Undress images for free

Clothoff.io
AI clothes remover

AI Hentai Generator
Generate AI Hentai for free.

Hot Article
Hot Tools

Notepad++7.3.1
Easy-to-use and free code editor

SublimeText3 Chinese version
Chinese version, very easy to use

Zend Studio 13.0.1
Powerful PHP integrated development environment

Dreamweaver CS6
Visual web development tools

SublimeText3 Mac version
God-level code editing software (SublimeText3)
Hot Topics
 1377
1377
 52
52

 What software is bonjour and can it be uninstalled?
Feb 20, 2024 am 09:33 AM
What software is bonjour and can it be uninstalled?
Feb 20, 2024 am 09:33 AM
Title: Explore the Bonjour software and how to uninstall it Abstract: This article will introduce the functions, scope of use and how to uninstall the Bonjour software. At the same time, it will also be explained how to use other tools to replace Bonjour to meet the needs of users. Introduction: Bonjour is a common software in the field of computer and network technology. Although this may be unfamiliar to some users, it can be very useful in some specific situations. If you happen to have Bonjour software installed but now want to uninstall it, then
 What to do if WPS Office cannot open the PPT file - What to do if WPS Office cannot open the PPT file
Mar 04, 2024 am 11:40 AM
What to do if WPS Office cannot open the PPT file - What to do if WPS Office cannot open the PPT file
Mar 04, 2024 am 11:40 AM
Recently, many friends have asked me what to do if WPSOffice cannot open PPT files. Next, let us learn how to solve the problem of WPSOffice not being able to open PPT files. I hope it can help everyone. 1. First open WPSOffice and enter the homepage, as shown in the figure below. 2. Then enter the keyword "document repair" in the search bar above, and then click to open the document repair tool, as shown in the figure below. 3. Then import the PPT file for repair, as shown in the figure below.
 What software is crystaldiskmark? -How to use crystaldiskmark?
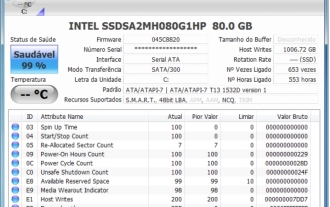
Mar 18, 2024 pm 02:58 PM
What software is crystaldiskmark? -How to use crystaldiskmark?
Mar 18, 2024 pm 02:58 PM
CrystalDiskMark is a small HDD benchmark tool for hard drives that quickly measures sequential and random read/write speeds. Next, let the editor introduce CrystalDiskMark to you and how to use crystaldiskmark~ 1. Introduction to CrystalDiskMark CrystalDiskMark is a widely used disk performance testing tool used to evaluate the read and write speed and performance of mechanical hard drives and solid-state drives (SSD). Random I/O performance. It is a free Windows application and provides a user-friendly interface and various test modes to evaluate different aspects of hard drive performance and is widely used in hardware reviews
![Corsair iCUE software not detecting RAM [Fixed]](https://img.php.cn/upload/article/000/465/014/170831448976874.png?x-oss-process=image/resize,m_fill,h_207,w_330) Corsair iCUE software not detecting RAM [Fixed]
Feb 19, 2024 am 11:48 AM
Corsair iCUE software not detecting RAM [Fixed]
Feb 19, 2024 am 11:48 AM
This article will explore what users can do when the CorsairiCUE software does not recognize the RAM in a Windows system. Although the CorsairiCUE software is designed to let users control their computer's RGB lighting, some users have found that the software does not function properly, resulting in an inability to detect RAM modules. Why doesn't ICUE pick up my memory? The main reason why ICUE cannot correctly identify RAM is usually related to background software conflicts. In addition, incorrect SPD write settings may also cause this problem. Fixed issue with CorsairIcue software not detecting RAM If CorsairIcue software is not detecting RAM on your Windows computer, please use the following suggestions.
 CrystalDiskinfo usage tutorial-What software is CrystalDiskinfo?
Mar 18, 2024 pm 04:50 PM
CrystalDiskinfo usage tutorial-What software is CrystalDiskinfo?
Mar 18, 2024 pm 04:50 PM
CrystalDiskInfo is a software used to check computer hardware devices. In this software, we can check our own computer hardware, such as reading speed, transmission mode, interface, etc.! So in addition to these functions, how to use CrystalDiskInfo and what exactly is CrystalDiskInfo? Let me sort it out for you! 1. The Origin of CrystalDiskInfo As one of the three major components of a computer host, a solid-state drive is the storage medium of a computer and is responsible for computer data storage. A good solid-state drive can speed up file reading and affect consumer experience. When consumers receive new devices, they can use third-party software or other SSDs to
 How to set the keyboard increment in Adobe Illustrator CS6 - How to set the keyboard increment in Adobe Illustrator CS6
Mar 04, 2024 pm 06:04 PM
How to set the keyboard increment in Adobe Illustrator CS6 - How to set the keyboard increment in Adobe Illustrator CS6
Mar 04, 2024 pm 06:04 PM
Many users are using the Adobe Illustrator CS6 software in their offices, so do you know how to set the keyboard increment in Adobe Illustrator CS6? Then, the editor will bring you the method of setting the keyboard increment in Adobe Illustrator CS6. Interested users can take a look below. Step 1: Start Adobe Illustrator CS6 software, as shown in the figure below. Step 2: In the menu bar, click the [Edit] → [Preferences] → [General] command in sequence. Step 3: The [Keyboard Increment] dialog box pops up, enter the required number in the [Keyboard Increment] text box, and finally click the [OK] button. Step 4: Use the shortcut key [Ctrl]
 What kind of software is bonjour? Is it useful?
Feb 22, 2024 pm 08:39 PM
What kind of software is bonjour? Is it useful?
Feb 22, 2024 pm 08:39 PM
Bonjour is a network protocol and software launched by Apple for discovering and configuring network services within a local area network. Its main role is to automatically discover and communicate between devices connected in the same network. Bonjour was first introduced in the MacOSX10.2 version in 2002, and is now installed and enabled by default in Apple's operating system. Since then, Apple has opened up Bonjour's technology to other manufacturers, so many other operating systems and devices can also support Bonjour.
 How to resolve an incompatible software attempt to load with Edge?
Mar 15, 2024 pm 01:34 PM
How to resolve an incompatible software attempt to load with Edge?
Mar 15, 2024 pm 01:34 PM
When we use the Edge browser, sometimes incompatible software attempts to be loaded together, so what is going on? Let this site carefully introduce to users how to solve the problem of trying to load incompatible software with Edge. How to solve an incompatible software trying to load with Edge Solution 1: Search IE in the start menu and access it directly with IE. Solution 2: Note: Modifying the registry may cause system failure, so operate with caution. Modify registry parameters. 1. Enter regedit during operation. 2. Find the path\HKEY_LOCAL_MACHINE\SOFTWARE\Policies\Micros