How to Format an External USB Drive on Mac
Formatting will erase everything on the drive, making it natively compatible with MacOS.
- Connect the USB drive to your Mac
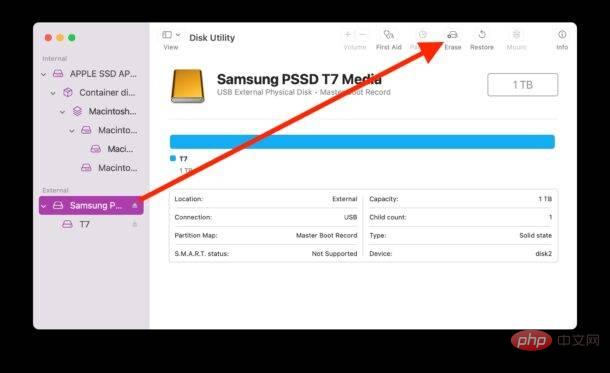
- Open the Disk Utility on your Mac from /Applications/Utilities/ or use Spotlight

- Select the USB drive you want to format from the left sidebar
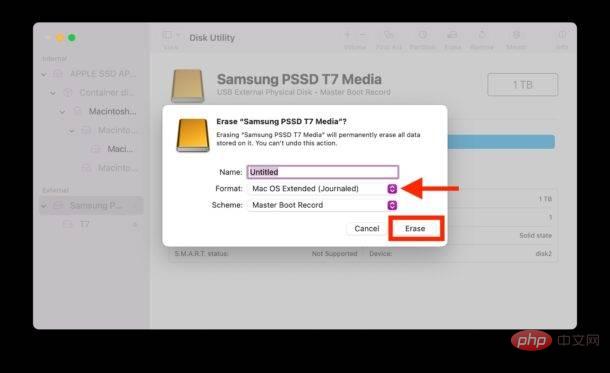
- Click " Erase button or another name, if you want native Mac compatibility, select "MacOS Extended (Journaled)" as the file system type and click Erase*

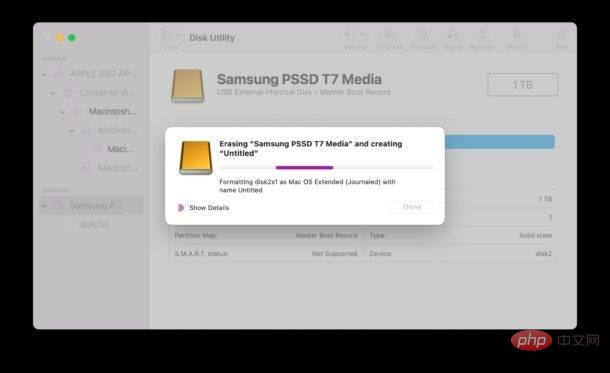
- #Let Disk Utility erase the drive, this may be very quick or take some time depending on the disk type, but please be patient until it completes

- When finished, click Finish and use the drive as expected

Now you can use the formatted USB drive on your Mac for any purpose, whether it is as a Time Machine backup drive, a destination for manual file backup , extra storage, running an OS directly from it, or whatever else you want to use it for. * You may have noticed that there are other file system types to choose from when formatting a USB drive on your Mac, but for most Mac users, they will want to stick with Mac OS Extended. However, if you want the drive to be compatible with Windows and MacOS, you can also choose FAT and exFAT formats. -
Formatting any USB drive for Mac is the same, whether it's a USB flash drive, USB external SSD drive, USB key, traditional rotating USB HDD drive, Or any other external drive or disk you have. The process is also essentially the same in all versions of MacOS, so you'll find these instructions apply no matter what system software your Mac is running.
The above is the detailed content of How to format a USB drive on Mac. For more information, please follow other related articles on the PHP Chinese website!


