
 Common Problem
Compare the system requirements and differences between Windows 11 and Windows 10
Common Problem
Compare the system requirements and differences between Windows 11 and Windows 10
Compare the system requirements and differences between Windows 11 and Windows 10

Microsoft released Windows 11 in the last quarter of 2021. Since then, Microsoft has gradually rolled it out as an upgrade to more and more users.
Before upgrading to any new platform, you should first check its system requirements. The latest version is no exception, as its system requirements aren't exactly the same as its predecessor.
If you want to know more, read on to learn how Windows 11 and Windows 10 system requirements compare.
How do the system requirements for Windows 11 and 10 compare?
What are the system requirements for Windows 11?
Microsoft provides minimum system and specific feature requirements for Windows 11 on its website.
Minimum system requirements are the minimum computer specifications that your PC must meet in order to install the latest version on it.
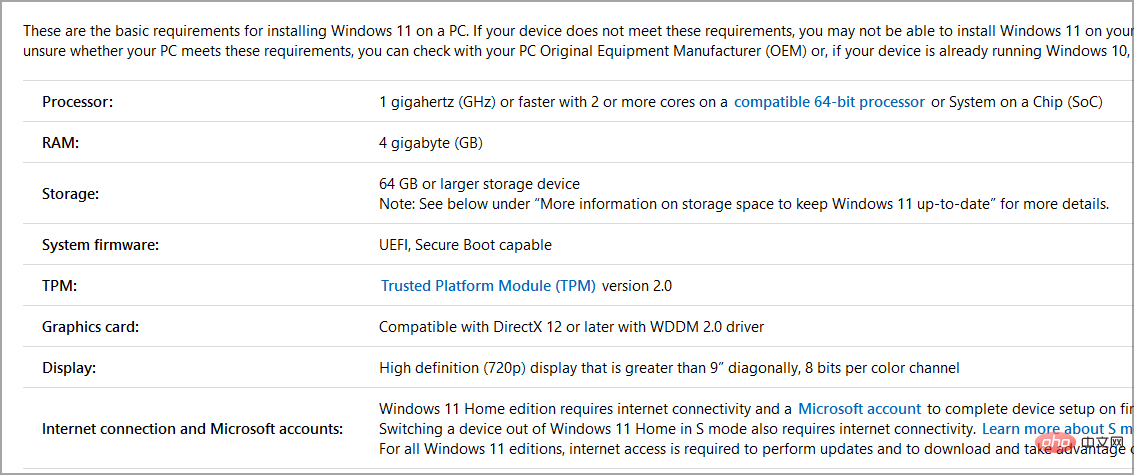
As for the requirements here, they are:
- Processor: 1 GHz CPU, two cores (must also be a 64-bit processor)
- Memory: 4 GB
- Storage: 64 GB available storage
- Video Card: DirectX 12 compatible GPU (with WDDM 2.0 driver)
- Visual Display Unit: 720p resolution vertical HD display
- TPM: Trusted Platform Module 2
Windows What are the system requirements for 10?
Microsoft released Windows 10 in July 2015, which was a while ago. The system requirements for this platform are approximately the same as those specified for Windows 8.
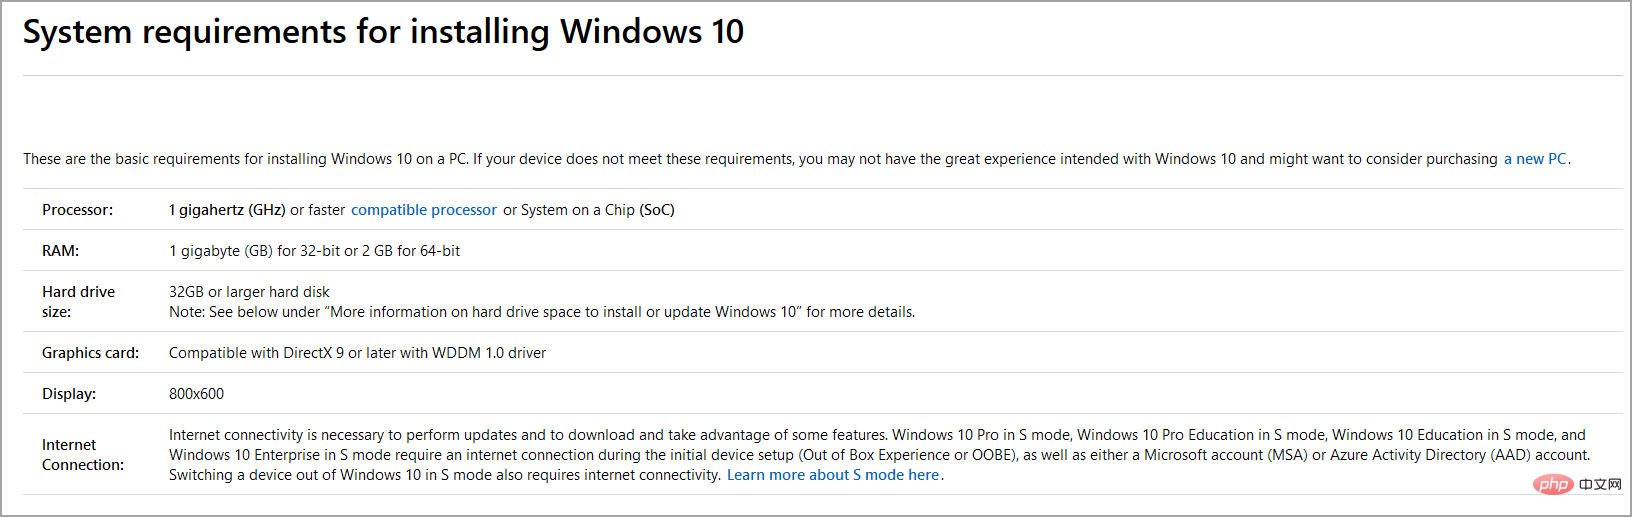
As for the requirements, here they are:
- Processor: 1 GHz CPU (Supports 64-bit and 32-bit processors)
- RAM: 2 GB for 64-Windows 10 (1 GB for 32-bit version)
- Storage Space: 20 GB for 64-bit Windows 10 (16 GB for 32-bit version)
- Graphics Card: DirectX 9 compatible graphics card
- Visual Display Unit: Requires 800 x 600 resolution VDU
- TPM: Trusted Platform Module 1.2 or later
Windows 11 and 10 What are the differences in system requirements between ?
So, with Microsoft releasing Windows 10 over five years ago, it's no surprise that the latest operating system has some significant system requirements differences. All minimum system requirements specified above have changed for Windows 11.
CPU
The first thing to pay attention to is the processor requirements. Windows 11 does not have a 32-bit version, which means it does not support 32-bit CPUs.
If you use such a processor, upgrading to the latest version is impossible. Additionally, if you use Intel and Zen or higher AMD CPUs, your PC's processor must be 8th generation or higher.
It is possible to bypass these CPU requirements and to learn more, we recommend reading our How to install Windows 11 on an unsupported processor tutorial.
Memory
Windows 11 has 2 GB more RAM (random access memory) system requirements than Windows 10.
For the latest desktop operating systems, your PC must have at least 4 GB of RAM. If not, you can expand your PC's memory by adding new RAM modules.
Storage
The minimum storage system requirement for Windows 11 has been increased from 20 GB to 64 GB. This means your PC must have at least 64 GB of free storage space.
It is not a specification of overall hard drive size. Therefore, make sure you have approximately 70 GB of free space on your C: drive so that you can install future updates and necessary software.
Display
Visual display unit system requirements primarily specify the minimum resolution. Your PC needs to have standard HD 1,280 x 720 resolution for Windows 11.
The system requirements also specify an 8-bit color channel, which is fully supported by most monitors, even older monitors.
While Windows 10 only requires graphics cards that support the earliest DirectX 9 API, this does not apply to Microsoft's new desktop platform.
Your PC must have a DirectX 12 capable GPU. If your PC graphics card is older than 2014, it may not support DirectX 12.
TPM
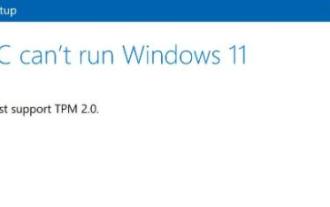
Windows 11’s TPM requirements prevent many users from upgrading. Some users are shocked by this PC can’t run Windows 11 error even if their PC meets the above system specifications. These users are still unable to upgrade due to TPM 2.0 system requirements.
TPM 2.0 (also known as Trusted Platform for Modules) is a security chip for Windows PCs. You need to make sure your PC supports the latest security features and better protects your data.
If your PC is less than five years old, it may be able to run TPM 2.0. However, TPM 2.0 may not be enabled by default. To learn more about this feature, visit our Windows 11 TPM tutorial for more information.
You can check the TPM details through the Microsoft Management Console by doing the following:
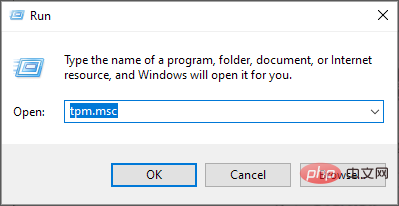
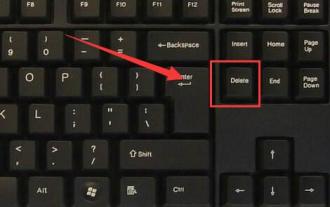
- Press the Windows R key to open Run ” dialog box.
- Now enter tpm.msc and press Enter.

- FindSpecification Version to find out what TPM version is available on your PC.
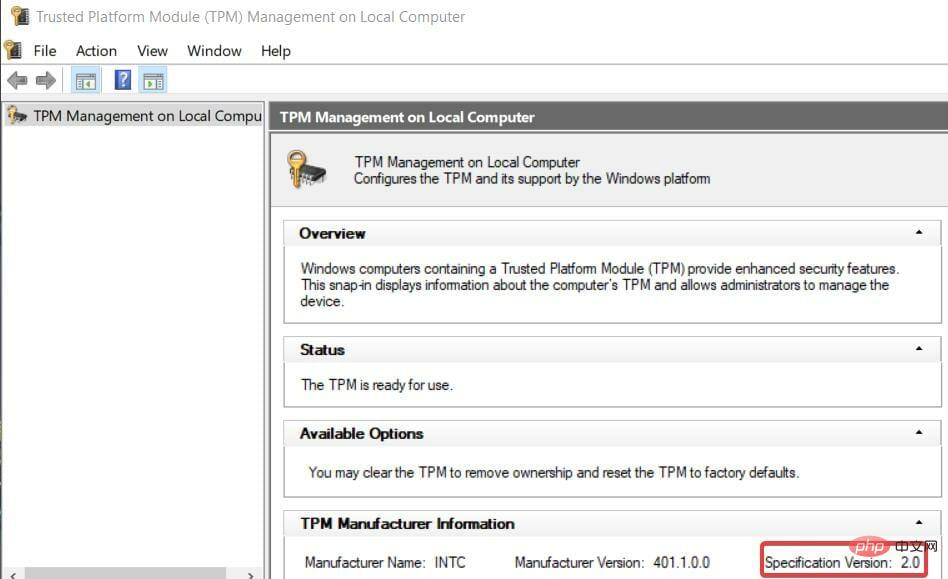
Please remember that if you do not get the same results, you need to enable TPM 2.0 in the BIOS and try again.
There are multiple versions of this feature available, if you are not on version 2.0 you may have issues upgrading. To understand the differences between the two, read our TPM 1.2 vs. TPM 2.0 tutorial.
Even if your computer does not support this feature, you can still install Windows 11 without the TPM tutorial.
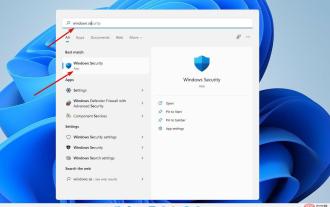
How do I check if my computer meets the system requirements for Windows 11?
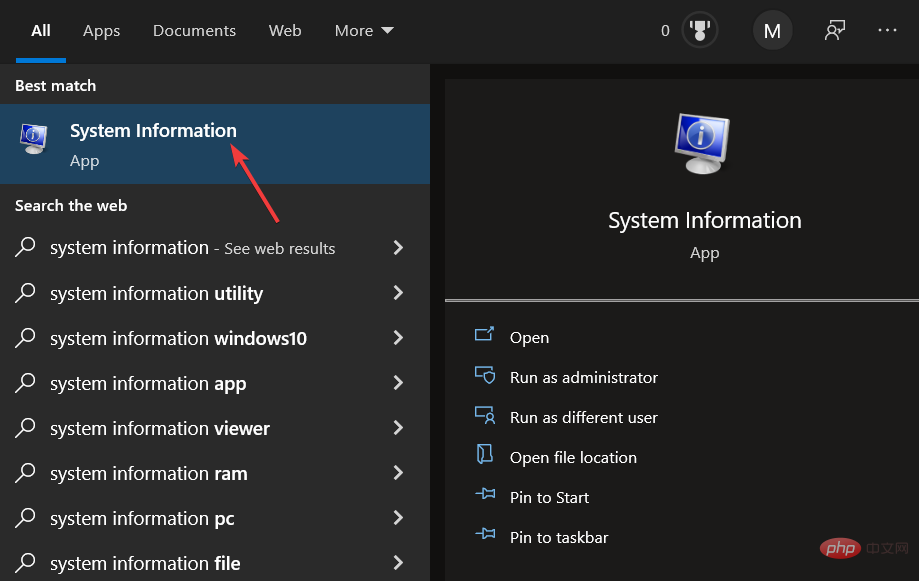
- Press the Windows S keys simultaneously to open the file and software search tool.
- Type system information in the text box of the search tool.
- Select System Information to open the application.
-
Take note of the system type, installed memory, and processor details listed in the System Summary category.
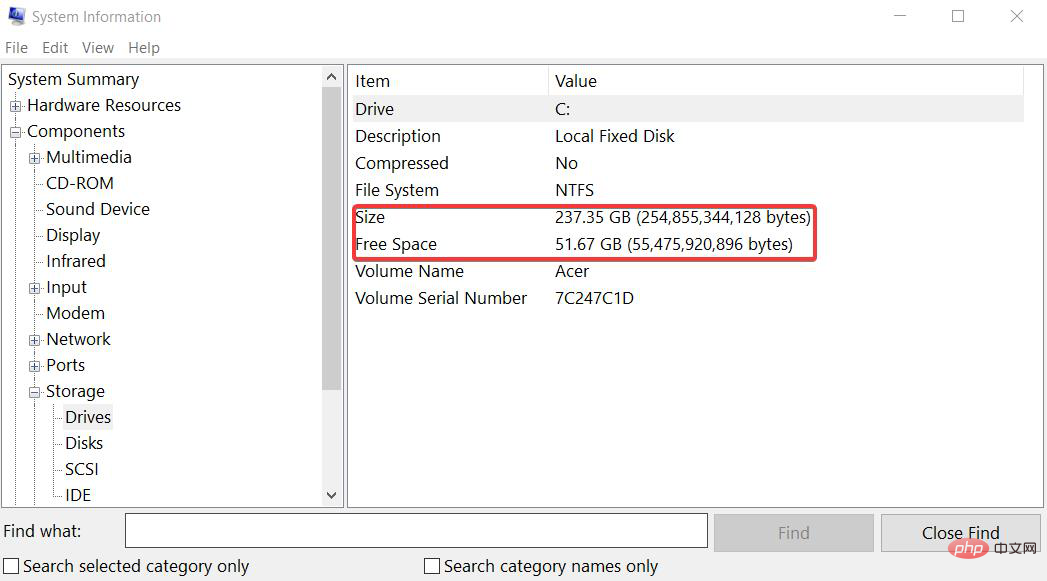
- Then double-click Component in the system information window.
- Double-click Store to expand the category. Select Drive in this category.
- Take note of the free space details there.
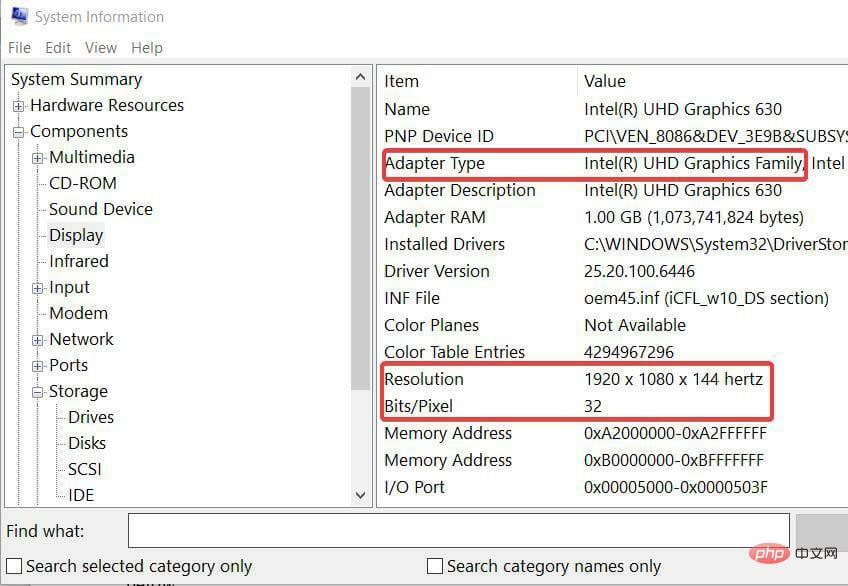
- Click Show to view VDU details.
- Take note of the graphics adapter type, resolution and bit/pixel details there.
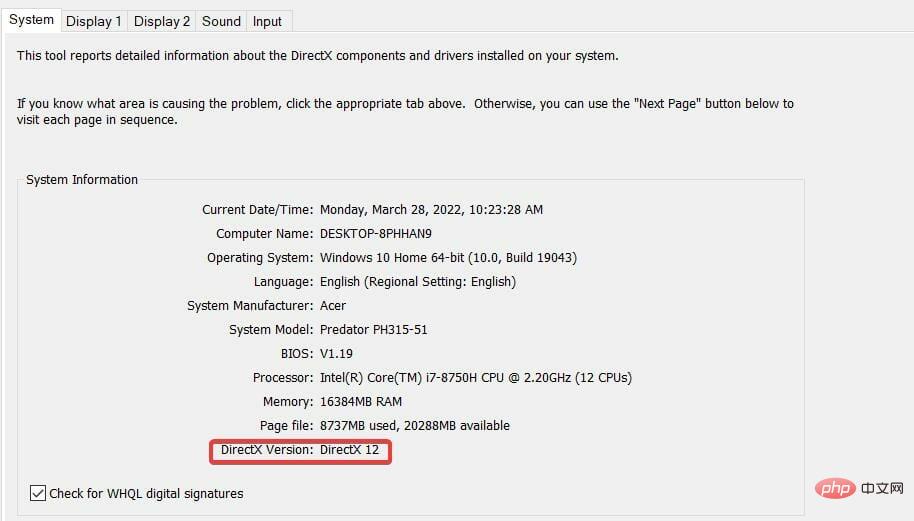
- You need to open the DirectX Diagnostic Tool to check the DirectX details. Open the search box again and enter dxdiag here.
- Click dxdiag to open the window shown directly below.
- Take note of the DirectX version details there.

Now you will note down all the PC specifications that you need to check to see if it meets the minimum system requirements for Windows 11.
If your PC meets all the requirements, you should be ready to upgrade. Unless, of course, your PC doesn’t have TPM 2.0 enabled!
If your PC doesn't meet certain requirements, you may be able to upgrade it. Desktop users can add RAM, a new graphics card, or even a CPU if needed. However, laptop upgradeability is more limited.
Microsoft has also released the PC Health Check app, which you can use to check if your PC meets the system requirements for Windows 11.
The application includes a "Check Now" option that tells your PC if it meets all the minimum requirements at the time of selection. It also includes some additional system maintenance tools.
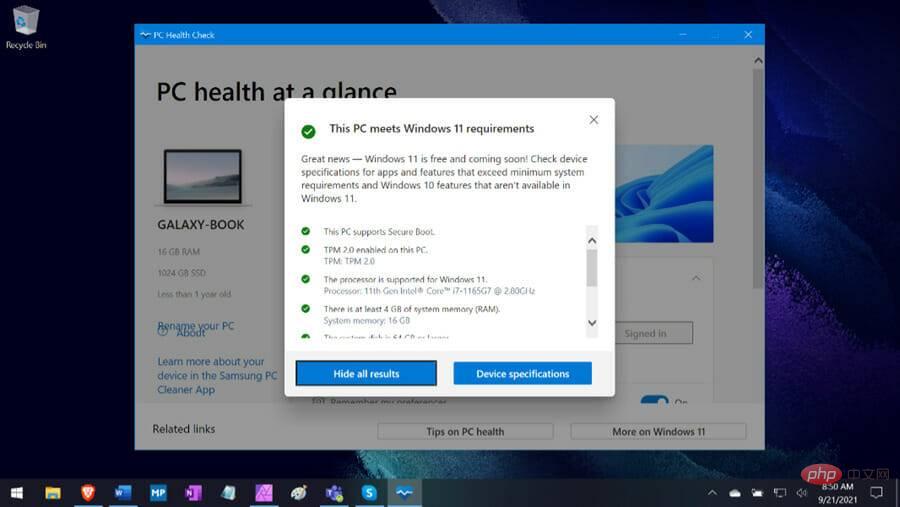
Our Download PC Health Check tutorial provides more details on how to download, install, and check that your PC meets the Windows 11 minimum system requirements for this app .
Is there any way to try Windows 11 without upgrading?
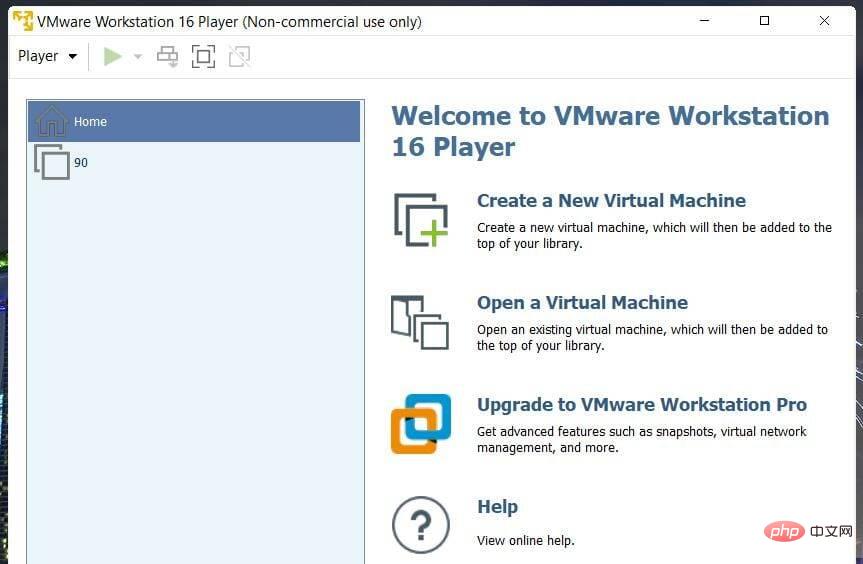
Yes, virtualization (virtual machine) software enables users to try out different platforms in Windows 10. We recommend reading our tutorial on how to run Windows 11 on a virtual machine for more information.
VMware Workstation and VirtualBox are two of the best free virtualization applications. Don’t hesitate to check out our best virtual machine software for Windows 11 article for more details.
Overall, Windows 11 is a big improvement over its predecessor in terms of system requirements. It requires more RAM, processing power, and storage space to launch.
Many PCs that are more than five years old may not meet the minimum requirements for all new platforms.
If your PC does meet all the minimum system requirements, another question is whether it's worth upgrading to Windows 11.
To learn more about the differences between the two, our Windows 11 vs. Windows 10 tutorial has all the information you need.
Windows 11 has some nice new features and many visual design changes. To help you decide, just check out our Windows 11 review.
The above is the detailed content of Compare the system requirements and differences between Windows 11 and Windows 10. For more information, please follow other related articles on the PHP Chinese website!

Hot AI Tools

Undresser.AI Undress
AI-powered app for creating realistic nude photos

AI Clothes Remover
Online AI tool for removing clothes from photos.

Undress AI Tool
Undress images for free

Clothoff.io
AI clothes remover

AI Hentai Generator
Generate AI Hentai for free.

Hot Article
Hot Tools

Notepad++7.3.1
Easy-to-use and free code editor

SublimeText3 Chinese version
Chinese version, very easy to use

Zend Studio 13.0.1
Powerful PHP integrated development environment

Dreamweaver CS6
Visual web development tools

SublimeText3 Mac version
God-level code editing software (SublimeText3)
Hot Topics
 1378
1378
 52
52

 Check if Lenovo laptop supports TPM? How to turn on and off TPM on Lenovo laptop?
Mar 14, 2024 am 08:30 AM
Check if Lenovo laptop supports TPM? How to turn on and off TPM on Lenovo laptop?
Mar 14, 2024 am 08:30 AM
Recently, some Lenovo notebook partners have upgraded their systems to Win11. At this time, they need to check the computer to see if it supports TPM. If the computer supports TPM, it can be turned on in the motherboard BIOS. But how to enable the tpm function on Lenovo computers? Does it support opening? The following tutorial will introduce in detail the TPM activation of Lenovo notebooks. 1. Check whether TPM is supported 1. Right-click the start menu-Run (or press the Win+R keys on the keyboard), enter TPM.msc-press Enter. 2. As shown in the red box in the figure below, "TPM is ready for use" indicates that the machine supports TPM, and the version is version 2.0 shown in the red box below. 3. If
 How to Fix Valorant Vanguard Windows 11 Error
Apr 15, 2023 pm 08:55 PM
How to Fix Valorant Vanguard Windows 11 Error
Apr 15, 2023 pm 08:55 PM
These two Vanguard errors appear when players try to launch Valorant in Windows 11. Therefore, players cannot play Valorant due to these bugs. If you need to resolve one of these issues, check out the potential fixes below. What is Vanguard? Vanguard is anti-cheat software for the Valorant game. Riot software is installed with the game to prevent players from cheating in Valorant. You will not be able to play Valorant without the RiotVanguard software installed and activated. This software is somewhat controversial because it blocks applications. Players complain about Vanguard viz.
 Rufus 3.18 bypasses Windows 11 TPM restrictions for in-place upgrade, fixes ISO to ESP error
Apr 16, 2023 am 10:49 AM
Rufus 3.18 bypasses Windows 11 TPM restrictions for in-place upgrade, fixes ISO to ESP error
Apr 16, 2023 am 10:49 AM
The latest 3.18 pre-release (beta) version of popular bootable USB media creation software Rufus also adds the ability to bypass Windows 11 system requirements for in-place upgrades. Earlier, in the 3.16Beta2 version, Rufus had been given the option to bypass Windows 11's strict system requirements through the "Extended" installation feature. However, this option is only available for fresh installations. However, now with Rufus3.18, this feature is also available for in-place upgrades. The official changelog says: Added bypass for Windows 11 restrictions for in-place upgrades though we can’t say for sure, based on the latest AdDuplex numbers
 How to clear TPM in Windows 11: A step-by-step guide
May 04, 2023 pm 11:34 PM
How to clear TPM in Windows 11: A step-by-step guide
May 04, 2023 pm 11:34 PM
Starting with Windows 10 and Windows 11, TPMs are now initialized immediately and granted ownership by the operating system, making them more secure. This is in contrast to previous operating systems where you would initialize the TPM and generate the owner password before proceeding. Before proceeding to clear the TPM in Windows 11, make sure you have a backup and recovery solution set up for any data protected or encrypted by it. Although the TPM must be wiped before a new operating system can be installed, the vast majority of TPM functionality will likely continue to function normally after the TPM is cleared. There are several ways to clear Windows 11’s TPM chip
 Win11tpm2.0 opens MSI motherboard
Jan 07, 2024 pm 10:10 PM
Win11tpm2.0 opens MSI motherboard
Jan 07, 2024 pm 10:10 PM
The method of upgrading Win11 and enabling TPM2.0 varies between different motherboards, so many MSI motherboard users wonder how to enable their own motherboards. In fact, you only need to operate in the BIOS to turn on the MSI motherboard with win11tpm2.0: 1. Intel platform 1. First restart the computer and repeatedly press the "Delete" key on the keyboard to enter the BIOS settings. What you need to do is: 2. Enter the BIOS settings, press the "F7" key on the keyboard to open the advanced options. The content that needs to be rewritten is: 3. Click the "Security" button in the lower right corner again, and then select "Trusted Computing". After entering, change "SecurityDeviceSupport" Change the "TPM" option below to "Enable"
 How to disable TPM and Secure Boot in Rufus when creating a Windows 11 bootable USB drive
May 16, 2023 am 08:04 AM
How to disable TPM and Secure Boot in Rufus when creating a Windows 11 bootable USB drive
May 16, 2023 am 08:04 AM
Microsoft allows you to install Windows 11 via registry cracking, but that's not the only way to bypass required checks like TPM2.0, Secure Boot, and more. You can simply delete the appraiserres.dll file in the Windows 11 ISO file to make the installer avoid these checks and install Windows 11 on any unsupported hardware. This method requires you to edit the ISO file to remove the appraiserres.dll file, which is not difficult, but thanks to Rufus, you have an easier way to do this. Read on to learn how to disable Windows 11 requirements like TPM2
 How to solve the problem that Win11 installation requires TPM2.0
Dec 26, 2023 pm 09:50 PM
How to solve the problem that Win11 installation requires TPM2.0
Dec 26, 2023 pm 09:50 PM
Many users have encountered problems titled "ThePCmustsupportTPM2.0" during the installation process of Windows 11 systems. We can successfully enable the TMP function in the BIOS settings interface or cleverly replace the corresponding files to bypass TPM detection. be resolved effectively! Let’s explore these solutions in depth together! What to do if win11 installation prompts tpm2.0? Method 1: 1. First restart the computer, restart the computer and use shortcut keys (hot keys) to enter the BIOS setting interface. 2. In this BIOS setting, look for TMP or CMOC related options and start them successfully. 2. Replace files 1. If in front of the BIOS setup interface
 Why is Tiny11 Windows so small but very secure without TPM and Secure Boot? - According to Dev's explanation
Apr 23, 2023 pm 01:55 PM
Why is Tiny11 Windows so small but very secure without TPM and Secure Boot? - According to Dev's explanation
Apr 23, 2023 pm 01:55 PM
Tiny Windows 11 While many people like the look or feel of Windows 11, some just want to cut back on what they consider to be bloat because their hardware may not be powerful enough to run the new operating system smoothly, or just for fun. A popular third-party Windows 11 tweak and customization app called ThisIsWin11 (TIW11) evolved into Debloos or DebloatOS, which, as the name suggests, allows the operating system to debloat. If someone isn't comfortable tweaking things themselves with it, they can also opt for Tiny11, which was released earlier today. This stripped-down Windows11Pro22H2mod requires 8G