

Pinned apps not showing up in Windows 11? Ways to fix this problem.

We all often pin apps to the taskbar for quick access, and it ends up saving a lot of time that would otherwise be spent searching for and launching them. However, many users have reported that pinned apps or their icons are not showing up in Windows 11.
This can be due to a variety of reasons, related to a corrupted icon cache, Windows Explorer process issues, misconfigured Local Group Policy Editor, and other issues. Moreover, all of them can be easily fixed and you will have your pinned projects back in no time.
So, let’s go through the most effective ways to fix pinned app not showing error in Windows 11.
What should I do if pinned apps don’t show up in Windows 11?
1. Restart the Windows Explorer process
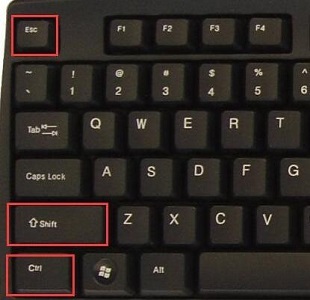
- Press Ctrl ShiftStart Task Management Esc tool.

- Locate the Windows Explorer process, right-click it and select Restart from the context menu.
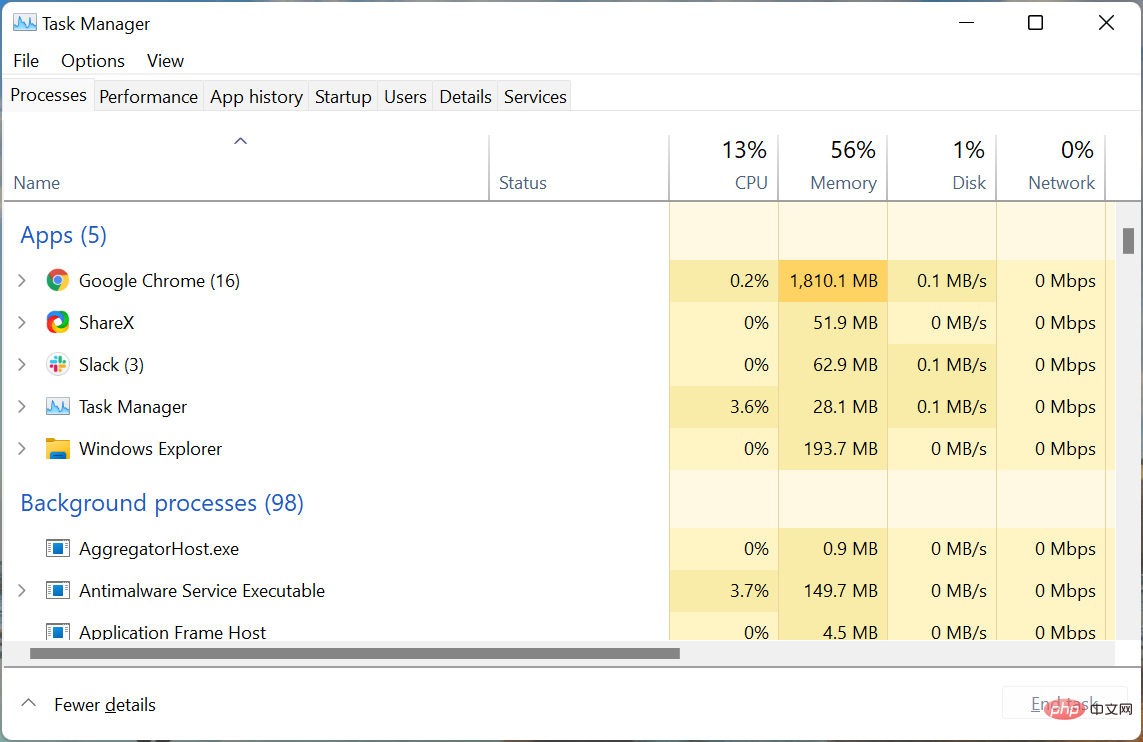

The taskbar is tied to the Windows Explorer (explorer.exe) process, and issues with the latter can cause pinned apps to not display in Windows 11. Simply restarting the process should resolve the error for you.
2. Update the graphics card driver
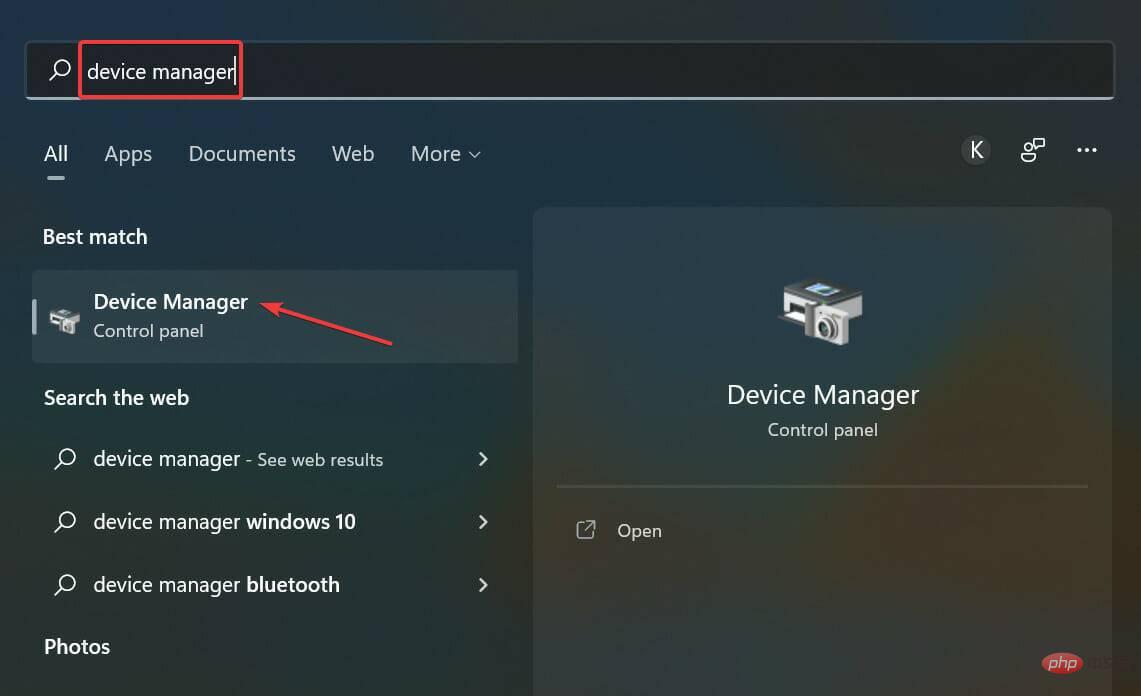
- Press Windows S to launch the search menu and enter device in the text field at the top Manager and click on the relevant search results that appear.
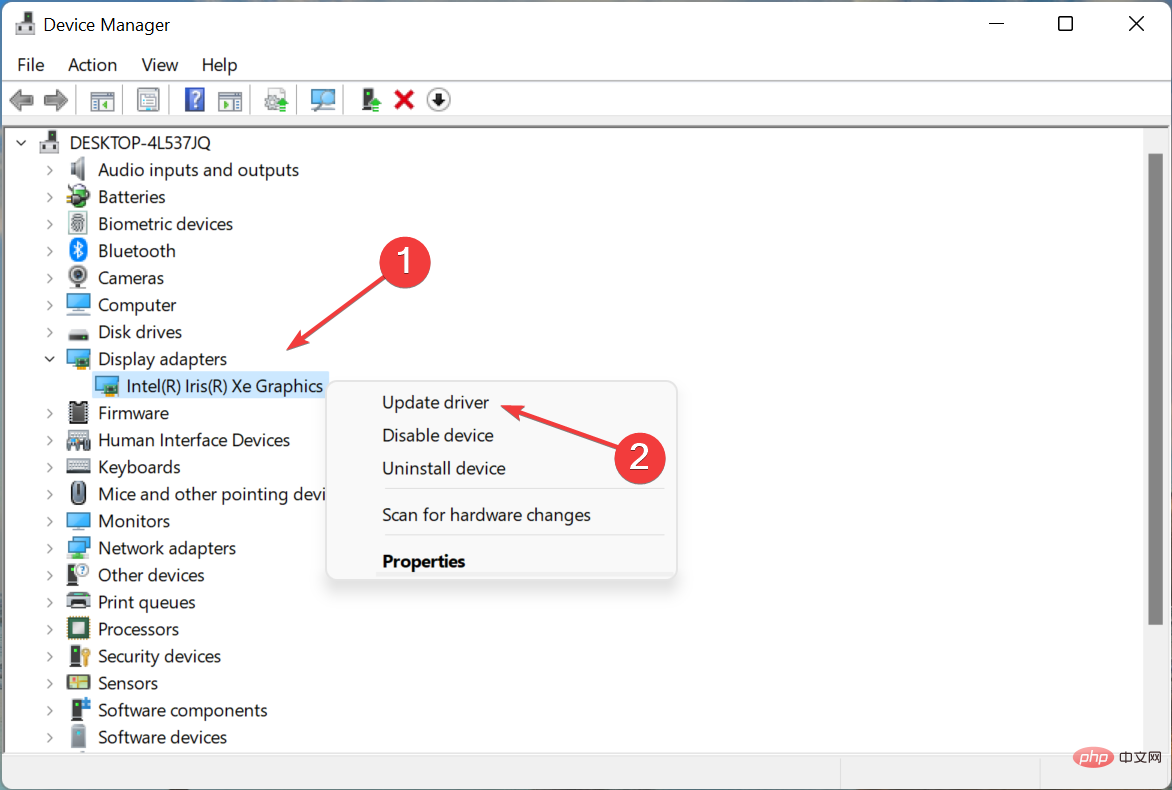
- Now, double-click on the Display Adapters entry here.
- Right-click on the graphics adapter and select Update Driver from the context menu.
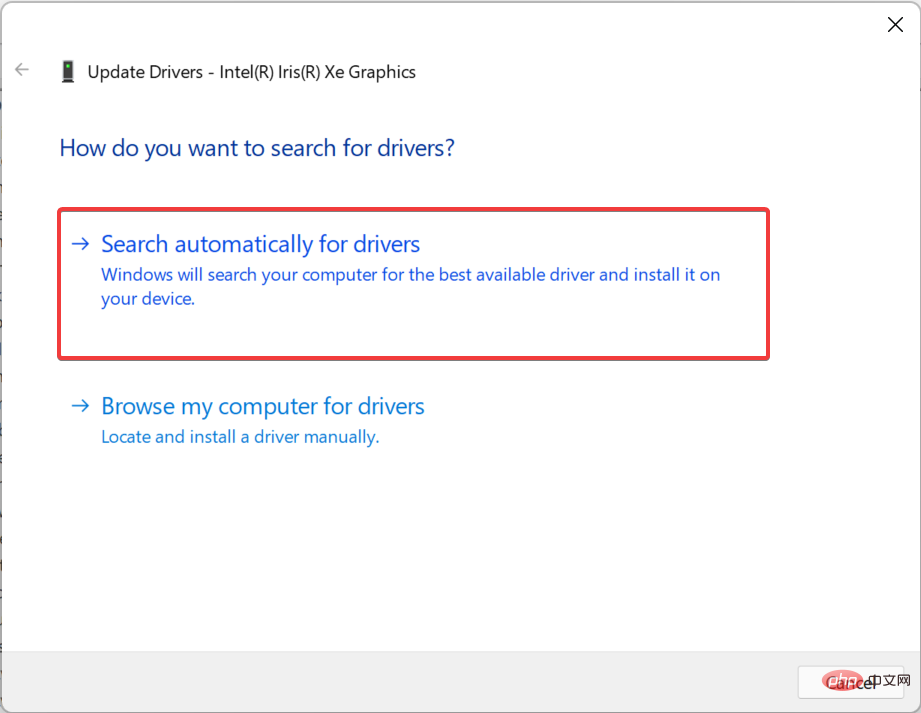
- SelectSearch automatically for drivers from the options displayed in the Update Driver window.
- Wait for the system to find the best available driver and install it.

Outdated graphics drivers are another possible issue with fixed apps not showing up in Windows 11. Therefore, it is better to update the graphics driver and verify if the error is eliminated.
Also, you can try other ways to update the driver in case the Device Manager method doesn't work.
If this sounds like too much trouble, using a reliable third-party application may help. We recommend DriverFix, a specialized tool that automatically scans for any available updates and installs them for the drivers on your computer, keeping them up to date.
⇒Get DriverFix
3. Delete the icon cache file
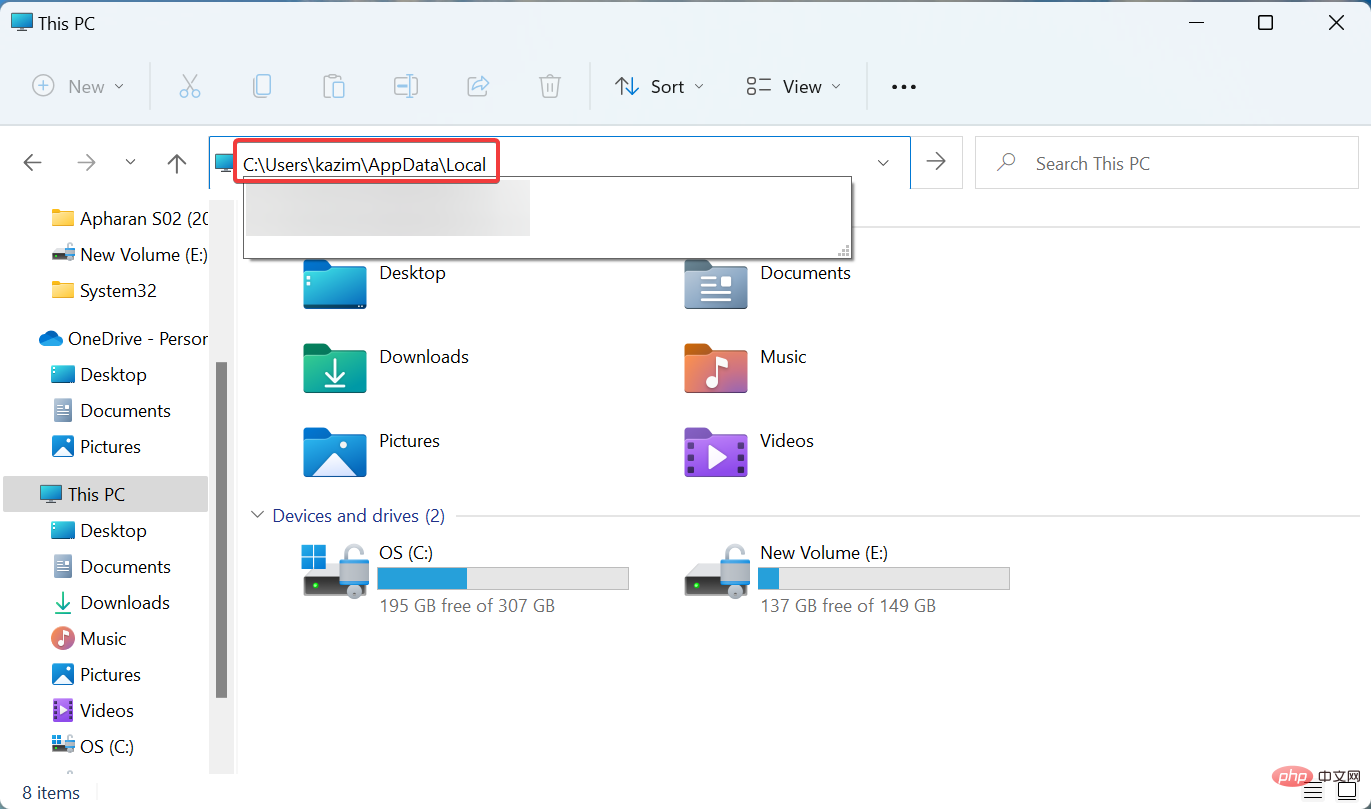
- Press Windows E Launch File Explorer, paste the following path into the address bar, and hit Enter. Just make sure to replace username with your actual user account.
<strong>C:\Users\Username\AppData\Local</strong>
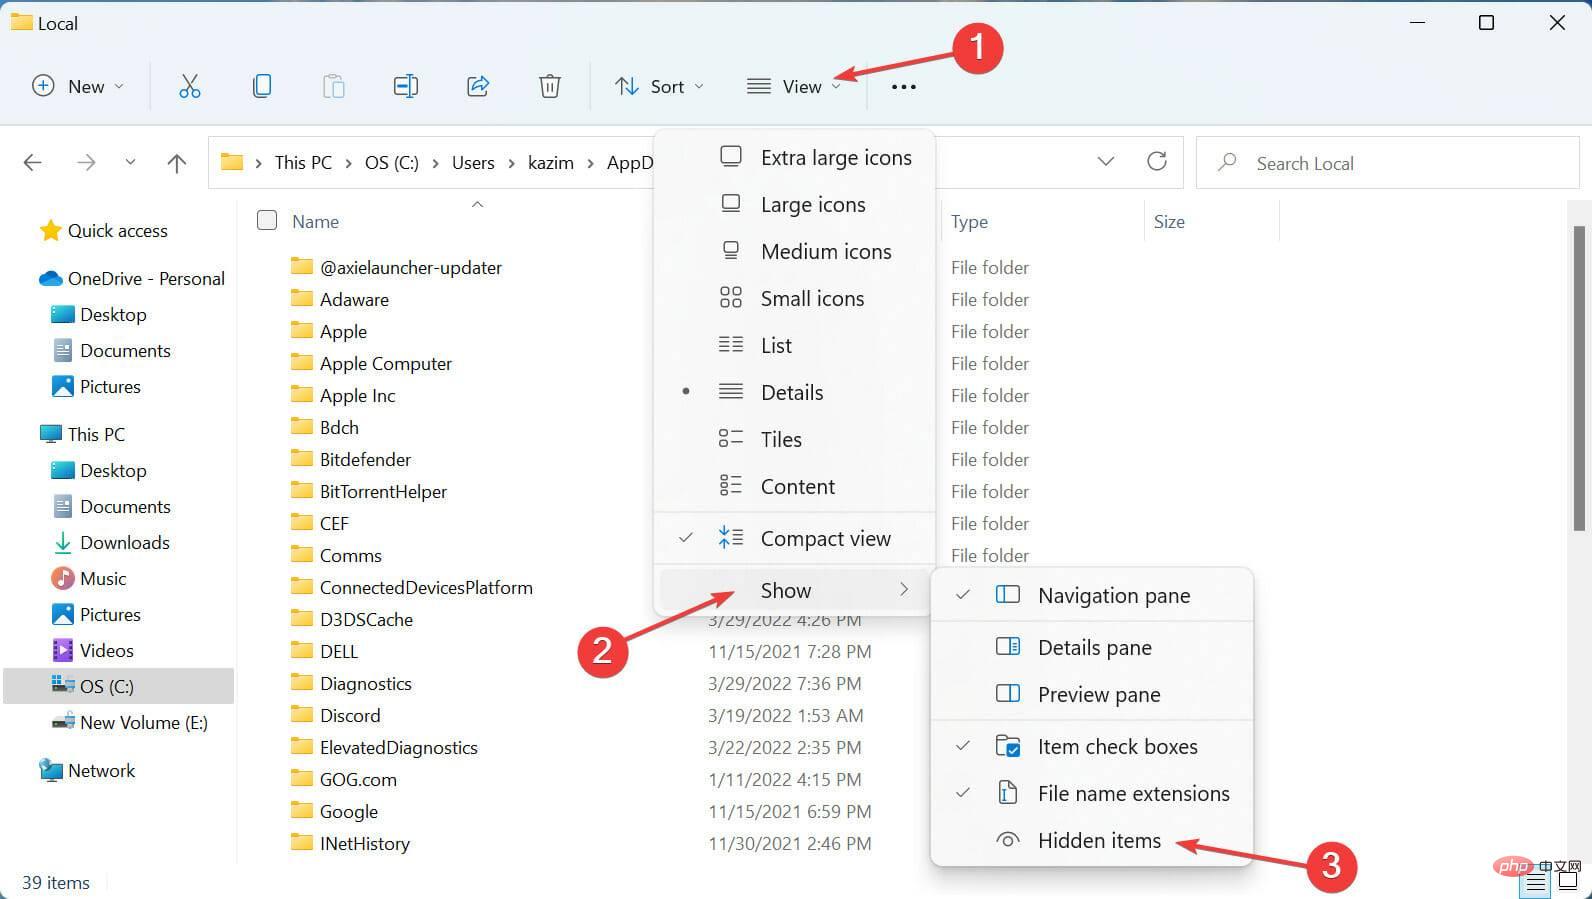
- Now, click on the View menu and hover the cursor over Show , and select Hidden items from the pop-up menu.
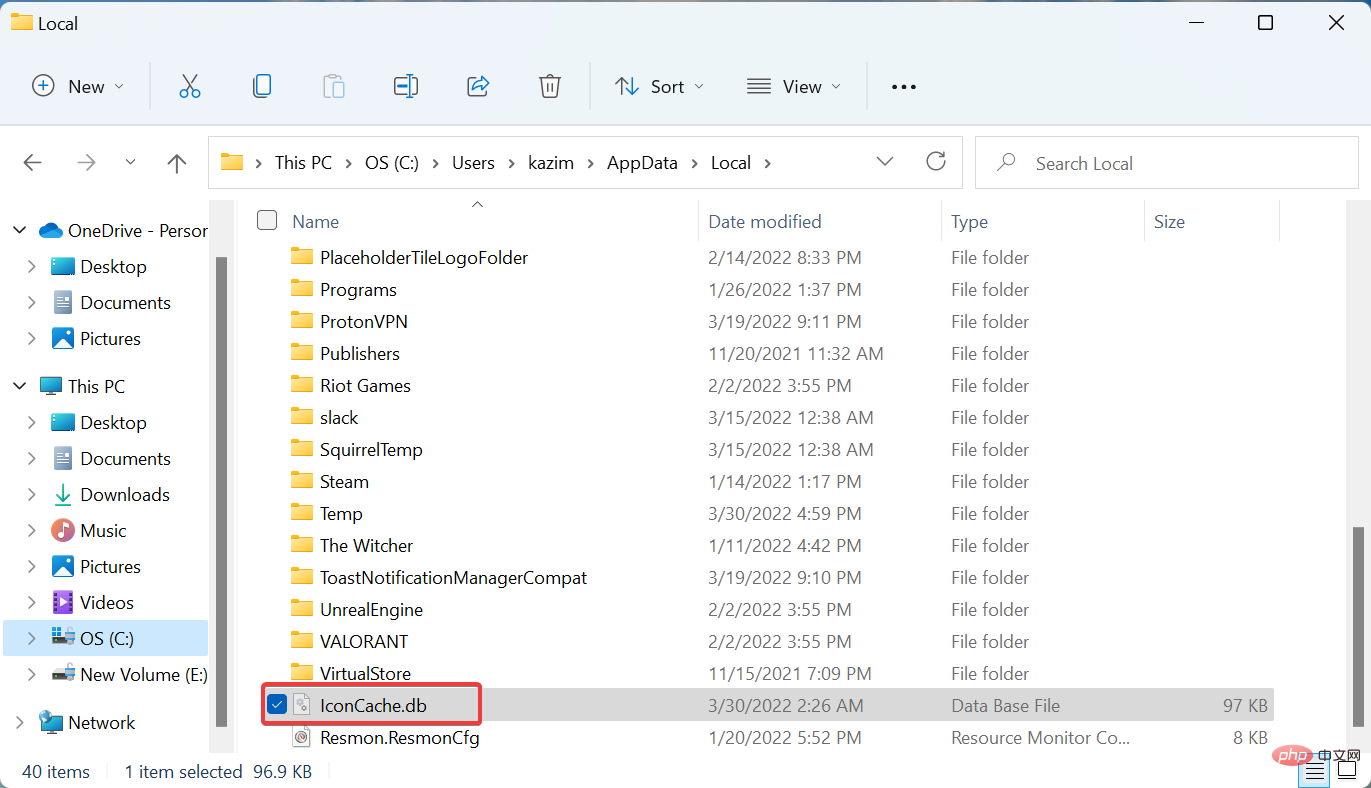
- Select the IconCache.db file and click the Del key.
- Restart your computer for the changes to take full effect.
IconCache.db has a copy of each application icon, and when needed, Windows retrieves it directly from here rather than through the application file. Once you delete the cache file and restart your computer, it will be recreated, which will eliminate any damage.
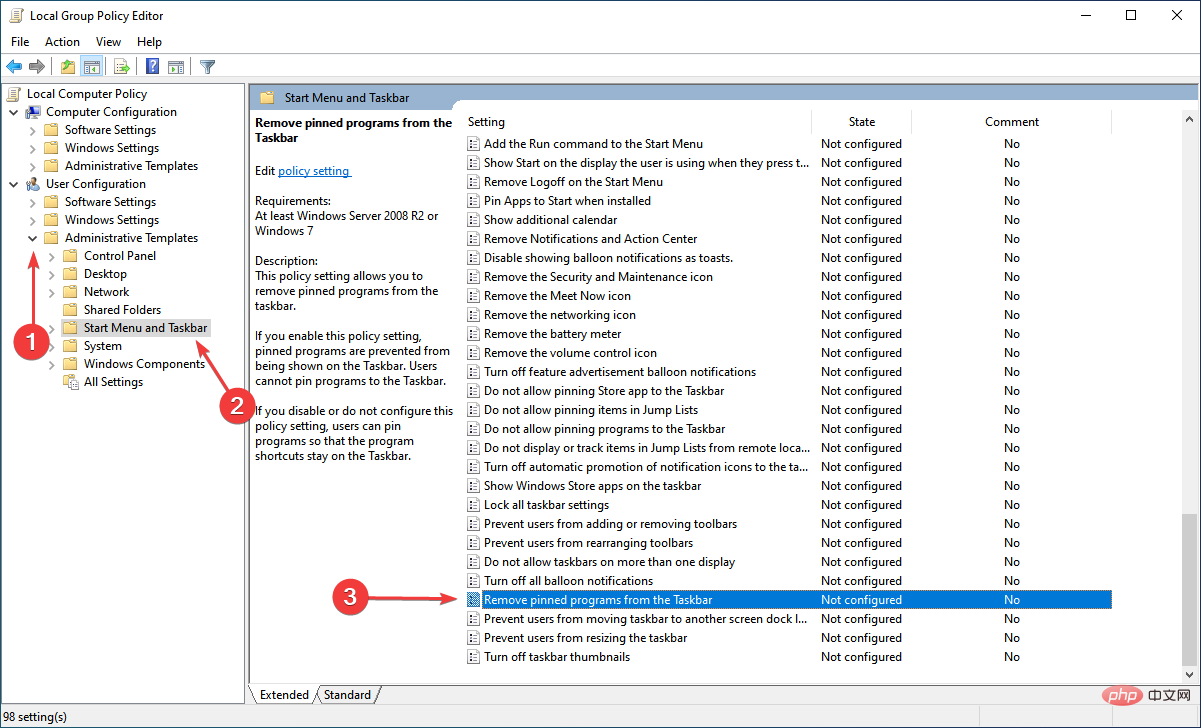
4. Reconfigure the local group policy editor
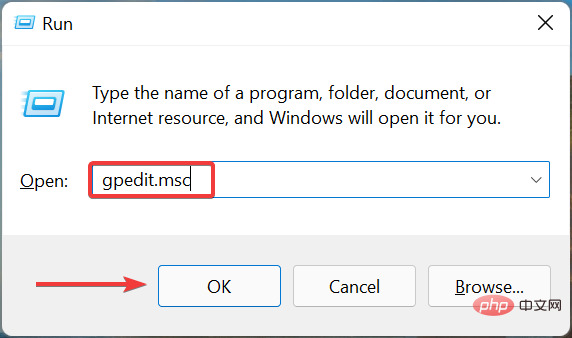
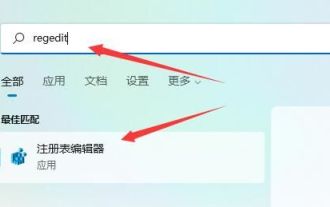
- Press Windows R to start the run command and enter gpedit. msc in the text field and click OK to launch Local Group Policy Editor.
- Next, click Administrative Templates under User Configuration, double-click Start Menu and Taskbar, then double-click on From Taskbar Policy on the right Remove fixed programs.
- Set it to Not Configured and click OK at the bottom to save the changes.
- Restart your computer to apply the changes.

That’s it, now the pinned app or icon not showing up in Windows 11 error should be fixed and you can easily access your favorite apps with a single click.
Also, some users are experiencing the taskbar app disappearing error in Windows 10, so if you have another PC running the previous iteration, the linked tutorial will help you fix it.
The above is the detailed content of Pinned apps not showing up in Windows 11? Ways to fix this problem.. For more information, please follow other related articles on the PHP Chinese website!

Hot AI Tools

Undresser.AI Undress
AI-powered app for creating realistic nude photos

AI Clothes Remover
Online AI tool for removing clothes from photos.

Undress AI Tool
Undress images for free

Clothoff.io
AI clothes remover

Video Face Swap
Swap faces in any video effortlessly with our completely free AI face swap tool!

Hot Article
Hot Tools

Notepad++7.3.1
Easy-to-use and free code editor

SublimeText3 Chinese version
Chinese version, very easy to use

Zend Studio 13.0.1
Powerful PHP integrated development environment

Dreamweaver CS6
Visual web development tools

SublimeText3 Mac version
God-level code editing software (SublimeText3)
Hot Topics
 1389
1389
 52
52

 How to disable taskbar thumbnail preview in Win11? Turn off the taskbar icon display thumbnail technique by moving the mouse
Feb 29, 2024 pm 03:20 PM
How to disable taskbar thumbnail preview in Win11? Turn off the taskbar icon display thumbnail technique by moving the mouse
Feb 29, 2024 pm 03:20 PM
This article will introduce how to turn off the thumbnail function displayed when the mouse moves the taskbar icon in Win11 system. This feature is turned on by default and displays a thumbnail of the application's current window when the user hovers the mouse pointer over an application icon on the taskbar. However, some users may find this feature less useful or disruptive to their experience and want to turn it off. Taskbar thumbnails can be fun, but they can also be distracting or annoying. Considering how often you hover over this area, you may have inadvertently closed important windows a few times. Another drawback is that it uses more system resources, so if you've been looking for a way to be more resource efficient, we'll show you how to disable it. but
 How to solve the problem of Win11 taskbar icon turning black
Jan 02, 2024 pm 04:25 PM
How to solve the problem of Win11 taskbar icon turning black
Jan 02, 2024 pm 04:25 PM
If we find that our taskbar icon has turned black when using win11 system, this may be because we have turned on dark mode. We only need to change it to light mode in the color settings. Here is a guide Get up and sort it out. What to do if win11 displays black taskbar icons: 1. First click on a blank space on the desktop, and then select "Personalization" in the right-click menu 2. Click "Color" on the right side of Personalization 3. Then select the mode and change it 4. After the setting is completed, we will find that our taskbar icon becomes white.
 How to pin the Win11 taskbar
Jan 04, 2024 pm 04:31 PM
How to pin the Win11 taskbar
Jan 04, 2024 pm 04:31 PM
In previous Windows systems, we often used the function of locking the taskbar to avoid misoperation of the taskbar. However, many users found that they could no longer lock the taskbar after updating the win11 system. This is actually because Microsoft has canceled this function. The following is Just follow the editor and take a look. How to lock the taskbar in win11: Answer: Unable to lock. 1. Microsoft has canceled the function of locking the taskbar in the win11 system, so we cannot lock the taskbar now. 2. Generally speaking, we can right-click on the blank space of the taskbar to lock the taskbar. 3. But in win11 system, right-clicking on the blank space of the taskbar only has the taskbar settings option. 4. If we open the taskbar settings, the corresponding taskbar lock cannot be found.
 What should I do if the Win7 taskbar does not display the icon? How to solve the problem of the computer taskbar icon disappearing
Jun 09, 2024 pm 01:49 PM
What should I do if the Win7 taskbar does not display the icon? How to solve the problem of the computer taskbar icon disappearing
Jun 09, 2024 pm 01:49 PM
Recently, many users using Win7 system have found that the icons in the taskbar suddenly disappeared, which makes the operation very inconvenient and they do not know how to solve the problem. This article will introduce to you how to solve the problem of disappearing taskbar icons in Win7 system. Bar! Cause Analysis When encountering such a situation, there are generally two situations: one is that the taskbar on the computer does not really disappear, but is just hidden, and the other is that the taskbar does disappear. Method 1: 1. There is a situation that you need to confirm first, that is, when the mouse is placed at the bottom of the screen, the taskbar will be displayed. You can directly click the mouse on the taskbar and select "Properties". 2. In the dialog box that opens, click & on the "Hide taskbar" option.
 How to reduce the height of the taskbar in win11? Tutorial on resizing the taskbar in Windows 11
Feb 29, 2024 pm 12:37 PM
How to reduce the height of the taskbar in win11? Tutorial on resizing the taskbar in Windows 11
Feb 29, 2024 pm 12:37 PM
When we use win11, we will find that the height of the taskbar is a bit high, which feels a bit unsightly to some users. So how to reduce the height of the win11 taskbar? Users can directly click the Registry Editor under the Start menu, and then find the Advanced folder to operate. Let this site carefully introduce to users how to adjust the taskbar size in Windows 11. How to resize the taskbar in Windows 11 First, we need to open the Registry Editor. You can open the registry editor by clicking the Start menu and entering "regedit" in the search box, or by pressing the Win+R key combination to open the Run function and entering "regedit".
 How to make the Win11 taskbar black? Introduction to how to set the black taskbar in Win11
Apr 22, 2024 pm 06:40 PM
How to make the Win11 taskbar black? Introduction to how to set the black taskbar in Win11
Apr 22, 2024 pm 06:40 PM
Some friends also want the taskbar to turn black after changing the dark wallpaper on their computers, but they don’t know how to do it. Let’s take a look at the specific methods below! 1. Right-click an empty area in the taskbar and select "Taskbar Settings." 2. In the taskbar settings window, find the "Appearance" tab and click it. 3. Under the "Appearance" tab, find the "Taskbar Background" option and click the drop-down menu. 4. Select "Black". 5. Close the "Taskbar Settings" window. Taskbar beautification Xiaozhi Eye Protector is a very easy-to-use win11 transparent taskbar tool. It supports taskbar transparency, taskbar beautification, and multiple styles to beautify the taskbar interface, making your computer interface more beautiful. Xiaozhi Eye Protector Eye Baby (click to download now) Xiaozhi Eye Protection
 How to expand the stacked display of the Win11 taskbar? Tutorial on stacking and expanding the Win11 taskbar
Jan 29, 2024 am 11:33 AM
How to expand the stacked display of the Win11 taskbar? Tutorial on stacking and expanding the Win11 taskbar
Jan 29, 2024 am 11:33 AM
When we use win11 system, we will find that our taskbar windows are merged. Many users don't like this operation very much. So how to expand the win11 taskbar stacking? Users can directly click on the taskbar settings under the right button, and then directly find the taskbar corner overflow option in the right menu to operate. Let this site carefully introduce to users how to expand the win11 taskbar stack. How to expand taskbar stacking in Windows 11 Method 1. 1. Right-click on a blank space on the taskbar and select Taskbar Settings. 3. After clicking the taskbar corner overflow, turn on the switch for the application icon to be displayed. Method two: 1. We need to use a software to achieve this, search, download and install star by ourselves
 How to solve the problem that the win11 taskbar does not respond when clicked/cannot be used
May 09, 2024 pm 06:43 PM
How to solve the problem that the win11 taskbar does not respond when clicked/cannot be used
May 09, 2024 pm 06:43 PM
After upgrading to Windows 11 system, many users encountered the problem that the taskbar cannot be clicked, which has a great impact on life and work. So how to solve it specifically? Let’s take a look below! Method 1 1. First, we press the Ctrl+Shift+Esc shortcut keys on the keyboard to open the Task Manager. 2. Then click File in the upper left corner and select Run New Task. 3. After opening it, enter control and press Enter to enter the control panel. 4. Find the time and area and choose to change the date and time. 5. Change the time to September 4 or later, turn off automatic time synchronization after the setting is completed, and then restart the computer. 6. After restarting, re-enter the time settings and come to the internet time selection.