How to fix Garmin USB devices not being detected or recognized on Windows PC
Garmin is a manufacturer of advanced GPS tracking and navigation equipment, producing high-quality wearable devices for ordinary users. If you are using a Garmin device and cannot connect it to your Windows 11/10 system and are looking for a quick solution, you have just arrived at the right destination. This article is helpful for those users who are unable to establish a connection between their device and Windows computer.
Fix 1 – Try Rebooting the System
Before jumping to the software side of the problem, you should try rebooting the system. So, before you do anything, you should do two things. The first is to restart the computer. A temporary issue or one-off bug may cause this issue.
Before restarting the system, kill all background processes and restart the device. Check if you can connect a Garmin device to your system.
Fix 2 – Use Another USB Port
If restarting your system does not allow you to connect your device to Windows, you must resort to the second hardware-based solution you can try.
1. Simply unplug the Garmin device from the current USB port.
2. Then, plug the device into another port on your computer.
If you are using a Windows PC, you can use the ports on the back of the cabinet.
For laptop users, please plug your Garmin device into a USB 3.0 port (if the device has one).
Check if you can establish a connection between the Garmin and the system.
Fix 3 – Download and Use Garmin Express
If you have recently updated your system, Garmin Express is the tool you need to identify connected Garmin devices on your Windows computer.
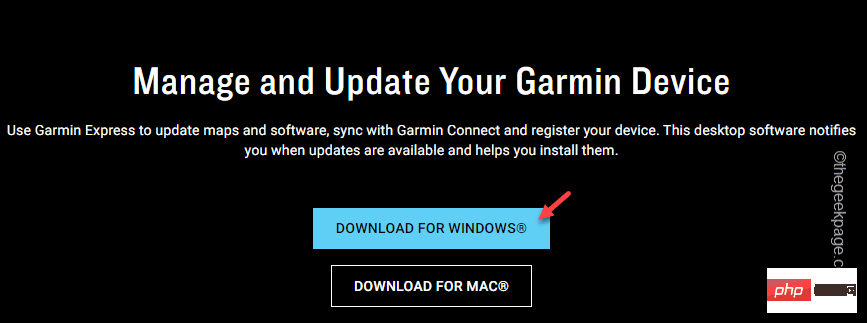
1. Reach the Garmin Express tool.
2. There, click "Download WINDOWS" to download the settings for Garmin Express.
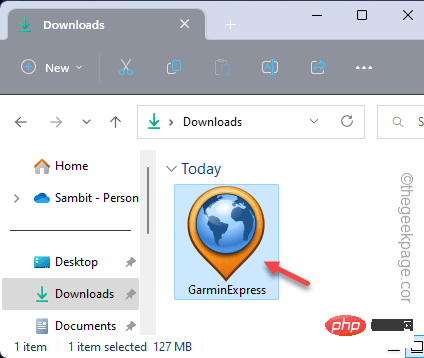
#3. After downloading the installation file, go to the location of the downloaded installer file.
4. Then, double-click the "GarminExpress" setting to start the installation.
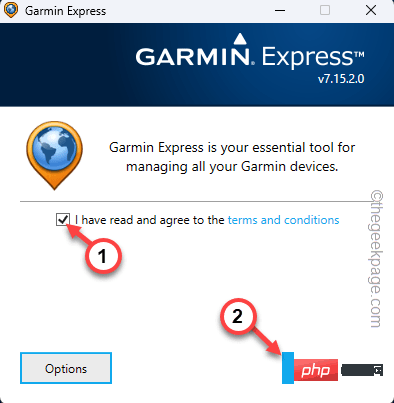
5. Now, on the installer page, check the "I have read and agree to the terms and conditions" box .
6. Then, click "Install" to start installation.
Wait for this installation to complete. This will take 2-3 minutes.
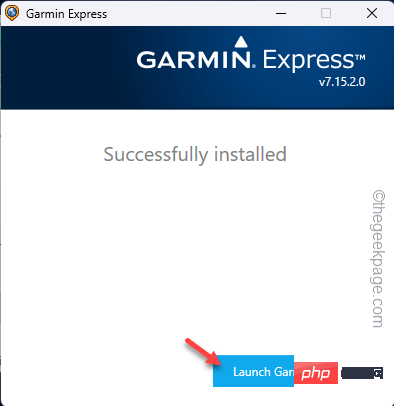
7. Once completed, you will notice the " Installed successfully" message.
8. Then, click "Start Garmin Express" to launch it.
Now, navigate through the Garmin Express setup stages.
9. Click "Get Started" in Garmin Express.
10. Later, click "Add Device" to add a new device.
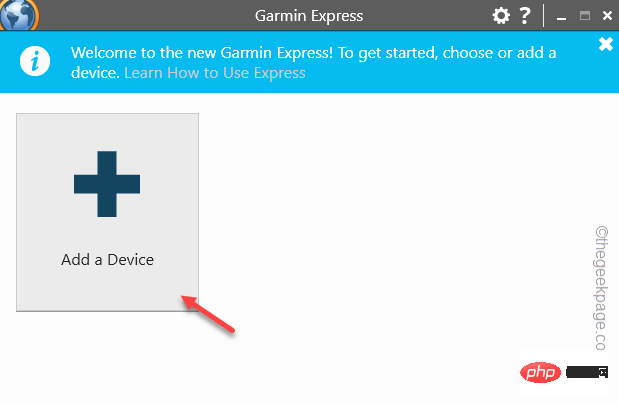
Plug your Garmin device into the system and follow further instructions to register and connect to the system.
In this way, the device will be recognized and the problem will definitely be solved.
Fix 4 – Update USB Driver
If the Universal Serial Bus device driver is not updated to the latest version, your computer may not recognize the Garmin device at all.
1. So, right-click on the Windows icon and click on "Device Manager".
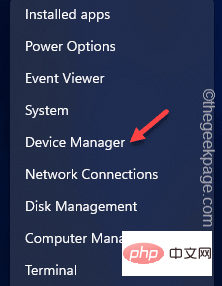
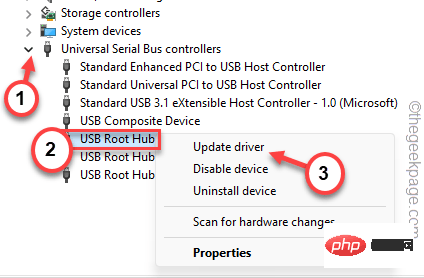
2. Now, expand “Universal Serial Bus Controller”.
3. You can view multiple USB devices with multiple USB root hubs.
4. Now, right-click on the first "USB Root Hub" device and click on "Update Driver".
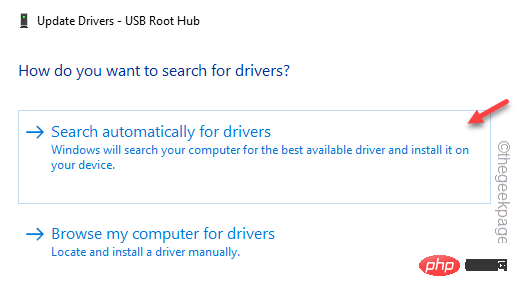
5. Now, click on the “Automatically search for drivers” option and follow the on-screen steps to complete the process.
When finished, return to the Device Manager screen.
6. Follow the same process and update these USB root hub devices simultaneously.
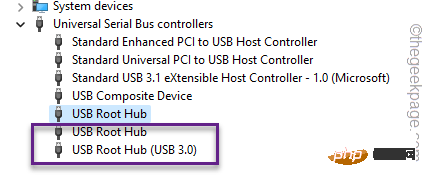
After that, exit Device Manager. You should then restart your computer once.
After the system restarts, when you come back again, plug in your Garmin device and test if you can see the Garmin device on Windows 10/11.
Fix 5 - Download and Update Garmin USB
You can download and use the latest version of the Garmin USB driver software on your computer.
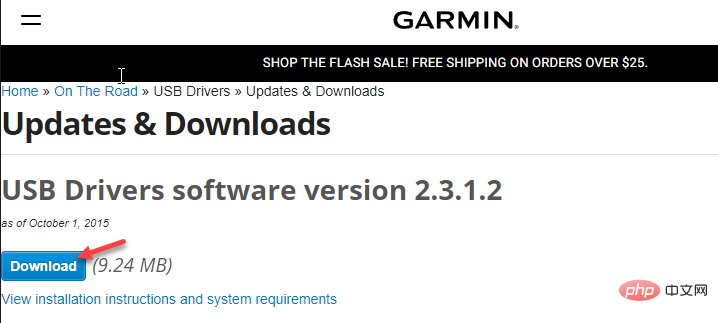
1. Visit the Garmin driver software page.
2. You can view the latest version of the software driver here.
3. So, click "Download" to download the driver.
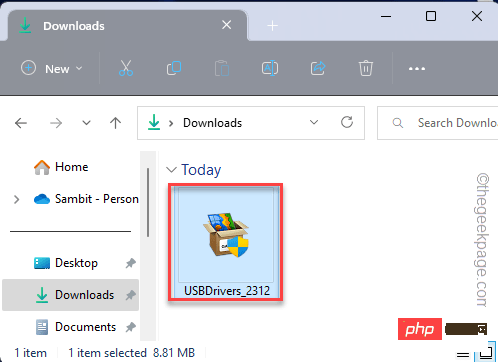
4. Now, just run this downloaded installer file and install the latest driver for the USB device.
Follow the steps shown on the screen to complete the process.
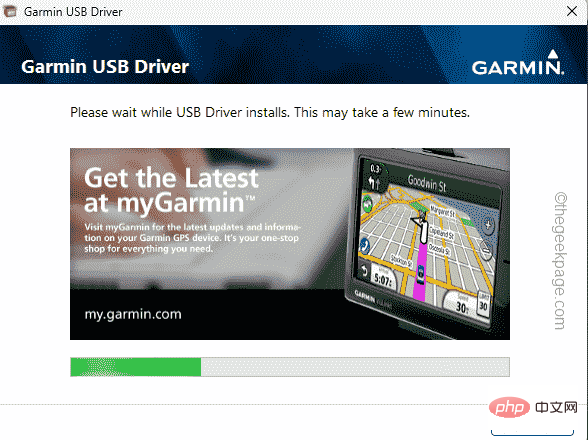
5. When finished, click "Exit" to close the settings screen.
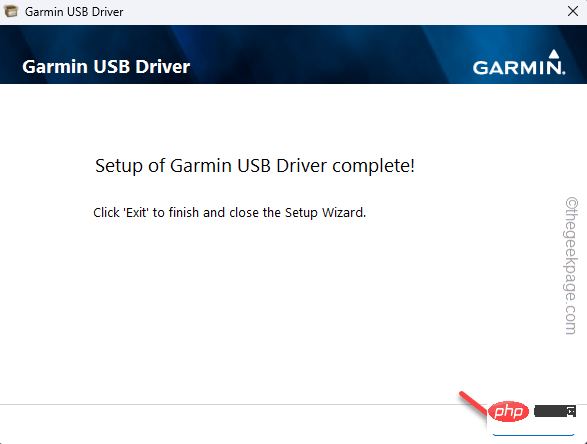
Now test if you can view the Garmin driver on your computer.
You may need to restart your computer once. If this doesn't solve the problem, move on to the next one.
Fix 6 – Change Power Management Settings
Your computer may sometimes turn off USB devices to save power or save battery power. Follow these steps to disable this setting –
1. Simply use the Windows key and X key at the same time.
2. Then, click "Device Manager" from the context menu.

3. After opening the Device Manager utility, click "Universal Serial Bus Controller" once.
3. This way, it will expand to show the full list of drivers.
4. Here you can now right-click on the first "USB Root Hub" device and click on "Properties".
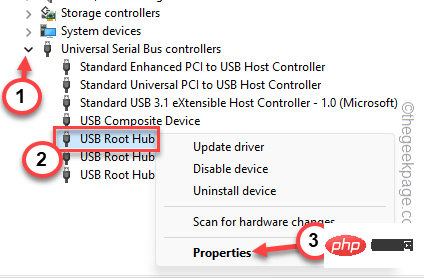
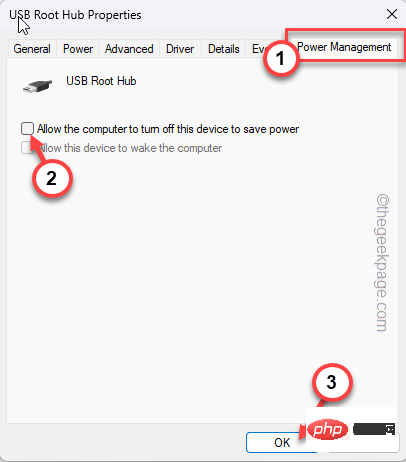
5. Now, go to the “Power Management” tab.
6. Once there, uncheck the "Allow the computer to turn off this device to save power" box.
7. After that, click "OK" to save.
After that, close the Device Manager. Windows will no longer power off Garmin USB devices.
So you can access your device easily.
The above is the detailed content of How to fix Garmin USB devices not being detected or recognized on Windows PC. For more information, please follow other related articles on the PHP Chinese website!

Hot AI Tools

Undresser.AI Undress
AI-powered app for creating realistic nude photos

AI Clothes Remover
Online AI tool for removing clothes from photos.

Undress AI Tool
Undress images for free

Clothoff.io
AI clothes remover

Video Face Swap
Swap faces in any video effortlessly with our completely free AI face swap tool!

Hot Article

Hot Tools

Notepad++7.3.1
Easy-to-use and free code editor

SublimeText3 Chinese version
Chinese version, very easy to use

Zend Studio 13.0.1
Powerful PHP integrated development environment

Dreamweaver CS6
Visual web development tools

SublimeText3 Mac version
God-level code editing software (SublimeText3)

Hot Topics
 What is the reason why PS keeps showing loading?
Apr 06, 2025 pm 06:39 PM
PS "Loading" problems are caused by resource access or processing problems: hard disk reading speed is slow or bad: Use CrystalDiskInfo to check the hard disk health and replace the problematic hard disk. Insufficient memory: Upgrade memory to meet PS's needs for high-resolution images and complex layer processing. Graphics card drivers are outdated or corrupted: Update the drivers to optimize communication between the PS and the graphics card. File paths are too long or file names have special characters: use short paths and avoid special characters. PS's own problem: Reinstall or repair the PS installer.
 How to speed up the loading speed of PS?
Apr 06, 2025 pm 06:27 PM
Solving the problem of slow Photoshop startup requires a multi-pronged approach, including: upgrading hardware (memory, solid-state drive, CPU); uninstalling outdated or incompatible plug-ins; cleaning up system garbage and excessive background programs regularly; closing irrelevant programs with caution; avoiding opening a large number of files during startup.
 How to solve the problem of loading when PS is always showing that it is loading?
Apr 06, 2025 pm 06:30 PM
PS card is "Loading"? Solutions include: checking the computer configuration (memory, hard disk, processor), cleaning hard disk fragmentation, updating the graphics card driver, adjusting PS settings, reinstalling PS, and developing good programming habits.
 Is slow PS loading related to computer configuration?
Apr 06, 2025 pm 06:24 PM
The reason for slow PS loading is the combined impact of hardware (CPU, memory, hard disk, graphics card) and software (system, background program). Solutions include: upgrading hardware (especially replacing solid-state drives), optimizing software (cleaning up system garbage, updating drivers, checking PS settings), and processing PS files. Regular computer maintenance can also help improve PS running speed.
 How to solve the problem of loading when the PS opens the file?
Apr 06, 2025 pm 06:33 PM
"Loading" stuttering occurs when opening a file on PS. The reasons may include: too large or corrupted file, insufficient memory, slow hard disk speed, graphics card driver problems, PS version or plug-in conflicts. The solutions are: check file size and integrity, increase memory, upgrade hard disk, update graphics card driver, uninstall or disable suspicious plug-ins, and reinstall PS. This problem can be effectively solved by gradually checking and making good use of PS performance settings and developing good file management habits.
 Is PS slow loading related to other programs that are running?
Apr 06, 2025 pm 06:03 PM
The secrets to mastering Office software include: understanding different versions and platforms, correctly installing and configuring, proficient in using the software interface, in-depth understanding of feature operations, application collaboration and sharing functions, utilizing templates and styles, mastering advanced skills, and solving common problems. In addition, you need to choose a version that suits your needs, make good use of templates and styles, develop backup habits, and learn shortcut keys and advanced techniques to improve efficiency.
 How to solve the problem of loading when PS is started?
Apr 06, 2025 pm 06:36 PM
A PS stuck on "Loading" when booting can be caused by various reasons: Disable corrupt or conflicting plugins. Delete or rename a corrupted configuration file. Close unnecessary programs or upgrade memory to avoid insufficient memory. Upgrade to a solid-state drive to speed up hard drive reading. Reinstalling PS to repair corrupt system files or installation package issues. View error information during the startup process of error log analysis.
 How to use mysql after installation
Apr 08, 2025 am 11:48 AM
The article introduces the operation of MySQL database. First, you need to install a MySQL client, such as MySQLWorkbench or command line client. 1. Use the mysql-uroot-p command to connect to the server and log in with the root account password; 2. Use CREATEDATABASE to create a database, and USE select a database; 3. Use CREATETABLE to create a table, define fields and data types; 4. Use INSERTINTO to insert data, query data, update data by UPDATE, and delete data by DELETE. Only by mastering these steps, learning to deal with common problems and optimizing database performance can you use MySQL efficiently.


