
 Backend Development
Python Tutorial
How to install and use the third-party module apscheduler in Python?
Backend Development
Python Tutorial
How to install and use the third-party module apscheduler in Python?
How to install and use the third-party module apscheduler in Python?

apscheduler module
Install apscheduler module
pip install apscheduler
apscheduler module introduction
APScheduler( Advanced Python Scheduler) is a lightweight Python scheduled task scheduling framework (Python library).
APScheduler has three built-in scheduling systems, including:
cron-style scheduling (optional start/end time)
Interval-based execution (run the job at even intervals, you can also choose the start/end time)
One-time delayed execution of the task (run the job once at the specified date/time)
Supported backend storage jobs
APScheduler can arbitrarily mix and match the backend of the scheduling system and job storage. Supported backend storage jobs include:
Memory
- ##SQLAlchemy
- MongoDB
- Redis
- RethinkDB
- ZooKeeper
- Triggers (triggers) contain scheduling logic, and each job has its own trigger to determine the next running time. Apart from their own initial configuration, triggers are completely stateless.
- job stores (job storage) store scheduled jobs. The default job store simply saves the job in memory, and other job stores save the job in the database. . When a job is saved to a persistent job store, the job's data is serialized and deserialized on load. Job storage cannot share the scheduler.
- Executors handle the running of jobs. They usually do this by submitting specified callable objects to a thread or process pool in the job. When the job is completed, the executor will notify the scheduler.
- schedulers (Scheduler) Configuring job storage and executors can be done in the scheduler, such as adding, modifying and removing jobs. Different schedulers can be selected according to different application scenarios. There are 7 options available: BlockingScheduler, BackgroundScheduler, AsyncIOScheduler, GeventScheduler, TornadoScheduler, TwistedScheduler, and QtScheduler.
- date: a one-time specified date;
- interval: at a certain time How often to execute within a time range;
- cron: Linux crontab format is compatible and the most powerful.
(datetime|str) – The running date or time of the job
(datetime.tzinfo|str) &ndash ; Specify time zone
Job Storage
If your application will re-create the job every time it is started, then use the default job store (MemoryJobStore), But if you need to retain jobs despite scheduler restarts or application crashes, you should choose a specific job store based on your application environment. For example: use Mongo or SQLAlchemy JobStore (used to support most RDBMS)executor
The choice of executor depends on which of the above frameworks you use, most In this case, using the default ThreadPoolExecutor can already meet the needs. If your application involvesCPU-intensive operations, you may consider using ProcessPoolExecutor to use more CPU cores. You can also use both at the same time, using ProcessPoolExecutor as the second executor.
Choose the right scheduler
- BlockingScheduler: When the scheduler is the only thing running in your application
- BackgroundScheduler : Use when you are not running any other framework and want the scheduler to execute in the background of your app.
- AsyncIOScheduler: Used when your program uses asyncio (an asynchronous framework).
- GeventScheduler: Used when your program uses gevent (a high-performance Python concurrency framework).
- TornadoScheduler: Used when your program is based on Tornado (a web framework).
- TwistedScheduler: Use when your program uses Twisted (an asynchronous framework)
- QtScheduler: If your application is a Qt Can be used when applying.
# -*- coding:utf-8 -*-
from apscheduler.schedulers.blocking import BlockingScheduler
import datetime

def my_job1():
    print('my_job1 is running, Now is %s' % datetime.datetime.now().strftime("%Y-%m-%d %H:%M:%S"))

def my_job2():
    print('my_job2 is running, Now is %s' % datetime.datetime.now().strftime("%Y-%m-%d %H:%M:%S"))

sched = BlockingScheduler()
# 每隔5秒运行一次my_job1
sched.add_job(my_job1, 'interval', seconds=5, id='my_job1')
# 每隔5秒运行一次my_job2
sched.add_job(my_job2, 'cron', second='*/5', id='my_job2')
sched.start()# -*- coding:utf-8 -*-
from apscheduler.schedulers.blocking import BlockingScheduler
import datetime
sched = BlockingScheduler()
# 每隔5秒运行一次my_job1
@sched.scheduled_job('interval', seconds=5, id='my_job1')
def my_job1():
print('my_job1 is running, Now is %s' % datetime.datetime.now().strftime("%Y-%m-%d %H:%M:%S"))
# 每隔5秒运行一次my_job2
@sched.scheduled_job('cron', second='*/5', id='my_job2')
def my_job2():
print('my_job2 is running, Now is %s' % datetime.datetime.now().strftime("%Y-%m-%d %H:%M:%S"))
sched.start()Remove job
No removal job# -*- coding:utf-8 -*-
from apscheduler.schedulers.blocking import BlockingScheduler
import datetime
def my_job(text=""):
print(text, 'my_job1 is running, Now is %s' % datetime.datetime.now().strftime("%Y-%m-%d %H:%M:%S"))
sched = BlockingScheduler()
job = sched.add_job(my_job, 'interval', seconds=2, args=['第一个作业'])
# #如果有多个任务序列的话可以给每个任务设置ID号,可以根据ID号选择清除对象,且remove放到start前才有效
sched.add_job(my_job, 'interval', seconds=2, id='my_job_id', args=['第二个作业'])
sched.start()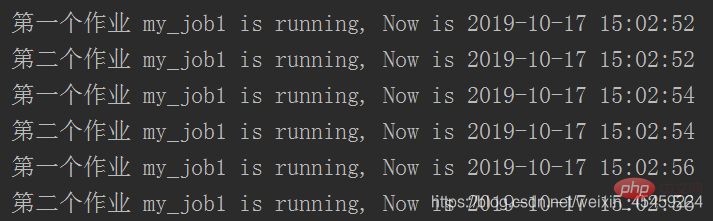
使用remove() 移除作业
# -*- coding:utf-8 -*-
from apscheduler.schedulers.blocking import BlockingScheduler
import datetime

def my_job(text=""):
    print(text, 'my_job1 is running, Now is %s' % datetime.datetime.now().strftime("%Y-%m-%d %H:%M:%S"))

sched = BlockingScheduler()
job = sched.add_job(my_job, 'interval', seconds=2, args=['第一个作业'])
job.remove()
# #如果有多个任务序列的话可以给每个任务设置ID号,可以根据ID号选择清除对象,且remove放到start前才有效
sched.add_job(my_job, 'interval', seconds=2, id='my_job_id', args=['第二个作业'])
sched.start()代码执行结果:

使用remove_job()移除作业
# -*- coding:utf-8 -*-
from apscheduler.schedulers.blocking import BlockingScheduler
import datetime
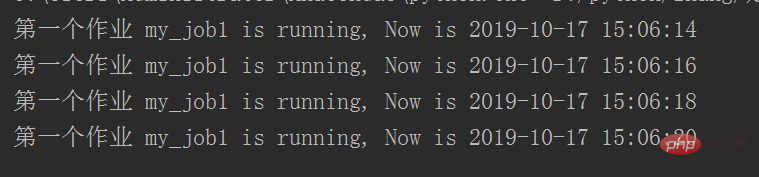
def my_job(text=""):
print(text, 'my_job1 is running, Now is %s' % datetime.datetime.now().strftime("%Y-%m-%d %H:%M:%S"))
sched = BlockingScheduler()
job = sched.add_job(my_job, 'interval', seconds=2, args=['第一个作业'])
# #如果有多个任务序列的话可以给每个任务设置ID号,可以根据ID号选择清除对象,且remove放到start前才有效
sched.add_job(my_job, 'interval', seconds=2, id='my_job_id', args=['第二个作业'])
sched.remove_job('my_job_id')
sched.start()代码执行结果:
触发器类型
APScheduler有3中内置的触发器类型:
新建一个调度器(scheduler);
添加一个调度任务(job store);
运行调度任务。
代码实现
# -*- coding:utf-8 -*-
import time
import datetime
from apscheduler.schedulers.blocking import BlockingScheduler

def my_job(text="默认值"):
    print(text, time.strftime('%Y-%m-%d %H:%M:%S', time.localtime(time.time())))

sched = BlockingScheduler()
sched.add_job(my_job, 'interval', seconds=3, args=['3秒定时'])
# 2018-3-17 00:00:00 执行一次,args传递一个text参数
sched.add_job(my_job, 'date', run_date=datetime.date(2019, 10, 17), args=['根据年月日定时执行'])
# 2018-3-17 13:46:00 执行一次,args传递一个text参数
sched.add_job(my_job, 'date', run_date=datetime.datetime(2019, 10, 17, 14, 10, 0), args=['根据年月日时分秒定时执行'])
# sched.start()
"""
interval 间隔调度,参数如下:
    weeks (int) – 间隔几周
    days (int) – 间隔几天
    hours (int) – 间隔几小时
    minutes (int) – 间隔几分钟
    seconds (int) – 间隔多少秒
    start_date (datetime|str) – 开始日期
    end_date (datetime|str) – 结束日期
    timezone (datetime.tzinfo|str) – 时区
"""
"""
cron参数如下:
    year (int|str) – 年,4位数字
    month (int|str) – 月 (范围1-12)
    day (int|str) – 日 (范围1-31)
    week (int|str) – 周 (范围1-53)
    day_of_week (int|str) – 周内第几天或者星期几 (范围0-6 或者 mon,tue,wed,thu,fri,sat,sun)
    hour (int|str) – 时 (范围0-23)
    minute (int|str) – 分 (范围0-59)
    second (int|str) – 秒 (范围0-59)
    start_date (datetime|str) – 最早开始日期(包含)
    end_date (datetime|str) – 最晚结束时间(包含)
    timezone (datetime.tzinfo|str) – 指定时区
"""
# my_job将会在6,7,8,11,12月的第3个周五的1,2,3点运行
sched.add_job(my_job, 'cron', month='6-8,11-12', day='3rd fri', hour='0-3')
# 截止到2018-12-30 00:00:00,每周一到周五早上五点半运行job_function
sched.add_job(my_job, 'cron', day_of_week='mon-fri', hour=5, minute=30, end_date='2018-12-31')

# 表示2017年3月22日17时19分07秒执行该程序
sched.add_job(my_job, 'cron', year=2017, month=3, day=22, hour=17, minute=19, second=7)

# 表示任务在6,7,8,11,12月份的第三个星期五的00:00,01:00,02:00,03:00 执行该程序
sched.add_job(my_job, 'cron', month='6-8,11-12', day='3rd fri', hour='0-3')

# 表示从星期一到星期五5:30(AM)直到2014-05-30 00:00:00
sched.add_job(my_job, 'cron', day_of_week='mon-fri', hour=5, minute=30, end_date='2014-05-30')

# 表示每5秒执行该程序一次,相当于interval 间隔调度中seconds = 5
sched.add_job(my_job, 'cron', second='*/5', args=['5秒定时'])
sched.start()| cron表达式 | 参数 | 描述 |
|---|---|---|
| * | any | Fire on every value |
| */a | any | Fire every a values, starting from the minimum |
| a-b | any | Fire on any value within the a-b range (a must be smaller than b) |
| a-b/c | any | Fire every c values within the a-b range |
| xth y | day | Fire on the x -th occurrence of weekday y within the month |
| last x | day | Fire on the last occurrence of weekday x within the month |
| last | day | Fire on the last day within the month |
| x,y,z | any | Fire on any matching expression; can combine any number of any of the above expressions |
使用SQLAlchemy作业存储器存放作业
# -*- coding:utf-8 -*-
from apscheduler.schedulers.blocking import BlockingScheduler
from datetime import datetime
import logging
sched = BlockingScheduler()

def my_job():
    print('my_job is running, Now is %s' % datetime.now().strftime("%Y-%m-%d %H:%M:%S"))

# 使用sqlalchemy作业存储器
# 根据自己电脑安装的库选择用什么连接 ,如pymysql   其中:scrapy表示数据库的名称,操作数据库之前应创建对应的数据库
url = 'mysql+pymysql://root:123456@localhost:3306/scrapy?charset=utf8'
sched.add_jobstore('sqlalchemy', url=url)
# 添加作业
sched.add_job(my_job, 'interval', id='myjob', seconds=5)

log = logging.getLogger('apscheduler.executors.default')
log.setLevel(logging.INFO)  # DEBUG
# 设定日志格式
fmt = logging.Formatter('%(levelname)s:%(name)s:%(message)s')
h = logging.StreamHandler()
h.setFormatter(fmt)
log.addHandler(h)

sched.start()暂停和恢复作业
# 暂停作业:
apsched.job.Job.pause()
apsched.schedulers.base.BaseScheduler.pause_job()
# 恢复作业:
apsched.job.Job.resume()
apsched.schedulers.base.BaseScheduler.resume_job()
获得job列表
get_jobs(),它会返回所有的job实例;
使用print_jobs()来输出所有格式化的作业列表;
get_job(job_id=“任务ID”)获取指定任务的作业列表。
代码实现:
# -*- coding:utf-8 -*-
from apscheduler.schedulers.blocking import BlockingScheduler
import datetime

def my_job(text=""):
    print(text, 'my_job1 is running, Now is %s' % datetime.datetime.now().strftime("%Y-%m-%d %H:%M:%S"))

sched = BlockingScheduler()

job = sched.add_job(my_job, 'interval', seconds=2, args=['第一个作业'])
sched.add_job(my_job, 'interval', seconds=2, id='my_job_id', args=['第二个作业'])

print(sched.get_jobs())

print(sched.get_job(job_id="my_job_id"))

sched.print_jobs()
sched.start()关闭调度器
默认情况下调度器会等待所有正在运行的作业完成后,关闭所有的调度器和作业存储。如果你不想等待,可以将wait选项设置为False。
sched.shutdown()
sched.shutdown(wait=False)
The above is the detailed content of How to install and use the third-party module apscheduler in Python?. For more information, please follow other related articles on the PHP Chinese website!

Hot AI Tools

Undresser.AI Undress
AI-powered app for creating realistic nude photos

AI Clothes Remover
Online AI tool for removing clothes from photos.

Undress AI Tool
Undress images for free

Clothoff.io
AI clothes remover

AI Hentai Generator
Generate AI Hentai for free.

Hot Article
Hot Tools

Notepad++7.3.1
Easy-to-use and free code editor

SublimeText3 Chinese version
Chinese version, very easy to use

Zend Studio 13.0.1
Powerful PHP integrated development environment

Dreamweaver CS6
Visual web development tools

SublimeText3 Mac version
God-level code editing software (SublimeText3)
Hot Topics


 Can the Python interpreter be deleted in Linux system?
Apr 02, 2025 am 07:00 AM
Can the Python interpreter be deleted in Linux system?
Apr 02, 2025 am 07:00 AM
Regarding the problem of removing the Python interpreter that comes with Linux systems, many Linux distributions will preinstall the Python interpreter when installed, and it does not use the package manager...
 How to solve the problem of Pylance type detection of custom decorators in Python?
Apr 02, 2025 am 06:42 AM
How to solve the problem of Pylance type detection of custom decorators in Python?
Apr 02, 2025 am 06:42 AM
Pylance type detection problem solution when using custom decorator In Python programming, decorator is a powerful tool that can be used to add rows...
 Python asyncio Telnet connection is disconnected immediately: How to solve server-side blocking problem?
Apr 02, 2025 am 06:30 AM
Python asyncio Telnet connection is disconnected immediately: How to solve server-side blocking problem?
Apr 02, 2025 am 06:30 AM
About Pythonasyncio...
 How to solve permission issues when using python --version command in Linux terminal?
Apr 02, 2025 am 06:36 AM
How to solve permission issues when using python --version command in Linux terminal?
Apr 02, 2025 am 06:36 AM
Using python in Linux terminal...
 Python 3.6 loading pickle file error ModuleNotFoundError: What should I do if I load pickle file '__builtin__'?
Apr 02, 2025 am 06:27 AM
Python 3.6 loading pickle file error ModuleNotFoundError: What should I do if I load pickle file '__builtin__'?
Apr 02, 2025 am 06:27 AM
Loading pickle file in Python 3.6 environment error: ModuleNotFoundError:Nomodulenamed...
 Do FastAPI and aiohttp share the same global event loop?
Apr 02, 2025 am 06:12 AM
Do FastAPI and aiohttp share the same global event loop?
Apr 02, 2025 am 06:12 AM
Compatibility issues between Python asynchronous libraries In Python, asynchronous programming has become the process of high concurrency and I/O...
 What should I do if the '__builtin__' module is not found when loading the Pickle file in Python 3.6?
Apr 02, 2025 am 07:12 AM
What should I do if the '__builtin__' module is not found when loading the Pickle file in Python 3.6?
Apr 02, 2025 am 07:12 AM
Error loading Pickle file in Python 3.6 environment: ModuleNotFoundError:Nomodulenamed...
 How to ensure that the child process also terminates after killing the parent process via signal in Python?
Apr 02, 2025 am 06:39 AM
How to ensure that the child process also terminates after killing the parent process via signal in Python?
Apr 02, 2025 am 06:39 AM
The problem and solution of the child process continuing to run when using signals to kill the parent process. In Python programming, after killing the parent process through signals, the child process still...
