How to connect and use a second monitor on Mac
If one screen isn't enough to display everything you need at once, consider getting a second screen. Here's how to manage multiple screens in macOS.
Many people get a lot done on their Mac, but they don't necessarily see the full picture. Due to the numerous applications required for the task, more pixels are required to play.
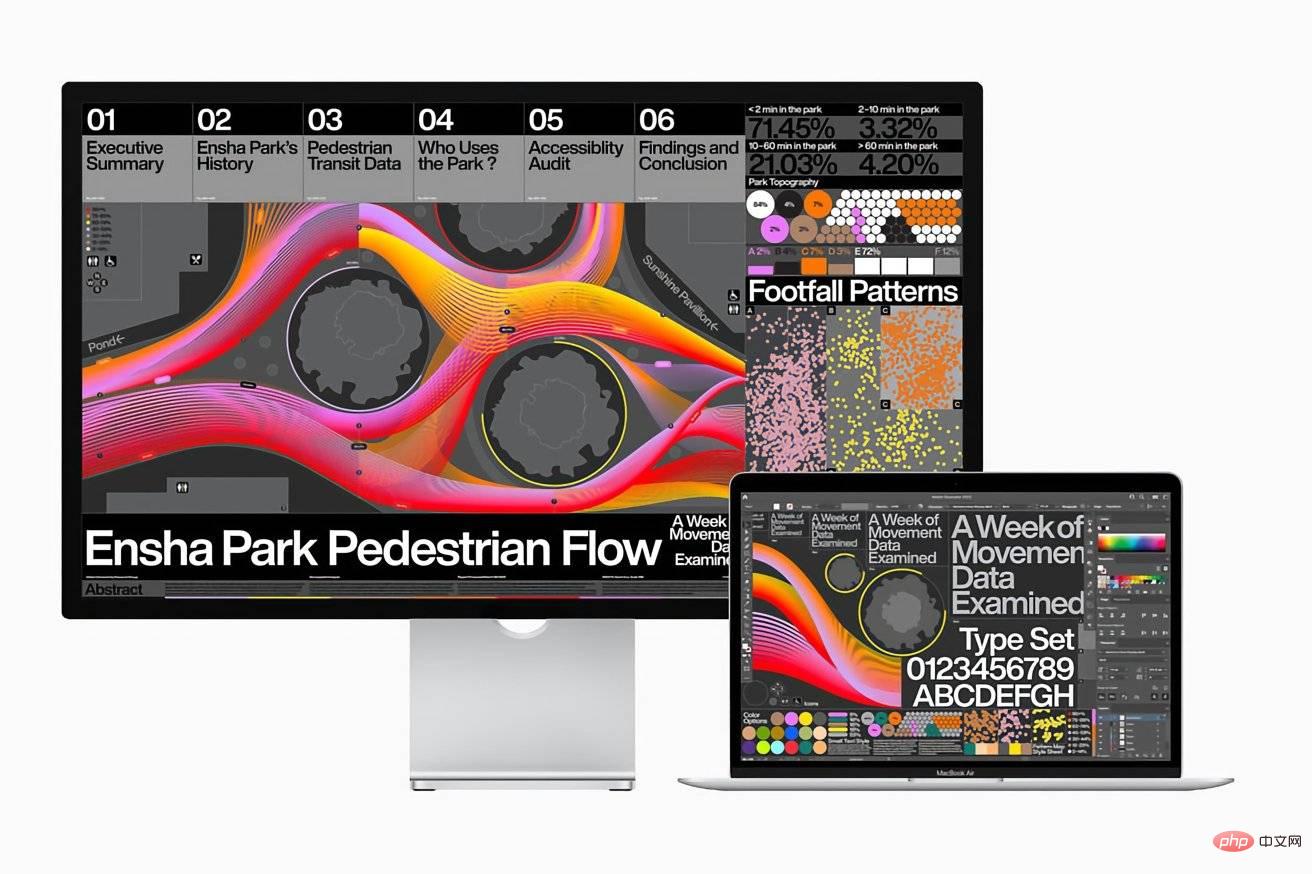
However, the desktop space of a large screen with 4K resolution, 5K Studio Display or even 6K Pro Display XDR may not be enough to meet your needs. After moving apps around the display too many times, it becomes tempting to physically expand your digital workspace to a second screen.
Why two or more screens?
In addition to simply giving you more pixels to work with, using a multi-screen computing setup offers additional productivity bonuses.
You can divide applications between screens more clearly. From a productivity perspective, you can place secondary apps on peripheral screens while keeping the main display of your primary tools clear.
For example, when using Photoshop on the home screen, an artist may decide to use the side screen as a source image for inspiration. Video editors can dedicate the monitor to showing the footage they are actively editing, for example for color grading.
It can also be as simple as dedicating one screen to all your social and communication apps so they don't get in the way while you're focusing. Or, have an app on that side screen that you're constantly monitoring so it's always available without having to open it every time.
You also don’t have to mount the monitor in landscape orientation, which provides other benefits. Take our editorial team as an example, some people use secondary monitors in portrait orientation so they can more easily read documents without scrolling too much. Depending on your intended task, using two or more screens will almost certainly help.
How many screens can your Mac handle?
While you can dream of having multiple screens at your desk and pretending to work at the "market" at your desk, or being able to play and watch multiple YouTube videos at the same time, not everyone can do that. a little.
Squeezing so many screens onto a desk isn't just a matter of finances or physical practicality. This may just be a limitation of your Mac.
Some Macs can only handle one external 6K screen. Others could use more.
To find out how many displays you can connect to your Mac, check Apple's product listings or the company's support page for a spec sheet. Depending on the model, you may have an HDMI port available, or you may end up using DisplayPort 1.4 in Thunderbolt 3 to connect the monitor.
Apple Silicon models with the M1 chip can handle two displays on the Mac mini, including a 6K display via Thunderbolt and a 4K screen via HDMI. Both the M1 13-inch MacBook Pro and MacBook Air can handle a single 6K external display, as well as built-in versions.
The M1 Pro in the 14-inch MacBook Pro is capable of managing two 6K external displays, and the M1 Max increases that number to three. Finally, the M1 Ultra in Mac Studio is capable of handling up to four 6K screens over USB-C and one 4K display over HDMI.
Setup
The first step is to connect the monitor to your Mac. This is relatively simple as you just plug the monitor's cable into the relevant port on your Mac.
If there are port differences, such as needing to use HDMI with a monitor but not being able to connect on your Mac, you can use an adapter. There are many available on the market for changing your video connection, but other multi-port dongles and docking stations can provide the same functionality with additional ports.
Once physically connected, your Mac should automatically detect the presence of the monitor.
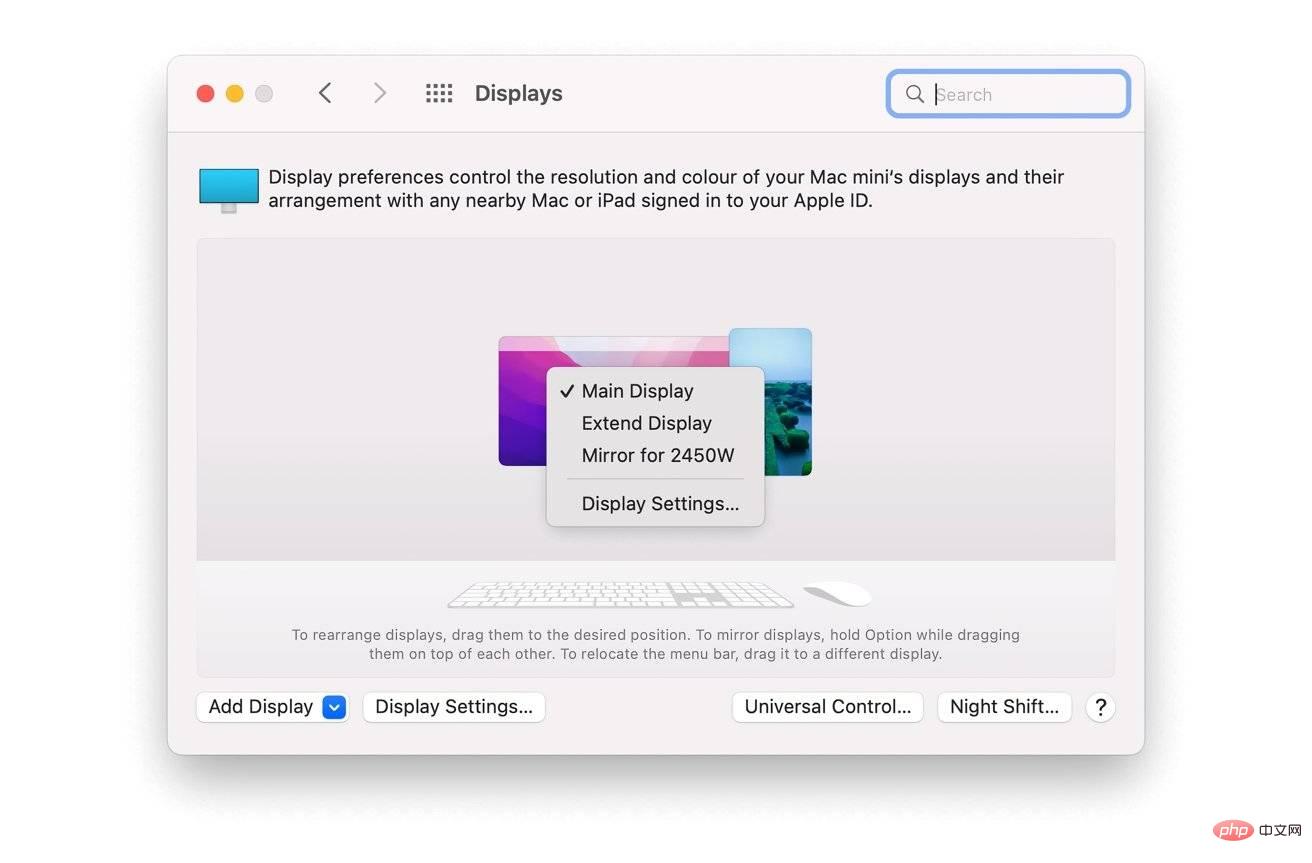
After placing and connecting the hardware, the next step is to configure macOS. This is all done in the same Displays menu, accessible by clicking on the Apple icon, System Preferences, and Displays in the menu.
At this point, macOS should show all monitors connected to your Mac. If not, hold down Option to reveal the Detect Displays button and click it.
Depending on your needs, you may need to notify macOS that you are going to mirror or extend the display.
 You can change the resolution and whether to expand or mirror the display in Display Settings.
 How to mirror or extend your display in macOS
- Click the Apple icon in the menu, then click System Preferences, then clickDisplays.
- Click to display settings.
- Click the name of the monitor you want to adjust from the left column.
- Click the drop-down menu for "Use as " and select the desired function.
- Extend Display will increase your workspace so that it stretches across the display.
- Selecting Mirror For using the name of the other screen will cause macOS to display the same image on both monitors.
- Alternatively, in the Display window, right-click the screen whose properties you want to change and select Extended Display or Mirror .
When you have multiple monitors, macOS will try to keep the original primary monitor, which refers to the screen where new applications will load and usually be the focus of your attention. You may need to change this if you are adding a new, larger monitor to your setup.
How to set a second monitor as your primary monitor in macOS
- Click the Apple icon in the menu, then clickSystem Preferences and click Displays.
- Right-click on the display you want to be the main display and select Main Display.
- Alternatively, drag the white bar in the current primary monitor to the location you want to be the primary monitor.
- Alternatively, click Display Settings, select Monitor, and then select Main Display under Use as.
Fine-Tune Settings
The Displays menu offers many options to make your second screen use even more optimized.
First, you can drag the screen locations in the Display window roughly to where they would be in real life, so you can move your cursor from one screen to the other more seamlessly.
This is not accurate because macOS knows the resolution but not the physical size of the display. Scaling may not be accurate for each monitor.
 The Display window in System Preferences lets you reposition your monitor to reflect real life.
 Clicking Display Settings will give you more options for managing your new display. If you're adding a 4K or higher screen to your arrangement, you may want to select Scale under Resolution and then select a lower resolution.
Doing this will make the desktop easier to read without straining your eyes.
Another key element here is rotation, use this if you have your monitor mounted in vertical orientation. Choose 90 degrees or 270 degrees for a vertical layout on a specific screen, but you can also choose to use 180 degrees if your monitor is in landscape but upside down.
 You might consider rotating your second monitor, macOS has a setting for that.
 You may also need to adjust the color profile as users may have different monitors when viewed side by side, such as monitors with warmer color temperatures.
What about Sidecar and Universal Control?
While you can connect a second monitor or backup TV to your Mac, Apple does offer options for expanding your digital workspace without requiring an additional dedicated screen. If you have an iPad nearby, Sidecar and Universal Control offer additional options, but in different ways.
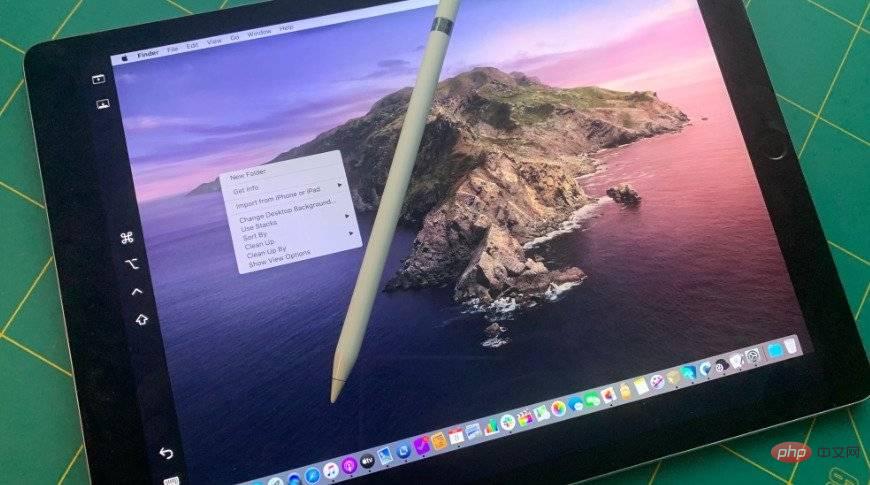
First of all, Sidecar is a mode that turns your iPad into a secondary display, like an extension of your Mac desktop. It's more than just a display, as there's some further interactivity available if you have an Apple Pencil, but you can control the same mirroring options and other settings in the Displays window.
 Sidecar enables the iPad to function as a secondary display for your Mac.
 Universal Control is a new feature for macOS and iPadOS that expands your workspace in different ways. Instead of using your iPad purely as a monitor, you can control your iPad with your Mac's keyboard, mouse, and trackpad.
This means you can access and manage apps on your iPad from the comfort of your Mac, but without treating it as an integral part of your typical Mac setup.
If you’re a MacBook Pro user who travels frequently or occasionally needs more desk space, these two models are worth looking into. They effectively give you a way to use your iPad as an additional workspace on the go without having to carry a second, dedicated monitor.
The above is the detailed content of How to connect and use a second monitor on Mac. For more information, please follow other related articles on the PHP Chinese website!

Hot AI Tools

Undresser.AI Undress
AI-powered app for creating realistic nude photos

AI Clothes Remover
Online AI tool for removing clothes from photos.

Undress AI Tool
Undress images for free

Clothoff.io
AI clothes remover

Video Face Swap
Swap faces in any video effortlessly with our completely free AI face swap tool!

Hot Article

Hot Tools

Notepad++7.3.1
Easy-to-use and free code editor

SublimeText3 Chinese version
Chinese version, very easy to use

Zend Studio 13.0.1
Powerful PHP integrated development environment

Dreamweaver CS6
Visual web development tools

SublimeText3 Mac version
God-level code editing software (SublimeText3)

Hot Topics
 1386
1386
 52
52
 SANC launches 23.8-inch G52 Plus monitor: 2K native 180Hz FastIPS, 799 yuan
Jul 29, 2024 pm 09:57 PM
According to news from this site on July 29, SANC launched a G52 monitor in December last year, with a 23.8-inch 2K180Hz, with a starting price of 798 yuan. Now it has launched a G52Plus monitor, with a starting price of 799 yuan. Compared with the G52, the color gamut and brightness are slightly smaller. promote. This monitor still uses a 23.8-inch Fast panel with 2560*1440 resolution, 180Hz refresh rate, brightness increased to 350 nits, 10bit color depth, 1msGTG response time, 100% sRGB/97%DCI-P3 color gamut, G-Sync compatible. This website noticed that this monitor has also been upgraded with a lifting and rotating bracket, and the design is more low-key. It is also equipped with an under-screen night light and supports Owl
 Discover ways to solve ghosting problems on HP monitors (How to eliminate ghosting on HP monitors)
Aug 08, 2024 am 01:11 AM
As a common computer peripheral, HP monitors will inevitably have some problems. One of them is the ghosting problem. When we use HP monitors, blur, ghosting or lag appears on the screen, which will not only affect our visual experience, but also reduce our work efficiency. How should we solve this problem? Understand the phenomenon of ghosting - Ghosting is when a copy of an object or text appears on the monitor screen, causing the image to be blurred or overlapping. -Ghosting issues can be caused by a variety of factors, such as monitor aging, signal transmission issues, etc. Check the connecting cables - Check that the cables connecting the computer and monitor are intact. - Make sure the connection cable is appropriately tight and not loose or broken. Adjust resolution and refresh rate - in operating system settings
 KTC '25GR950' 24.5-inch monitor is now available: 1080P 180Hz Fast IPS, 579 yuan
Aug 19, 2024 pm 10:45 PM
According to news from this website on August 19, KTC launched a 24.5-inch monitor with model number "25GR950" on JD.com today. This monitor features "1080P180Hz" and the initial price is 579 yuan. As of the time of publication of this website, the machine has not yet been displayed. Specific sales time. According to reports, this monitor uses a 1920x1080 resolution 180Hz panel, a response speed of 1ms, a static contrast ratio of 1000:1, a brightness of 350 nits, supports 8-Bit color, and covers 99% sRGB and 95% DCI-P3 color gamut. This monitor stand supports tilting, and the monitor body supports VESA100x100mm wall mounting. It provides 1 DP1.4 interface, 2 HDMI2.0 interfaces, and 1 3.
 Apple iPhone 16 is no longer pre-installed with Apple Intelligence
Jul 30, 2024 pm 01:18 PM
According to industry insider Mark Gurman, Apple’s Apple Intelligence will be postponed to October. In other words, it will be pushed first on iOS18.1. Apple iPhone 16 is expected to be released in September, so Apple Intelligence will not be pre-installed. 1. Apple Intelligence Apple Intelligence is a personal intelligence system that uses a powerful generative model to provide new functions for iPhone, iPad and Mac to assist users in communicating, working and expressing. 2. Natural language understanding The large model embedded in Apple Intelligence has a deep understanding of the meaning of language.
 AOC launches 'U24P10R' 23.8-inch monitor: 4K 60Hz + 90W PD USB-C, 1699 yuan
Aug 16, 2024 am 07:34 AM
According to news from this site on August 15, AOC launched a 23.8-inch monitor model "U24P10R" on JD.com today. This monitor features "4K60Hz + 90WPD USB-C" and is currently on sale, with an initial price of 1,699 yuan. According to reports, this monitor is equipped with a 3840x2160 resolution 60Hz IPS panel, a brightness of 400 nits, a response speed of 4ms, a static contrast ratio of 1300:1, supports 10-Bit color, and covers 100% sRGB and 95% DCI-P3 color gamut. In addition, this monitor stand supports tilt/lift/rotate/tilt, the monitor body supports 100x100mm VESA wall mounting, and provides 2 HDMI2.0 interfaces and 1 DP1
 AOC 'Q24B35' 23.8-inch monitor is now available: 2K 120Hz, 749 yuan
Aug 17, 2024 pm 07:44 PM
According to news from this site on August 17, AOC launched a 23.8-inch monitor with the model number "Q24B35" in its JD flagship store today. This monitor features "2K120Hz", but it is currently out of stock. The product page shows that the price of the monitor is 749 yuan. According to reports, this monitor uses a 2560x1440 resolution 120Hz IPS panel, a brightness of 250 nits, a static contrast ratio of 1300:1, a response speed of 4ms, and supports 8-Bit color. In addition, the monitor stand supports tilt/lift/rotate/tilt, the main body supports VESA100x100mm wall mounting, and provides 1 HDMI2.0 interface and 1 DP1.4 interface. This site organizes the currently known monitor parameter information as follows:
 MSI showcases MAG 321CUPDF: the world's first curved dual-mode monitor, supporting 4K 160Hz / 1080P 320Hz
Aug 23, 2024 am 11:17 AM
According to news from this website on August 23, MSI attended the Cologne Games Show in Germany and showed off the new MAG321CUPDF monitor, claiming to be the world's first curved dual-mode monitor. MSI initially showed the details of the monitor at the 2024 Taipei International Computer Show held in June this year, but the model at the time was MPG321CUPF, but now the official model and series have been adjusted, and it is now called MAG321CUPDF. The MAG321CUPDF display is 31.5 inches in size and supports a 160Hz refresh rate at 4K (3840x2160) resolution and a 320Hz refresh rate at 1080P resolution. Users can switch to high resolution or high refresh rate according to needs. MAG321CUPD
 180Hz WQHD Rapid VA panel, MSI launches MAG 275CQPF curved monitor
Aug 07, 2024 pm 08:18 PM
According to news from this site on August 7, based on reports from foreign media GdM and DisplaySpecifications, MSI launched the MAG275CQPF curved screen monitor on the 5th of this month. MAG275CQPF is equipped with a 27-inch 1500R curvature RapidVA panel with a resolution of 2560×1440 (aspect ratio 16:9), a refresh rate of 180Hz, a GtG response time as low as 0.5ms, and supports Adaptive-Sync adaptive synchronization and HDR. The display has a typical brightness of 300 nits, a static contrast ratio of 5000:1, and a dynamic contrast ratio of 100000000:1. It supports 8 dithers and 10 color depths, and the color gamut covers 136% sRGB, 94


