

Wireless display installation fails in Windows 11: 4 simple tips

Wireless display represents a technology that allows you to project photos, movies, and web content. And any type of media, from a compatible mobile device or computer to another.
Even though it should always work under the right conditions, Windows 11 users are reporting that some wireless display installations fail. This is how they describe the problem in the Microsoft forums:
I installed Windows 11 Pro Version Dev (OS Build 21996.1) on a ProBook 6470b and it shows an error when wirelessly projecting to this PC , and the installation failed when installing the optional feature of wireless display.
Fortunately, there are many ways to easily solve this annoying problem. After all, you already know how Windows 11 compares to Windows 10, and there's no turning back.
We have selected the best options, so be sure to read this article in full to discover which option is best for you.
Important Things to Consider Before Installing a Wireless Monitor
Installing a wireless monitor is always helpful and can actually clear away clutter on your desk. As well as eliminating the wear and tear issues associated with cable connections.
However, your device must have the key component to install, connect, and use a wireless display: Miracast technology.
What is Miracast and what does it do?
Miracast is a standard designed by the Wi-Fi Alliance that allows content to be mirrored wirelessly from a compatible PC. Or smartphone, tablet screen to TV or monitor.
It is often called HDMI over Wi-Fi because it is wireless and can replace all known HDMI cables.
Make sure your device is compatible with Miracast
If you want to project your screen to a wireless display, your device and screen must be Miracast-compatible with the wireless broadcast technology.
To see if your device is compatible with Miracast, go to Settings and click System in the left pane, then select Projection from the right pane Go to this PC option.
If you see a screen like the one below, the message This device does not support receiving Miracast, so you cannot cast to it wirelessly, means your device does not have this capability.
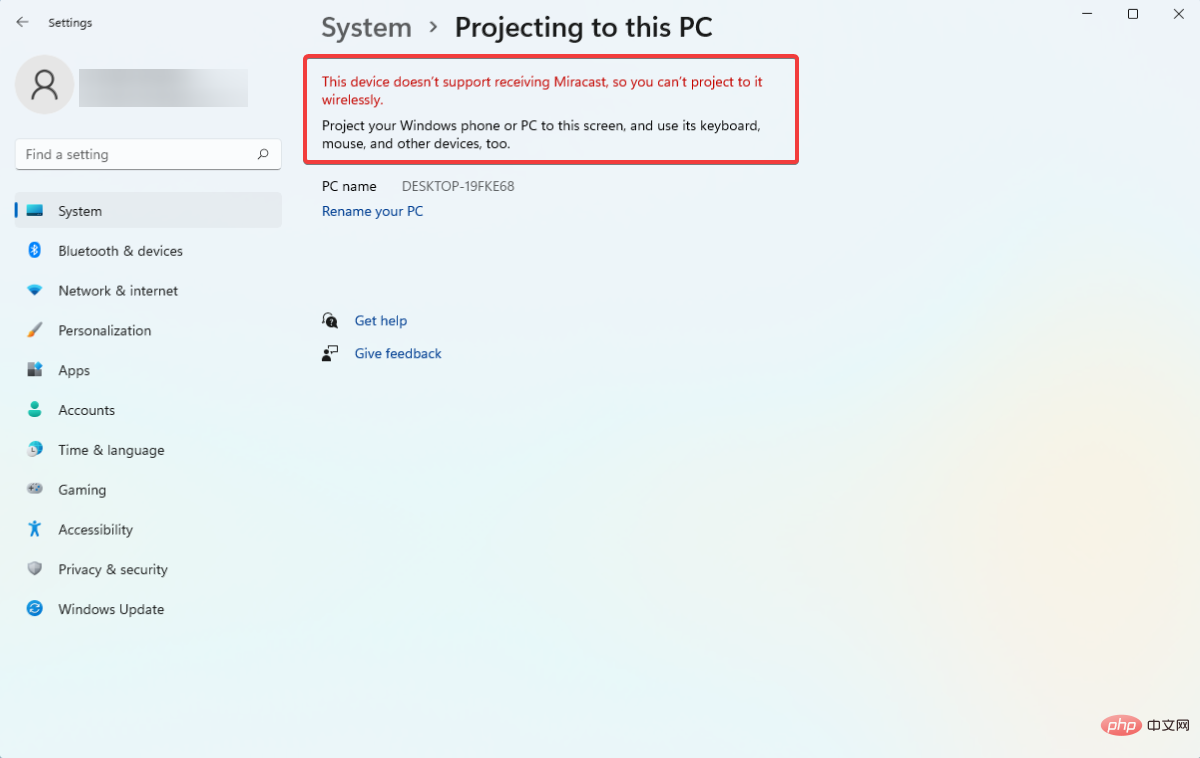
The fact that your device does not have Miracast capabilities may prevent you from installing a wireless display, so you should still check this.
If your device doesn't have this feature, you can always buy a separate Miracast dongle, connect it to your device and use it, but make sure the monitor is also Miracast-compatible.
With that said, let’s jump into the list of solutions and note that they will also fix the wireless monitor installation failure issue in Windows 10.
What should I do if the wireless display installation fails?
1. Connect to the Internet
In addition to Windows 11 not running on a device without Internet access, on a In some cases, users forget to connect to the Internet before attempting to perform the installation. This should be the fastest and easiest way to install the wireless monitor add-on feature.
If you are having trouble trying to connect to a network in Windows 11, check out the linked article to learn how to fix it. After this, Windows 11 wireless display not working issue will be resolved.
Therefore, we strongly recommend trying to connect to it and then reload the process. However, if the first option doesn't work, continue reading this tutorial.
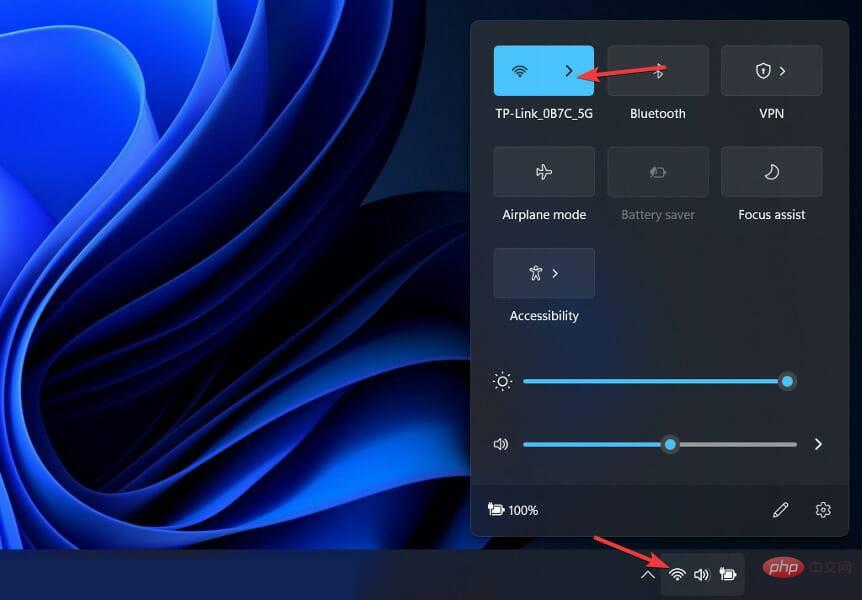
2. Try different internet resources
If the first solution fails, it could still be a random error and poor internet connection the reason. The second thing is to try connecting to a different Internet source.
As you can see, the first two options only take a few seconds to fix, and they can help you make sure everything is ready for your wireless monitor installation.
3. Turn off metered connections
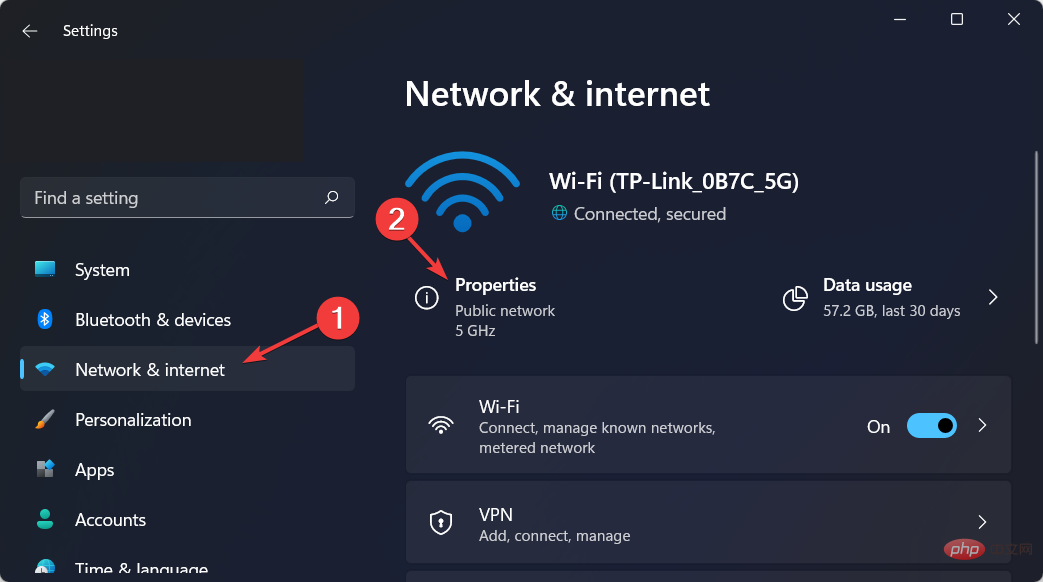
- Hold the and keys to open Settings, then go to Network and Internet and click on Properties. WindowsI

- Scroll down and click the toggle button to set MeteredConnection to Off .
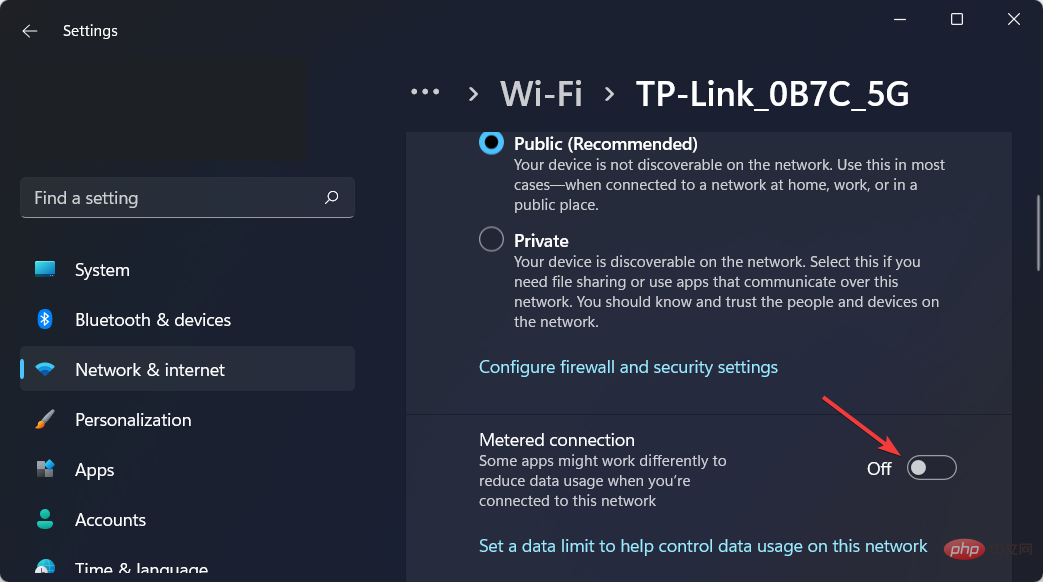
After you complete this, try installing the wireless display again to see if it works now.
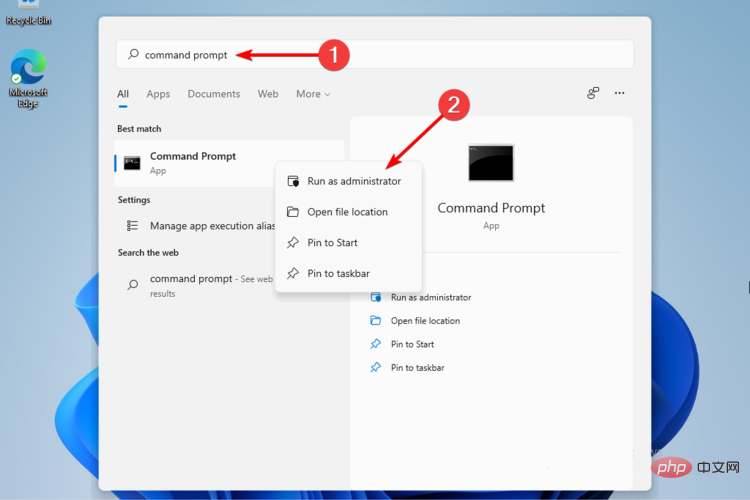
4. Using Command Prompt
- click the magnifying glass icon and type cmd in the search bar to right click on the top result and select Run as administrator.
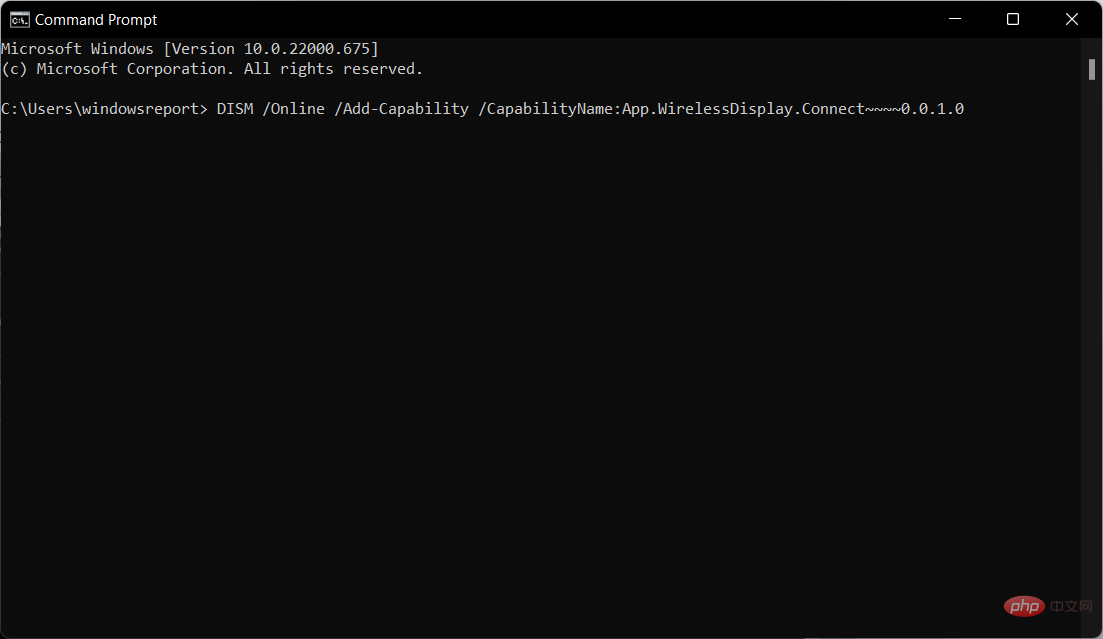
- In the pop-up window, type the following command and press Enter:
<strong>DISM /Online /Add-Capability /CapabilityName:App.WirelessDisplay.Connect~ ~~~0.0.1.0</strong>
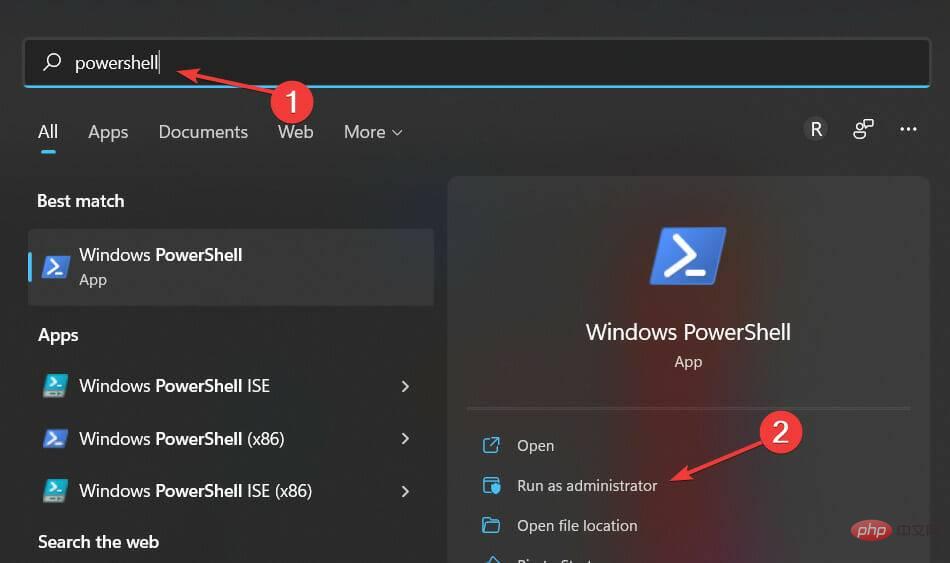
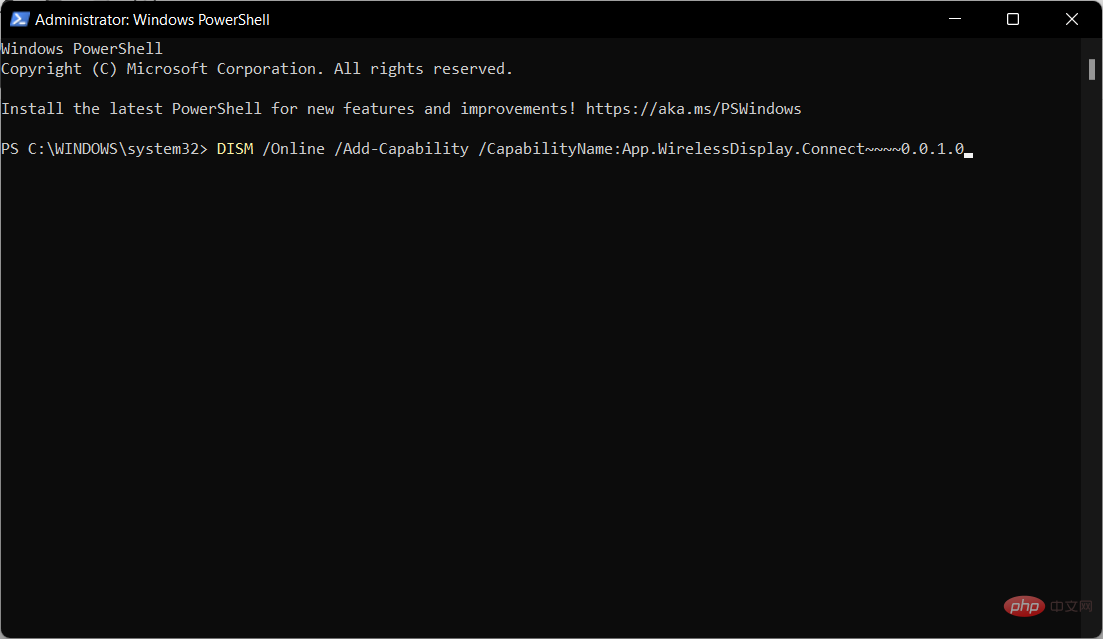
- Click the magnifying glass icon and enter PowerShell, then select Run as administrator on the right.
- In the pop-up window, type the following command the same as above and press Enter:
<strong>DISM /Online /Add-Capability /CapabilityName:App .WirelessDisplay.Connect~~~~0.0.1.0</strong>
So if your wireless display installation fails, these are the most valuable options. As you can see, they're not complicated, so you don't have to be an expert to complete them quickly.
For those interested in learning more about the design of the latest operating system version, we recommend checking out our post on the 15+ new features you should know about Windows 11.
Or, check out the best security and privacy features in Windows 11 and learn how this operating system version handles your data.
The above is the detailed content of Wireless display installation fails in Windows 11: 4 simple tips. For more information, please follow other related articles on the PHP Chinese website!

Hot AI Tools

Undresser.AI Undress
AI-powered app for creating realistic nude photos

AI Clothes Remover
Online AI tool for removing clothes from photos.

Undress AI Tool
Undress images for free

Clothoff.io
AI clothes remover

AI Hentai Generator
Generate AI Hentai for free.

Hot Article
Hot Tools

Notepad++7.3.1
Easy-to-use and free code editor

SublimeText3 Chinese version
Chinese version, very easy to use

Zend Studio 13.0.1
Powerful PHP integrated development environment

Dreamweaver CS6
Visual web development tools

SublimeText3 Mac version
God-level code editing software (SublimeText3)
Hot Topics


 How to fine-tune deepseek locally
Feb 19, 2025 pm 05:21 PM
How to fine-tune deepseek locally
Feb 19, 2025 pm 05:21 PM
Local fine-tuning of DeepSeek class models faces the challenge of insufficient computing resources and expertise. To address these challenges, the following strategies can be adopted: Model quantization: convert model parameters into low-precision integers, reducing memory footprint. Use smaller models: Select a pretrained model with smaller parameters for easier local fine-tuning. Data selection and preprocessing: Select high-quality data and perform appropriate preprocessing to avoid poor data quality affecting model effectiveness. Batch training: For large data sets, load data in batches for training to avoid memory overflow. Acceleration with GPU: Use independent graphics cards to accelerate the training process and shorten the training time.
 deepseek image generation tutorial
Feb 19, 2025 pm 04:15 PM
deepseek image generation tutorial
Feb 19, 2025 pm 04:15 PM
DeepSeek: A powerful AI image generation tool! DeepSeek itself is not an image generation tool, but its powerful core technology provides underlying support for many AI painting tools. Want to know how to use DeepSeek to generate images indirectly? Please continue reading! Generate images with DeepSeek-based AI tools: The following steps will guide you to use these tools: Launch the AI Painting Tool: Search and open a DeepSeek-based AI Painting Tool (for example, search "Simple AI"). Select the drawing mode: select "AI Drawing" or similar function, and select the image type according to your needs, such as "Anime Avatar", "Landscape"
 Pi Node Teaching: What is a Pi Node? How to install and set up Pi Node?
Mar 05, 2025 pm 05:57 PM
Pi Node Teaching: What is a Pi Node? How to install and set up Pi Node?
Mar 05, 2025 pm 05:57 PM
Detailed explanation and installation guide for PiNetwork nodes This article will introduce the PiNetwork ecosystem in detail - Pi nodes, a key role in the PiNetwork ecosystem, and provide complete steps for installation and configuration. After the launch of the PiNetwork blockchain test network, Pi nodes have become an important part of many pioneers actively participating in the testing, preparing for the upcoming main network release. If you don’t know PiNetwork yet, please refer to what is Picoin? What is the price for listing? Pi usage, mining and security analysis. What is PiNetwork? The PiNetwork project started in 2019 and owns its exclusive cryptocurrency Pi Coin. The project aims to create a one that everyone can participate
 binance official website URL Binance official website entrance latest genuine entrance
Dec 16, 2024 pm 06:15 PM
binance official website URL Binance official website entrance latest genuine entrance
Dec 16, 2024 pm 06:15 PM
This article focuses on the latest genuine entrances to Binance’s official website, including Binance Global’s official website, the US official website and the Academy’s official website. In addition, the article also provides detailed access steps, including using a trusted device, entering the correct URL, double-checking the website interface, verifying the website certificate, contacting customer support, etc., to ensure safe and reliable access to the Binance platform.
 How to ask deepseek
Feb 19, 2025 pm 04:39 PM
How to ask deepseek
Feb 19, 2025 pm 04:39 PM
The search accuracy of DeepSeek depends on the way of asking questions. To achieve ideal results, the question should contain the following key elements: Clear topic: Specific specified information objectives. Specific angles: Cut into the topic from a specific perspective. Expected output form: define the desired result type (summary, analysis, list, etc.).
 How to download deepseek
Feb 19, 2025 pm 05:45 PM
How to download deepseek
Feb 19, 2025 pm 05:45 PM
Make sure to access official website downloads and carefully check the domain name and website design. After downloading, scan the file. Read the protocol during installation and avoid the system disk when installing. Test the function and contact customer service to solve the problem. Update the version regularly to ensure the security and stability of the software.
 How to use deepseek
Feb 19, 2025 pm 04:45 PM
How to use deepseek
Feb 19, 2025 pm 04:45 PM
DeepSeek is an efficient data search and analysis tool with an indexing mechanism at its core. Factors that affect their efficiency include: data type, data size, search strategy, and DeepSeek performance. High-quality data, refined search queries and sufficient computing resources are essential to optimize search results.
 How to adjust Sesame Open Exchange into Chinese
Mar 04, 2025 pm 11:51 PM
How to adjust Sesame Open Exchange into Chinese
Mar 04, 2025 pm 11:51 PM
How to adjust Sesame Open Exchange to Chinese? This tutorial covers detailed steps on computers and Android mobile phones, from preliminary preparation to operational processes, and then to solving common problems, helping you easily switch the Sesame Open Exchange interface to Chinese and quickly get started with the trading platform.