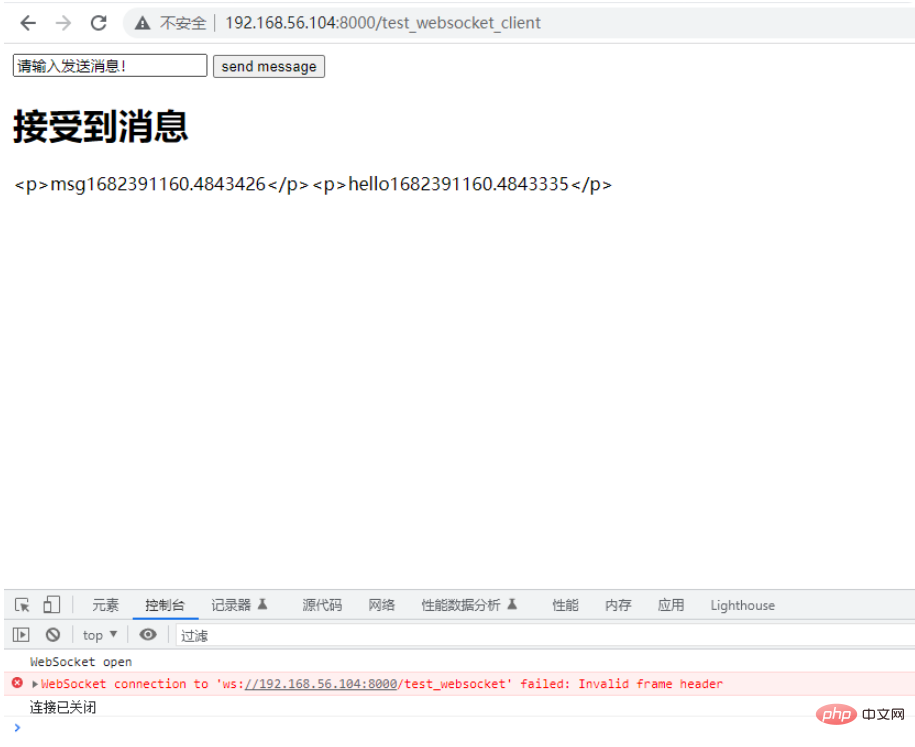
When executing a scheduled task, we need to know the execution percentage or real-time data return. The method that can be used at this time is
1. Ajax requests the back-end server, and then the front-end page is partially rendered to obtain the percentage
2. Use webscoket for long connection communication and refresh
Ajax usage method uses the interval function to implement timing requests. This time there will be no explanation here.
Add the following content to the views.py file
from django.shortcuts import render,HttpResponse
from dwebsocket.decorators import accept_websocket
import time,random
import uuid
import json
@accept_websocket
def test_websocket(request):
cnt=1
if request.is_websocket():
while True:
messages = {
'time': time.strftime('%Y.%m.%d %H:%M:%S', time.localtime(time.time())),
'server_msg': 'hello%s'%time.time(),
'client_msg': 'msg%s'%time.time()
}
time.sleep(1)
cnt+=1
if cnt<=10:
request.websocket.send(json.dumps(messages))
else:
break
def test_websocket_client(request):
return render(request,'websocket_client.html',locals())Settings.py file adds dwebsocket
INSTALLED_APPS = [
'django.contrib.admin',
'django.contrib.auth',
'django. contrib.contenttypes',
'django.contrib.sessions',
'django.contrib.messages',
'django.contrib.staticfiles',
'dwebsocket'
]
Add relevant links to the urls.py file
urlpatterns = [
    path('test_websocket', views.test_websocket, name='test_websocket'),
    path('test_websocket_client', views.test_websocket_client, name='test_websocket_client'),
]Directly upload the html code
<!DOCTYPE html>
<html lang="en">
<head>
<meta charset="UTF-8">
<title>dwebsocket实践</title>
<script src="http://code.jquery.com/jquery-1.11.1.min.js"></script>
<script type="text/javascript">
$(function () {
// $('#send_message').click(
// function() {
var socket = new WebSocket("ws://" + window.location.host + "/test_websocket");
socket.onopen = function () {
console.log('WebSocket open');//成功连接上Websocket
// socket.send($('#message').val());//发送数据到服务端
};
socket.onmessage = function (e) {
// console.log('message: ' + e.data);//打印服务端返回的数据
$('#messagecontainer').text('<p>' + JSON.parse(e.data).client_msg + '</p>'+'<p>' + JSON.parse(e.data).server_msg + '</p>');
// $('#messagecontainer').text('<p>' + JSON.parse(e.data).server_msg + '</p>');
};
socket.onclose=function () {
console.log("连接已关闭")
}
// });
});
</script>
</head>
<body>
<input type="text" id="message" value="请输入发送消息!" />
<button type="button" id="send_message">send message</button>
<h2>接受到消息</h2>
<div id="messagecontainer">
</div>
</body>
</html>Then we run the program

Disconnect after ten seconds and get the results we want
If you have business needs, you can modify our logic in our test_websocket and render based on the returned results
The above is the detailed content of How to use dwebsocket in Python to achieve real-time refresh of back-end data. For more information, please follow other related articles on the PHP Chinese website!


