

How to publish springboot project using docker-compose image

Introduction
The Docker-Compose project is Docker’s official open source project, responsible for the rapid orchestration of Docker container clusters. Compose allows users to define a set of associated application containers as a project through a separate docker-compose.yml template file (YAML format). The Docker-Compose project is written in Python and calls the API provided by the Docker service to manage containers. Therefore, as long as the platform you are operating on supports the Docker API, you can use Compose for orchestration management.
Docker-Compose divides the managed containers into three layers, namely project, service and container. All files in the Docker-Compose running directory (docker-compose.yml, extends files or environment variable files, etc.) form a project. If there is no special specification, the project name is the current directory name. A project can contain multiple services, and each service defines the image, parameters, and dependencies for the container to run. A service can include multiple container instances. Docker-Compose does not solve the problem of load balancing, so other tools are needed to achieve service discovery and load balancing.
The default project configuration file of Docker-Compose is docker-compose.yml. The configuration file can be customized through the environment variable COMPOSE_FILE or the -f parameter, which defines multiple dependent services and the operation of each service. container.
Using a Dockerfile template file allows users to easily define a separate application container. At work, we often encounter situations where multiple containers need to cooperate with each other to complete a certain task. For example, to implement a Web project, in addition to the Web service container itself, it is often necessary to add a back-end database service container and even a load balancing container.
Commonly used commands
docker-compose
Introduction
The function of Compose is to "define and run applications of multiple Docker containers". Using Compose, you can configure your application's services in a configuration file (yaml format), and then use a single command to create and start all services referenced in the configuration.
Two important concepts in Compose:
• Service (service): An application container can actually include several container instances running the same image.
• Project: A complete business unit consisting of a set of associated application containers, defined in the docker-compose.yml file.
docker compose installation steps
Download and install through GitHub link Non-ROOT users remember to add sudo
sudo curl -L "https://github.com/docker/compose/releases/download/1.25.5/docker-compose-$(uname -s)-$(uname -m)" -o /usr/local/bin/docker-compose
Give the binary download file executable permissions
sudo chmod +x /usr/local/bin/docker-compose
Verification Whether to install
docker-compose --version
Uninstall
If it is installed as a binary package, just delete the binary file
rm /usr/local/bin/docker-compose
Directory structure
compose
	docker-compose.yml
	eureka
		Dockerfile
		eureka-server-2.0.2.RELEASE.jar
	user
		Dockerfile
		user-2.0.2.RELEASE.jar
	power
		Dockerfile
		power-2.0.2.RELEASE.jar
Example
Compose The use is very simple, you only need to write a docker-compose.yml, and then use the docker-compose command to operate. docker-compose.yml describes the configuration of the container, and the docker-compose command describes the operation of the container.
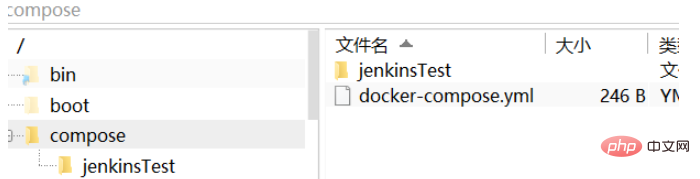
1. We use a microservice project to make a simple example first. First, create a compose working directory, then create a jenkinsTest folder, put the executable jar package in it and write a Dockerfile file. The directory structure is as follows:
jenkins stores the jar package uploaded for testing
docker-compose.yml
version: '3.1'  #这里要指定docker-compose对应的docker版本
services:
  jenkinstest:             #指定服务名
    #image: jenkinstest  #指定镜像名称 小写不然会报错
    build: ./jenkinsTest   #指定Dockfile所在路径
    ports:
      - 8099:8099   #指定端口映射
    expose:
      - 8099  #对外暴露的服务端口
Dockerfile file
FROM adoptopenjdk/openjdk8:jdk8u-centos-nightly

#作者
MAINTAINER lkz

# 镜像要暴露的端口,如要使用端口,在执行docker run命令时使用-p生效
EXPOSE 8099

COPY jenkinsTest.jar 11.jar
# 在镜像运行为容器后执行的命令
ENTRYPOINT ["java","-jar","11.jar"]
Start micro Service, you can add the parameter -d to start in the background
docker-compose up -d

Use Docker Compose to orchestrate SpringCloud microservices
Configuration is the same as above
Modify docker-compose.yml File
version: '3.3'
services:
  eureka:
    image: eureka:v1  #指定镜像名称
    build: ./eureka   #指定Dockfile所在路径
    ports:
     - 8080:8080
  user:
    image: user:v1
    build: ./user #指定Dockfile所在路径
    ports:
     - 8081:8081
  power:
    image: power:v1
    build: ./power #指定Dockfile所在路径
    ports:
     - 8082:8082
The above is the detailed content of How to publish springboot project using docker-compose image. For more information, please follow other related articles on the PHP Chinese website!

Hot AI Tools

Undresser.AI Undress
AI-powered app for creating realistic nude photos

AI Clothes Remover
Online AI tool for removing clothes from photos.

Undress AI Tool
Undress images for free

Clothoff.io
AI clothes remover

Video Face Swap
Swap faces in any video effortlessly with our completely free AI face swap tool!

Hot Article
Hot Tools

Notepad++7.3.1
Easy-to-use and free code editor

SublimeText3 Chinese version
Chinese version, very easy to use

Zend Studio 13.0.1
Powerful PHP integrated development environment

Dreamweaver CS6
Visual web development tools

SublimeText3 Mac version
God-level code editing software (SublimeText3)
Hot Topics
 1386
1386
 52
52

 How to update the image of docker
Apr 15, 2025 pm 12:03 PM
How to update the image of docker
Apr 15, 2025 pm 12:03 PM
The steps to update a Docker image are as follows: Pull the latest image tag New image Delete the old image for a specific tag (optional) Restart the container (if needed)
 How to use docker desktop
Apr 15, 2025 am 11:45 AM
How to use docker desktop
Apr 15, 2025 am 11:45 AM
How to use Docker Desktop? Docker Desktop is a tool for running Docker containers on local machines. The steps to use include: 1. Install Docker Desktop; 2. Start Docker Desktop; 3. Create Docker image (using Dockerfile); 4. Build Docker image (using docker build); 5. Run Docker container (using docker run).
 How to create a mirror in docker
Apr 15, 2025 am 11:27 AM
How to create a mirror in docker
Apr 15, 2025 am 11:27 AM
Steps to create a Docker image: Write a Dockerfile that contains the build instructions. Build the image in the terminal, using the docker build command. Tag the image and assign names and tags using the docker tag command.
 How to exit the container by docker
Apr 15, 2025 pm 12:15 PM
How to exit the container by docker
Apr 15, 2025 pm 12:15 PM
Four ways to exit Docker container: Use Ctrl D in the container terminal Enter exit command in the container terminal Use docker stop <container_name> Command Use docker kill <container_name> command in the host terminal (force exit)
 What to do if the docker image fails
Apr 15, 2025 am 11:21 AM
What to do if the docker image fails
Apr 15, 2025 am 11:21 AM
Troubleshooting steps for failed Docker image build: Check Dockerfile syntax and dependency version. Check if the build context contains the required source code and dependencies. View the build log for error details. Use the --target option to build a hierarchical phase to identify failure points. Make sure to use the latest version of Docker engine. Build the image with --t [image-name]:debug mode to debug the problem. Check disk space and make sure it is sufficient. Disable SELinux to prevent interference with the build process. Ask community platforms for help, provide Dockerfiles and build log descriptions for more specific suggestions.
 How to save docker image
Apr 15, 2025 am 11:54 AM
How to save docker image
Apr 15, 2025 am 11:54 AM
To save the image in Docker, you can use the docker commit command to create a new image, containing the current state of the specified container, syntax: docker commit [Options] Container ID Image name. To save the image to the repository, you can use the docker push command, syntax: docker push image name [: tag]. To import saved images, you can use the docker pull command, syntax: docker pull image name [: tag].
 How to copy files in docker to outside
Apr 15, 2025 pm 12:12 PM
How to copy files in docker to outside
Apr 15, 2025 pm 12:12 PM
Methods for copying files to external hosts in Docker: Use the docker cp command: Execute docker cp [Options] <Container Path> <Host Path>. Using data volumes: Create a directory on the host, and use the -v parameter to mount the directory into the container when creating the container to achieve bidirectional file synchronization.
 How to check the name of the docker container
Apr 15, 2025 pm 12:21 PM
How to check the name of the docker container
Apr 15, 2025 pm 12:21 PM
You can query the Docker container name by following the steps: List all containers (docker ps). Filter the container list (using the grep command). Gets the container name (located in the "NAMES" column).
