1.Database structure

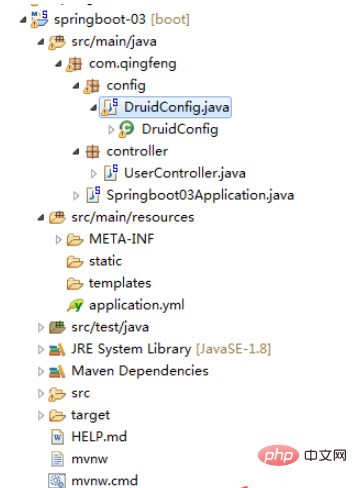
2.Project structure

<dependencies>
  <dependency>
    <groupid>org.springframework.boot</groupid>
    <artifactid>spring-boot-starter-jdbc</artifactid>
  </dependency>
  <dependency>
    <groupid>mysql</groupid>
    <artifactid>mysql-connector-java</artifactid>
    <scope>runtime</scope>
  </dependency>

  <!--引入druid数据源 -->
  <!-- https://mvnrepository.com/artifact/com.alibaba/druid -->
  <dependency>
    <groupid>com.alibaba</groupid>
    <artifactid>druid</artifactid>
    <version>1.1.8</version>
  </dependency>

  <!-- https://mvnrepository.com/artifact/log4j/log4j -->
  <!-- 如果 不加入这依赖    配置监控统计拦截的filters时  这个会报错 filters: stat,wall,log4j  -->
  <dependency>
    <groupid>log4j</groupid>
    <artifactid>log4j</artifactid>
    <version>1.2.17</version>
  </dependency>

  <dependency>
    <groupid>org.springframework.boot</groupid>
    <artifactid>spring-boot-starter-web</artifactid>
  </dependency>


  <dependency>
    <groupid>org.springframework.boot</groupid>
    <artifactid>spring-boot-starter-test</artifactid>
    <scope>test</scope>
  </dependency>
</dependencies>

<build>
  <plugins>
    <plugin>
      <groupid>org.springframework.boot</groupid>
      <artifactid>spring-boot-maven-plugin</artifactid>
    </plugin>
  </plugins>
</build>
spring:
 datasource:
  username: root
  password: wangqing
  url: jdbc:mysql://localhost:3306/test?useUnicode=true&characterEncoding=utf-8&serverTimezone=Asia/Shanghai
  driver-class-name: com.mysql.jdbc.Driver
  type: com.alibaba.druid.pool.DruidDataSource


 #  数据源其他配置
  initialSize: 5
  minIdle: 5
  maxActive: 20
  maxWait: 60000
  timeBetweenEvictionRunsMillis: 60000
  minEvictableIdleTimeMillis: 300000
  validationQuery: SELECT 1 FROM DUAL
  testWhileIdle: true
  testOnBorrow: false
  testOnReturn: false
  poolPreparedStatements: true
#  配置监控统计拦截的filters,去掉后监控界面sql无法统计,'wall'用于防火墙
  filters: stat,wall,log4j
  maxPoolPreparedStatementPerConnectionSize: 20
  useGlobalDataSourceStat: true
  connectionProperties: druid.stat.mergeSql=true;druid.stat.slowSqlMillis=500
  # 合并多个DruidDataSource的监控数据
  #useGlobalDataSourceStat: true

mybatis:
 # 指定全局配置文件位置
 #config-location: classpath:mybatis/mybatis-config.xml
 # 指定sql映射文件位置
 mapper-locations: classpath:mapper/*.xml      #如src/main/resources下的mappers文件下的TUserMapper.xml

#  schema:
#   - classpath:sql/department.sql     #根据department.sql 的sql语句创建表
#   - classpath:sql/employee.sql
package com.qingfeng.config;

import com.alibaba.druid.pool.DruidDataSource;
import com.alibaba.druid.support.http.StatViewServlet;
import com.alibaba.druid.support.http.WebStatFilter;
import org.springframework.boot.context.properties.ConfigurationProperties;
import org.springframework.boot.web.servlet.FilterRegistrationBean;
import org.springframework.boot.web.servlet.ServletRegistrationBean;
import org.springframework.context.annotation.Bean;
import org.springframework.context.annotation.Configuration;

import javax.sql.DataSource;
import java.util.Arrays;
import java.util.HashMap;
import java.util.Map;

@Configuration
public class DruidConfig {
   //指定加载appliction.yml文件里面的spring.datasource开头的
   // DruidDataSource类里面的属性与appliction.yml文件里面的spring.datasource开头的对应映射
  @ConfigurationProperties(prefix = "spring.datasource")
  @Bean
  public DataSource druid(){
    return new DruidDataSource();
  }

  //配置Druid的监控
  //1、配置一个管理后台的Servlet
  @Bean
  public ServletRegistrationBean statViewServlet(){
    ServletRegistrationBean bean = new ServletRegistrationBean(new StatViewServlet(), "/druid/*");
    Map<string> initParams = new HashMap();

    initParams.put("loginUsername","admin");
    initParams.put("loginPassword","123456");
    initParams.put("allow","");//默认就是允许所有访问
    initParams.put("deny","");

    bean.setInitParameters(initParams);
    return bean;
  }


  //2、配置一个web监控的filter
  @Bean
  public FilterRegistrationBean webStatFilter(){
    FilterRegistrationBean bean = new FilterRegistrationBean();
    bean.setFilter(new WebStatFilter());
    Map<string> initParams = new HashMap();
    initParams.put("exclusions","*.js,*.css,/druid/*");
    bean.setInitParameters(initParams);
    bean.setUrlPatterns(Arrays.asList("/*"));
    return bean;
  }
}</string></string>package com.qingfeng.controller;
import org.springframework.beans.factory.annotation.Autowired;
import org.springframework.jdbc.core.JdbcTemplate;
import org.springframework.stereotype.Controller;
import org.springframework.web.bind.annotation.GetMapping;
import org.springframework.web.bind.annotation.ResponseBody;
import java.util.List;
import java.util.Map;
@Controller
public class UserController {
@Autowired
JdbcTemplate jdbcTemplate;
@ResponseBody
@GetMapping("/query")
public Map<string> map(){
List<map>> list = jdbcTemplate.queryForList("select * FROM user");
return list.get(0);
}
}</map></string>
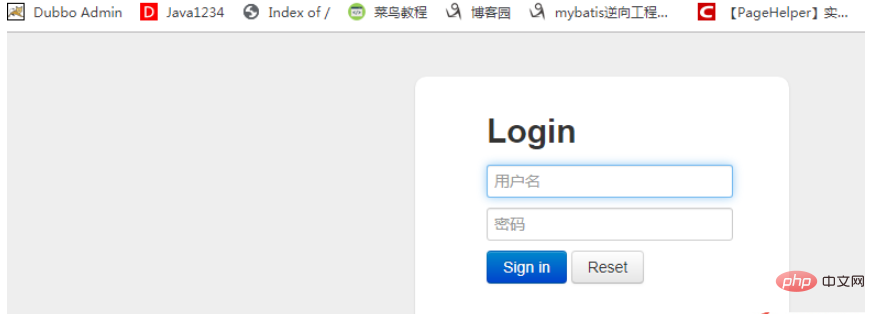
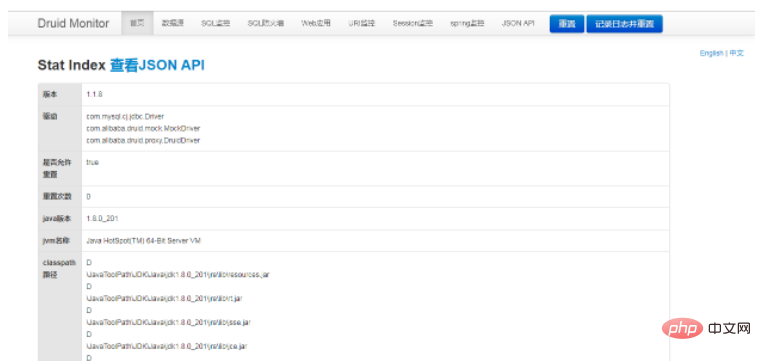
//配置Druid的监控
  //1、配置一个管理后台的Servlet
  @Bean
  public ServletRegistrationBean statViewServlet(){
    ServletRegistrationBean bean = new ServletRegistrationBean(new StatViewServlet(), "/druid/*");
    Map<string> initParams = new HashMap();

    initParams.put("loginUsername","admin");
    initParams.put("loginPassword","123456");
    initParams.put("allow","");//默认就是允许所有访问
    initParams.put("deny","");

    bean.setInitParameters(initParams);
    return bean;
  }</string>

The above is the detailed content of How to integrate Druid data sources in SpringBoot. For more information, please follow other related articles on the PHP Chinese website!
 SpringBoot project building steps
 What is the difference between j2ee and springboot
 Usage of urlencode function
 The difference between footnotes and endnotes
 Computer blue screen code 0xc0000225
 Is there a big difference between c language and Python?
 How to activate win7 professional version system
 What file is mid format?


