

How to Fix Browser Back Button Not Working in Windows 11/10

Browsing is what most users do on their systems for work or in their free time. Many Windows users have reported that they are facing issues while browsing the system as the browser’s back button suddenly does not work, which also means that the back button becomes grayed out. There's nothing they can do about it.
This could happen for several reasons, and we have analyzed the issue and come up with some solutions. If you are also facing the same issue on your system, then this article will definitely help you solve it.
Fix 1: Clear your browser's cookies and site data
Sometimes, clearing your cookies and site data may help resolve browser issues to some extent. We have analyzed the fix and come up with some steps on how to fix it on your browser.
For Google Chrome
Step 1: Open Google Chrome## on your system by pressing Windows and typing google chrome #browser.
Step 2: Then, selectGoogle Chrome from the search results as shown below.
Enter key as shown below.
铬://设置/隐私
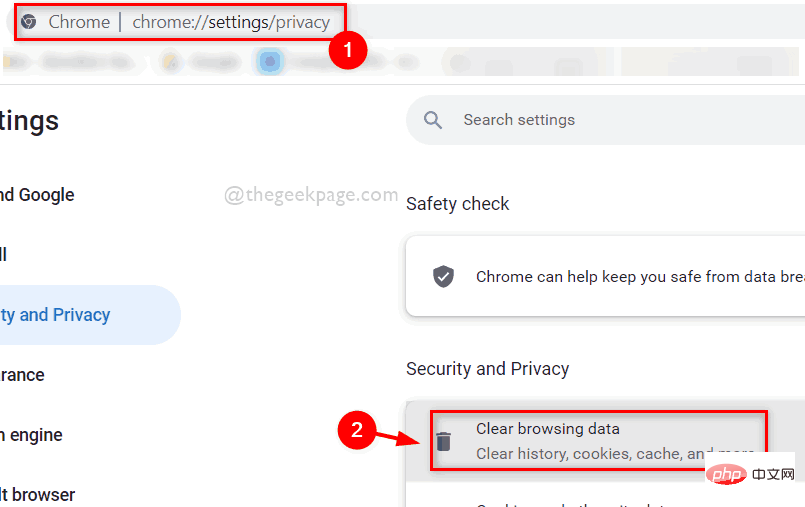
Clear browsing data option in the privacy page as shown below.
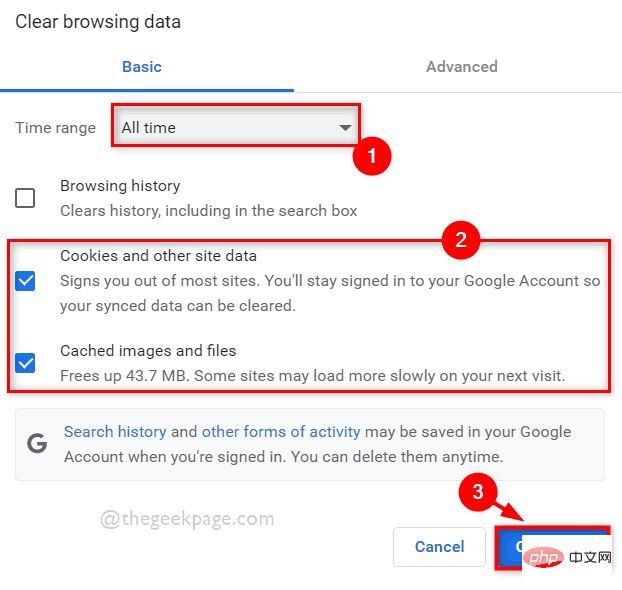
All time is selected from the drop-down list for Time range.
Step 6: Then, check theCookies and other site data and Cache images and files checkboxes as shown below.
Step 7: Finally, click theClear Data button in the Clear Browsing Data window, as shown in the picture.
Mozilla Firefox on your system by pressing Windows and type firefox.
Step 2: Then, select theFirefox application from the search results as shown below.
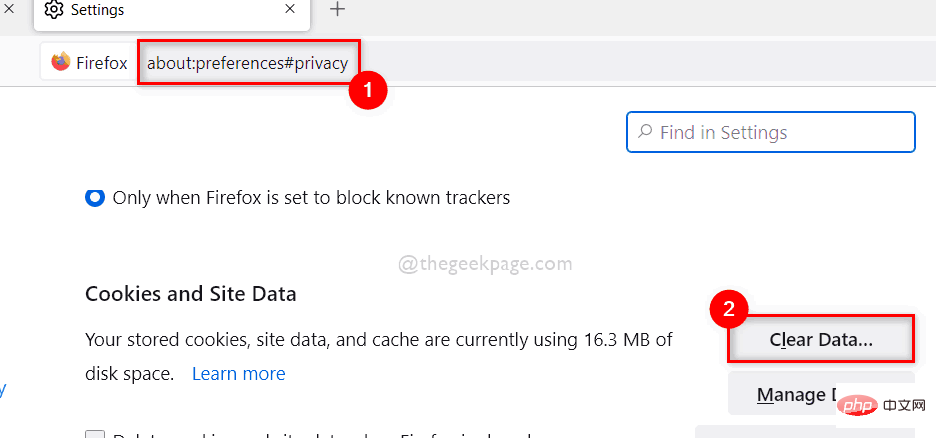
about:preferences#privacy in the address bar, and then click the Enter key to enter its privacy page .
Step 4: Once on the Privacy page, scroll down and click theClear Data button under Cookies and Site Data as shown below.
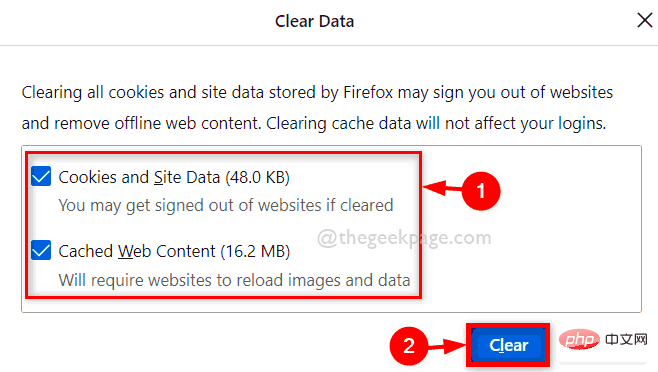
Cookie and Site Data and Cached Web Content check boxes.
Step 6: Then, click theClear button to clear cookies and other site data as shown below.
Google Chrome## on your system by pressing Windows and typing google chrome #browser. Step 2: Then, select
Google Chromefrom the search results as shown below.
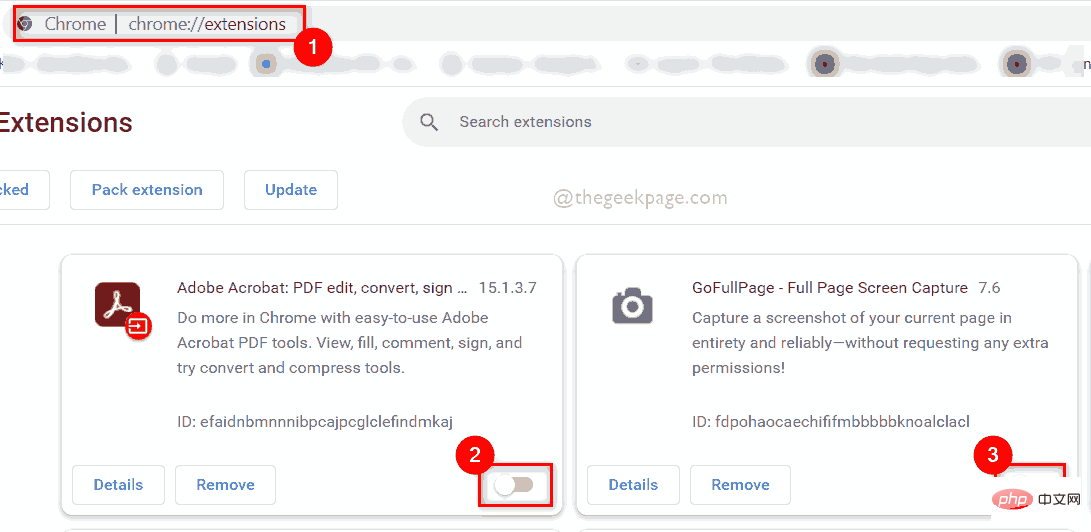
Step 3: Open a new tab and enter the below given path in the address bar and
key to go to Extension page. 铬://扩展/
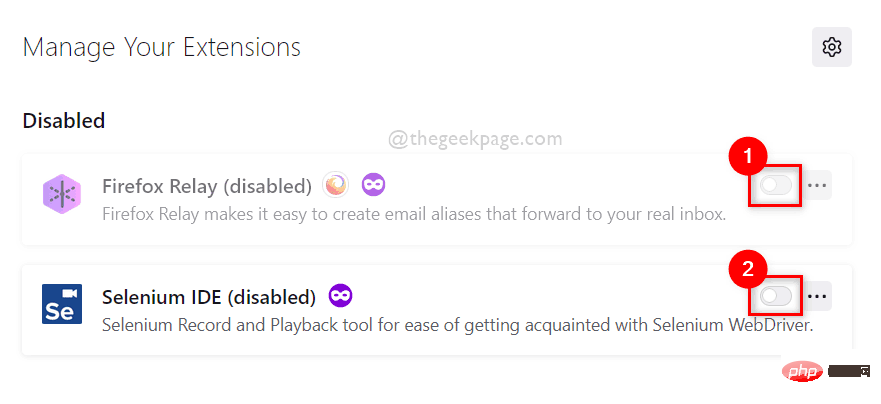
toggle button to turn it off, as shown below.
 Step 5: Once you have finished disabling the extension, you can restart your browser and start using it.
that's all.
For Firefox
Step 1: Open Mozilla Firefox on your system by pressing Windows and type firefox.
Step 2: Then, select the Firefox application from the search results as shown below.
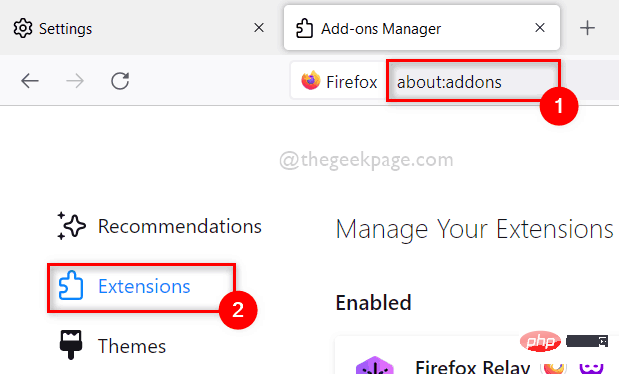
Step 4: Open a new tab in Firefox and type about:addons in the address bar and press Enter key, as shown below.
Step 5: Then, click Extensions on the left panel of the page as shown.
Step 6: In the Manage your extensions page, click the extension's toggle button to disable it, As shown in the screenshot below.
Step 7: Once completed, restart the browser and start using it, otherwise you can close it.
That’s all.
Fix 3: Reset Browser App
NOTE: After resetting the Browser App, all your browsing data will be deleted and you will not be able to retrieve. So, if you want, you can back up your browsing data on your Microsoft account or Google account, etc.
Sometimes, when we have tried most of the possible solutions to fix the browser back button not working issue, it is better to reset your browser application on your system, which clears the browser settings, And the browser works better than before. Just follow some simple steps given below.
For Google Chrome
Step 1: Open Google Chrome## on your system by pressing Windows and typing google chrome #browser.
Step 2: Then, selectGoogle Chrome from the search results as shown below.
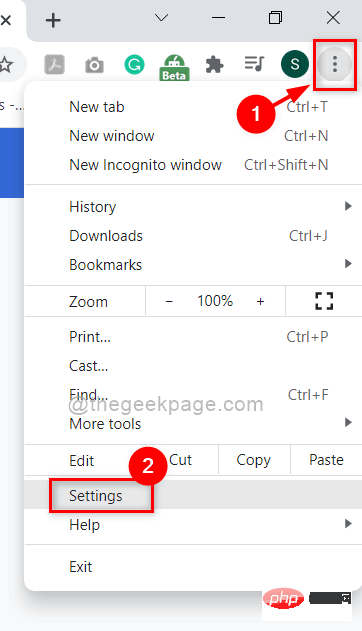
Settings from the Show more options list.
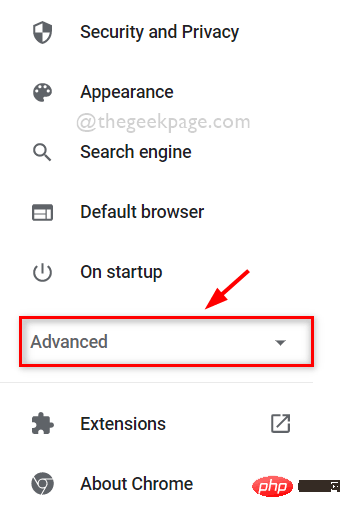
Advanced" drop-down option, as shown below Show.
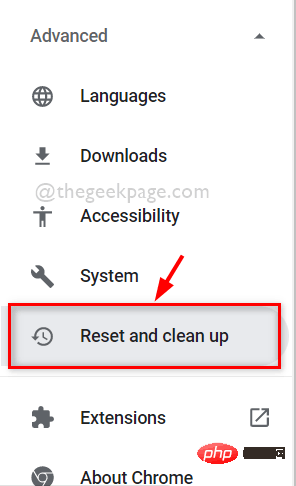
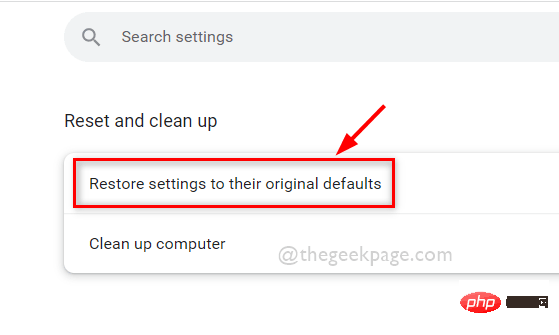
Reset and Clean option as shown below.
Restore settings to original defaults option as shown below.
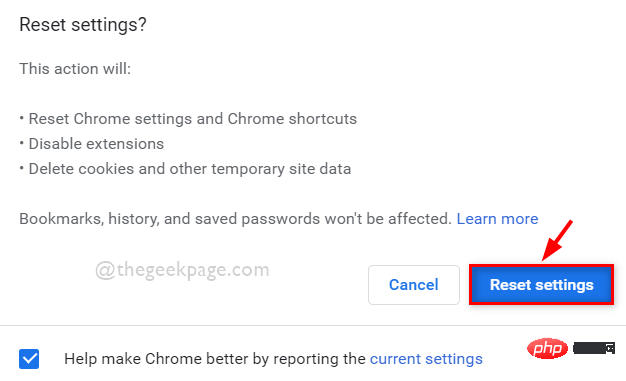
Reset Settings" button to reset the browser to Its default value is as shown below.
Mozilla Firefox on your system by pressing Windows and type firefox.
Step 2: Then, select theFirefox application from the search results as shown below.
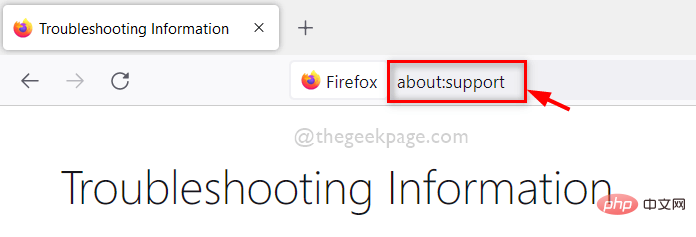
about:support in the address bar and press Enter key, as shown below.
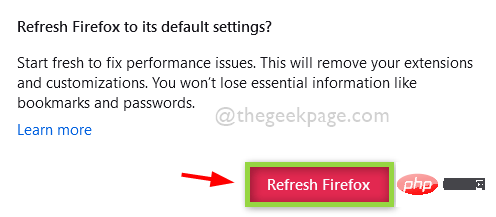
Refresh Firefox option as shown below.
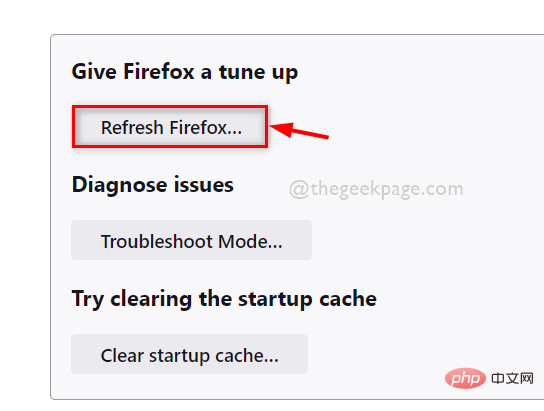
Step 5: In the Refresh Firefox window, click the Refresh Firefox button to reset Firefox to its default values, as shown in the screenshot below.
Step 6: Once completed, it will restart your Firefox app and you can continue using the Firefox app without any issues.
That’s all.
Hope you enjoyed this article and solved your problem.
Please tell us which fix worked for you in the comments section below.
Thanks!
You can also download this PC Repair Tool to find and fix any PC issues:Step 1 - Download Restoro PC Repair Tool from here
Step 2 Step - Click to start scanning to automatically find and fix any PC issues.
The above is the detailed content of How to Fix Browser Back Button Not Working in Windows 11/10. For more information, please follow other related articles on the PHP Chinese website!

Hot AI Tools

Undresser.AI Undress
AI-powered app for creating realistic nude photos

AI Clothes Remover
Online AI tool for removing clothes from photos.

Undress AI Tool
Undress images for free

Clothoff.io
AI clothes remover

Video Face Swap
Swap faces in any video effortlessly with our completely free AI face swap tool!

Hot Article
Hot Tools

Notepad++7.3.1
Easy-to-use and free code editor

SublimeText3 Chinese version
Chinese version, very easy to use

Zend Studio 13.0.1
Powerful PHP integrated development environment

Dreamweaver CS6
Visual web development tools

SublimeText3 Mac version
God-level code editing software (SublimeText3)
Hot Topics
 1387
1387
 52
52

 This Apple ID is not yet in use in the iTunes Store: Fix
Jun 10, 2024 pm 05:42 PM
This Apple ID is not yet in use in the iTunes Store: Fix
Jun 10, 2024 pm 05:42 PM
When logging into iTunesStore using AppleID, this error saying "This AppleID has not been used in iTunesStore" may be thrown on the screen. There are no error messages to worry about, you can fix them by following these solution sets. Fix 1 – Change Shipping Address The main reason why this prompt appears in iTunes Store is that you don’t have the correct address in your AppleID profile. Step 1 – First, open iPhone Settings on your iPhone. Step 2 – AppleID should be on top of all other settings. So, open it. Step 3 – Once there, open the “Payment & Shipping” option. Step 4 – Verify your access using Face ID. step
 What is the middle mouse button? What is the use of pressing the middle mouse button?
May 09, 2024 pm 12:40 PM
What is the middle mouse button? What is the use of pressing the middle mouse button?
May 09, 2024 pm 12:40 PM
What is the middle mouse button? In fact, it is the mouse wheel. You can slide the wheel up and down to view the page easily. But if you click the wheel, then this is the so-called middle button. In different software, the middle mouse button may have different functions. It depends on the software settings. How is it defined. The middle mouse button is actually a click on the mouse wheel. The middle mouse button has different functions in different software programs, but it may also have no effect at all. 1. Change to continuous scrolling mode. Clicking the middle mouse button while browsing the web will change to continuous scrolling mode. At this time, the user only needs to move the mouse up and down to slide the page. 2. Open a new tab. For example, in Google Chrome, if the user uses the middle mouse button to click on a web page hyperlink, then
 How to add trusted sites in Google Chrome
Jul 19, 2024 pm 04:14 PM
How to add trusted sites in Google Chrome
Jul 19, 2024 pm 04:14 PM
How to add trusted sites in Google Chrome? Some users cannot browse the web normally because the page prompts that it is not secure when surfing the Internet. At this time, they can add the website as a trusted site, and we can access it normally and surf the Internet smoothly. The editor below will bring you the steps to add a trusted site in Google Chrome. The steps are simple and easy to operate, and even beginners can easily get started. Friends who need it can learn about it together. How to add a trusted site in Google Chrome: 1. Open Google Chrome and click the three dots in the upper right corner. Click [Settings]. Choose privacy settings and security. (As shown in the picture) 2. Click Website Settings at the bottom of the page. (As shown in the picture) 3. Click on the unsafe content at the bottom of the page. (As shown in the picture) 4. Click the Add button to the right of the Allow option. (As shown in the picture) 5. Lose
 How to change the language in Firefox
Jun 22, 2024 am 01:31 AM
How to change the language in Firefox
Jun 22, 2024 am 01:31 AM
How to change the language in Firefox? Firefox is a pure and easy-to-use open source browser software. This browser brings users a fast and pure Internet experience. The default language of the Google Chrome we downloaded and installed is Chinese. This browser supports multiple Many friends need to change the interface language to another country's language, so how to operate it at this time. This article brings you an overview of how to change the language of the Firefox browser interface. Friends in need should not miss it. Overview of how to change the language of the Firefox browser interface 1. The user opens the Firefox browser on the computer, and goes to the homepage and clicks the three horizontal icons in the upper right corner, and then a drop-down tab pops up, and the user selects the setting option (as shown in the figure). 2. The page switches and enters the settings window.
 Introduction to the specific process of setting up Thunder downloads in Google Chrome
May 09, 2024 pm 01:01 PM
Introduction to the specific process of setting up Thunder downloads in Google Chrome
May 09, 2024 pm 01:01 PM
First install Google Chrome and Thunder software. After installation, open Google Chrome and click on the Settings option. Then we select the extension in the settings options. Because we want to enable Thunder downloads, which is generally not available here, so click below to get more extensions. Then we enter Google's online app store and enter [Thunder] in the search box and select the first related search in the drop-down box. At this time, we find the extension column in the display results, and then find thunderdownload extension for chrome. Then click Free on the right to download and install. Then it will be displayed after the addition is successful. Next, enter the extension program. You will find that the newly added Thunder extension program is enabled, indicating that
 iPhone stuck in airplane mode: How to fix it
Jun 15, 2024 pm 02:16 PM
iPhone stuck in airplane mode: How to fix it
Jun 15, 2024 pm 02:16 PM
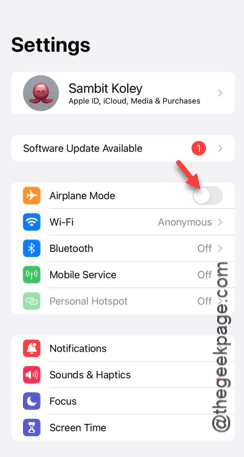
Airplane mode is very convenient in some situations. However, the same airplane mode may give you a headache if your iPhone suddenly gets stuck on it. In this article, we have designed this set of solutions to get your iPhone out of airplane mode. Quick fix – 1. Try disabling Airplane Mode directly from Control Center. 2. If you are unable to disable Airplane Mode from Control Center, you can disable Airplane Mode directly from the Settings tab – If these tips don’t work, follow the fixes below to resolve the issue. Fix 1 – Force Restart Your Device The process of force restarting your device is very simple. All you have to do is follow these step-by-step instructions. Step 1 – You can start the process by pressing and releasing the Volume Up button. step
 How to install postman on Google Chrome
Jul 01, 2024 pm 02:18 PM
How to install postman on Google Chrome
Jul 01, 2024 pm 02:18 PM
How to install postman on Google Chrome? Google Chrome is a very powerful browser tool. In this browser, users can freely install various plug-ins according to their own needs. Among them, the postman plug-in is mainly designed for interface testing, and many users need to use it. This plug-in is used for interface testing, so how to install the postman plug-in in Google Chrome. Next, let the editor introduce to you the tutorial on installing the postman plug-in in Google Chrome. Friends who are not sure about the specific steps should hurry up and take a look at the details. Tutorial introduction to installing the postman plug-in in Google Chrome 1. We first open the Google Chrome installed on the computer, and then click More in the upper right corner of the browser
 How to change the default download path in Firefox How to change the default download path in Firefox
May 09, 2024 am 11:19 AM
How to change the default download path in Firefox How to change the default download path in Firefox
May 09, 2024 am 11:19 AM
1. Open the Firefox browser, click the [three horizontal lines] icon in the upper right corner, and select [Settings] in the drop-down menu bar, as shown in the figure below. 2. Select [General] on the settings page, scroll down the page, and find [Files and Applications], as shown in the figure below. 3. Under the download options bar, click [Browse] after the save file option box, as shown in the figure below. 4. In the pop-up dialog box, select the download directory location you want to change, as shown in the figure below. 5. After the selection is completed, select "Always ask you where to save files" so that you can change the default download path and select it each time you download a file, as shown in the figure below.