How to deploy Springboot or Nginx using Kubernetes
1 Preface
This is very simple, just a yaml file.
2 One-click deployment of springboot
2.1 Prepare yaml file
When the image file is ready, deploy it to kubernetes It's very easy. You only need a file in the format of yaml. This file can describe the components you need, such as deployment, service, ingressetc. The definition is as follows:
1 2 3 4 5 6 7 8 9 10 11 12 13 14 15 16 17 18 19 20 21 22 23 24 25 26 27 28 29 30 31 32 33 34 35 36 37 |
|
kind: Type, including deployment, service, pod, ingress, etc., very rich;
metadata: used to define some component information, such as names, labels, etc.;
labels: label function , very useful for selecting associations; but label does not provide uniqueness, you can use combinations to select;
nodeport: For services that need to be exposed to the outside, There are three ways: nodeports, loadbalancer, ingress, here nodeports is used; it should be noted that its default port range is [3000-32767], if you need other ranges, you need to modify the relevant parameters.
2.2 Deployment through kubectl command
When the yaml file is ready, it can be deployed through the following command:
1 2 3 |
|
Looking at the console log shows deployment and service were created successfully. View dashboard as follows:
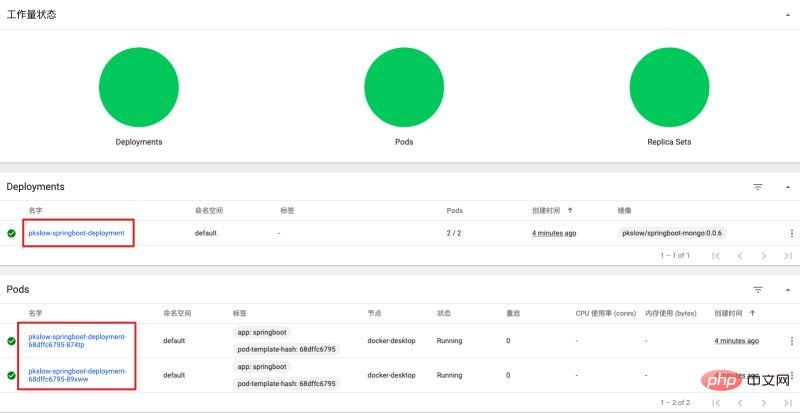
Access web service:

Check it through the command line:
1 2 3 4 5 6 7 8 9 10 11 12 13 |
|
At this point, we have successfully published springboot to kubernetes.
2.3 Try killing a pod?
kubernetesThe smallest management element is not the container, but pod.
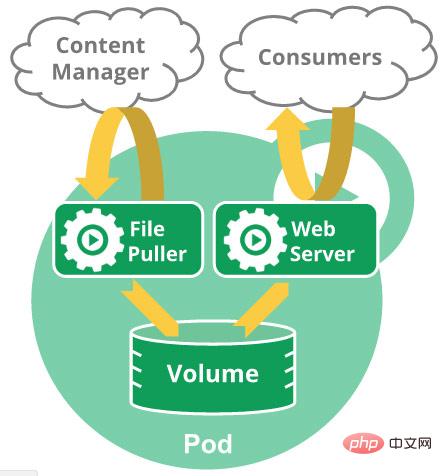
Let’s try to delete a pod and see what happens?
1 2 3 4 5 6 7 |
|
It can be found that after deleting another pod, a new pod will be automatically generated for us, which can improve the high availability of the entire service.
2.4 Try killing a container?
Let's explore what will happen if we kill a container instance.
1 2 3 4 5 |
|
After experiments, after killing a container, a container instance will be automatically regenerated for us. The pod will not change or be regenerated.
2.5 Rapid expansion of pod
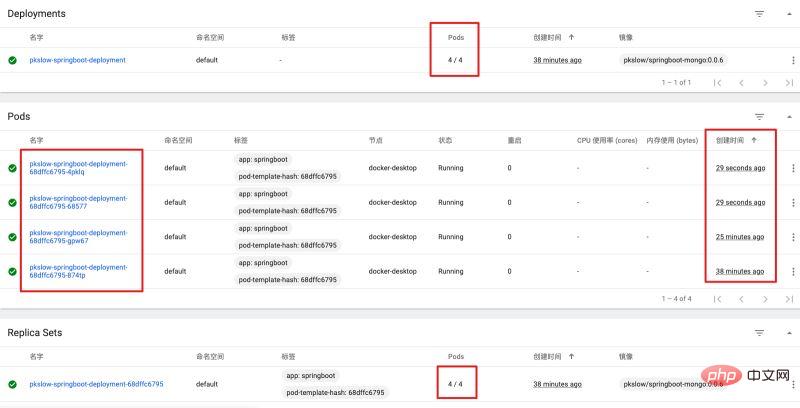
User requests suddenly increase and the service cannot support it. At this time, you need to increase the number of pod. Just modify the replicas of the yaml configuration file and update it to replicas: 4. Then execute the following command:
1 |
|
View dashboard. Based on the original two pod, two more have been added.
3 One-click deployment of nginx
If you don’t have a springboot image, you can use the officialnginx Mirror, yaml file is as follows:
1 2 3 4 5 6 7 8 9 10 11 12 13 14 15 16 17 18 19 20 21 22 23 24 25 26 27 28 29 30 31 32 33 34 35 36 37 38 39 40 41 42 |
|
Execute deployment command:
1 2 3 |
|
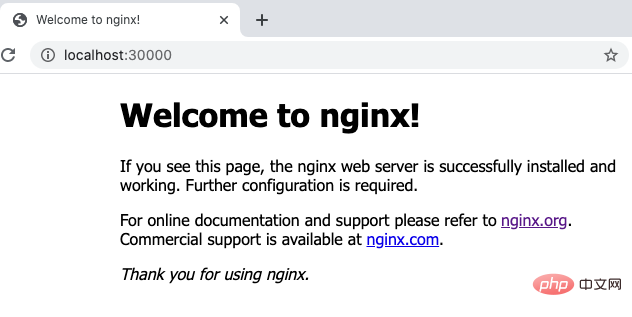
View dashboard as follows:
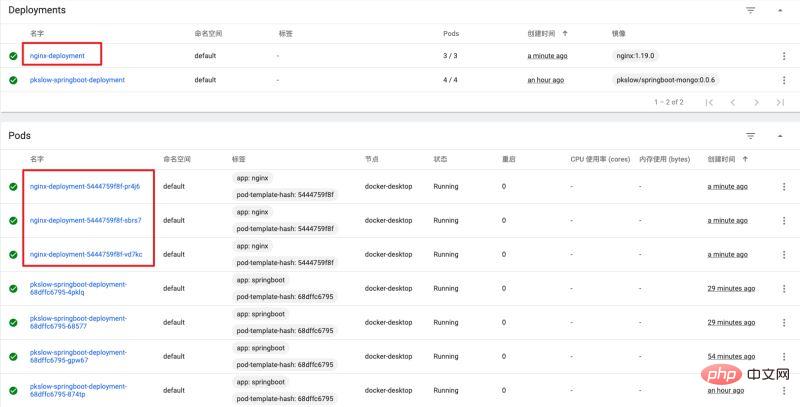
Access service: or . Because we set up two.
The above is the detailed content of How to deploy Springboot or Nginx using Kubernetes. For more information, please follow other related articles on the PHP Chinese website!

Hot AI Tools

Undresser.AI Undress
AI-powered app for creating realistic nude photos

AI Clothes Remover
Online AI tool for removing clothes from photos.

Undress AI Tool
Undress images for free

Clothoff.io
AI clothes remover

AI Hentai Generator
Generate AI Hentai for free.

Hot Article

Hot Tools

Notepad++7.3.1
Easy-to-use and free code editor

SublimeText3 Chinese version
Chinese version, very easy to use

Zend Studio 13.0.1
Powerful PHP integrated development environment

Dreamweaver CS6
Visual web development tools

SublimeText3 Mac version
God-level code editing software (SublimeText3)

Hot Topics
 1377
1377
 52
52
 How to allow external network access to tomcat server
Apr 21, 2024 am 07:22 AM
To allow the Tomcat server to access the external network, you need to: modify the Tomcat configuration file to allow external connections. Add a firewall rule to allow access to the Tomcat server port. Create a DNS record pointing the domain name to the Tomcat server public IP. Optional: Use a reverse proxy to improve security and performance. Optional: Set up HTTPS for increased security.
 How to run thinkphp
Apr 09, 2024 pm 05:39 PM
Steps to run ThinkPHP Framework locally: Download and unzip ThinkPHP Framework to a local directory. Create a virtual host (optional) pointing to the ThinkPHP root directory. Configure database connection parameters. Start the web server. Initialize the ThinkPHP application. Access the ThinkPHP application URL and run it.
 Welcome to nginx!How to solve it?
Apr 17, 2024 am 05:12 AM
To solve the "Welcome to nginx!" error, you need to check the virtual host configuration, enable the virtual host, reload Nginx, if the virtual host configuration file cannot be found, create a default page and reload Nginx, then the error message will disappear and the website will be normal show.
 How to generate URL from html file
Apr 21, 2024 pm 12:57 PM
Converting an HTML file to a URL requires a web server, which involves the following steps: Obtain a web server. Set up a web server. Upload HTML file. Create a domain name. Route the request.
 How to deploy nodejs project to server
Apr 21, 2024 am 04:40 AM
Server deployment steps for a Node.js project: Prepare the deployment environment: obtain server access, install Node.js, set up a Git repository. Build the application: Use npm run build to generate deployable code and dependencies. Upload code to the server: via Git or File Transfer Protocol. Install dependencies: SSH into the server and use npm install to install application dependencies. Start the application: Use a command such as node index.js to start the application, or use a process manager such as pm2. Configure a reverse proxy (optional): Use a reverse proxy such as Nginx or Apache to route traffic to your application
 What are the most common instructions in a dockerfile
Apr 07, 2024 pm 07:21 PM
The most commonly used instructions in Dockerfile are: FROM: Create a new image or derive a new image RUN: Execute commands (install software, configure the system) COPY: Copy local files to the image ADD: Similar to COPY, it can automatically decompress tar archives or obtain URL files CMD: Specify the command when the container starts EXPOSE: Declare the container listening port (but not public) ENV: Set the environment variable VOLUME: Mount the host directory or anonymous volume WORKDIR: Set the working directory in the container ENTRYPOINT: Specify what to execute when the container starts Executable file (similar to CMD, but cannot be overwritten)
 Can nodejs be accessed from the outside?
Apr 21, 2024 am 04:43 AM
Yes, Node.js can be accessed from the outside. You can use the following methods: Use Cloud Functions to deploy the function and make it publicly accessible. Use the Express framework to create routes and define endpoints. Use Nginx to reverse proxy requests to Node.js applications. Use Docker containers to run Node.js applications and expose them through port mapping.
 How to deploy and maintain a website using PHP
May 03, 2024 am 08:54 AM
To successfully deploy and maintain a PHP website, you need to perform the following steps: Select a web server (such as Apache or Nginx) Install PHP Create a database and connect PHP Upload code to the server Set up domain name and DNS Monitoring website maintenance steps include updating PHP and web servers, and backing up the website , monitor error logs and update content.


