

How to install and use Nginx in Linux environment

1. Check the centos version
cat /etc/redhat-release
2. Add the resource library
To install nginx on the centos system, you must first add it A resource library:
vim /etc/yum.repos.d/nginx.repo
  [nginx]
  name=nginx repo
  baseurl=http://nginx.org/packages/centos/$releasever/$basearch/
  gpgcheck=0
  enabled=1
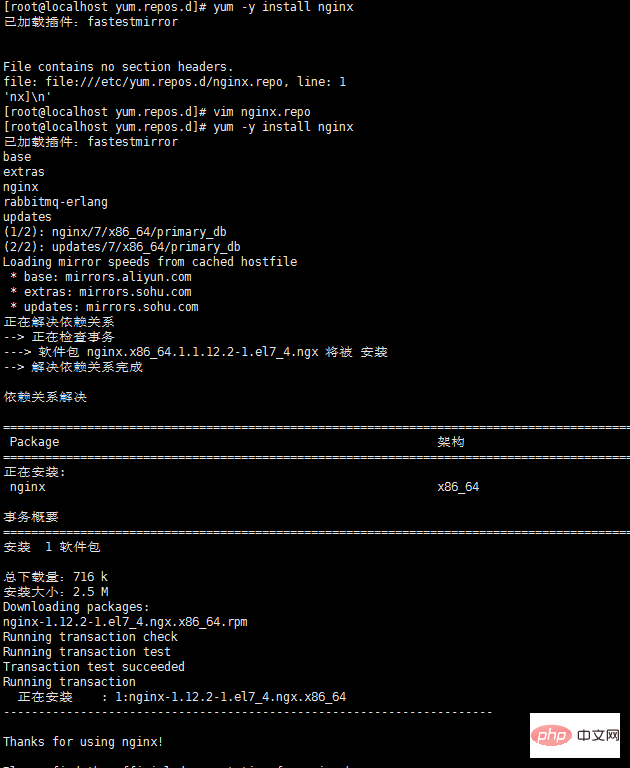
3. Install nginx
yum -y install nginx
##4. Test whether the nginx configuration file is Correct
nginx -t
nginx: the configuration file /etc/nginx/nginx.conf syntax is ok##5. Centos7.0 nginx realizes stop, start and restartnginx: configuration file /etc/nginx /nginx.conf test is successful
systemctl stop nginx.service
systemctl start nginx.service
systemctl restart nginx.service
systemctl status nginx.service
systemctl enable nginx.service
Cancel auto-start at boot:
systemctl disable nginx.service
6. nginx.conf configuration example
My configuration:
user nginx;
worker_processes 4;

error_log /var/log/nginx/error.log warn;
pid    /var/run/nginx.pid;


events {
  worker_connections 1024;
}


http {
  include    /etc/nginx/mime.types;
  default_type application/octet-stream;

  log_format main '$remote_addr - $remote_user [$time_local] "$request" '
           '$status $body_bytes_sent "$http_referer" '
           '"$http_user_agent" "$http_x_forwarded_for"';

  access_log /var/log/nginx/access.log main;

  sendfile    on;
  #tcp_nopush   on;

  keepalive_timeout 65;

  #gzip on;

  include /etc/nginx/conf.d/*.conf;

  #设定负载均衡的服务器列表
  upstream pay_server {
    ip_hash;
    server 10.74.248.01:8088 max_fails=2 fail_timeout=2;
    server 10.74.248.02:8088 max_fails=2 fail_timeout=2;
  }

  upstream print_server {
    ip_hash;
    server 10.74.248.03:2001 max_fails=2 fail_timeout=2;
    server 10.74.248.04:2001 max_fails=2 fail_timeout=2;
  }

  upstream accss_door_server {
    ip_hash;
    server 10.74.248.05:2002 max_fails=2 fail_timeout=2;
    server 10.74.248.06:2002 max_fails=2 fail_timeout=2;
  }

  server {
    listen 80;
    server_name wab.kupu.ccoop.com.cn;
    location /invengo {
         proxy_pass http://pay_server;
         index index.jsp index.html index.htm;
    }
    location /invengo/epc {
         proxy_pass http://print_server;
         index index.jsp index.html index.htm;
    }
    location /invengo/print {
         proxy_pass http://print_server;
         index index.jsp index.html index.htm;
    }

    location /checkout {
         proxy_pass http://accss_door_server;
         index index.jsp index.html index.htm;
    }
    location /asset {
         proxy_pass http://accss_door_server;
         index index.jsp index.html index.htm;
    }
}Commonly used nginx.conf configuration:
user www www;
worker_processes 2;
error_log logs/error.log;
#error_log logs/error.log notice;
#error_log logs/error.log info;
pid    logs/nginx.pid;
events {
  use epoll;
  worker_connections 2048;
}
http {
  include    mime.types;
  default_type application/octet-stream;
  #log_format main '$remote_addr - $remote_user [$time_local] "$request" '
  #         '$status $body_bytes_sent "$http_referer" '
  #         '"$http_user_agent" "$http_x_forwarded_for"';
  #access_log logs/access.log main;
  sendfile    on;
  # tcp_nopush   on;
  keepalive_timeout 65;
 # gzip压缩功能设置
  gzip on;
  gzip_min_length 1k;
  gzip_buffers  4 16k;
  gzip_http_version 1.0;
  gzip_comp_level 6;
  gzip_types text/html text/plain text/css text/javascript application/json application/javascript application/x-javascript application/xml;
  gzip_vary on;

 # http_proxy 设置
  client_max_body_size  10m;
  client_body_buffer_size  128k;
  proxy_connect_timeout  75;
  proxy_send_timeout  75;
  proxy_read_timeout  75;
  proxy_buffer_size  4k;
  proxy_buffers  4 32k;
  proxy_busy_buffers_size  64k;
  proxy_temp_file_write_size 64k;
  proxy_temp_path  /usr/local/nginx/proxy_temp 1 2;
 # 设定负载均衡后台服务器列表
  upstream backend {
       #ip_hash;
       server  192.168.10.100:8080 max_fails=2 fail_timeout=30s ;
       server  192.168.10.101:8080 max_fails=2 fail_timeout=30s ;
  }
 # 很重要的虚拟主机配置
  server {
    listen    80;
    server_name itoatest.example.com;
    root  /apps/oaapp;
    charset utf-8;
    access_log logs/host.access.log main;
    #对 / 所有做负载均衡+反向代理
    location / {
      root  /apps/oaapp;
      index index.jsp index.html index.htm;
      proxy_pass    http://backend;
      proxy_redirect off;
      # 后端的web服务器可以通过x-forwarded-for获取用户真实ip
      proxy_set_header host $host;
      proxy_set_header x-real-ip $remote_addr;
      proxy_set_header x-forwarded-for $proxy_add_x_forwarded_for;
      proxy_next_upstream error timeout invalid_header http_500 http_502 http_503 http_504;

    }
    #静态文件,nginx自己处理,不去backend请求tomcat
    location ~* /download/ {
      root /apps/oa/fs;

    }
    location ~ .*\.(gif|jpg|jpeg|bmp|png|ico|txt|js|css)$
    {
      root /apps/oaapp;
      expires   7d;
    }
    location /nginx_status {
      stub_status on;
      access_log off;
      allow 192.168.10.0/24;
      deny all;
    }
    location ~ ^/(web-inf)/ {
      deny all;
    }
    #error_page 404       /404.html;
    # redirect server error pages to the static page /50x.html
    #
    error_page  500 502 503 504 /50x.html;
    location = /50x.html {
      root  html;
    }
  }
 ## 其它虚拟主机,server 指令开始
}The above is the detailed content of How to install and use Nginx in Linux environment. For more information, please follow other related articles on the PHP Chinese website!

Hot AI Tools

Undresser.AI Undress
AI-powered app for creating realistic nude photos

AI Clothes Remover
Online AI tool for removing clothes from photos.

Undress AI Tool
Undress images for free

Clothoff.io
AI clothes remover

Video Face Swap
Swap faces in any video effortlessly with our completely free AI face swap tool!

Hot Article
Hot Tools

Notepad++7.3.1
Easy-to-use and free code editor

SublimeText3 Chinese version
Chinese version, very easy to use

Zend Studio 13.0.1
Powerful PHP integrated development environment

Dreamweaver CS6
Visual web development tools

SublimeText3 Mac version
God-level code editing software (SublimeText3)
Hot Topics
 1387
1387
 52
52

 What computer configuration is required for vscode
Apr 15, 2025 pm 09:48 PM
What computer configuration is required for vscode
Apr 15, 2025 pm 09:48 PM
VS Code system requirements: Operating system: Windows 10 and above, macOS 10.12 and above, Linux distribution processor: minimum 1.6 GHz, recommended 2.0 GHz and above memory: minimum 512 MB, recommended 4 GB and above storage space: minimum 250 MB, recommended 1 GB and above other requirements: stable network connection, Xorg/Wayland (Linux)
 vscode cannot install extension
Apr 15, 2025 pm 07:18 PM
vscode cannot install extension
Apr 15, 2025 pm 07:18 PM
The reasons for the installation of VS Code extensions may be: network instability, insufficient permissions, system compatibility issues, VS Code version is too old, antivirus software or firewall interference. By checking network connections, permissions, log files, updating VS Code, disabling security software, and restarting VS Code or computers, you can gradually troubleshoot and resolve issues.
 Can vscode be used for mac
Apr 15, 2025 pm 07:36 PM
Can vscode be used for mac
Apr 15, 2025 pm 07:36 PM
VS Code is available on Mac. It has powerful extensions, Git integration, terminal and debugger, and also offers a wealth of setup options. However, for particularly large projects or highly professional development, VS Code may have performance or functional limitations.
 What is vscode What is vscode for?
Apr 15, 2025 pm 06:45 PM
What is vscode What is vscode for?
Apr 15, 2025 pm 06:45 PM
VS Code is the full name Visual Studio Code, which is a free and open source cross-platform code editor and development environment developed by Microsoft. It supports a wide range of programming languages and provides syntax highlighting, code automatic completion, code snippets and smart prompts to improve development efficiency. Through a rich extension ecosystem, users can add extensions to specific needs and languages, such as debuggers, code formatting tools, and Git integrations. VS Code also includes an intuitive debugger that helps quickly find and resolve bugs in your code.
 How to switch Chinese mode with vscode
Apr 15, 2025 pm 11:39 PM
How to switch Chinese mode with vscode
Apr 15, 2025 pm 11:39 PM
VS Code To switch Chinese mode: Open the settings interface (Windows/Linux: Ctrl, macOS: Cmd,) Search for "Editor: Language" settings Select "Chinese" in the drop-down menu Save settings and restart VS Code
 What is the main purpose of Linux?
Apr 16, 2025 am 12:19 AM
What is the main purpose of Linux?
Apr 16, 2025 am 12:19 AM
The main uses of Linux include: 1. Server operating system, 2. Embedded system, 3. Desktop operating system, 4. Development and testing environment. Linux excels in these areas, providing stability, security and efficient development tools.
 How to run java code in notepad
Apr 16, 2025 pm 07:39 PM
How to run java code in notepad
Apr 16, 2025 pm 07:39 PM
Although Notepad cannot run Java code directly, it can be achieved by using other tools: using the command line compiler (javac) to generate a bytecode file (filename.class). Use the Java interpreter (java) to interpret bytecode, execute the code, and output the result.
 vscode Previous Next Shortcut Key
Apr 15, 2025 pm 10:51 PM
vscode Previous Next Shortcut Key
Apr 15, 2025 pm 10:51 PM
VS Code One-step/Next step shortcut key usage: One-step (backward): Windows/Linux: Ctrl ←; macOS: Cmd ←Next step (forward): Windows/Linux: Ctrl →; macOS: Cmd →
