

Nginx build https server instance analysis

Introduction to https
https (hypertext transfer protocol over secure socket layer) is an http channel targeting security. Simply put, it is a secure version of http. That is, an SSL layer is added under http. The security foundation of https is SSL, so the details of encryption require SSL.
It is a uri scheme (abstract identifier system), the syntax is similar to the http: system, and is used for secure http data transmission. The default port used by https is 443.
ssl certificate
Introduction to certificate types
To set up a secure server, use public Create a public-private key pair. In most cases, send the certificate request (including your own public key), your company credentials, and the fee to a Certificate Authority (ca).ca verifies the certificate request and your identity, then returns the certificate to your secure server .
But the intranet implements encryption of server-side and client-side transmission content. You can issue your own certificate and just ignore the browser distrust alert!
A certificate signed by a ca provides two important functions for your server:
The browser will automatically recognize the certificate and allow creation without prompting the user A secure connection
When a CA generates a signed certificate, it provides assurance of the identity of the organization that provides the web page to the browser.
Most web servers that support SSL have a list of CAs whose certificates will be automatically accepted. When a browser encounters a certificate whose authority ca is not in the list, the browser will ask the user whether to accept or reject the connection
Generate SSL Certificate
openssl genrsa -des3 -out wangzhengyi.key 2048

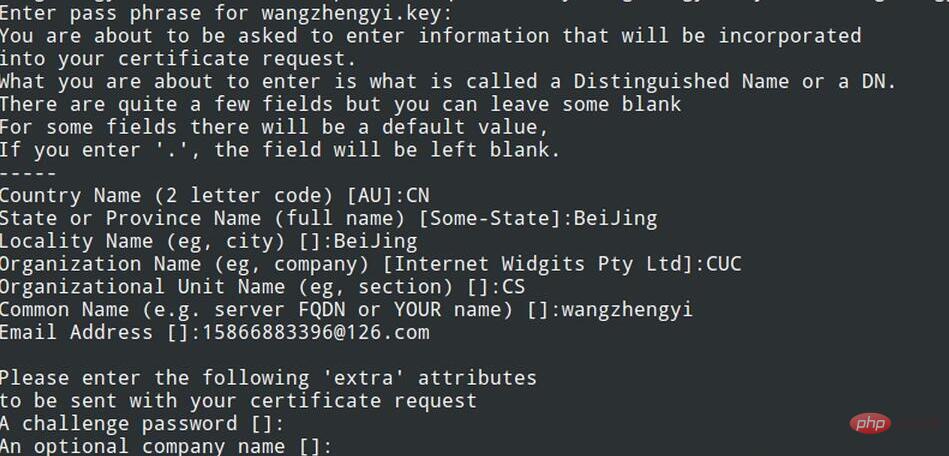
Create a self-signed ca certificate
openssl req -new -x509 -days 3650 -key wangzhengyi_nopass.key -out wangzhengyi.crt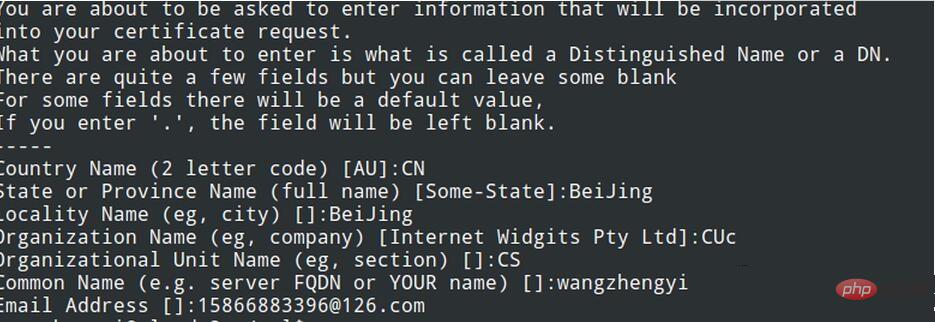
Build https virtual host
upstream sslfpm {
 server 127.0.0.1:9000 weight=10 max_fails=3 fail_timeout=20s;
}

server {
 listen   192.168.1.*:443;
 server_name 192.168.1.*;

 #为一个server开启ssl支持
 ssl         on;
 #为虚拟主机指定pem格式的证书文件
 ssl_certificate   /home/wangzhengyi/ssl/wangzhengyi.crt;
 #为虚拟主机指定私钥文件
 ssl_certificate_key /home/wangzhengyi/ssl/wangzhengyi_nopass.key;
 #客户端能够重复使用存储在缓存中的会话参数时间
 ssl_session_timeout 5m;
 #指定使用的ssl协议
 ssl_protocols sslv3 tlsv1;
 #指定许可的密码描述
 ssl_ciphers all:!adh:!export56:rc4+rsa:+high:+medium:+low:+sslv2:+exp;
 #sslv3和tlsv1协议的服务器密码需求优先级高于客户端密码
 ssl_prefer_server_ciphers on;

 location / {
 root /home/wangzhengyi/ssl/;
 autoindex on;
     autoindex_exact_size  off;
     autoindex_localtime on;
 }
   # redirect server error pages to the static page /50x.html
   #
   error_page 500 502 503 504 /50x.html;
   error_page 404 /404.html;

 location = /50x.html {
     root /usr/share/nginx/www;
   }
  location = /404.html {
     root /usr/share/nginx/www;
   }

   # proxy the php scripts to fpm
   location ~ \.php$ {
 access_log /var/log/nginx/ssl/ssl.access.log main;
 error_log /var/log/nginx/ssl/ssl.error.log;
 root /home/wangzhengyi/ssl/;
 fastcgi_param https on;
     include /etc/nginx/fastcgi_params;
     fastcgi_pass  sslfpm;
   }
}The above is the detailed content of Nginx build https server instance analysis. For more information, please follow other related articles on the PHP Chinese website!

Hot AI Tools

Undresser.AI Undress
AI-powered app for creating realistic nude photos

AI Clothes Remover
Online AI tool for removing clothes from photos.

Undress AI Tool
Undress images for free

Clothoff.io
AI clothes remover

AI Hentai Generator
Generate AI Hentai for free.

Hot Article
Hot Tools

Notepad++7.3.1
Easy-to-use and free code editor

SublimeText3 Chinese version
Chinese version, very easy to use

Zend Studio 13.0.1
Powerful PHP integrated development environment

Dreamweaver CS6
Visual web development tools

SublimeText3 Mac version
God-level code editing software (SublimeText3)
Hot Topics
 1378
1378
 52
52

 How to start nginx in Linux
Apr 14, 2025 pm 12:51 PM
How to start nginx in Linux
Apr 14, 2025 pm 12:51 PM
Steps to start Nginx in Linux: Check whether Nginx is installed. Use systemctl start nginx to start the Nginx service. Use systemctl enable nginx to enable automatic startup of Nginx at system startup. Use systemctl status nginx to verify that the startup is successful. Visit http://localhost in a web browser to view the default welcome page.
 How to configure nginx in Windows
Apr 14, 2025 pm 12:57 PM
How to configure nginx in Windows
Apr 14, 2025 pm 12:57 PM
How to configure Nginx in Windows? Install Nginx and create a virtual host configuration. Modify the main configuration file and include the virtual host configuration. Start or reload Nginx. Test the configuration and view the website. Selectively enable SSL and configure SSL certificates. Selectively set the firewall to allow port 80 and 443 traffic.
 How to check whether nginx is started
Apr 14, 2025 pm 01:03 PM
How to check whether nginx is started
Apr 14, 2025 pm 01:03 PM
How to confirm whether Nginx is started: 1. Use the command line: systemctl status nginx (Linux/Unix), netstat -ano | findstr 80 (Windows); 2. Check whether port 80 is open; 3. Check the Nginx startup message in the system log; 4. Use third-party tools, such as Nagios, Zabbix, and Icinga.
 How to start nginx server
Apr 14, 2025 pm 12:27 PM
How to start nginx server
Apr 14, 2025 pm 12:27 PM
Starting an Nginx server requires different steps according to different operating systems: Linux/Unix system: Install the Nginx package (for example, using apt-get or yum). Use systemctl to start an Nginx service (for example, sudo systemctl start nginx). Windows system: Download and install Windows binary files. Start Nginx using the nginx.exe executable (for example, nginx.exe -c conf\nginx.conf). No matter which operating system you use, you can access the server IP
 How to solve nginx304 error
Apr 14, 2025 pm 12:45 PM
How to solve nginx304 error
Apr 14, 2025 pm 12:45 PM
Answer to the question: 304 Not Modified error indicates that the browser has cached the latest resource version of the client request. Solution: 1. Clear the browser cache; 2. Disable the browser cache; 3. Configure Nginx to allow client cache; 4. Check file permissions; 5. Check file hash; 6. Disable CDN or reverse proxy cache; 7. Restart Nginx.
 How to check whether nginx is started?
Apr 14, 2025 pm 12:48 PM
How to check whether nginx is started?
Apr 14, 2025 pm 12:48 PM
In Linux, use the following command to check whether Nginx is started: systemctl status nginx judges based on the command output: If "Active: active (running)" is displayed, Nginx is started. If "Active: inactive (dead)" is displayed, Nginx is stopped.
 How to solve nginx403 error
Apr 14, 2025 pm 12:54 PM
How to solve nginx403 error
Apr 14, 2025 pm 12:54 PM
The server does not have permission to access the requested resource, resulting in a nginx 403 error. Solutions include: Check file permissions. Check the .htaccess configuration. Check nginx configuration. Configure SELinux permissions. Check the firewall rules. Troubleshoot other causes such as browser problems, server failures, or other possible errors.
 How to solve nginx403
Apr 14, 2025 am 10:33 AM
How to solve nginx403
Apr 14, 2025 am 10:33 AM
How to fix Nginx 403 Forbidden error? Check file or directory permissions; 2. Check .htaccess file; 3. Check Nginx configuration file; 4. Restart Nginx. Other possible causes include firewall rules, SELinux settings, or application issues.
