

Windows 11 doesn't recognize SSD? this is what you should do

Whenever you connect a disk (whether HDD or SSD) to your computer, it will automatically be listed in File Explorer, Device Manager, and Disk Management. However, some users have reported that Windows 11 does not recognize the SSD.
If the SSD is new and you are connecting it for the first time, you will most likely run into problems, possibly because the disk has not been initialized or formatted. But with SSDs already in use, the problem lies elsewhere.
In the following sections, we discuss the root causes and troubleshooting methods for Windows 11 not recognizing your SSD.
Why doesn’t Windows 11 recognize SSD?
We browsed several forums where users shared their issues along with their valuable opinions. Based on this, we were able to identify some issues as to why SSD is not recognized in Windows 11. They are listed below:
- Improper connection
- Unallocated disk space
- Unassigned drive letter
- Incorrectly configured BIOS settings
- Outdated SSD Driver
If by any chance you are able to identify the issue from the list, go to the relevant method and execute it. Otherwise, follow these steps in the order listed for quick troubleshooting.
What should I do if Windows 11 doesn’t recognize the SSD?
1. Check the connection
If you are using an external SSD, it is likely that the connection is incorrect. Remove it, clean the port and USB, and plug it back in. It should appear now. If it doesn't connect it to another port and check.
If Windows 11 still doesn't recognize the SSD, try connecting it to another computer. If it works there, there may be a problem with the port and you will have to have it checked and repaired by a professional.
However, if it is not recognized on other systems, reconnect it to the first system and try the methods listed below to get it up and running.
2. Initialize SSD
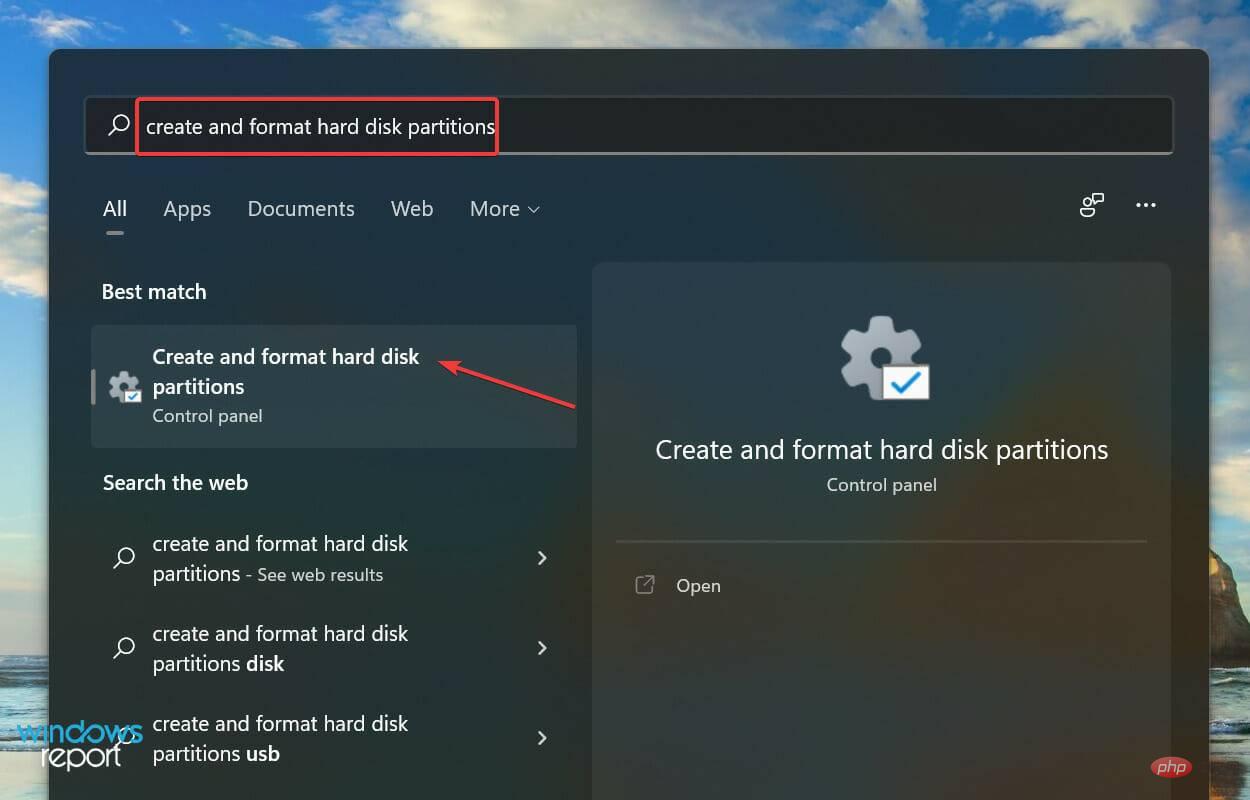
- Press Windows S to launch the search menu, enter in the text field at the top to create and Format the hard drive partition and click on the relevant search results that appear.

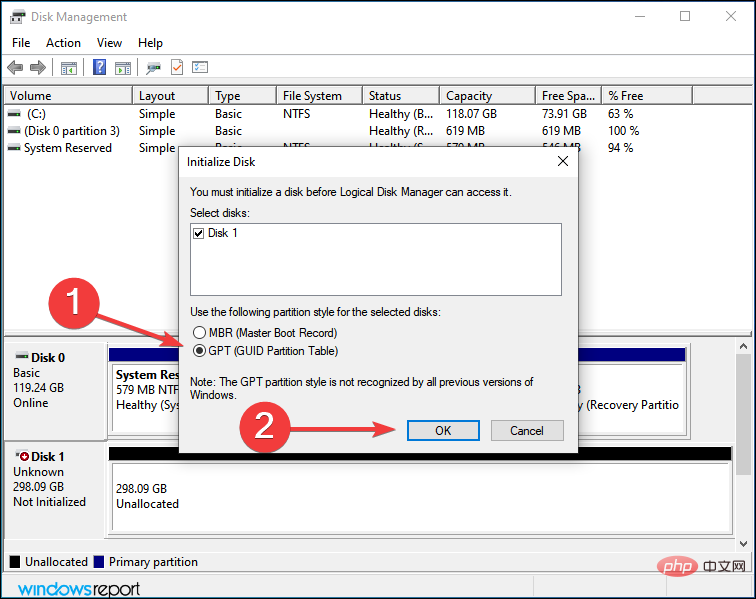
- Check if the SSD in question has a black bar at the top and says Not Initialized. If this is the case, right-click on it and select Initialize Disk from the context menu.
- Select the desired partition style, i.e. MBR or GPT. We recommend choosing GPT as it allows you to create more partitions, but has the disadvantage that it is not recognized by Windows 8 and earlier.
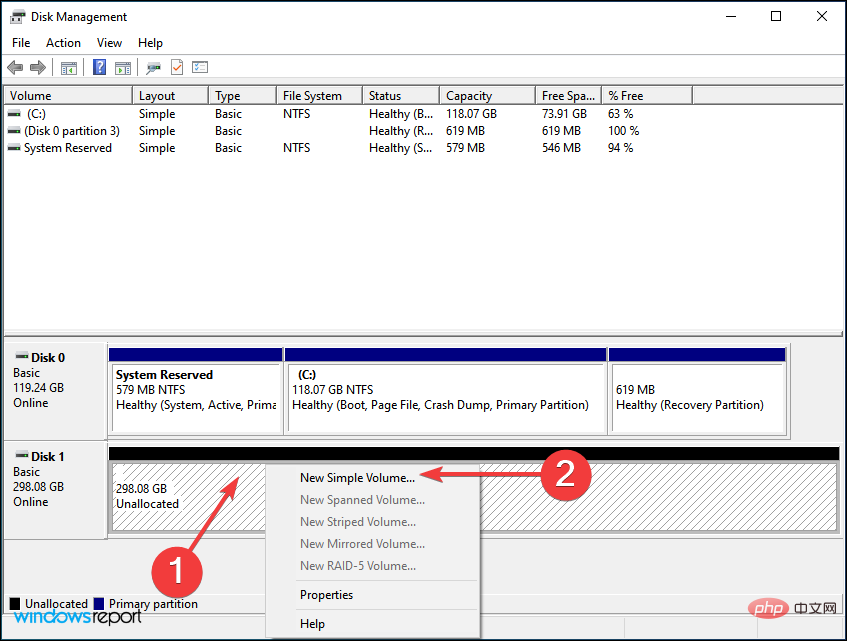
- After initializing the SSD, right-click on it and select New Simple Volume from the context menu.
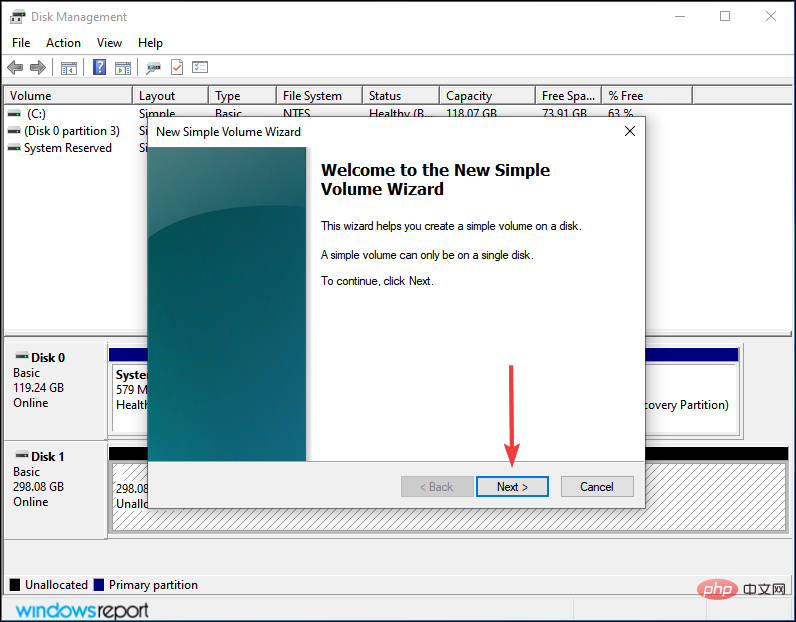
- Click Next to continue.
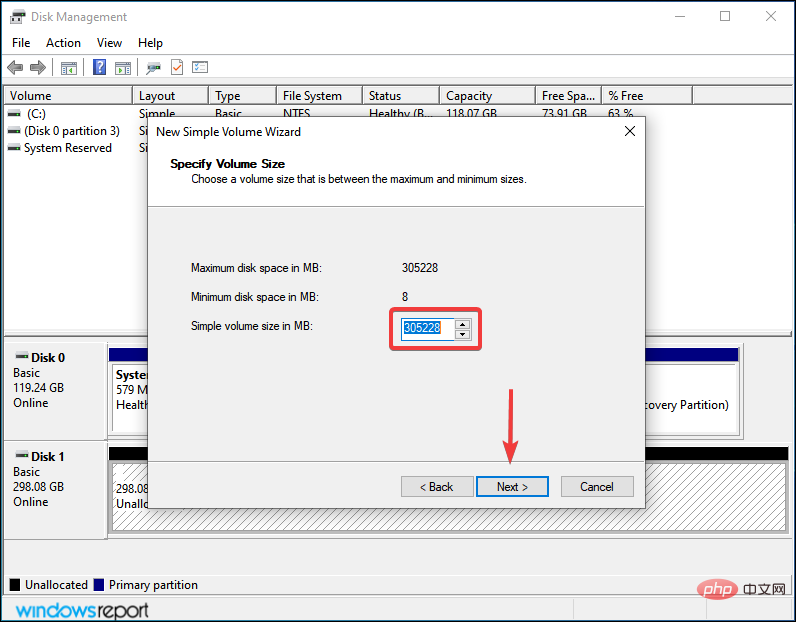
- Enter the volume size in MB. We recommend that you leave the default entry as it is the maximum volume size and click Next.
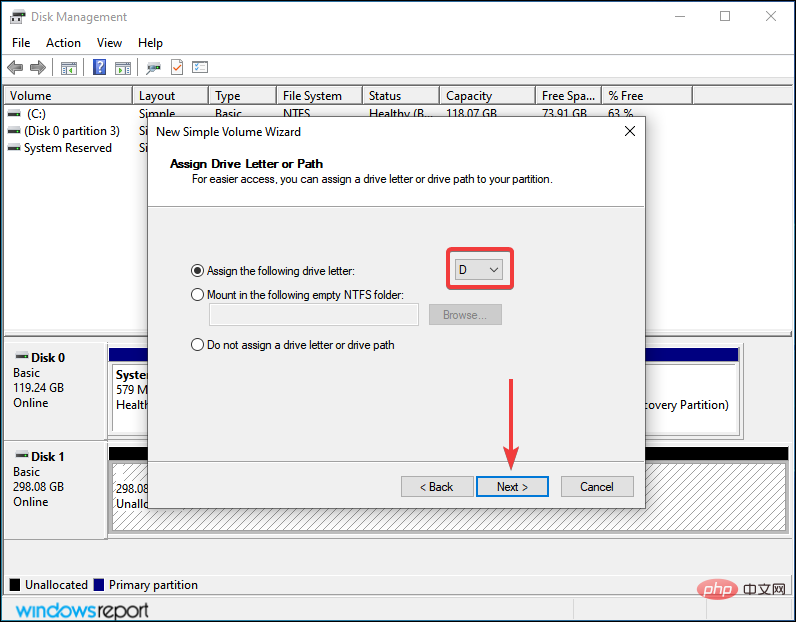
- Select a drive letter from the drop-down menu and click Next.
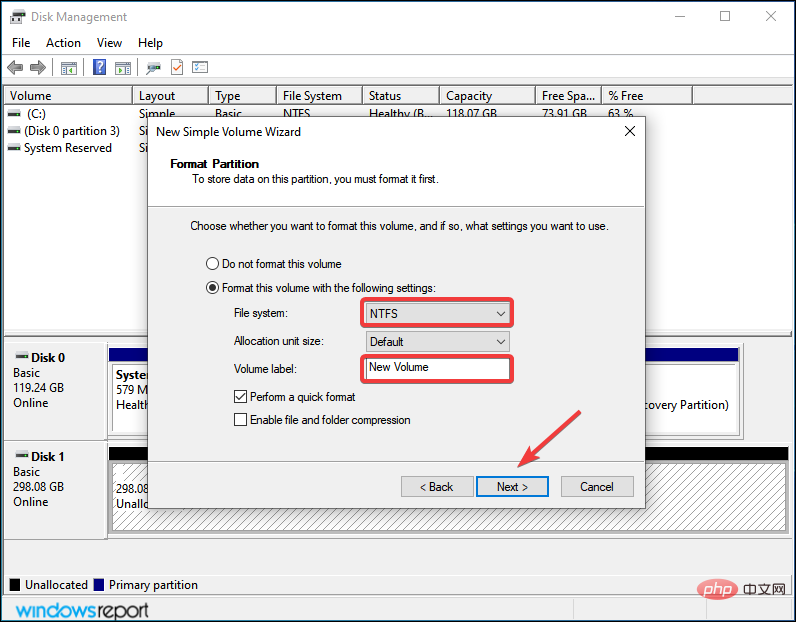
- Next, select the file system and volume label for the SSD and click Next. If you are creating a volume for the first time, we recommend that you use the default entries at every step.
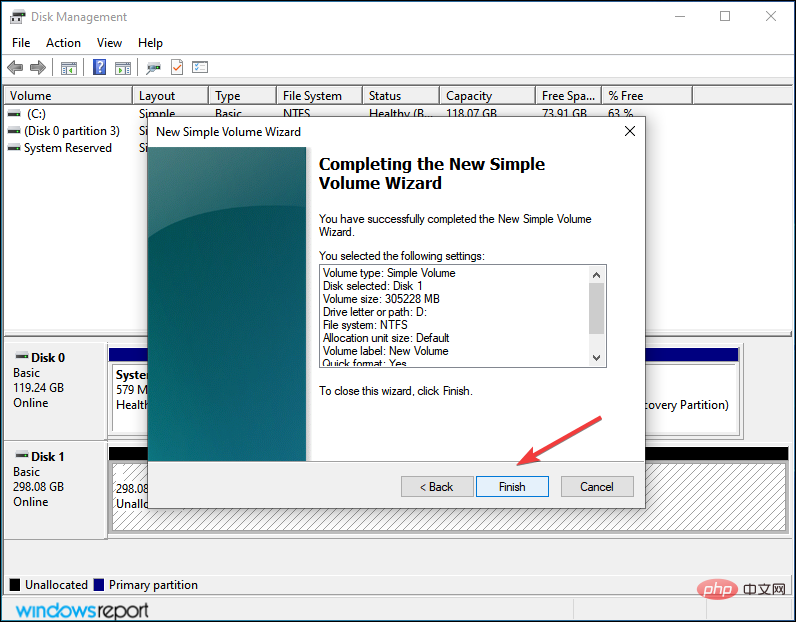
- Finally, verify the details and click Finish.

If the SSD is not initialized or the data on it is corrupted for some reason, Windows 11 will not recognize the drive. In this case, initializing the drive and creating a new volume on it will help resolve the issue.
3. Assign/Change Drive Letter
- Press Windows S to launch the search menu and enter Create and Format in the text field Hard drive partition and click the relevant search results.
- Right-click on the SSD volume and select Change drive letter and path from the context menu.
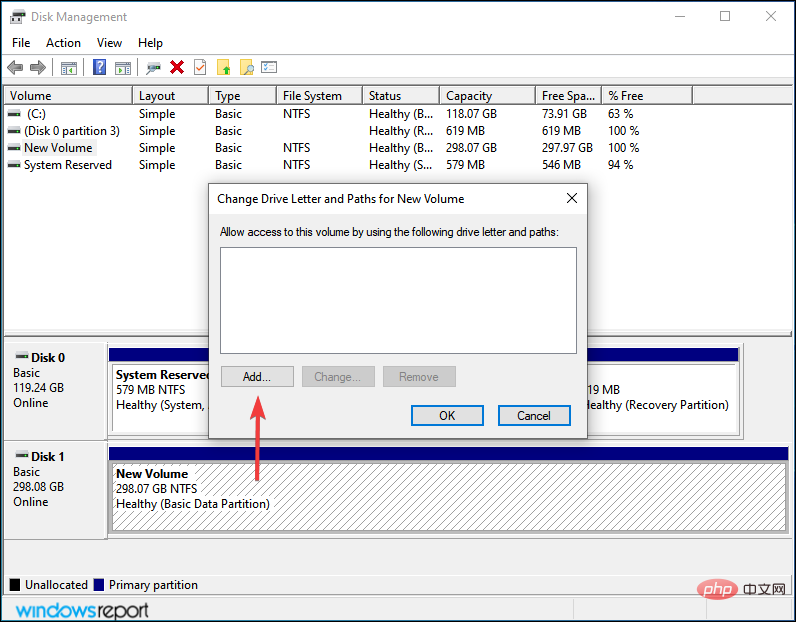
- Next, click the Add button. If the drive is already assigned a letter, click Change.
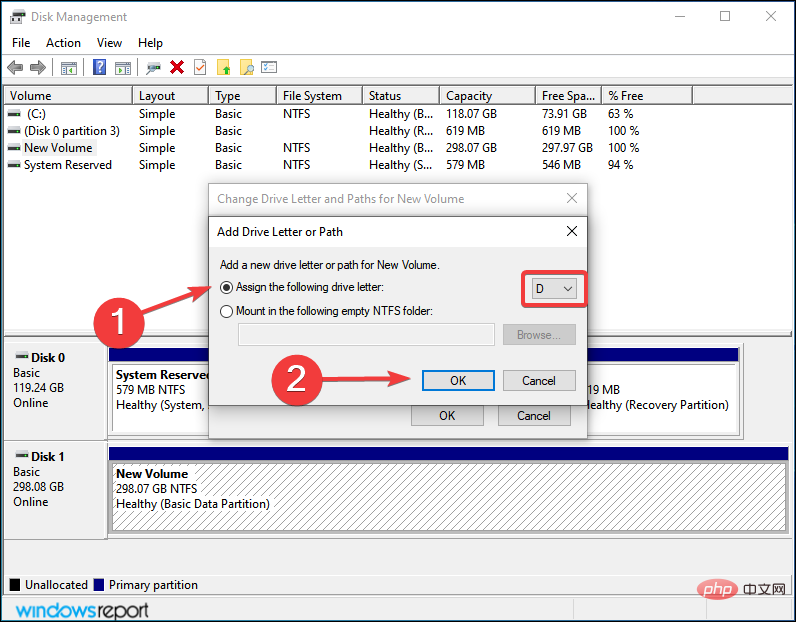
- Check the Assign the following drive letter option, select the desired drive from the drop-down menu and click OK to assign it.
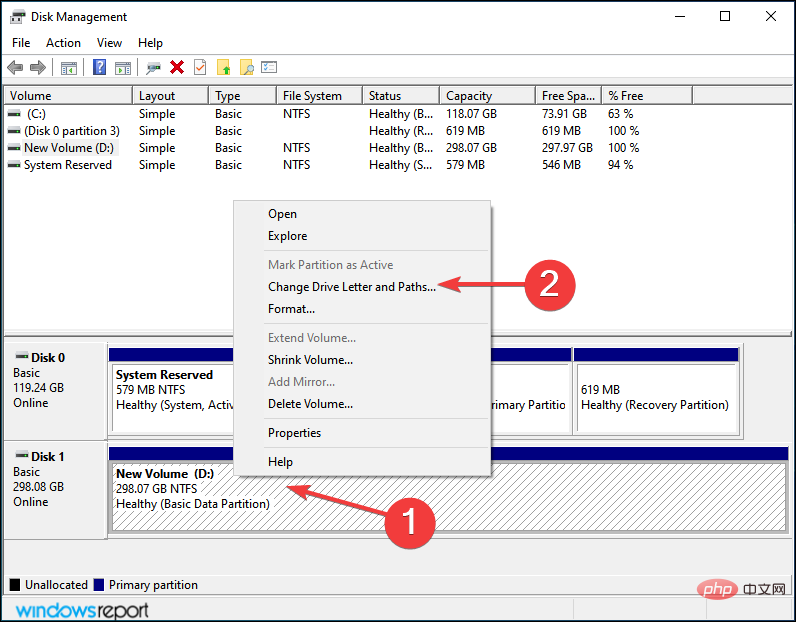
If a volume on an SSD has not been assigned a letter, it will not be listed in File Explorer. In this case, use the steps listed above to assign a drive letter and Windows 11 will now recognize the SSD.
Even though it has been assigned one, there is some issue with it and changing it should help.
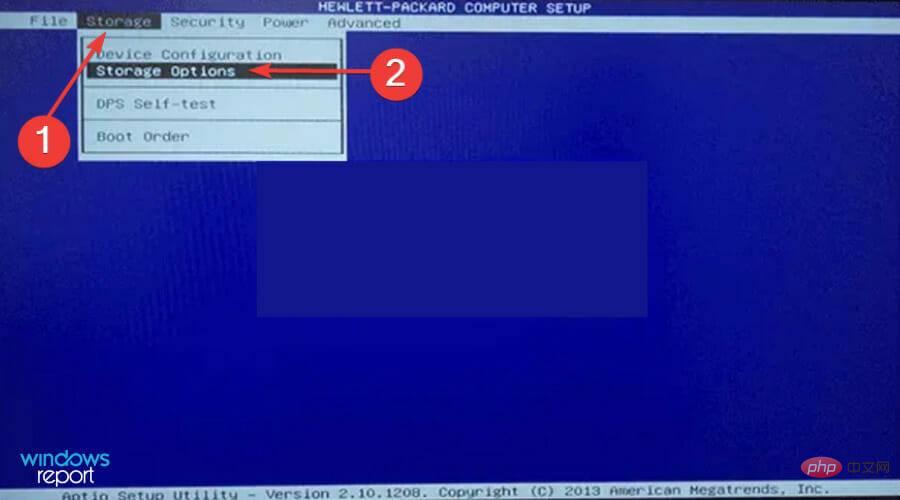
4. Check the BIOS settings
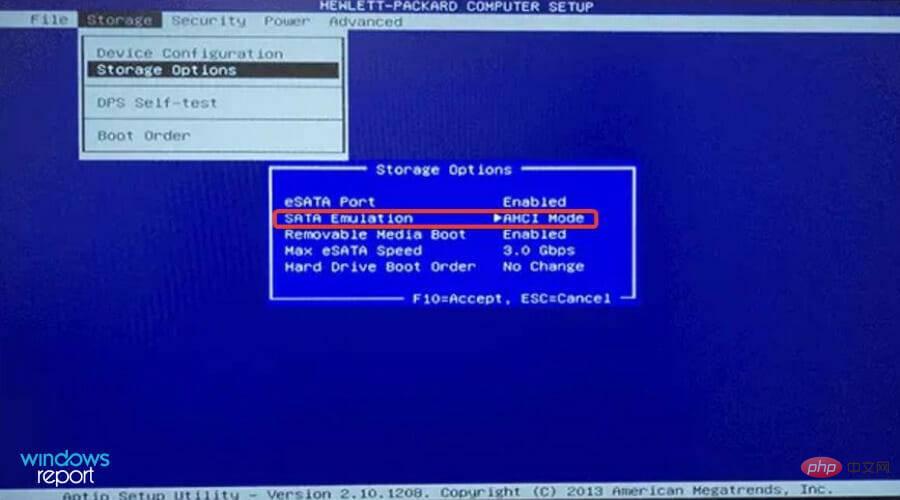
The steps listed here may differ on your computer, but they will give you a fair understanding of the process. For specific steps, check the support or FAQ section on the manufacturer's website.- Turn off the computer and then turn it back on. After the display lights up, press the Del or F12 key or the system manufacturer's relevant key to enter the BIOS settings.
- Locate and click Storage and select the Storage Options entry.
- Now, set SATA Emulation to AHCI Mode and save the changes.
Once completed, boot Windows 11 and the SSD should now be recognized. If it's still not listed, move on to the next method.
5. Update SSD driver
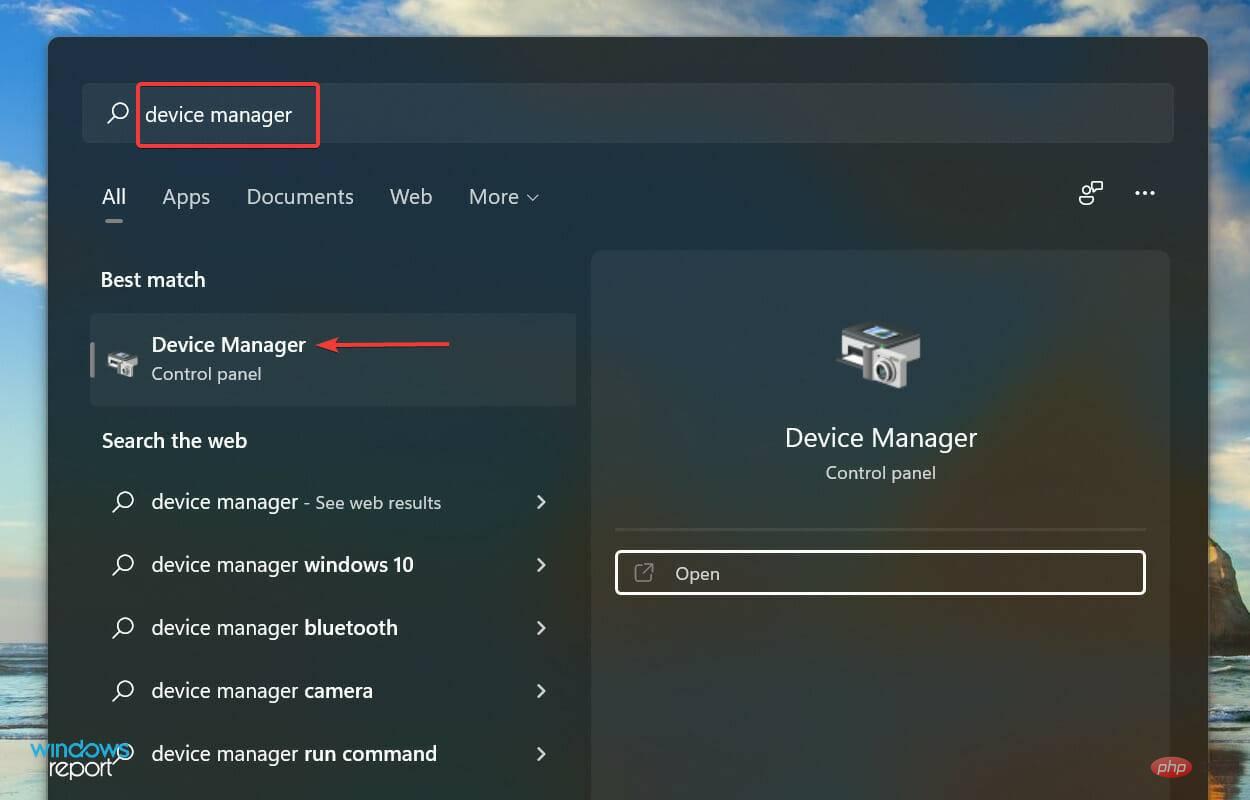
- Press Windows S to launch the search menu and enter device in the text field at the top Manager and click the relevant search result.
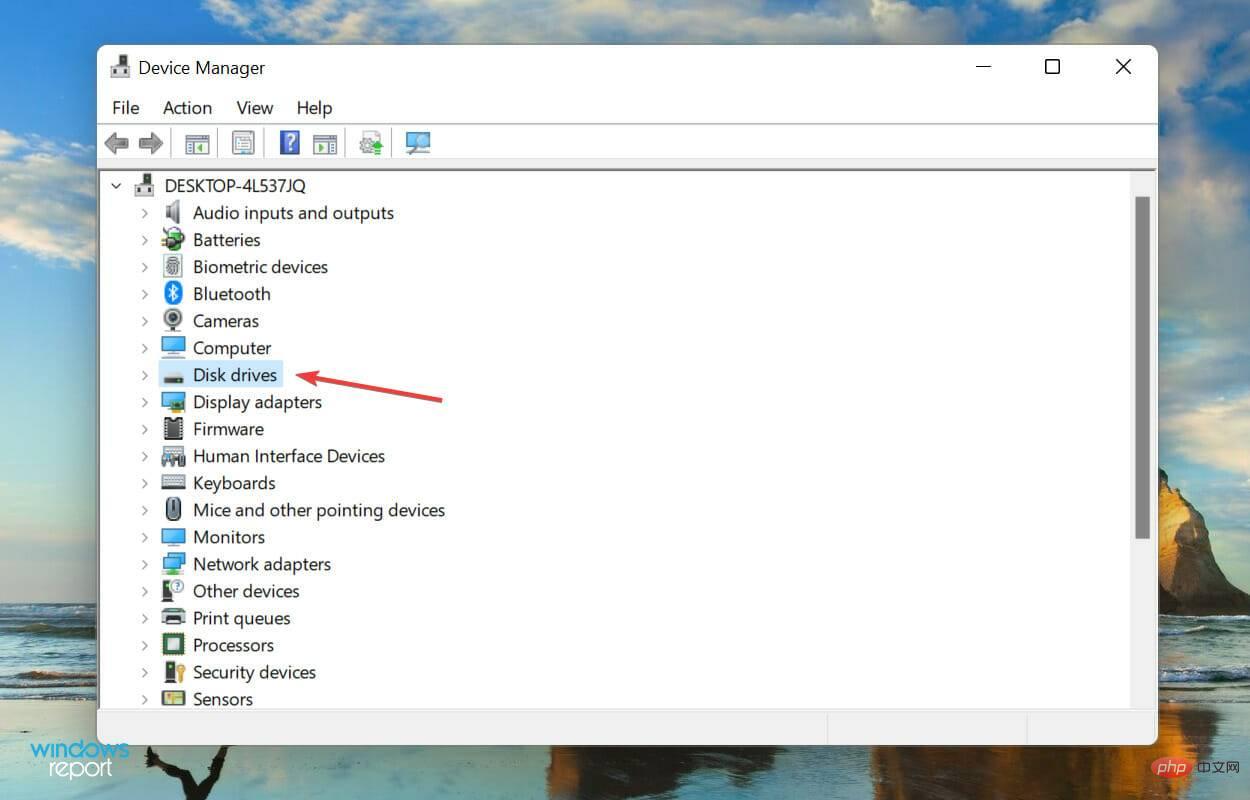
- Double-click the Disk Drive entry to expand and view the problematic SSD.
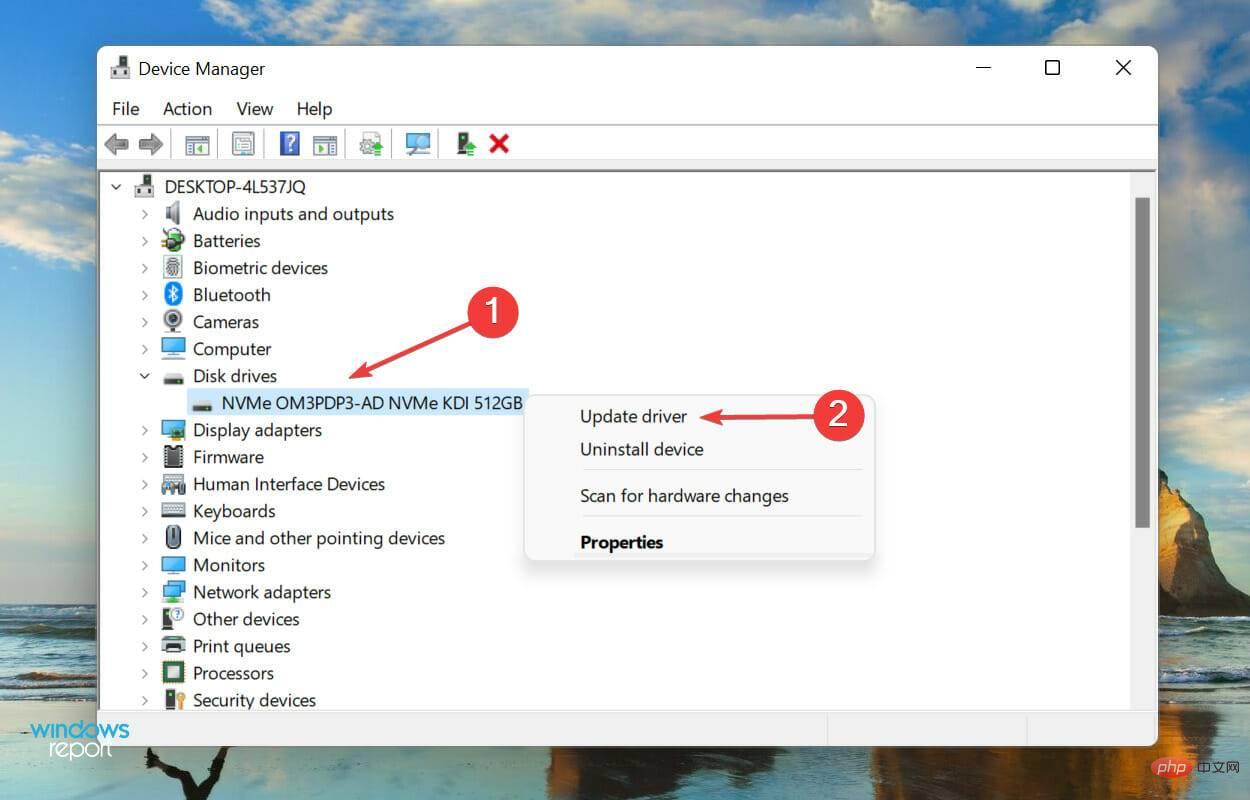
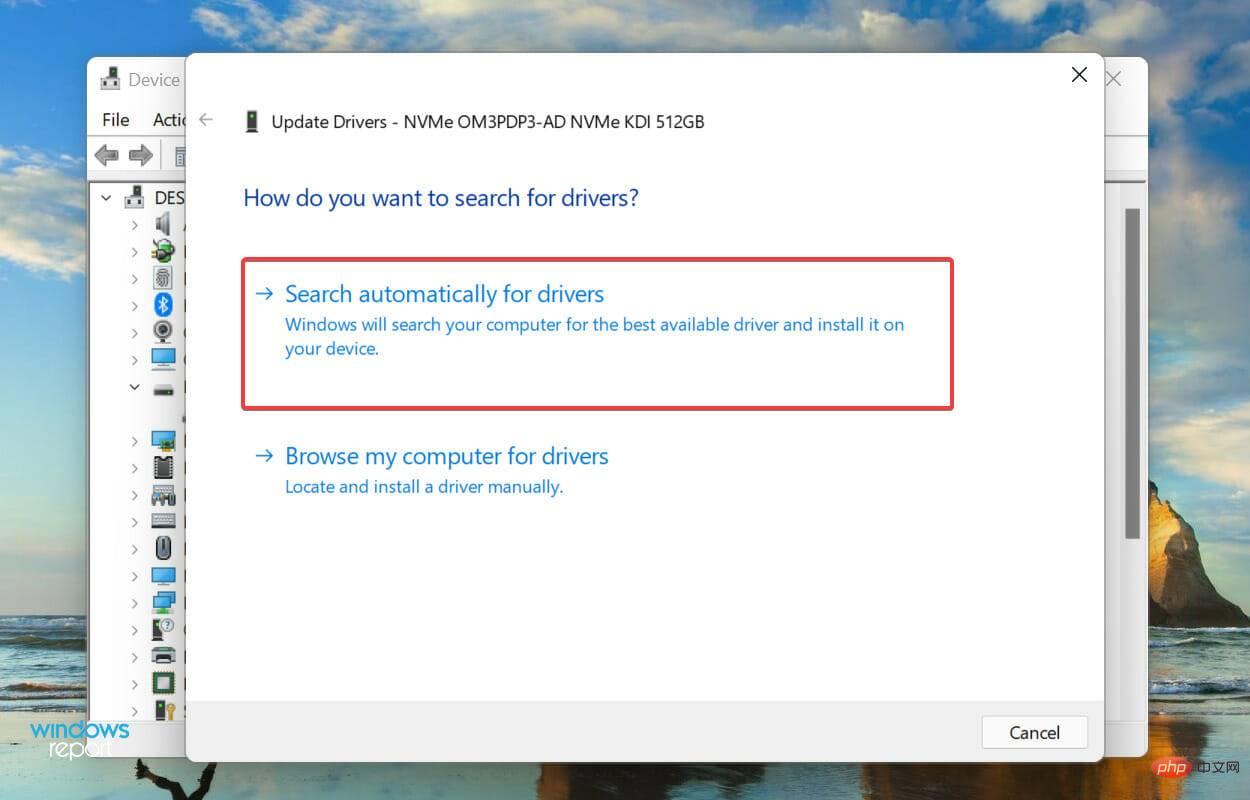
- Right-click on the unrecognized SSD and select Update Driver from the context menu.
- Next, select Search automatically for drivers from the two options displayed in the Update Driver window.
- Your computer will now scan for the best driver available on your system and install it for your SSD.
It is known that outdated drivers can cause some issues with the device in question, in this case the SSD. When you update your drivers, it can improve your device's performance, in addition to introducing new features and eliminating previously known bugs.
However, one of the disadvantages of the Device Manager method listed above is that it only scans drivers stored on the system. Therefore, if you have not downloaded a newer version before, the update process may not go through.
If the whole process sounds like too much trouble, you can always use a reliable third-party app. We recommend using DriverFix, a specialized tool that automatically scans available sources for the latest versions and keeps installed drivers up to date.
After updating the driver, check if Windows 11 can now recognize the SSD. If the problem persists, go to the last method.
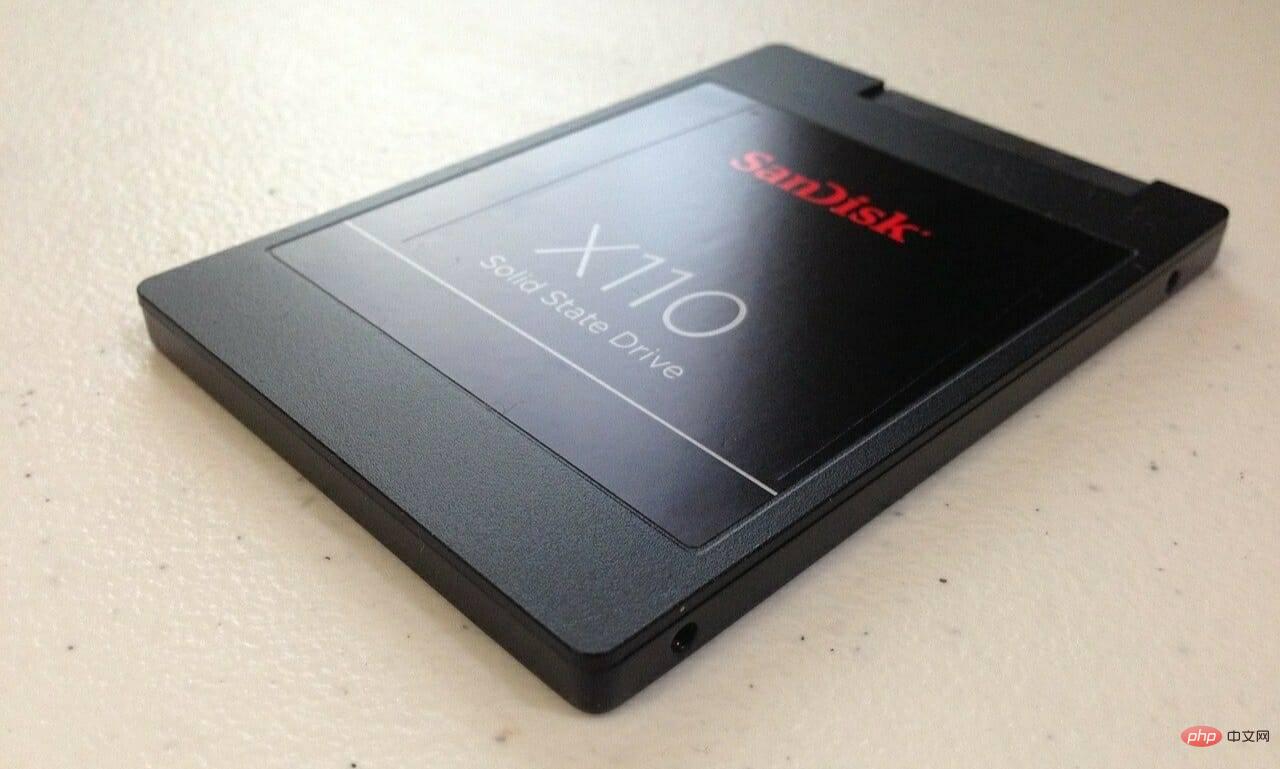
6. Replace the SSD
If nothing else works, the problem is most likely with the SSD itself. Some users reported that after trying every available troubleshooting method, they later discovered that the SSD itself was faulty and that replacing it was enough.
Should I defrag my SSD?
Before we answer this question, you must understand what defragmenting a drive actually is. When you store data on a drive, it is placed together in some space, but if you delete certain files from it, part of that space is empty.
Your system will list all such empty spaces and store new files there. However, if the new file is larger than the available space, only part of it will be saved here, while the rest will be saved in another part of the drive.
This is where the concept of defragmentation comes in. When you defragment a drive, the data on it is rearranged so that all files for the same program are stored together and can be read quickly.
So you noticed a considerable improvement in system performance when defragmenting your HDD.
But with an SSD, data can be read equally quickly whether the data is stored together or separately. This is why there is no real benefit to defragmenting an SSD. On the contrary, it may have adverse effects and shorten the lifespan of the solid-state drive.
If you're looking for a shorter answer, it's No. Never make the mistake of defragmenting an SSD as it provides no real benefit and can instead lead to the degradation of the storage unit.
The methods listed above will eliminate any issues causing Windows 11 to not recognize the SSD. By the time you reach this part of the article, the error will have been eliminated or you will have discovered that the SSD is faulty.
The above is the detailed content of Windows 11 doesn't recognize SSD? this is what you should do. For more information, please follow other related articles on the PHP Chinese website!

Hot AI Tools

Undresser.AI Undress
AI-powered app for creating realistic nude photos

AI Clothes Remover
Online AI tool for removing clothes from photos.

Undress AI Tool
Undress images for free

Clothoff.io
AI clothes remover

Video Face Swap
Swap faces in any video effortlessly with our completely free AI face swap tool!

Hot Article
Hot Tools

Notepad++7.3.1
Easy-to-use and free code editor

SublimeText3 Chinese version
Chinese version, very easy to use

Zend Studio 13.0.1
Powerful PHP integrated development environment

Dreamweaver CS6
Visual web development tools

SublimeText3 Mac version
God-level code editing software (SublimeText3)
Hot Topics
 1392
1392
 52
52

 What is the reason why PS keeps showing loading?
Apr 06, 2025 pm 06:39 PM
What is the reason why PS keeps showing loading?
Apr 06, 2025 pm 06:39 PM
PS "Loading" problems are caused by resource access or processing problems: hard disk reading speed is slow or bad: Use CrystalDiskInfo to check the hard disk health and replace the problematic hard disk. Insufficient memory: Upgrade memory to meet PS's needs for high-resolution images and complex layer processing. Graphics card drivers are outdated or corrupted: Update the drivers to optimize communication between the PS and the graphics card. File paths are too long or file names have special characters: use short paths and avoid special characters. PS's own problem: Reinstall or repair the PS installer.
 How to solve the problem of loading when PS is always showing that it is loading?
Apr 06, 2025 pm 06:30 PM
How to solve the problem of loading when PS is always showing that it is loading?
Apr 06, 2025 pm 06:30 PM
PS card is "Loading"? Solutions include: checking the computer configuration (memory, hard disk, processor), cleaning hard disk fragmentation, updating the graphics card driver, adjusting PS settings, reinstalling PS, and developing good programming habits.
 How to speed up the loading speed of PS?
Apr 06, 2025 pm 06:27 PM
How to speed up the loading speed of PS?
Apr 06, 2025 pm 06:27 PM
Solving the problem of slow Photoshop startup requires a multi-pronged approach, including: upgrading hardware (memory, solid-state drive, CPU); uninstalling outdated or incompatible plug-ins; cleaning up system garbage and excessive background programs regularly; closing irrelevant programs with caution; avoiding opening a large number of files during startup.
 Is slow PS loading related to computer configuration?
Apr 06, 2025 pm 06:24 PM
Is slow PS loading related to computer configuration?
Apr 06, 2025 pm 06:24 PM
The reason for slow PS loading is the combined impact of hardware (CPU, memory, hard disk, graphics card) and software (system, background program). Solutions include: upgrading hardware (especially replacing solid-state drives), optimizing software (cleaning up system garbage, updating drivers, checking PS settings), and processing PS files. Regular computer maintenance can also help improve PS running speed.
 How to solve the problem of loading when the PS opens the file?
Apr 06, 2025 pm 06:33 PM
How to solve the problem of loading when the PS opens the file?
Apr 06, 2025 pm 06:33 PM
"Loading" stuttering occurs when opening a file on PS. The reasons may include: too large or corrupted file, insufficient memory, slow hard disk speed, graphics card driver problems, PS version or plug-in conflicts. The solutions are: check file size and integrity, increase memory, upgrade hard disk, update graphics card driver, uninstall or disable suspicious plug-ins, and reinstall PS. This problem can be effectively solved by gradually checking and making good use of PS performance settings and developing good file management habits.
 How to use mysql after installation
Apr 08, 2025 am 11:48 AM
How to use mysql after installation
Apr 08, 2025 am 11:48 AM
The article introduces the operation of MySQL database. First, you need to install a MySQL client, such as MySQLWorkbench or command line client. 1. Use the mysql-uroot-p command to connect to the server and log in with the root account password; 2. Use CREATEDATABASE to create a database, and USE select a database; 3. Use CREATETABLE to create a table, define fields and data types; 4. Use INSERTINTO to insert data, query data, update data by UPDATE, and delete data by DELETE. Only by mastering these steps, learning to deal with common problems and optimizing database performance can you use MySQL efficiently.
 Is PS slow loading related to other programs that are running?
Apr 06, 2025 pm 06:03 PM
Is PS slow loading related to other programs that are running?
Apr 06, 2025 pm 06:03 PM
The secrets to mastering Office software include: understanding different versions and platforms, correctly installing and configuring, proficient in using the software interface, in-depth understanding of feature operations, application collaboration and sharing functions, utilizing templates and styles, mastering advanced skills, and solving common problems. In addition, you need to choose a version that suits your needs, make good use of templates and styles, develop backup habits, and learn shortcut keys and advanced techniques to improve efficiency.
 How to solve the problem of loading when PS is started?
Apr 06, 2025 pm 06:36 PM
How to solve the problem of loading when PS is started?
Apr 06, 2025 pm 06:36 PM
A PS stuck on "Loading" when booting can be caused by various reasons: Disable corrupt or conflicting plugins. Delete or rename a corrupted configuration file. Close unnecessary programs or upgrade memory to avoid insufficient memory. Upgrade to a solid-state drive to speed up hard drive reading. Reinstalling PS to repair corrupt system files or installation package issues. View error information during the startup process of error log analysis.