How does SpringBoot integrate Jackson?
1. Introduction to Jackson
Note: This article talks about the detailed usage of Jackson. The Jackson tool class is at the end of the article, you can just copy and paste it to use. Jackson is one of the components that must be used in the company. Alibaba's Fastjson is also commonly used. However, due to some reasons, there are too many bugs and loopholes. Companies that pay attention to security are directly passed. There is also Google's Gson (this is useless) But I don’t know much about it). Spring MVC’s default json parser is Jackson. Jackson has many strengths. Jackson relies on fewer jar packages and is simple and easy to use. Compared with other Java json frameworks such as Gson, Jackson parses large json files faster; Jackson takes up less memory during runtime and has better performance; Jackson has a flexible API that can be easily expanded and customized.
Additional knowledge:
The package name of the 1.x version of Jackson is org.codehaus.jackson,
When upgraded to 2 .x version, the package name becomes com.fasterxml.jackson.
Jackson has three core packages, namely Streaming, Databid, Annotations, through which JSON can be easily operated.
jackson-core: The core package provides related APIs based on "stream mode" parsing, which includes JsonPaser and JsonGenerator. Jackson's internal implementation generates and parses json through the high-performance streaming API's JsonGenerator and JsonParser.jackson-annotations: Annotation package, providing standard annotation functions.jackson-databind: Data binding package, provides related APIs (ObjectMapper) based on "object binding" parsing and related APIs (JsonNode) parsed by "tree model"; APIs based on "object binding" parsing and "tree model" parsing The API relies on APIs parsed based on "streaming mode". Contains the above two packages, just import this coordinate.
Running environment:
idea2020.2jdk1.8springboot 2.7.9
Download demo: Just go to my resources to download (Jackson instance - attached tool class)
2. Json introduction
Description: As a Java developer, it must be To learn Json, Json is the most common data exchange format in current front-end and back-end separated projects. For example, the @RequestBody annotation in SpringBoot is used as an annotation for receiving Json format. When using Postman for testing, the raw-json transmitted is also Json format data.
JSON representation structure:
Object array: The object structure starts with "{" braces and ends with "}" braces, and the middle part consists of 0 or more ", It consists of "key (keyword)/value (value)" pairs separated by "." Keywords and values are separated by ":", and the syntax structure is like code. Here is an example.
{
  "array": [1,2,3],
  "boolean": true,
  "name": "cllb",
  "null": null,
  "age": 12345,
  "object": {
    "height": 100,
    "color": "红色"
  },
  "string": "陈老老老板"
}3. Springboot integrates Jackson
1. Create project
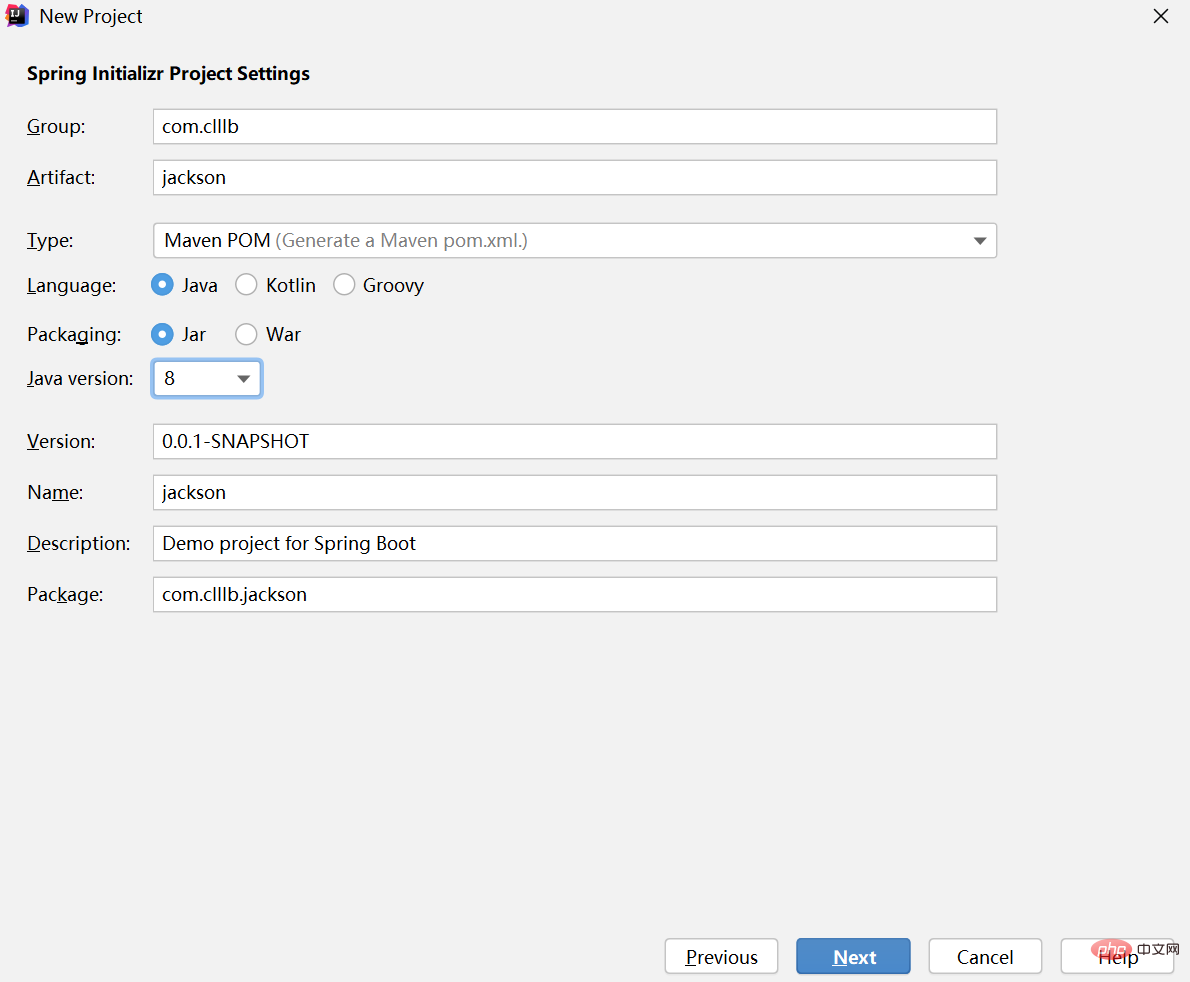
Instructions: Create an empty springboot project (version 2.7.9). I won’t repeat it too much here. It is very convenient to select the lombok component when creating it, without having to write the Get/Set method.
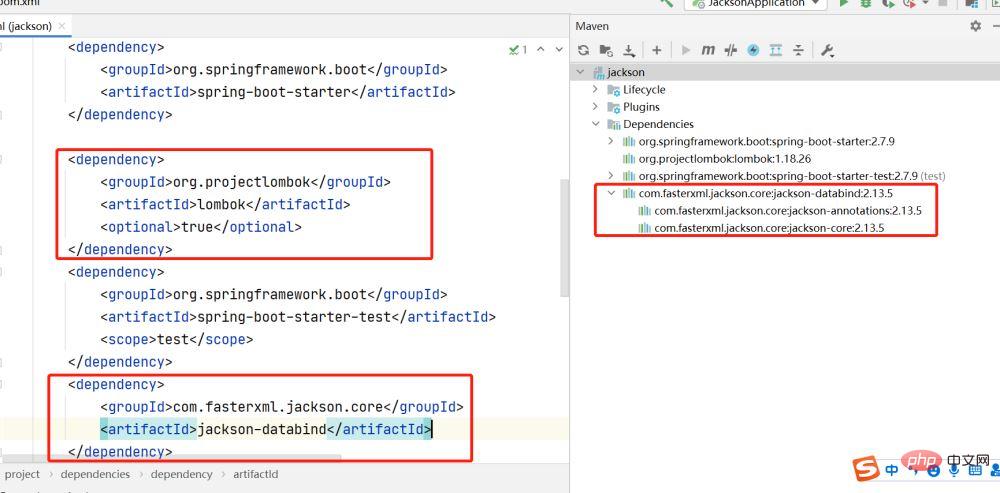
Note: You can see that importing the databind package will automatically import the remaining two packages.

2. Import coordinates
Instructions: You can see that importing the databind package will automatically import the remaining two packages.
<dependency>
    <groupId>com.fasterxml.jackson.core</groupId>
    <artifactId>jackson-databind</artifactId>
    <version>2.13.3</version>
</dependency>
3. Configuration file
a. Configuration file configuration
properties format:
#指定日期格式,比如yyyy-MM-dd HH:mm:ss,或者具体的格式化类的全限定名
spring.jackson.date-format
#指定日期格式化时区,比如America/Los_Angeles或者GMT+10.
spring.jackson.time-zone
#是否开启Jackson的反序列化
spring.jackson.deserialization
#是否开启json的generators.
spring.jackson.generator
#指定Joda date/time的格式,比如yyyy-MM-ddHH:mm:ss). 如果没有配置的话,dateformat会作为backup
spring.jackson.joda-date-time-format
#指定json使用的Locale.
spring.jackson.locale
#是否开启Jackson通用的特性.
spring.jackson.mapper
#是否开启jackson的parser特性.
spring.jackson.parser
#指定PropertyNamingStrategy(CAMEL_CASE_TO_LOWER_CASE_WITH_UNDERSCORES)或者指定PropertyNamingStrategy子类的全限定类名.
spring.jackson.property-naming-strategy
#是否开启jackson的序列化.
spring.jackson.serialization
#指定序列化时属性的inclusion方式,具体查看JsonInclude.Include枚举.
spring.jackson.serialization-inclusion
yml format:
spring:
  jackson:
    #日期格式化
    date-format: yyyy-MM-dd HH:mm:ss
    time-zone: GMT+8
    #设置空如何序列化
    default-property-inclusion: non_null
    serialization:
       #格式化输出
      indent_output: true
      #忽略无法转换的对象
      fail_on_empty_beans: false
    deserialization:
      #允许对象忽略json中不存在的属性
      fail_on_unknown_properties: false
    parser:
      #允许出现特殊字符和转义符
      allow_unquoted_control_chars: true
      #允许出现单引号
allow_single_quotes: trueb. Custom configuration
Instructions: Here I will directly give you the Jackson tool class. The custom configuration refers to the set assignment to object_mapper in the tool class. . All methods are available, and demonstrations are performed directly using tool classes.
package com.clllb.jackson.utils;

import com.fasterxml.jackson.annotation.JsonInclude;
import com.fasterxml.jackson.core.JsonProcessingException;
import com.fasterxml.jackson.core.type.TypeReference;
import com.fasterxml.jackson.databind.*;
import lombok.extern.slf4j.Slf4j;
import org.springframework.util.StringUtils;

import java.io.File;
import java.io.IOException;
import java.text.SimpleDateFormat;
import java.util.List;

@Slf4j
public class JacksonUtil {

    private static final ObjectMapper OBJECT_MAPPER = new ObjectMapper();

    private static final ObjectMapper OBJECT_MAPPER_SNAKE_CASE = new ObjectMapper();
    // 日期格式化
    private static final String STANDARD_FORMAT = "yyyy-MM-dd HH:mm:ss";

    static {
        //对象的所有字段全部列入
        OBJECT_MAPPER.setSerializationInclusion(JsonInclude.Include.ALWAYS);
        //取消默认转换timestamps形式
        OBJECT_MAPPER.configure(SerializationFeature.WRITE_DATES_AS_TIMESTAMPS, false);
        //忽略空Bean转json的错误
        OBJECT_MAPPER.configure(SerializationFeature.FAIL_ON_EMPTY_BEANS, false);
        //所有的日期格式都统一为以下的样式,即yyyy-MM-dd HH:mm:ss
        OBJECT_MAPPER.setDateFormat(new SimpleDateFormat(STANDARD_FORMAT));
        //忽略 在json字符串中存在,但是在java对象中不存在对应属性的情况。防止错误
        OBJECT_MAPPER.configure(DeserializationFeature.FAIL_ON_UNKNOWN_PROPERTIES, false);
    }

    static {
        //对象的所有字段全部列入
        OBJECT_MAPPER_SNAKE_CASE.setSerializationInclusion(JsonInclude.Include.ALWAYS);
        //取消默认转换timestamps形式
        OBJECT_MAPPER_SNAKE_CASE.configure(SerializationFeature.WRITE_DATES_AS_TIMESTAMPS, false);
        //忽略空Bean转json的错误
        OBJECT_MAPPER_SNAKE_CASE.configure(SerializationFeature.FAIL_ON_EMPTY_BEANS, false);
        //所有的日期格式都统一为以下的样式,即yyyy-MM-dd HH:mm:ss
        OBJECT_MAPPER_SNAKE_CASE.setDateFormat(new SimpleDateFormat(STANDARD_FORMAT));
        //忽略 在json字符串中存在,但是在java对象中不存在对应属性的情况。防止错误
        OBJECT_MAPPER_SNAKE_CASE.configure(DeserializationFeature.FAIL_ON_UNKNOWN_PROPERTIES, false);
        //转换为下划线
        OBJECT_MAPPER_SNAKE_CASE.setPropertyNamingStrategy(PropertyNamingStrategies.SNAKE_CASE);
    }

    private JacksonUtil() {
    }

    /**
     * 对象转Json格式字符串
     *
     * @param obj 对象
     * @return Json格式字符串
     */
    public static <T> String obj2String(T obj) {
        if (obj == null) {
            return null;
        }
        try {
            return obj instanceof String ? (String) obj : OBJECT_MAPPER.writeValueAsString(obj);
        } catch (JsonProcessingException e) {
            log.warn("Parse Object to String error : {}", e.getMessage());
            return null;
        }
    }

    /**
     * 对象转file
     * @param fileName
     * @param obj
     */
     public static void obj2File(String fileName,Object obj){
        if (obj == null){
            return;
        }
         try {
             OBJECT_MAPPER.writeValue(new File(fileName),obj);
         } catch (IOException e) {
             e.printStackTrace();
         }
     }

    /**
     * 对象转Json格式字符串; 属性名从驼峰改为下划线形式
     *
     * @param obj 对象
     * @return Json格式字符串
     */
    public static <T> String obj2StringFieldSnakeCase(T obj) {
        if (obj == null) {
            return null;
        }
        try {
            ObjectMapper objectMapper = OBJECT_MAPPER_SNAKE_CASE;
            return obj instanceof String ? (String) obj : objectMapper.writeValueAsString(obj);
        } catch (JsonProcessingException e) {
            log.warn("Parse Object to String error : {}", e.getMessage());
            return null;
        }
    }

    /**
     * 字符串转换为自定义对象; 属性名从下划线形式改为驼峰
     *
     * @param str   要转换的字符串
     * @param clazz 自定义对象的class对象
     * @return 自定义对象
     */
    public static <T> T string2ObjFieldLowerCamelCase(String str, Class<T> clazz) {
        if (StringUtils.isEmpty(str) || clazz == null) {
            return null;
        }
        try {
            ObjectMapper objectMapper = OBJECT_MAPPER_SNAKE_CASE;
            return clazz.equals(String.class) ? (T) str : objectMapper.readValue(str, clazz);
        } catch (Exception e) {
            log.warn("Parse String to Object error : {}", e.getMessage());
            return null;
        }
    }

    /**
     * 字符串转换为自定义对象(List); 属性名从下划线形式改为驼峰
     *
     * @param str           要转换的字符串
     * @param typeReference 自定义对象的typeReference List 对象
     * @return 自定义对象
     */
    public static <T> List<T> string2ListFieldLowerCamelCase(String str, TypeReference<List<T>> typeReference) {
        if (StringUtils.isEmpty(str) || typeReference == null) {
            return null;
        }
        try {
            ObjectMapper objectMapper = OBJECT_MAPPER_SNAKE_CASE;
            return objectMapper.readValue(str, typeReference);
        } catch (Exception e) {
            log.warn("Parse String to Object error : {}", e.getMessage());
            return null;
        }
    }

    /**
     * 对象转Json格式字符串(格式化的Json字符串)
     *
     * @param obj 对象
     * @return 美化的Json格式字符串
     */
    public static <T> String obj2StringPretty(T obj) {
        if (obj == null) {
            return null;
        }
        try {
            return obj instanceof String ? (String) obj : OBJECT_MAPPER.writerWithDefaultPrettyPrinter().writeValueAsString(obj);
        } catch (JsonProcessingException e) {
            log.warn("Parse Object to String error : {}", e.getMessage());
            return null;
        }
    }

    /**
     * 字符串转换为自定义对象
     *
     * @param str   要转换的字符串
     * @param clazz 自定义对象的class对象
     * @return 自定义对象
     */
    public static <T> T string2Obj(String str, Class<T> clazz) {
        if (StringUtils.isEmpty(str) || clazz == null) {
            return null;
        }
        try {
            return clazz.equals(String.class) ? (T) str : OBJECT_MAPPER.readValue(str, clazz);
        } catch (Exception e) {
            log.warn("Parse String to Object error : {}", e.getMessage());
            return null;
        }
    }

    /**
     * 字符串转换为自定义字段转为list
     * @param str
     * @param typeReference
     * @param <T>
     * @return
     */
    public static <T> T string2Obj(String str, TypeReference<T> typeReference) {
        if (StringUtils.isEmpty(str) || typeReference == null) {
            return null;
        }
        try {
            return (T) (typeReference.getType().equals(String.class) ? str : OBJECT_MAPPER.readValue(str, typeReference));
        } catch (IOException e) {
            log.warn("Parse String to Object error", e);
            return null;
        }
    }

    public static <T> T string2Obj(String str, Class<?> collectionClazz, Class<?>... elementClazzes) {
        JavaType javaType = OBJECT_MAPPER.getTypeFactory().constructParametricType(collectionClazz, elementClazzes);
        try {
            return OBJECT_MAPPER.readValue(str, javaType);
        } catch (IOException e) {
            log.warn("Parse String to Object error : {}" + e.getMessage());
            return null;
        }
    }
}4. Entity class
Instructions: Create a user entity class here
package com.clllb.jackson.PO;

import lombok.Data;

import java.util.List;

@Data
public class User {

    private String username;

    private Integer age;

    private List<String> info;

	private Long userId;
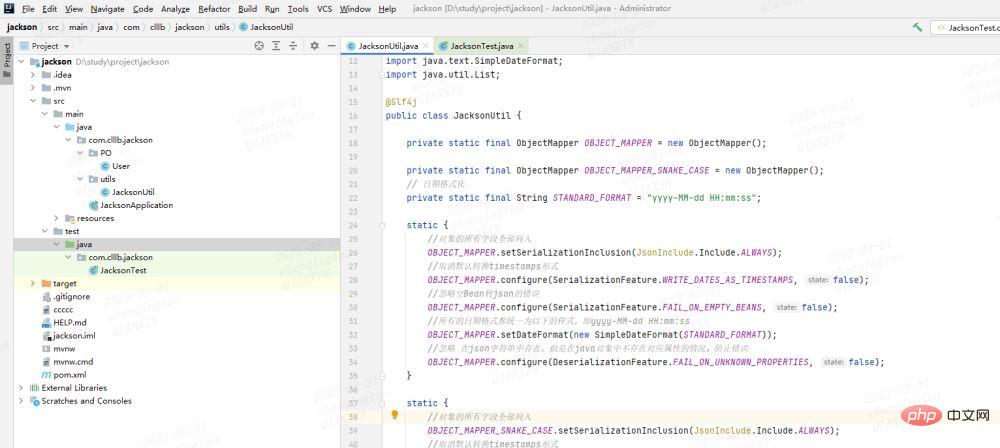
}Project sample:

5. Test class
Instructions: Directly adjust the method in the tool class in the test class. It is very simple and the output results are attached.
a.object type to Json
Instructions: Use writeValueAsString method
  @Test
    void obj2string(){
        User user = new User();
        user.setUsername("clllb");
        user.setAge(24);
        user.setUserId(1L);
        List<String> infoList = new ArrayList<>();
        infoList.add("有一百万");
        infoList.add("发大财");
        user.setInfo(infoList);

        String json = JacksonUtil.obj2String(user);
        System.out.println(json);
}Output result:
{" username":"clllb","age":24,"info":["One million","make a fortune"],"userId":1}
b.object Type conversion file
Instructions: Use writeValue method
  @Test
    void obj2file(){
        User user = new User();
        user.setUsername("clllb");
        user.setAge(24);
        user.setUserId(1L);
        List<String> infoList = new ArrayList<>();
        infoList.add("有一百万");
        infoList.add("发大财");
        user.setInfo(infoList);
        String fileName = "ccccc";
        JacksonUtil.obj2File(fileName,user);
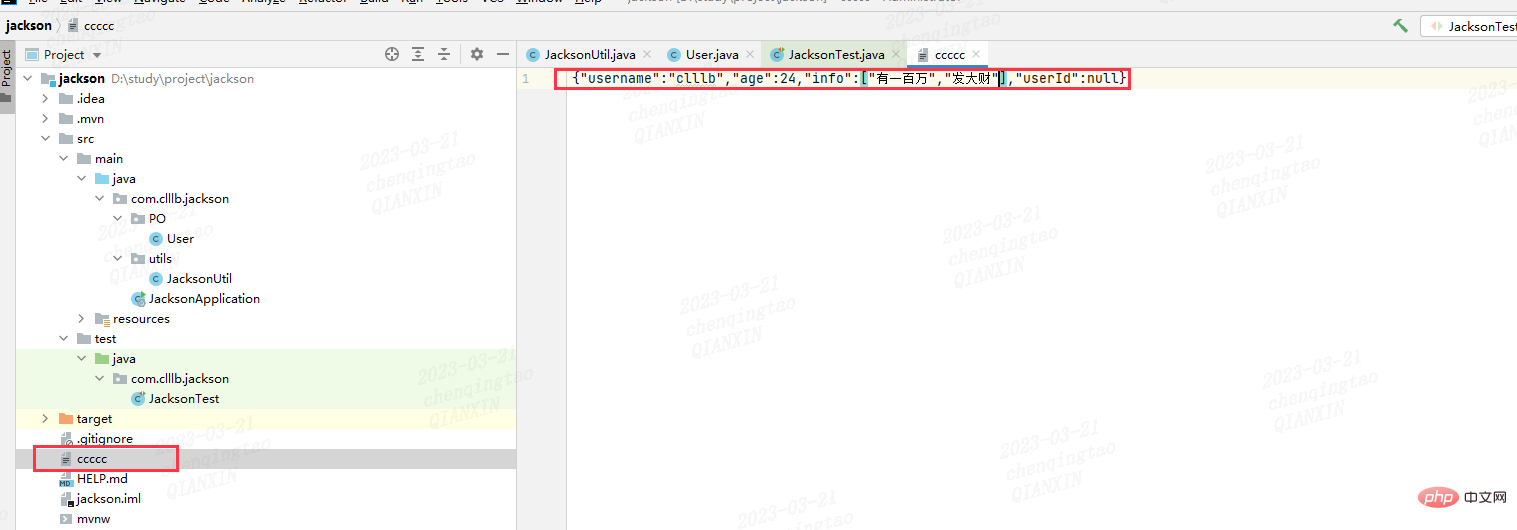
}Output result:

c.string type conversion Object custom type
Instructions: Use the readValue method
 @Test
    void string2obj(){
        String json = "{\"username\":\"clllb\",\"age\":24,\"info\":[\"有一百万\",\"发大财\"],\"userId\":11}";
        User user = JacksonUtil.string2Obj(json, User.class);
        System.out.println(user);
}输出结果:
User(username=clllb, age=24, info=[有一百万, 发大财], userId=11)
d.string类型转Object自定义类型list
说明: 使用readValue方法,传参变为TypeReference typeReference,这里工具类用的重载方法名是相同的。
@Test
    void string2objList(){
        String json = "[{\"username\":\"clllb\",\"age\":24,\"info\":[\"有一百万\",\"发大财\"],\"userId\":11},\n" +
                "{\"username\":\"陈老老老板\",\"age\":25,\"info\":[\"有一千万\",\"发大大财\"],\"userId\":12}]";
        List<User> user = JacksonUtil.string2Obj(json, new TypeReference<List<User>>(){});
        user.forEach(System.out::println);
}输出结果:
User(username=clllb, age=24, info=[有一百万, 发大财], userId=11)
User(username=陈老老老板, age=25, info=[有一千万, 发大大财], userId=12)
e.object类型转String(驼峰转下划线)
说明: 使用writeValueAsString方法,这里区别看工具类就会发现,就是多了一个设置OBJECT_MAPPER_SNAKE_CASE.setPropertyNamingStrategy(PropertyNamingStrategies.SNAKE_CASE);
 @Test
    void obj2sringSnakeCase(){
        User user = new User();
        user.setUsername("clllb");
        user.setAge(24);
        user.setUserId(11L);
        List<String> infoList = new ArrayList<>();
        infoList.add("有一百万");
        infoList.add("发大财");
        user.setInfo(infoList);
        String json = JacksonUtil.obj2StringFieldSnakeCase(user);
        System.out.println(json);
}输出结果:
{"username":"clllb","age":24,"info":["有一百万","发大财"],"user_id":11}
f.string类型(下划线)转Object类型
<font color = 'red'><b>说明:</font> 使用readValue方法
```java
@Test
void string2obj(){
String json = "{\"username\":\"clllb\",\"age\":24,\"info\":[\"有一百万\",\"发大财\"],\"user_id\":11}";
User user = JacksonUtil.string2Obj(json, User.class);
System.out.println(user);
}输出结果:
User(username=clllb, age=24, info=[有一百万, 发大财], userId=11)
g.string类型(下划线)转Object自定义类型list
说明: 使用readValue方法,传参变为TypeReference typeReference,这里工具类用的重载方法名是相同的。
 @Test
    void string2objSnakeCase(){
        String json = "[{\"username\":\"clllb\",\"age\":24,\"info\":[\"有一百万\",\"发大财\"],\"user_id\":11},\n" +
                "{\"username\":\"陈老老老板\",\"age\":25,\"info\":[\"有一千万\",\"发大大财\"],\"user_id\":12}]";
        List<User> user = JacksonUtil.string2ListFieldLowerCamelCase(json, new TypeReference<List<User>>(){});
        user.forEach(System.out::println);
}输出结果:
User(username=clllb, age=24, info=[有一百万, 发大财], userId=11)
User(username=陈老老老板, age=25, info=[有一千万, 发大大财], userId=12)
The above is the detailed content of How does SpringBoot integrate Jackson?. For more information, please follow other related articles on the PHP Chinese website!

Hot AI Tools

Undresser.AI Undress
AI-powered app for creating realistic nude photos

AI Clothes Remover
Online AI tool for removing clothes from photos.

Undress AI Tool
Undress images for free

Clothoff.io
AI clothes remover

AI Hentai Generator
Generate AI Hentai for free.

Hot Article

Hot Tools

Notepad++7.3.1
Easy-to-use and free code editor

SublimeText3 Chinese version
Chinese version, very easy to use

Zend Studio 13.0.1
Powerful PHP integrated development environment

Dreamweaver CS6
Visual web development tools

SublimeText3 Mac version
God-level code editing software (SublimeText3)

Hot Topics
 How Springboot integrates Jasypt to implement configuration file encryption
Jun 01, 2023 am 08:55 AM
Introduction to Jasypt Jasypt is a java library that allows a developer to add basic encryption functionality to his/her project with minimal effort and does not require a deep understanding of how encryption works. High security for one-way and two-way encryption. , standards-based encryption technology. Encrypt passwords, text, numbers, binaries... Suitable for integration into Spring-based applications, open API, for use with any JCE provider... Add the following dependency: com.github.ulisesbocchiojasypt-spring-boot-starter2. 1.1Jasypt benefits protect our system security. Even if the code is leaked, the data source can be guaranteed.
 How to use Redis to implement distributed locks in SpringBoot
Jun 03, 2023 am 08:16 AM
1. Redis implements distributed lock principle and why distributed locks are needed. Before talking about distributed locks, it is necessary to explain why distributed locks are needed. The opposite of distributed locks is stand-alone locks. When we write multi-threaded programs, we avoid data problems caused by operating a shared variable at the same time. We usually use a lock to mutually exclude the shared variables to ensure the correctness of the shared variables. Its scope of use is in the same process. If there are multiple processes that need to operate a shared resource at the same time, how can they be mutually exclusive? Today's business applications are usually microservice architecture, which also means that one application will deploy multiple processes. If multiple processes need to modify the same row of records in MySQL, in order to avoid dirty data caused by out-of-order operations, distribution needs to be introduced at this time. The style is locked. Want to achieve points
 How to solve the problem that springboot cannot access the file after reading it into a jar package
Jun 03, 2023 pm 04:38 PM
Springboot reads the file, but cannot access the latest development after packaging it into a jar package. There is a situation where springboot cannot read the file after packaging it into a jar package. The reason is that after packaging, the virtual path of the file is invalid and can only be accessed through the stream. Read. The file is under resources publicvoidtest(){Listnames=newArrayList();InputStreamReaderread=null;try{ClassPathResourceresource=newClassPathResource("name.txt");Input
 Comparison and difference analysis between SpringBoot and SpringMVC
Dec 29, 2023 am 11:02 AM
SpringBoot and SpringMVC are both commonly used frameworks in Java development, but there are some obvious differences between them. This article will explore the features and uses of these two frameworks and compare their differences. First, let's learn about SpringBoot. SpringBoot was developed by the Pivotal team to simplify the creation and deployment of applications based on the Spring framework. It provides a fast, lightweight way to build stand-alone, executable
 How SpringBoot customizes Redis to implement cache serialization
Jun 03, 2023 am 11:32 AM
1. Customize RedisTemplate1.1, RedisAPI default serialization mechanism. The API-based Redis cache implementation uses the RedisTemplate template for data caching operations. Here, open the RedisTemplate class and view the source code information of the class. publicclassRedisTemplateextendsRedisAccessorimplementsRedisOperations, BeanClassLoaderAware{//Declare key, Various serialization methods of value, the initial value is empty @NullableprivateRedisSe
 How to implement Springboot+Mybatis-plus without using SQL statements to add multiple tables
Jun 02, 2023 am 11:07 AM
When Springboot+Mybatis-plus does not use SQL statements to perform multi-table adding operations, the problems I encountered are decomposed by simulating thinking in the test environment: Create a BrandDTO object with parameters to simulate passing parameters to the background. We all know that it is extremely difficult to perform multi-table operations in Mybatis-plus. If you do not use tools such as Mybatis-plus-join, you can only configure the corresponding Mapper.xml file and configure The smelly and long ResultMap, and then write the corresponding sql statement. Although this method seems cumbersome, it is highly flexible and allows us to
 How to get the value in application.yml in springboot
Jun 03, 2023 pm 06:43 PM
In projects, some configuration information is often needed. This information may have different configurations in the test environment and the production environment, and may need to be modified later based on actual business conditions. We cannot hard-code these configurations in the code. It is best to write them in the configuration file. For example, you can write this information in the application.yml file. So, how to get or use this address in the code? There are 2 methods. Method 1: We can get the value corresponding to the key in the configuration file (application.yml) through the ${key} annotated with @Value. This method is suitable for situations where there are relatively few microservices. Method 2: In actual projects, When business is complicated, logic
 SpringBoot+Dubbo+Nacos development practical tutorial
Aug 15, 2023 pm 04:49 PM
This article will write a detailed example to talk about the actual development of dubbo+nacos+Spring Boot. This article will not cover too much theoretical knowledge, but will write the simplest example to illustrate how dubbo can be integrated with nacos to quickly build a development environment.


