

How to configure and optimize Nginx static file service

Root Directory and Index Files
The root directive specifies the root directory that will be used to search for files. To get the path to the requested file, nginx appends the request uri to the path specified by the root directive. This directive can be placed at any level within the http {} , server {} or location {} context. In the following example, the root directive is defined for the virtual server. It works for all location {} blocks that do not contain a root directive to explicitly redefine the root:
server {
  root /www/data;

  location / {
  }

  location /images/ {
  }

  location ~ \.(mp3|mp4) {
    root /www/media;
  }
}Here, nginx's uri starting with /images/ will be in the file system's /www/ data/images Search for the corresponding file in the / directory. If the uri ends with a .mp3 or .mp4 extension, nginx searches for the file in the /www/media/ directory because it is defined in a matching location block.
If the request ends with /, nginx treats it as a request for the directory and attempts to find the index file in the directory. The index directive defines the name of the index file (default is index.html). To continue the example, if the request uri is /images/some/path/ , nginx returns the file /www/data/images/some/path/index.html if it exists. If not, nginx returns an http 404 error (not found) by default. To configure nginx to return an automatically generated directory listing, include the on parameter in the autoindex directive:
location /images/ {
  autoindex on;
}You can list multiple file names in the index directive. nginx searches for files in the specified order and returns the first file it finds.
location / {
  index index.$geo.html index.htm index.html;
}The $geo variable used here is a custom variable set through the geo directive. The value of the variable depends on the client's IP address.
To return the index file, nginx checks to see if it exists and then does an internal redirect to the new uri obtained by appending the name of the index file to the base uri. Internal redirects cause a new search for the location and may end up in another location, as shown in the following example:
location / {
  root /data;
  index index.html index.php;
}

location ~ \.php {
  fastcgi_pass localhost:8000;
  #...

}Here, if the uri in the request is /path/ and /data/path/index .html does not exist but /data/path/index.php does, then the internal redirect to /path/index.php will be mapped to the second location. As a result, the request is proxied.
Try a few options
The try_files directive can be used to check if a specified file or directory exists; nginx will redirect internally and return if not The specified status code. For example, to check whether the file corresponding to the request uri exists, use the try_files directive and the $uri variable as follows:
server {
  root /www/data;

  location /images/ {
    try_files $uri /images/default.gif;
  }
}The file is specified as a uri, using the context of the current location or virtual server The root or alias directive set in is processed. In this case, if the file corresponding to the original uri does not exist, nginx will redirect internally to the uri specified by the last parameter and return /www/data/images/default.gif .
The last parameter can also be a status code (directly starting with an equal sign) or a location name. In the following example, if none of the arguments to the try_files directive resolve to an existing file or directory, a 404 error is returned.
location / {
  try_files $uri $uri/ $uri.html =404;
}In the next example, if neither the original URI nor the URI with an appended trailing slash resolves to an existing file or directory, the request will be redirected to the specified location and passed to proxy server.
location / {
  try_files $uri $uri/ @backend;
}

location @backend {
  proxy_pass http://backend.example.com;
}Optimize the performance of served content
Loading speed is a key factor in serving any content. Minor optimizations to your nginx configuration can increase productivity and help achieve optimal performance.
Enable sendfile
By default, nginx handles the file transfer itself and copies the file into a buffer before sending. Enabling the sendfile directive eliminates the step of copying data to a buffer and allows data to be copied directly from one file descriptor to another. Alternatively, to prevent a fast connection from completely occupying a worker process, the sendfile_max_chunk directive can be used to limit the amount of data transferred in a single sendfile() call (in this case 1 mb):
location /mp3 {
  sendfile      on;
  sendfile_max_chunk 1m;
  #...

}enable tcp_nopush
Use the tcp_nopush directive together with the sendfile on; directive. This allows nginx to send http response headers in a packet immediately after sendfile() gets the chunk of data.
location /mp3 {
  sendfile  on;
  tcp_nopush on;
  #...

}Enable tcp_nodelay
The tcp_nodelay directive allows overriding nagle's algorithm, which was originally designed to solve the problem of small packets in slow networks. The algorithm combines many small packets into one larger packet and sends the packet with a delay of 200 milliseconds. Today, when serving large static files, data can be sent instantly regardless of packet size. Latency also affects online applications (ssh, online games, online transactions, etc.). By default, the tcp_nodelay directive is set to on, which means nagle's algorithm is disabled. This directive is only used for keepalive connections:
location /mp3 {
  tcp_nodelay    on;
  keepalive_timeout 65;
  #...

}Optimize the backlog queue
其中一个重要因素是 nginx 可以多快地处理传入连接。一般规则是在建立连接时,将其放入侦听套接字的 "listen" (监听)队列中。在正常负载下,队列很小或根本没有队列。但是在高负载下,队列会急剧增长,导致性能不均匀,连接中断,延迟增加。
显示积压队列使用命令 netstat -lan 来显示当前监听队列。输出可能如下所示,它显示在端口 80上的监听队列中,有 10 个未接受的连接,这些连接针对配置的最多 128 个排队连接。这种情况很正常。
current listen queue sizes (qlen/incqlen/maxqlen)
listen     local address
0/0/128    *.12345
10/0/128    *.80
0/0/128    *.8080
相反,在以下命令中,未接受的连接数(192)超过了 128 的限制。当网站流量很大时,这种情况很常见。要获得最佳性能,需要在操作系统和 nginx 配置中增加可以排队等待 nginx 接受的最大连接数。
current listen queue sizes (qlen/incqlen/maxqlen)
listen     local address
0/0/128    *.12345
192/0/128    *.80
0/0/128    *.8080
调整操作系统
将 net.core.somaxconn 内核参数的值从其默认值(128)增加到足以容纳大量流量的值。在这个例子中,它增加到 4096。
freebsd 的命令为 sudo sysctl kern.ipc.somaxconn=4096
linux 的命令为 1. sudo sysctl -w net.core.somaxconn=4096 2. 将 net.core.somaxconn = 4096 加入到 /etc/sysctl.conf 文件中。
调整 nginx
如果将 somaxconn 内核参数设置为大于 512 的值,请将 backlog 参数增加在 nginx listen 指令以匹配修改:
server {
  listen 80 backlog=4096;
  # ...

}The above is the detailed content of How to configure and optimize Nginx static file service. For more information, please follow other related articles on the PHP Chinese website!

Hot AI Tools

Undresser.AI Undress
AI-powered app for creating realistic nude photos

AI Clothes Remover
Online AI tool for removing clothes from photos.

Undress AI Tool
Undress images for free

Clothoff.io
AI clothes remover

AI Hentai Generator
Generate AI Hentai for free.

Hot Article
Hot Tools

Notepad++7.3.1
Easy-to-use and free code editor

SublimeText3 Chinese version
Chinese version, very easy to use

Zend Studio 13.0.1
Powerful PHP integrated development environment

Dreamweaver CS6
Visual web development tools

SublimeText3 Mac version
God-level code editing software (SublimeText3)
Hot Topics
 1377
1377
 52
52

 How to allow external network access to tomcat server
Apr 21, 2024 am 07:22 AM
How to allow external network access to tomcat server
Apr 21, 2024 am 07:22 AM
To allow the Tomcat server to access the external network, you need to: modify the Tomcat configuration file to allow external connections. Add a firewall rule to allow access to the Tomcat server port. Create a DNS record pointing the domain name to the Tomcat server public IP. Optional: Use a reverse proxy to improve security and performance. Optional: Set up HTTPS for increased security.
 Welcome to nginx!How to solve it?
Apr 17, 2024 am 05:12 AM
Welcome to nginx!How to solve it?
Apr 17, 2024 am 05:12 AM
To solve the "Welcome to nginx!" error, you need to check the virtual host configuration, enable the virtual host, reload Nginx, if the virtual host configuration file cannot be found, create a default page and reload Nginx, then the error message will disappear and the website will be normal show.
 How to generate URL from html file
Apr 21, 2024 pm 12:57 PM
How to generate URL from html file
Apr 21, 2024 pm 12:57 PM
Converting an HTML file to a URL requires a web server, which involves the following steps: Obtain a web server. Set up a web server. Upload HTML file. Create a domain name. Route the request.
 How to deploy nodejs project to server
Apr 21, 2024 am 04:40 AM
How to deploy nodejs project to server
Apr 21, 2024 am 04:40 AM
Server deployment steps for a Node.js project: Prepare the deployment environment: obtain server access, install Node.js, set up a Git repository. Build the application: Use npm run build to generate deployable code and dependencies. Upload code to the server: via Git or File Transfer Protocol. Install dependencies: SSH into the server and use npm install to install application dependencies. Start the application: Use a command such as node index.js to start the application, or use a process manager such as pm2. Configure a reverse proxy (optional): Use a reverse proxy such as Nginx or Apache to route traffic to your application
 Can nodejs be accessed from the outside?
Apr 21, 2024 am 04:43 AM
Can nodejs be accessed from the outside?
Apr 21, 2024 am 04:43 AM
Yes, Node.js can be accessed from the outside. You can use the following methods: Use Cloud Functions to deploy the function and make it publicly accessible. Use the Express framework to create routes and define endpoints. Use Nginx to reverse proxy requests to Node.js applications. Use Docker containers to run Node.js applications and expose them through port mapping.
 How to deploy and maintain a website using PHP
May 03, 2024 am 08:54 AM
How to deploy and maintain a website using PHP
May 03, 2024 am 08:54 AM
To successfully deploy and maintain a PHP website, you need to perform the following steps: Select a web server (such as Apache or Nginx) Install PHP Create a database and connect PHP Upload code to the server Set up domain name and DNS Monitoring website maintenance steps include updating PHP and web servers, and backing up the website , monitor error logs and update content.
 How to use Fail2Ban to protect your server from brute force attacks
Apr 27, 2024 am 08:34 AM
How to use Fail2Ban to protect your server from brute force attacks
Apr 27, 2024 am 08:34 AM
An important task for Linux administrators is to protect the server from illegal attacks or access. By default, Linux systems come with well-configured firewalls, such as iptables, Uncomplicated Firewall (UFW), ConfigServerSecurityFirewall (CSF), etc., which can prevent a variety of attacks. Any machine connected to the Internet is a potential target for malicious attacks. There is a tool called Fail2Ban that can be used to mitigate illegal access on the server. What is Fail2Ban? Fail2Ban[1] is an intrusion prevention software that protects servers from brute force attacks. It is written in Python programming language
 Come with me to learn Linux and install Nginx
Apr 28, 2024 pm 03:10 PM
Come with me to learn Linux and install Nginx
Apr 28, 2024 pm 03:10 PM
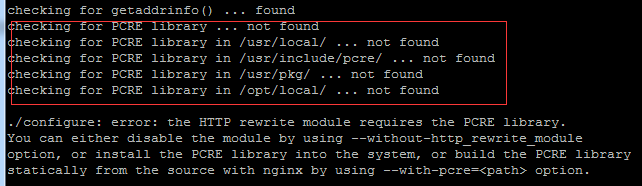
Today, I will lead you to install Nginx in a Linux environment. The Linux system used here is CentOS7.2. Prepare the installation tools 1. Download Nginx from the Nginx official website. The version used here is: 1.13.6.2. Upload the downloaded Nginx to Linux. Here, the /opt/nginx directory is used as an example. Run "tar-zxvfnginx-1.13.6.tar.gz" to decompress. 3. Switch to the /opt/nginx/nginx-1.13.6 directory and run ./configure for initial configuration. If the following prompt appears, it means that PCRE is not installed on the machine, and Nginx needs to
