How to deploy Django through Nginx based on ubuntu
Django can be deployed in many ways, and nginx uwsgi is one of the more common ways.
In this method, our usual approach is to use nginx as the front end of the server, which will receive all requests from the web and manage the requests uniformly. nginx handles all static requests by itself (this is nginx's strength). Then, nginx passes all non-static requests to django through uwsgi, which is processed by django, thus completing a web request. It can be seen that uwsgi functions like a bridge. Act as a bridge.
1. Install nginx Nginx is a lightweight web server/reverse proxy server and email (imap/pop) 3 ) proxy server and is released under a bsd-like protocol. Its characteristics are that it occupies less memory and has strong concurrency capabilities. In fact, nginx's concurrency capabilities do perform better among web servers of the same type.
nginx is also a very popular web server. We will also give a brief introduction here to use it to deploy django.
nginx official website:
Open the ubuntu console (ctrl alt t) and use the ubuntu warehouse to install.
fnngj@ubuntu:~$ sudo apt-get install nginx #安装
Start nginx:
fnngj@ubuntu:~$ /etc/init.d/nginx start #启动
fnngj@ubuntu:~$ /etc/init.d/nginx stop #关闭
fnngj@ubuntu:~$ /etc/init.d/nginx restart #重启
Modify the nginx default port number, open the /etc/nginx/nginx.conf file, and modify the port number.
 server {
  listen    8088;  # 修改端口号
  server_name localhost;

  #charset koi8-r;

  #access_log logs/host.access.log main;

  location / {
    root  html;
    index index.html index.htm;
}Approximately at line 36 of the file, change the default port number 80 to another port number, such as 8088. Because the default port number 80 is easily occupied by other applications.
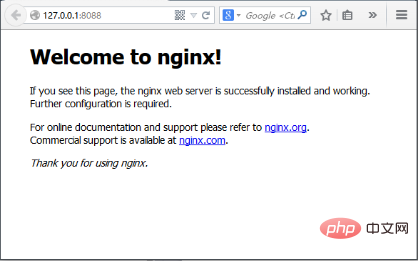
Then, restart nginx through the above command. Visit: http://127.0.0.1:8088/
 If the above picture appears, it means nginx started successfully.
Install uwsgi through pip.
root@ubuntu:/etc# python3 -m pip install uwsgi
def application(env, start_response):
  start_response('200 ok', [('content-type','text/html')])
  return [b"hello world"]
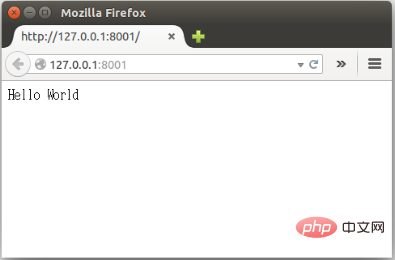
fnngj@ubuntu:~/pydj$ uwsgi --http :8001 --wsgi-file test.py
Next configure the connection between django and uwsgi. Here, the assumed location of my django project is: /home/fnngj/pydj/myweb
Copy code The code is as follows:
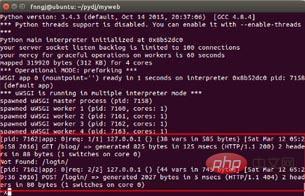
uwsgi --http :8001 --chdir / home/fnngj/pydj/myweb/ --wsgi-file myweb/wsgi.py --master --processes 4 --threads 2 --stats 127.0.0.1:9191
Commonly used Options:
processes: Number of processes started
workers: Number of processes started, equivalent to processes (according to the official website) is spawn the specified number of workers / processes) chdir: Specify the running directory (chdir to specified directory before apps loading) wsgi-file: Load wsgi-file (load .wsgi file) stats: Enable the stats server on the specified address. threads: Run threads. Due to the existence of gil, I think this is really useless. (run each worker in prethreaded mode with the specified number of threads)master: Allow the master process to exist (enable master process)daemonize: Make the process run in the background and log to Specified log file or udp server (daemonize uwsgi). In fact, the most commonly used method is to output the running records to a local file. pidfile: Specify the location of the pid file and record the pid number of the main process. vacuum: Automatically clean up the environment when the server exits, delete the unix socket file and pid file (try to remove all of the generated file/sockets)3. nginx uwsgi django
Next, we have to combine the three. First, list the files required for the project:myweb/ ├── manage.py ├── myweb/ │ ├── __init__.py │ ├── settings.py │ ├── urls.py │ └── wsgi.py └── myweb_uwsgi.ini
# myweb_uwsgi.ini file
[uwsgi]

# django-related settings

socket = :8000

# the base directory (full path)
chdir      = /home/fnngj/pydj/myweb

# django s wsgi file
module     = myweb.wsgi

# process-related settings
# master
master     = true

# maximum number of worker processes
processes    = 4

# ... with appropriate permissions - may be needed
# chmod-socket  = 664
# clear environment on exit
vacuum     = true
这个配置,其实就相当于在上一小节中通过wsgi命令,后面跟一堆参数的方式,给文件化了。
socket 指定项目执行的端口号。
chdir 指定项目的目录。
module myweb.wsgi ,可以这么来理解,对于myweb_uwsgi.ini文件来说,与它的平级的有一个myweb目录,这个目录下有一个wsgi.py文件。
其它几个参数,可以参考上一小节中参数的介绍。
接下来,切换到myweb项目目录下,通过uwsgi命令读取myweb_uwsgi.ini文件启动项目。
fnngj@ubuntu:~$ cd /home/fnngj/pydj/myweb/
fnngj@ubuntu:~/pydj/myweb$ uwsgi --ini myweb_uwsgi.ini
[uwsgi] getting ini configuration from myweb_uwsgi.ini
*** starting uwsgi 2.0.12 (32bit) on [sat mar 12 13:05:06 2016] ***
compiled with version: 4.8.4 on 26 january 2016 06:14:41
os: linux-3.19.0-25-generic #26~14.04.1-ubuntu smp fri jul 24 21:18:00 utc 2015
nodename: ubuntu
machine: i686
clock source: unix
detected number of cpu cores: 2
current working directory: /home/fnngj/pydj/myweb
detected binary path: /usr/local/bin/uwsgi
!!! no internal routing support, rebuild with pcre support !!!
chdir() to /home/fnngj/pydj/myweb
your processes number limit is 15962
your memory page size is 4096 bytes
detected max file descriptor number: 1024
lock engine: pthread robust mutexes
thunder lock: disabled (you can enable it with --thunder-lock)
uwsgi socket 0 bound to tcp address :8000 fd 3
python version: 3.4.3 (default, oct 14 2015, 20:37:06) [gcc 4.8.4]
*** python threads support is disabled. you can enable it with --enable-threads ***
python main interpreter initialized at 0x8b52dc0
your server socket listen backlog is limited to 100 connections
your mercy for graceful operations on workers is 60 seconds
mapped 319920 bytes (312 kb) for 4 cores
*** operational mode: preforking ***
wsgi app 0 (mountpoint='') ready in 1 seconds on interpreter 0x8b52dc0 pid: 7158 (default app)
*** uwsgi is running in multiple interpreter mode ***
spawned uwsgi master process (pid: 7158)
spawned uwsgi worker 1 (pid: 7160, cores: 1)
spawned uwsgi worker 2 (pid: 7161, cores: 1)
spawned uwsgi worker 3 (pid: 7162, cores: 1)
spawned uwsgi worker 4 (pid: 7163, cores: 1)
注意查看uwsgi的启动信息,如果有错,就要检查配置文件的参数是否设置有误。
再接下来要做的就是修改nginx.conf配置文件。打开/etc/nginx/nginx.conf文件,添加如下内容。
……
server {
  listen     8099;
  server_name  127.0.0.1
  charset utf-8;
  access_log   /var/log/nginx/myweb_access.log;
  error_log    /var/log/nginx/myweb_error.log;

  client_max_body_size 75m;

  location / {
    include uwsgi_params;
    uwsgi_pass 127.0.0.1:8000;
    uwsgi_read_timeout 2;
  }
  location /static {
    expires 30d;
    autoindex on;
    add_header cache-control private;
    alias /home/fnngj/pydj/myweb/static/;
   }
 }
……listen 指定的是nginx代理uwsgi对外的端口号。
server_name 网上大多资料都是设置的一个网址(例,www.example.com),我这里如果设置成网址无法访问,所以,指定的到了本机默认ip。
在进行配置的时候,我有个问题一直想不通。nginx到底是如何uwsgi产生关联。现在看来大概最主要的就是这两行配置。
include uwsgi_params;
uwsgi_pass 127.0.0.1:8000;
include 必须指定为uwsgi_params;而uwsgi_pass指的本机ip的端口与myweb_uwsgi.ini配置文件中的必须一直。
现在重新启动nginx,翻看上面重启动nginx的命令。然后,访问:http://127.0.0.1:8099/
通过这个ip和端口号的指向,请求应该是先到nginx的。如果你在页面上执行一些请求,就会看到,这些请求最终会转到uwsgi来处理。

The above is the detailed content of How to deploy Django through Nginx based on ubuntu. For more information, please follow other related articles on the PHP Chinese website!

Hot AI Tools

Undresser.AI Undress
AI-powered app for creating realistic nude photos

AI Clothes Remover
Online AI tool for removing clothes from photos.

Undress AI Tool
Undress images for free

Clothoff.io
AI clothes remover

AI Hentai Generator
Generate AI Hentai for free.

Hot Article

Hot Tools

Notepad++7.3.1
Easy-to-use and free code editor

SublimeText3 Chinese version
Chinese version, very easy to use

Zend Studio 13.0.1
Powerful PHP integrated development environment

Dreamweaver CS6
Visual web development tools

SublimeText3 Mac version
God-level code editing software (SublimeText3)

Hot Topics
 How to allow external network access to tomcat server
Apr 21, 2024 am 07:22 AM
To allow the Tomcat server to access the external network, you need to: modify the Tomcat configuration file to allow external connections. Add a firewall rule to allow access to the Tomcat server port. Create a DNS record pointing the domain name to the Tomcat server public IP. Optional: Use a reverse proxy to improve security and performance. Optional: Set up HTTPS for increased security.
 Android TV Box gets unofficial Ubuntu 24.04 upgrade
Sep 05, 2024 am 06:33 AM
For many users, hacking an Android TV box sounds daunting. However, developer Murray R. Van Luyn faced the challenge of looking for suitable alternatives to the Raspberry Pi during the Broadcom chip shortage. His collaborative efforts with the Armbia
 How to run thinkphp
Apr 09, 2024 pm 05:39 PM
Steps to run ThinkPHP Framework locally: Download and unzip ThinkPHP Framework to a local directory. Create a virtual host (optional) pointing to the ThinkPHP root directory. Configure database connection parameters. Start the web server. Initialize the ThinkPHP application. Access the ThinkPHP application URL and run it.
 Welcome to nginx!How to solve it?
Apr 17, 2024 am 05:12 AM
To solve the "Welcome to nginx!" error, you need to check the virtual host configuration, enable the virtual host, reload Nginx, if the virtual host configuration file cannot be found, create a default page and reload Nginx, then the error message will disappear and the website will be normal show.
 How to register phpmyadmin
Apr 07, 2024 pm 02:45 PM
To register for phpMyAdmin, you need to first create a MySQL user and grant permissions to it, then download, install and configure phpMyAdmin, and finally log in to phpMyAdmin to manage the database.
 How to deploy nodejs project to server
Apr 21, 2024 am 04:40 AM
Server deployment steps for a Node.js project: Prepare the deployment environment: obtain server access, install Node.js, set up a Git repository. Build the application: Use npm run build to generate deployable code and dependencies. Upload code to the server: via Git or File Transfer Protocol. Install dependencies: SSH into the server and use npm install to install application dependencies. Start the application: Use a command such as node index.js to start the application, or use a process manager such as pm2. Configure a reverse proxy (optional): Use a reverse proxy such as Nginx or Apache to route traffic to your application
 How to communicate between docker containers
Apr 07, 2024 pm 06:24 PM
There are five methods for container communication in the Docker environment: shared network, Docker Compose, network proxy, shared volume, and message queue. Depending on your isolation and security needs, choose the most appropriate communication method, such as leveraging Docker Compose to simplify connections or using a network proxy to increase isolation.
 How to generate URL from html file
Apr 21, 2024 pm 12:57 PM
Converting an HTML file to a URL requires a web server, which involves the following steps: Obtain a web server. Set up a web server. Upload HTML file. Create a domain name. Route the request.


