
 Java
javaTutorial
How SpringBoot integrates Mongodb to implement additions, deletions, and changes
Java
javaTutorial
How SpringBoot integrates Mongodb to implement additions, deletions, and changes
How SpringBoot integrates Mongodb to implement additions, deletions, and changes

1. What is MongoDB
MongoDB is different from the relational databases (MySQL, Oracle) we are familiar with before. MongoDB is a document database, which has the required scalability and flexibility, as well as all Required queries and indexes.
MongoDB stores data in flexible, JSON-like documents, which means that the fields of a document can vary from document to document and the data structure can change over time. The document model maps to objects in application code, making the data easy to work with. MongoDB is a distributed database at its core, so high availability, scale-out, and geographic distribution are built-in and easy to use. Moreover, MongoDB is free and open source.
2. Install MongoDB on Window10
Open the MongoDB official website
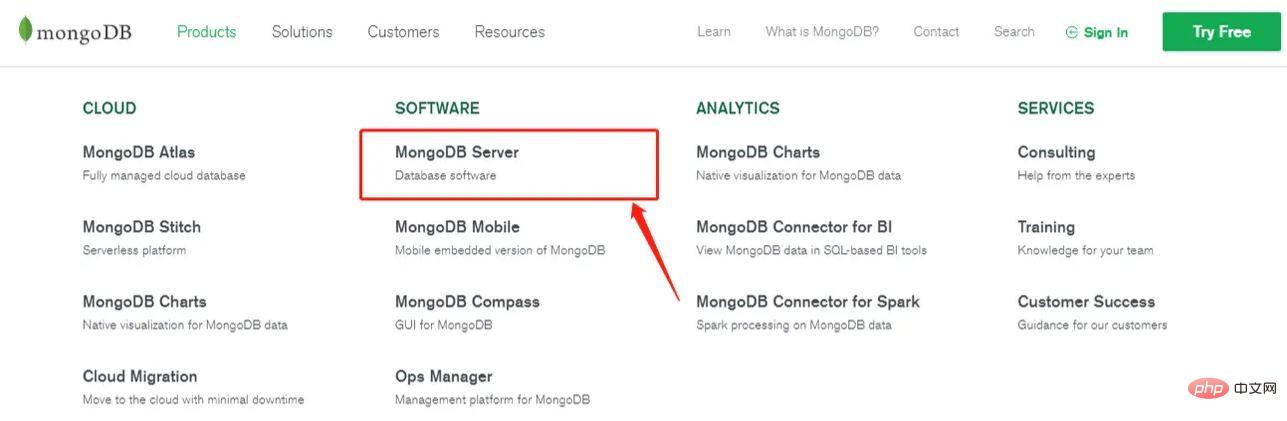
Download the MSI version (installation version)
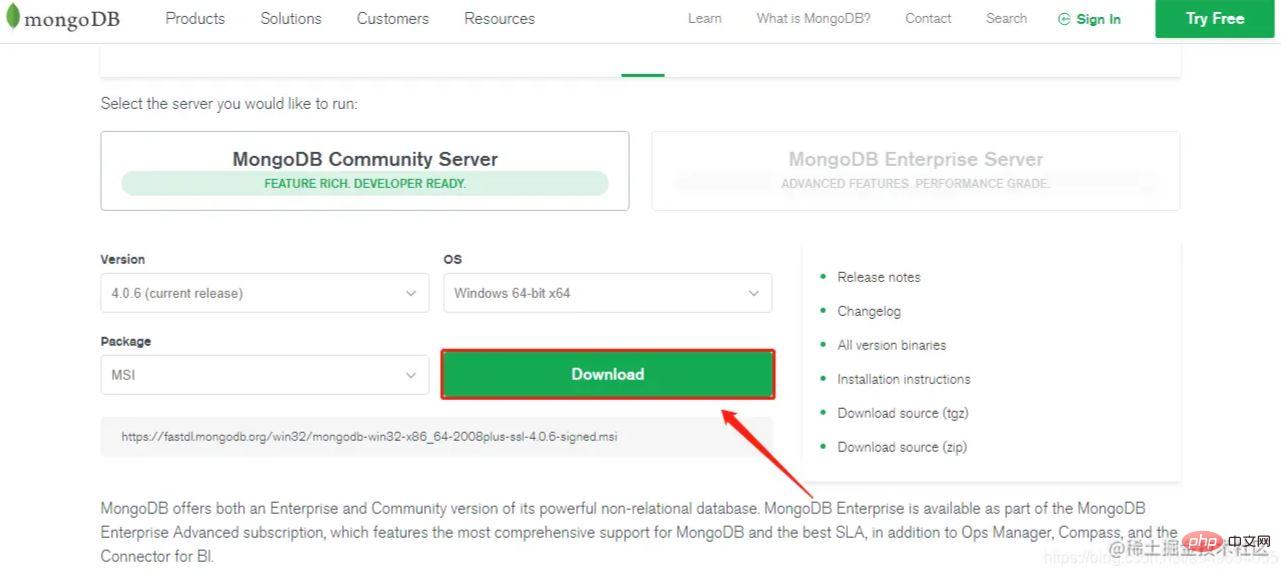
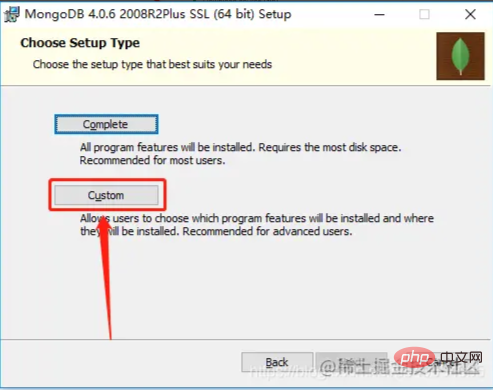
When downloading, select Custom
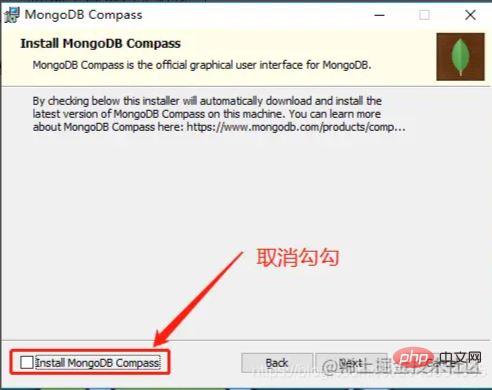
When installing, be careful not to check the installation visual plug-in, otherwise the installation will be very slow ( Unless your Internet speed is fast enough)
3. Configure MongoDB service
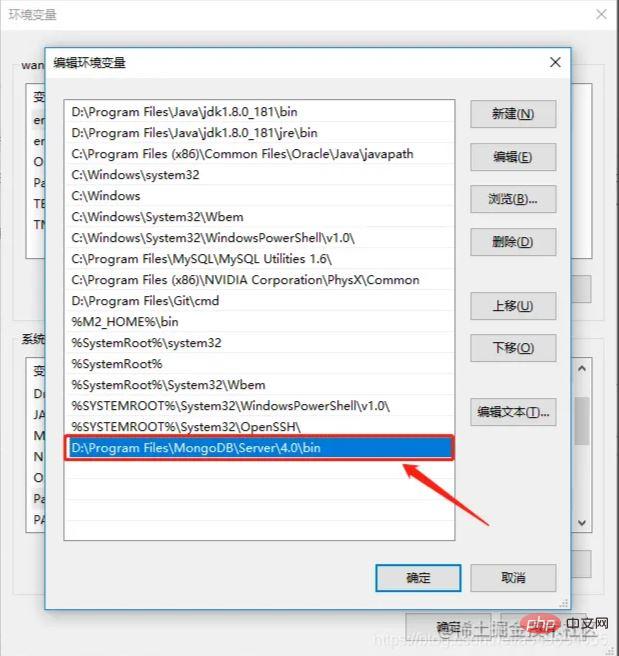
Configure environment variables
Copy the current path

My Computer->Right-click->Advanced System Settings->Environment Variables->System Variables
Find Path in the system variables, edit, Add the path copied above
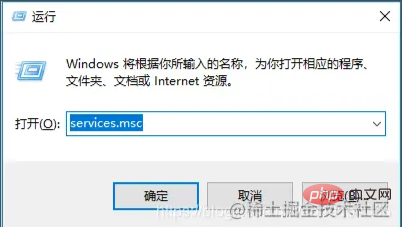
4. Start the service
win R->Enter services.msc
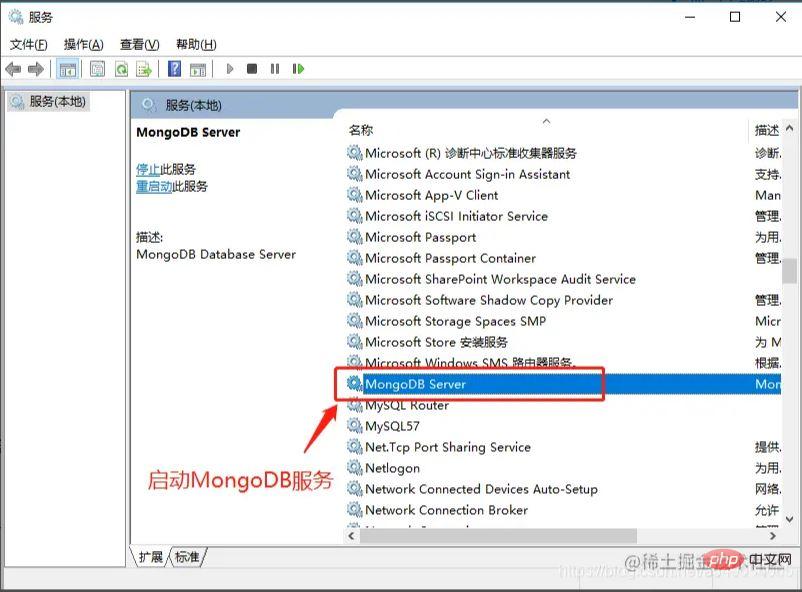
After the service is started, enter 127.0.0.1:2701
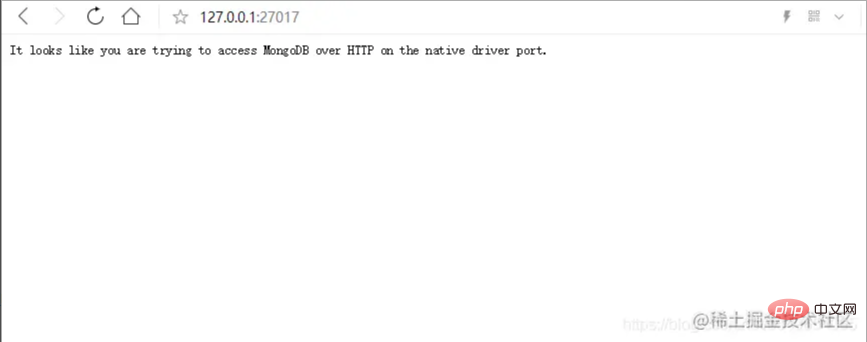
in the browser and it will appear This line of English means that the service was successfully started.
5. SpringBoot integrates MongoDB
Environment preparation
Operating system: Window10
IDE: IntelliJ IDEA 2018.2.4
Database: MongoDB
1) Introduce dependencies
        <dependency>
            <groupId>org.springframework.boot</groupId>
            <artifactId>spring-boot-starter-data-mongodb</artifactId>
</dependency>2) Add the following configuration in application.yml
spring:
  data:
    mongodb:
uri: mongodb://localhost/test_mongodbThe complete configuration information is as follows:
spring:
  data:
    mongodb:
      authentication-database: # Authentication database name.
      database: # Database name.
      field-naming-strategy: # Fully qualified name of the FieldNamingStrategy to use.
      grid-fs-database: # GridFS database name.
      host: # Mongo server host. Cannot be set with URI.
      password: # Login password of the mongo server. Cannot be set with URI.
      port: # Mongo server port. Cannot be set with URI.
      repositories:
        type: # Type of Mongo repositories to enable.
      uri: # Mongo database URI. Cannot be set with host, port and credentials.
username: # Login user of the mongo server. Cannot be set with URI.3) Add entity class UserEntity
public class UserEntity {
    @Id
    private String uid;
    private String username;
    private String password;
    public String getUid() {
        return uid;
    }
    public void setUid(String uid) {
        this.uid = uid;
    }
    public String getUsername() {
        return username;
    }
    public void setUsername(String username) {
        this.username = username;
    }
    public String getPassword() {
        return password;
    }
    public void setPassword(String password) {
        this.password = password;
    }
    @Override
    public String toString() {
        return "UserEntity{" +
                "uid='" + uid + '\'' +
                ", username='" + username + '\'' +
                ", password='" + password + '\'' +
                '}';
    }
}4) Create new test. Here I use navicat as a visualization tool for MongoDB to view.
Test 1: Insert operation
    @Autowired
    private MongoTemplate mongoTemplate;
    @Test
    public void saveUser(){
        UserEntity userEntity1 = new UserEntity();
        UserEntity userEntity2 = new UserEntity();
        UserEntity userEntity3 = new UserEntity();
        userEntity1.setUid("111");
        userEntity1.setUsername("用户1");
        userEntity1.setPassword("密码1");
        userEntity2.setUid("222");
        userEntity2.setUsername("用户2");
        userEntity2.setPassword("密码2");
        userEntity3.setUid("333");
        userEntity3.setUsername("用户3");
        userEntity3.setPassword("密码3");
        mongoTemplate.save(userEntity1);
        mongoTemplate.save(userEntity2);
        mongoTemplate.save(userEntity3);
}Database information:
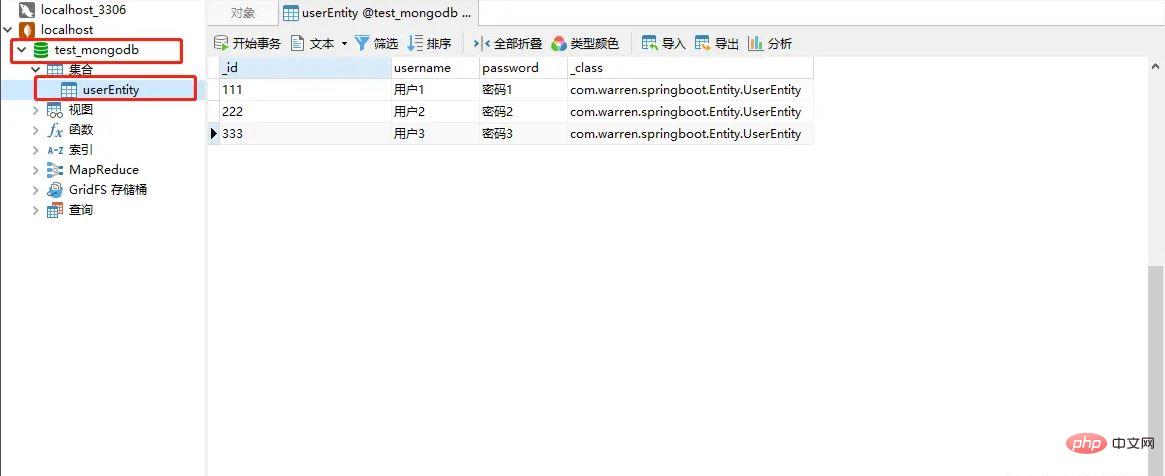
As you can see, MongoDB automatically creates the database and generates it through entity classes The collection (which is what we often call the data table), and we have inserted several documents (that is, inserted several records) into the userEntity collection of the database through MongoTemplate. _id is the primary key, _class is the entity class package name and class name
Test 2: Query operation
    @Autowired
    private MongoTemplate mongoTemplate;
	@Test
    public void findUserByUserName(){
        String username = "用户1";
        Query query=new Query(Criteria.where("username").is(username));
        UserEntity user =  mongoTemplate.findOne(query , UserEntity.class);
        System.out.println(user);
}Output result:
UserEntity{uid='111', username='User 1', password='Password 1'}
Test 3: Update operation
  @Autowired
    private MongoTemplate mongoTemplate;
	@Test
    public void updateUser(){
        UserEntity userEntity = new UserEntity();
        userEntity.setUid("111");
        userEntity.setUsername("更新后的用户名");
        userEntity.setPassword("更新后的密码");
        Query query = new Query(Criteria.where("_id").is(userEntity.getUid()));
        Update update = Update.update("username",userEntity.getUsername()).set("password",userEntity.getPassword());
        //更新返回结果集的第一条
        mongoTemplate.updateFirst(query,update,UserEntity.class);
        //更新返回结果集的所有
        //mongoTemplate.updateMulti(query,update,UserEntity.class);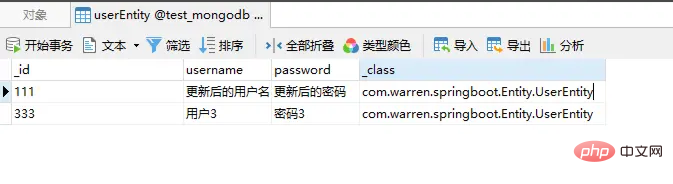
}Update The database after deletion is as shown in the figure:

Test 4: Delete operation
    @Autowired
    private MongoTemplate mongoTemplate;
	@Test
    public  void DeleteByUserId(){
        String id = "222";
        Query query=new Query(Criteria.where("_id").is(id));
        mongoTemplate.remove(query,UserEntity.class);
}The database after deletion is as shown in the figure:
The above is the detailed content of How SpringBoot integrates Mongodb to implement additions, deletions, and changes. For more information, please follow other related articles on the PHP Chinese website!

Hot AI Tools

Undresser.AI Undress
AI-powered app for creating realistic nude photos

AI Clothes Remover
Online AI tool for removing clothes from photos.

Undress AI Tool
Undress images for free

Clothoff.io
AI clothes remover

AI Hentai Generator
Generate AI Hentai for free.

Hot Article
Hot Tools

Notepad++7.3.1
Easy-to-use and free code editor

SublimeText3 Chinese version
Chinese version, very easy to use

Zend Studio 13.0.1
Powerful PHP integrated development environment

Dreamweaver CS6
Visual web development tools

SublimeText3 Mac version
God-level code editing software (SublimeText3)
Hot Topics
 1378
1378
 52
52

 What to do if navicat expires
Apr 23, 2024 pm 12:12 PM
What to do if navicat expires
Apr 23, 2024 pm 12:12 PM
Solutions to resolve Navicat expiration issues include: renew the license; uninstall and reinstall; disable automatic updates; use Navicat Premium Essentials free version; contact Navicat customer support.
 How to connect navicat to mongodb
Apr 24, 2024 am 11:27 AM
How to connect navicat to mongodb
Apr 24, 2024 am 11:27 AM
To connect to MongoDB using Navicat, you need to: Install Navicat Create a MongoDB connection: a. Enter the connection name, host address and port b. Enter the authentication information (if required) Add an SSL certificate (if required) Verify the connection Save the connection
 What is the use of net4.0
May 10, 2024 am 01:09 AM
What is the use of net4.0
May 10, 2024 am 01:09 AM
.NET 4.0 is used to create a variety of applications and it provides application developers with rich features including: object-oriented programming, flexibility, powerful architecture, cloud computing integration, performance optimization, extensive libraries, security, Scalability, data access, and mobile development support.
 Integration of Java functions and databases in serverless architecture
Apr 28, 2024 am 08:57 AM
Integration of Java functions and databases in serverless architecture
Apr 28, 2024 am 08:57 AM
In a serverless architecture, Java functions can be integrated with the database to access and manipulate data in the database. Key steps include: creating Java functions, configuring environment variables, deploying functions, and testing functions. By following these steps, developers can build complex applications that seamlessly access data stored in databases.
 How to configure MongoDB automatic expansion on Debian
Apr 02, 2025 am 07:36 AM
How to configure MongoDB automatic expansion on Debian
Apr 02, 2025 am 07:36 AM
This article introduces how to configure MongoDB on Debian system to achieve automatic expansion. The main steps include setting up the MongoDB replica set and disk space monitoring. 1. MongoDB installation First, make sure that MongoDB is installed on the Debian system. Install using the following command: sudoaptupdatesudoaptinstall-ymongodb-org 2. Configuring MongoDB replica set MongoDB replica set ensures high availability and data redundancy, which is the basis for achieving automatic capacity expansion. Start MongoDB service: sudosystemctlstartmongodsudosys
 How to ensure high availability of MongoDB on Debian
Apr 02, 2025 am 07:21 AM
How to ensure high availability of MongoDB on Debian
Apr 02, 2025 am 07:21 AM
This article describes how to build a highly available MongoDB database on a Debian system. We will explore multiple ways to ensure data security and services continue to operate. Key strategy: ReplicaSet: ReplicaSet: Use replicasets to achieve data redundancy and automatic failover. When a master node fails, the replica set will automatically elect a new master node to ensure the continuous availability of the service. Data backup and recovery: Regularly use the mongodump command to backup the database and formulate effective recovery strategies to deal with the risk of data loss. Monitoring and Alarms: Deploy monitoring tools (such as Prometheus, Grafana) to monitor the running status of MongoDB in real time, and
 How to connect nodejs to database
Apr 21, 2024 am 06:16 AM
How to connect nodejs to database
Apr 21, 2024 am 06:16 AM
To connect to the database, Node.js provides multiple database connector packages for MySQL, PostgreSQL, MongoDB, and Redis. The connection steps include: 1. Install the corresponding connector package; 2. Create a connection pool to maintain reusable connections; 3. Establish a connection with the database. Note: The operation is asynchronous and errors need to be handled to ensure security and optimize performance.
 Can navicat connect to mongodb?
Apr 23, 2024 pm 05:15 PM
Can navicat connect to mongodb?
Apr 23, 2024 pm 05:15 PM
Yes, Navicat can connect to MongoDB database. Specific steps include: Open Navicat and create a new connection. Select the database type as MongoDB. Enter the MongoDB host address, port, and database name. Enter your MongoDB username and password (if required). Click the "Connect" button.
