
 Operation and Maintenance
Nginx
How to build a picture server on Linux platform through nginx and vsftpd
Operation and Maintenance
Nginx
How to build a picture server on Linux platform through nginx and vsftpd
How to build a picture server on Linux platform through nginx and vsftpd

1. nginx installation
1. nginx installation environment
nginx is developed in C language. It is recommended to run on Linux. This tutorial Use centos6.5 as the installation environment.
To install nginx, you need to compile the source code downloaded from the official website first. The compilation depends on the gcc environment. If there is no gcc environment, you need to install gcc: yum install gcc-c
pcre (perlcompatible regular expressions) is A perl library that includes a perl-compatible regular expression library. The http module of nginx uses pcre to parse regular expressions, so the pcre library needs to be installed on Linux.
yuminstall -y pcre pcre-devel
Note: pcre-devel is a secondary development library developed using pcre. nginx also requires this library.
The zlib library provides many compression and decompression methods. nginx uses zlib to gzip the contents of the http package, so the zlib library needs to be installed on Linux.
yuminstall -y zlib zlib-devel
openssl is a powerful secure socket layer cryptographic library, including major cryptographic algorithms, commonly used key and certificate encapsulation management functions and SSL protocols, and provides a wealth of applications for testing or other purposes use.
nginx not only supports the http protocol, but also supports https (that is, transmitting http over the ssl protocol), so you need to install the openssl library on Linux.
yuminstall -y openssl openssl-devel
2. Compile and install
Copy nginx-1.8.0.tar.gz to the linux server.
Unzip:
tar -zxvf nginx-1.8.0.tar.gz
Enter the root directory of nginx:
cd nginx-1.8.0
a.configure
./configure --help Query detailed parameters (refer to this tutorial Appendix part: nginx compilation parameters)
The parameter settings are as follows:
./configure \
--prefix=/usr/local/nginx \
--pid-path=/var/run/nginx/nginx.pid \
--lock-path=/var/lock/nginx.lock \
--error-log-path=/var/log/nginx/error.log \
--http-log-path=/var/log/nginx/access.log \
--with-http_gzip_static_module \
--http-client-body-temp-path=/var/temp/nginx/client\
--http-proxy-temp-path=/var/temp/nginx/proxy\
--http-fastcgi-temp-path=/var/temp/nginx/fastcgi\
--http-uwsgi-temp-path=/var/temp/nginx/uwsgi\
--http-scgi-temp-path=/var/temp/nginx/scgi
Note: The temporary file directory is specified as /var/temp/nginx above, and the temp and nginx directories need to be created under /var
b. Compile and install
make
make install
Installation is successful. Check the installation directory:
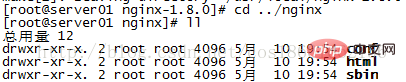
c. Start nginx
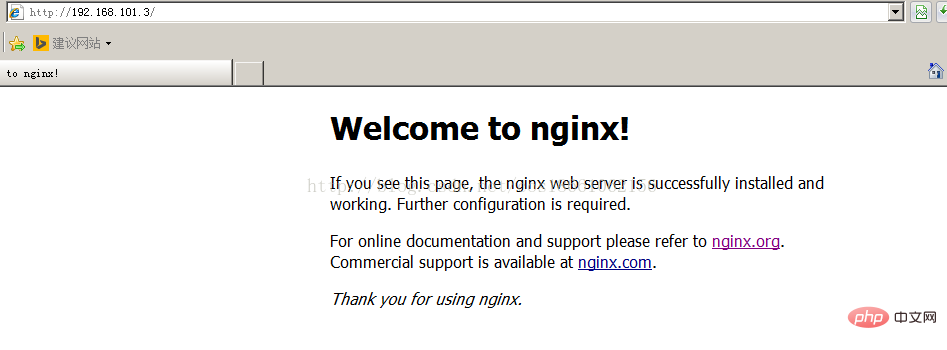
cd /usr/local/nginx/sbin/
./nginx
Query the nginx process:

./nginx-c /usr/local/nginx/conf/nginx.conf
Method 1, quick stop:
cd /usr/local/nginx/sbin
./nginx -s stop
Method 2, complete stop (recommended):
cd /usr/local/nginx/sbin
./nginx -s quit
Method 1, stop and then start (recommended):
Restarting nginx is equivalent to stopping nginx first and then Start nginx, that is, execute the stop command first and then the start command. As follows:./nginx -s quit ./nginx
Method 2, reload the configuration file:
When the nginx configuration file nginx.conf is modified, you want to make the configuration To take effect, nginx needs to be restarted. Use -s reload to make the configuration information effective in nginx without first stopping nginx and then starting nginx, as follows:./nginx -s reload
2. FTP installation
1. Install the vsftpd component[root@bogon ~]# yum -y install vsftpd
[root@bogon ~]# useradd ftpuser
[root@bogon ~]# passwd ftpuser
[root@bogon ~]# vim /etc/sysconfig/iptables
[root@bogon ~]# service iptables restart
[root@bogon ~]# getsebool -a | grepftp
allow_ftpd_anon_write --> off
allow_ftpd_full_access --> off
allow_ftpd_use_cifs --> off
allow_ftpd_use_nfs --> off
ftp_home_dir --> off
ftpd_connect_db --> off
ftpd_use_passive_mode --> off
httpd_enable_ftp_server --> off
tftp_anon_write --> off
[root@bogon ~]#
[root@bogon ~]#setsebool -p allow_ftpd_full_access on
[root@bogon ~]#setsebool -p ftp_home_dir on
这样应该没问题了(如果,还是不行,看看是不是用了ftp客户端工具用了passive模式访问了,如提示entering passive mode,就代表是passive模式,默认是不行的,因为ftp passive模式被iptables挡住了,下面会讲怎么开启,如果懒得开的话,就看看你客户端ftp是否有port模式的选项,或者把passive模式的选项去掉。如果客户端还是不行,看看客户端上的主机的电脑是否开了防火墙,关吧)
filezilla的主动、被动模式修改:
菜单:编辑→设置

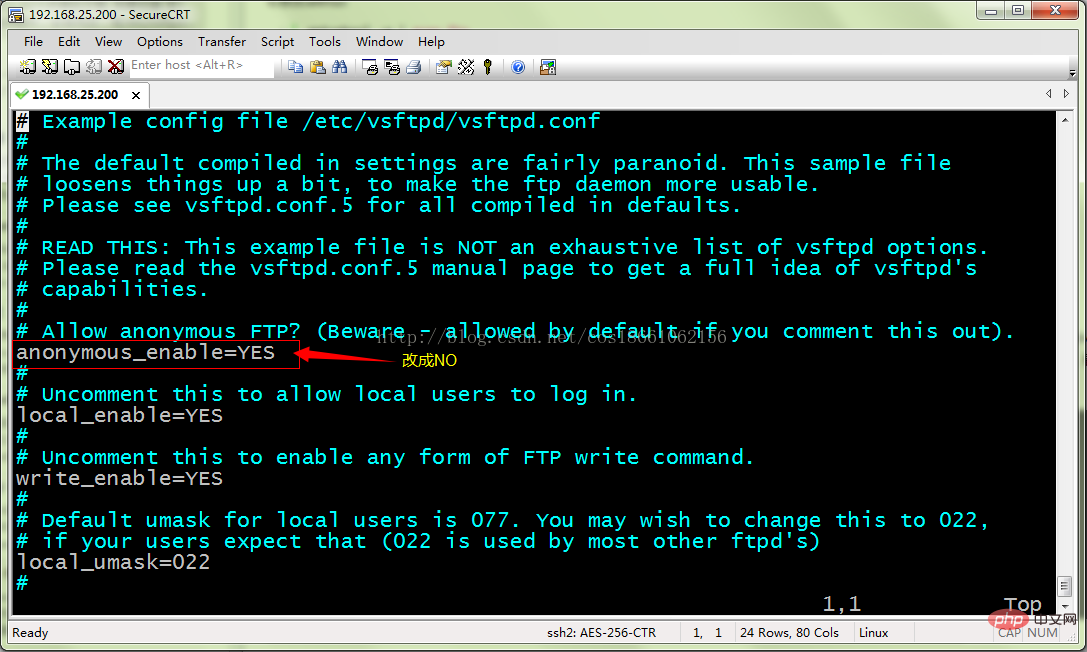
6、关闭匿名访问
修改/etc/vsftpd/vsftpd.conf文件:
重启ftp服务:
[root@bogon ~]# service vsftpd restart
7、开启被动模式
默认是开启的,但是要指定一个端口范围,打开vsftpd.conf文件,在后面加上
pasv_min_port=30000
pasv_max_port=30999
表示端口范围为30000~30999,这个可以随意改。改完重启一下vsftpd
由于指定这段端口范围,iptables也要相应的开启这个范围,所以像上面那样打开iptables文件。
也是在21上下面另起一行,更那行差不多,只是把21 改为30000:30999,然后:wq保存,重启下iptables。这样就搞定了。
8、设置开机启动vsftpd ftp服务
[root@bogon ~]# chkconfig vsftpd on
The above is the detailed content of How to build a picture server on Linux platform through nginx and vsftpd. For more information, please follow other related articles on the PHP Chinese website!

Hot AI Tools

Undresser.AI Undress
AI-powered app for creating realistic nude photos

AI Clothes Remover
Online AI tool for removing clothes from photos.

Undress AI Tool
Undress images for free

Clothoff.io
AI clothes remover

AI Hentai Generator
Generate AI Hentai for free.

Hot Article
Hot Tools

Notepad++7.3.1
Easy-to-use and free code editor

SublimeText3 Chinese version
Chinese version, very easy to use

Zend Studio 13.0.1
Powerful PHP integrated development environment

Dreamweaver CS6
Visual web development tools

SublimeText3 Mac version
God-level code editing software (SublimeText3)
Hot Topics
 1378
1378
 52
52

 How to solve nginx403
Apr 14, 2025 am 10:33 AM
How to solve nginx403
Apr 14, 2025 am 10:33 AM
How to fix Nginx 403 Forbidden error? Check file or directory permissions; 2. Check .htaccess file; 3. Check Nginx configuration file; 4. Restart Nginx. Other possible causes include firewall rules, SELinux settings, or application issues.
 How to start nginx in Linux
Apr 14, 2025 pm 12:51 PM
How to start nginx in Linux
Apr 14, 2025 pm 12:51 PM
Steps to start Nginx in Linux: Check whether Nginx is installed. Use systemctl start nginx to start the Nginx service. Use systemctl enable nginx to enable automatic startup of Nginx at system startup. Use systemctl status nginx to verify that the startup is successful. Visit http://localhost in a web browser to view the default welcome page.
 How to solve nginx403 error
Apr 14, 2025 pm 12:54 PM
How to solve nginx403 error
Apr 14, 2025 pm 12:54 PM
The server does not have permission to access the requested resource, resulting in a nginx 403 error. Solutions include: Check file permissions. Check the .htaccess configuration. Check nginx configuration. Configure SELinux permissions. Check the firewall rules. Troubleshoot other causes such as browser problems, server failures, or other possible errors.
 How to solve the problem of nginx cross-domain
Apr 14, 2025 am 10:15 AM
How to solve the problem of nginx cross-domain
Apr 14, 2025 am 10:15 AM
There are two ways to solve the Nginx cross-domain problem: modify the cross-domain response header: add directives to allow cross-domain requests, specify allowed methods and headers, and set cache time. Use CORS modules: Enable modules and configure CORS rules that allow cross-domain requests, methods, headers, and cache times.
 How to solve nginx304 error
Apr 14, 2025 pm 12:45 PM
How to solve nginx304 error
Apr 14, 2025 pm 12:45 PM
Answer to the question: 304 Not Modified error indicates that the browser has cached the latest resource version of the client request. Solution: 1. Clear the browser cache; 2. Disable the browser cache; 3. Configure Nginx to allow client cache; 4. Check file permissions; 5. Check file hash; 6. Disable CDN or reverse proxy cache; 7. Restart Nginx.
 How to check whether nginx is started
Apr 14, 2025 pm 01:03 PM
How to check whether nginx is started
Apr 14, 2025 pm 01:03 PM
How to confirm whether Nginx is started: 1. Use the command line: systemctl status nginx (Linux/Unix), netstat -ano | findstr 80 (Windows); 2. Check whether port 80 is open; 3. Check the Nginx startup message in the system log; 4. Use third-party tools, such as Nagios, Zabbix, and Icinga.
 How to check the running status of nginx
Apr 14, 2025 am 11:48 AM
How to check the running status of nginx
Apr 14, 2025 am 11:48 AM
The methods to view the running status of Nginx are: use the ps command to view the process status; view the Nginx configuration file /etc/nginx/nginx.conf; use the Nginx status module to enable the status endpoint; use monitoring tools such as Prometheus, Zabbix, or Nagios.
 How to clean nginx error log
Apr 14, 2025 pm 12:21 PM
How to clean nginx error log
Apr 14, 2025 pm 12:21 PM
The error log is located in /var/log/nginx (Linux) or /usr/local/var/log/nginx (macOS). Use the command line to clean up the steps: 1. Back up the original log; 2. Create an empty file as a new log; 3. Restart the Nginx service. Automatic cleaning can also be used with third-party tools such as logrotate or configured.
