 Operation and Maintenance
 Nginx
Nginx
 What is the method for smooth upgrade of Nginx production environment?
What is the method for smooth upgrade of Nginx production environment?
1. Background
Recently I encountered a rather embarrassing and practical problem, that is, the Nginx used in our production environment is an old antique of Centos6. Business requirements need to be implemented by loading a module of Nginx, but the version is too old and needs Nginx1.18 or later to support it, and ours is Nginx1.12. Then upgrading Nginx is what we have to do. But in the production environment, you have to consider many things. Unlike the test server, Nginx stops the service, recompiles the new version, and then starts it again. Our online services need to be provided uninterrupted, otherwise it will cause economic losses to the business. So is there any plan to smoothly upgrade the Nginx version?
2. Upgrade plan
In fact, the official has already announced We have done a lot of work on the smooth upgrade of Nginx. The basic principle is to start a new Nginx (master worker) process, and then send the -USER2 command to the old master process, so that the new and old versions of the process can receive processing requests at the same time. After that, we send -WINCH to the old process to stop the working service (close all old worker processes, but the old master process is not closed to prevent you from encountering problems later). If you confirm that there is no problem with the new Nginx, then manually Kill the old master process to complete the smooth upgrade.
3. Operation process
1. View-Old version [nginx 1.12.2] process information
[root@k8s-master nginx-1.12.2]# ps aux | grep 'nginx' | grep -v '7月' | grep -v 'grep'

root     15180  0.0  0.0  46136   920 ?        Ss   17:22   0:00 nginx: master process ./nginx-1.12.2/sbin/nginx

nobody   15181  0.0  0.1  46584  4344 ?        S    17:22   0:00 nginx: worker process
Main process pid: 15180 Worker process 15181
2. nginx -V View the compilation parameters of the old version of nginx
[root@k8s-master nginx-1.12.2]# nginx-1.12.2/sbin/nginx.old.1.12 -V

nginx version: nginx/1.12.2

built by gcc 4.8.5 20150623 (Red Hat 4.8.5-44) (GCC)

built with OpenSSL 1.0.2k-fips  26 Jan 2017

TLS SNI support enabled

configure arguments: --prefix=nginx-1.12.2 --with-pcre=/root/nginx-test/pcre-8.45/ --with-http_stub_status_module --with-http_gzip_static_module --with-http_ssl_module --with-stream

[root@k8s-master nginx-1.12.2]#
If make or ./configure reports an error , you can try to install: yum install -y gcc-c
3. Back up the old version binary nginx program, mv nginx nginx.old
mv nginx nginx.old
4. At this time we download [nginx1.20.2] Recompile the new version and follow the compilation parameters of the old version (or add a new compilation module yourself)
5. Copy the newly generated binary nginx and move it to the nginx path of the previous old version to overwrite it.
./configure --prefix=/usr/local/ --with-stream  xxxx[模块列表]

make

&make install
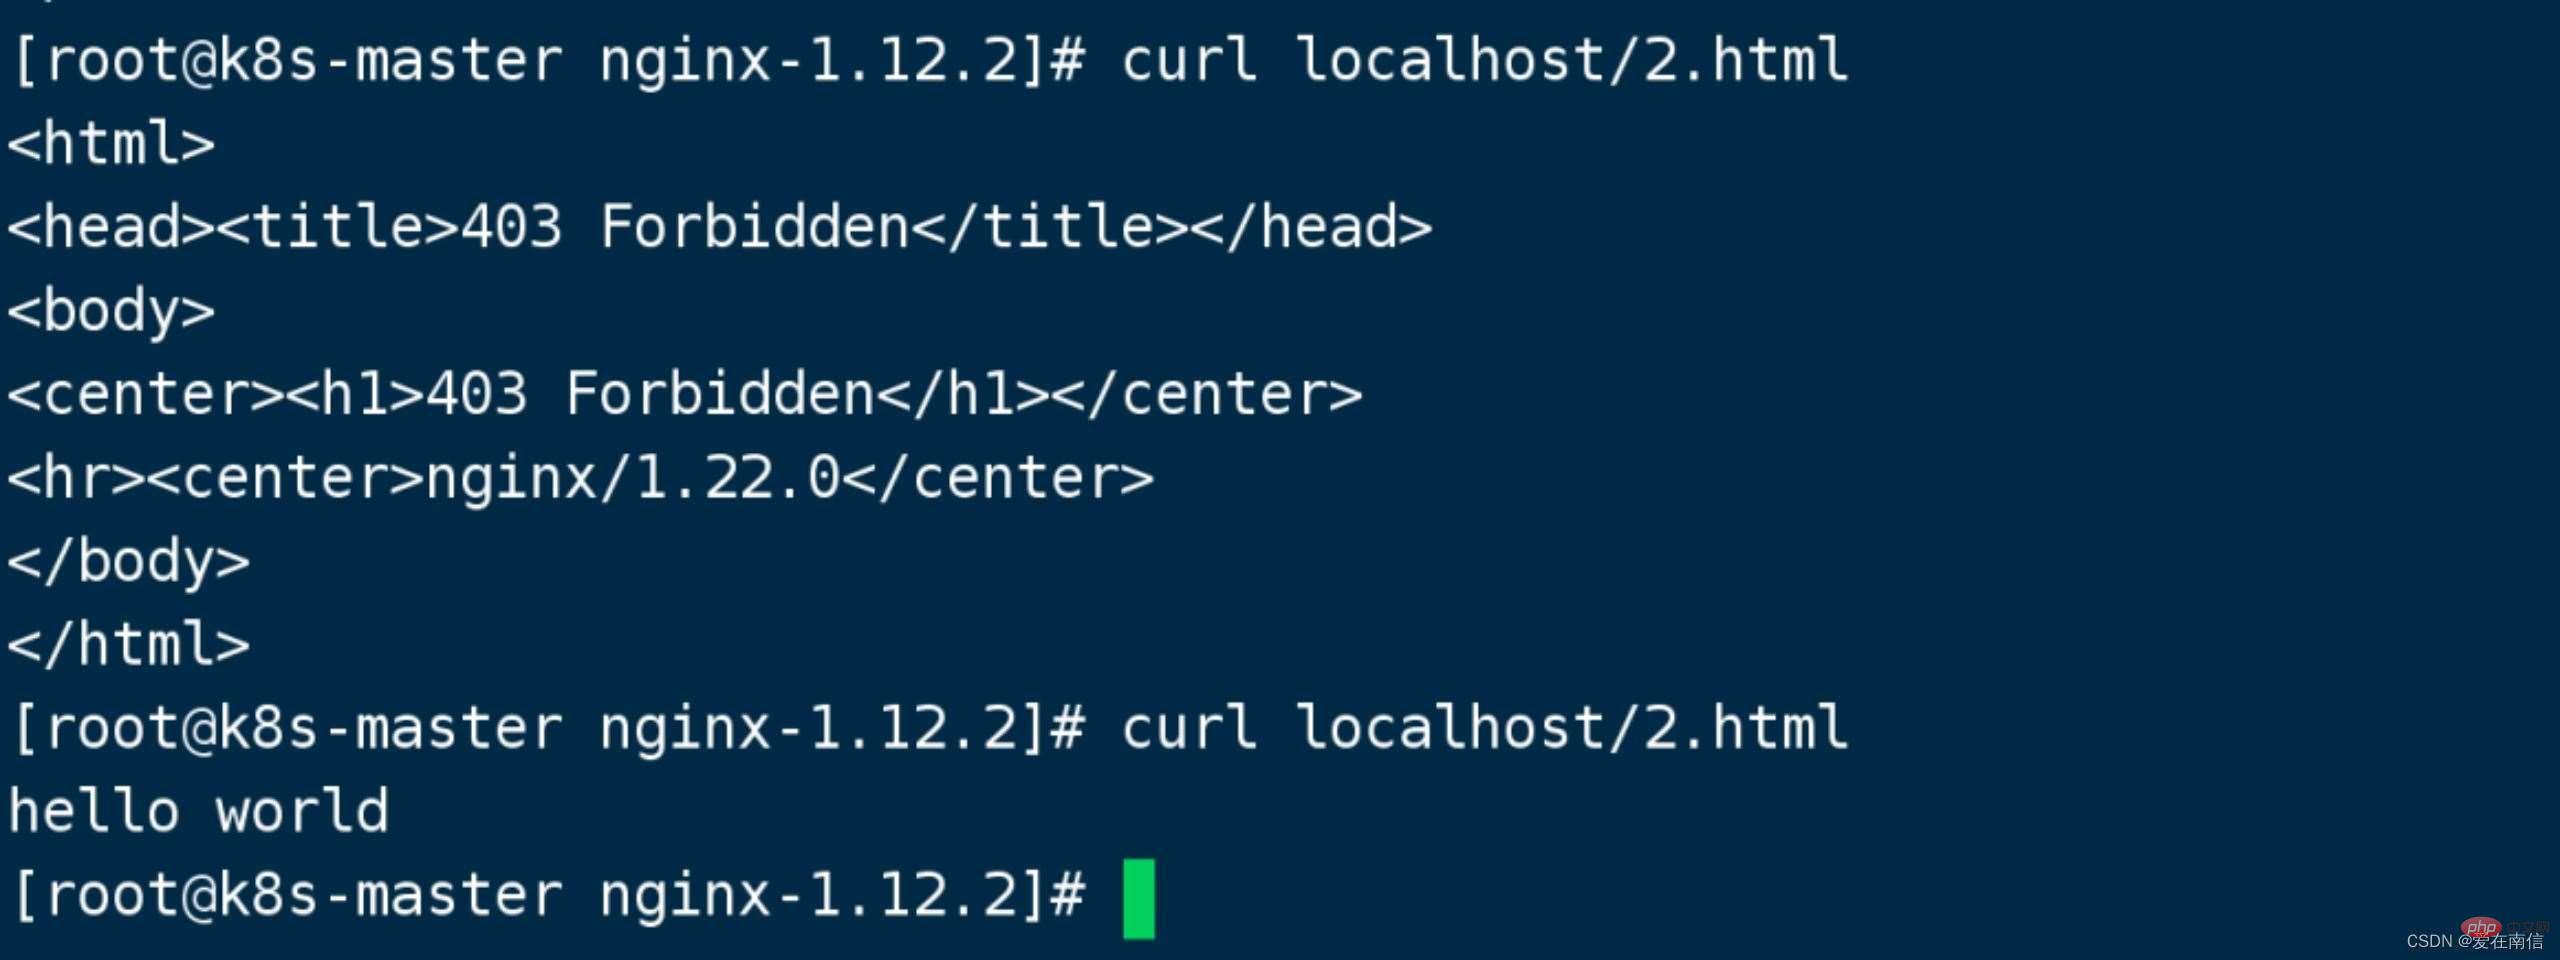
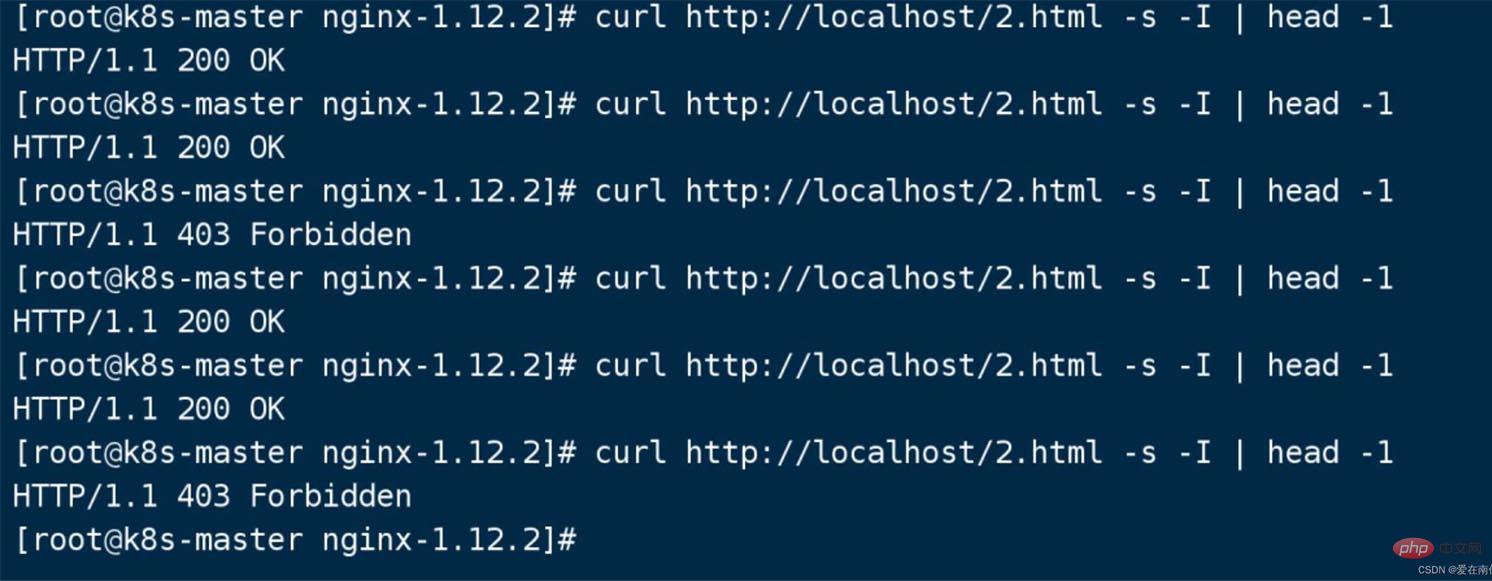
6. Send nginx -USR2 15180 (old nginx main process) for replacement. At this time, there are 4 processes. 2 old nginx processes 2 new nginx processes

This When the request is tested, it is load balanced to these two masters.

The request is made 2 times, the first time it is loaded to the new master, and the second time it is loaded to the old master .
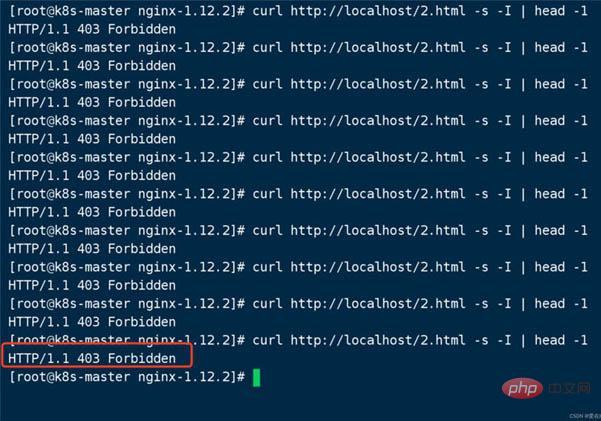
7. Confirm that the upgrade is successful, -WINCH signal stops the old version master from receiving new requests (at this time, the old version nginx master process is not dead, but just stops receiving new requests)
kill -winch 15180

The old version of nginx only has the master process left, and the child process no longer exists.
At this time, if the URL is accessed multiple times, load balancing will not occur.

Hello world does not appear again
8. To roll back the version is also very simple, just send kill -HUP 15180 (old nginx master process)


At this time, both the old version and the new version of nginx are load balancing. Just kill the new version of nginx master.
At this time, the new version of nginx has been killed Just -QUIT.
The above is the detailed content of What is the method for smooth upgrade of Nginx production environment?. For more information, please follow other related articles on the PHP Chinese website!

Hot AI Tools

Undresser.AI Undress
AI-powered app for creating realistic nude photos

AI Clothes Remover
Online AI tool for removing clothes from photos.

Undress AI Tool
Undress images for free

Clothoff.io
AI clothes remover

AI Hentai Generator
Generate AI Hentai for free.

Hot Article

Hot Tools

Notepad++7.3.1
Easy-to-use and free code editor

SublimeText3 Chinese version
Chinese version, very easy to use

Zend Studio 13.0.1
Powerful PHP integrated development environment

Dreamweaver CS6
Visual web development tools

SublimeText3 Mac version
God-level code editing software (SublimeText3)

Hot Topics
 How to allow external network access to tomcat server
Apr 21, 2024 am 07:22 AM
To allow the Tomcat server to access the external network, you need to: modify the Tomcat configuration file to allow external connections. Add a firewall rule to allow access to the Tomcat server port. Create a DNS record pointing the domain name to the Tomcat server public IP. Optional: Use a reverse proxy to improve security and performance. Optional: Set up HTTPS for increased security.
 How to run thinkphp
Apr 09, 2024 pm 05:39 PM
Steps to run ThinkPHP Framework locally: Download and unzip ThinkPHP Framework to a local directory. Create a virtual host (optional) pointing to the ThinkPHP root directory. Configure database connection parameters. Start the web server. Initialize the ThinkPHP application. Access the ThinkPHP application URL and run it.
 Welcome to nginx!How to solve it?
Apr 17, 2024 am 05:12 AM
To solve the "Welcome to nginx!" error, you need to check the virtual host configuration, enable the virtual host, reload Nginx, if the virtual host configuration file cannot be found, create a default page and reload Nginx, then the error message will disappear and the website will be normal show.
 How to communicate between docker containers
Apr 07, 2024 pm 06:24 PM
There are five methods for container communication in the Docker environment: shared network, Docker Compose, network proxy, shared volume, and message queue. Depending on your isolation and security needs, choose the most appropriate communication method, such as leveraging Docker Compose to simplify connections or using a network proxy to increase isolation.
 How to register phpmyadmin
Apr 07, 2024 pm 02:45 PM
To register for phpMyAdmin, you need to first create a MySQL user and grant permissions to it, then download, install and configure phpMyAdmin, and finally log in to phpMyAdmin to manage the database.
 How to deploy nodejs project to server
Apr 21, 2024 am 04:40 AM
Server deployment steps for a Node.js project: Prepare the deployment environment: obtain server access, install Node.js, set up a Git repository. Build the application: Use npm run build to generate deployable code and dependencies. Upload code to the server: via Git or File Transfer Protocol. Install dependencies: SSH into the server and use npm install to install application dependencies. Start the application: Use a command such as node index.js to start the application, or use a process manager such as pm2. Configure a reverse proxy (optional): Use a reverse proxy such as Nginx or Apache to route traffic to your application
 How to generate URL from html file
Apr 21, 2024 pm 12:57 PM
Converting an HTML file to a URL requires a web server, which involves the following steps: Obtain a web server. Set up a web server. Upload HTML file. Create a domain name. Route the request.
 What to do if the installation of phpmyadmin fails
Apr 07, 2024 pm 03:15 PM
Troubleshooting steps for failed phpMyAdmin installation: Check system requirements (PHP version, MySQL version, web server); enable PHP extensions (mysqli, pdo_mysql, mbstring, token_get_all); check configuration file settings (host, port, username, password); Check file permissions (directory ownership, file permissions); check firewall settings (whitelist web server ports); view error logs (/var/log/apache2/error.log or /var/log/nginx/error.log); seek Technical support (phpMyAdmin


