1. nginx installs ssl certificate
Requires two configuration files
(Warm reminder: Please back up the server configuration file you need to modify before installing the certificate)
1_root_bundle.crt;
2_domainname.com.key.
Note: These three certificate files are in the folder for nginx.zip. For example: 1_root_bundle.crt is the root certificate chain (public key), 2_ domainname.com.key is the private key.
(Among them: the certificate public key and private key files are generally named after your domain name; the nature of the certificate suffixes crt and cer are the same).
2. Modification of nginx certificate code
1. Open the nginx.conf file in the conf directory under the nginx installation directory. The Alibaba Cloud server is in /alidata/server/nginx /conf/nginx.conf.
Found:
# https server
 #
 #server {
 #  listen    443;
 #  server_name localhost;
 #  ssl      on;
 #  ssl_certificate   cert.pem;
 #  ssl_certificate_key cert.key;
 #  ssl_session_timeout 5m;
 #  ssl_protocols sslv2 sslv3 tlsv1;
 #  ssl_ciphers all:!adh:!export56:rc4+rsa:+high:+medium:+low:+sslv2:+exp;
 #  ssl_prefer_server_ciphers  on;
 #  location / {
 #    root  html;
 #    index index.html index.htm;
 #  }
#}Modify it to :
server {
    listen    443;
    server_name localhost;
    ssl         on;
    ssl_certificate   1_root_bundle.crt;   (证书公钥)
    ssl_certificate_key   2_ domainname.com.key;   (证书私钥)
    ssl_session_timeout 5m;
    ssl_protocols tlsv1 tlsv1.1 tlsv1.2;
    ssl_ciphers aesgcm:all:!dh:!export:!rc4:+high:!medium:!low:!anull:!enull;
    ssl_prefer_server_ciphers  on;
    location / {
      root  html;
      index index.html index.htm;
}Note: After the configuration is completed, the website path and default page and other configurations should be consistent with port 80.
2. Local test access.
If you test locally, please do local resolution access: open the system disk:\windows\system32\drivers\etc\hosts file, modify it with a text editor, and resolve the domain name bound to the certificate to the local IP.

#3. The effect after completing the configuration.
Start nginx and visit https://domain name bound to the certificate

Note: After deployment, if the website cannot be accessed normally through https, you can confirm the server Is port 443 open or blocked by acceleration tools such as Website Defender?
(1) Opening method: Firewall Settings-Exception Port-Add 443 port (tcp).
(2) If intercepted by security or acceleration tools, you can add 443 to the trust list in the interception record.
After restarting, access via https again.
3. WordPress configuration (2 methods: Qiniu and Alibaba oss)
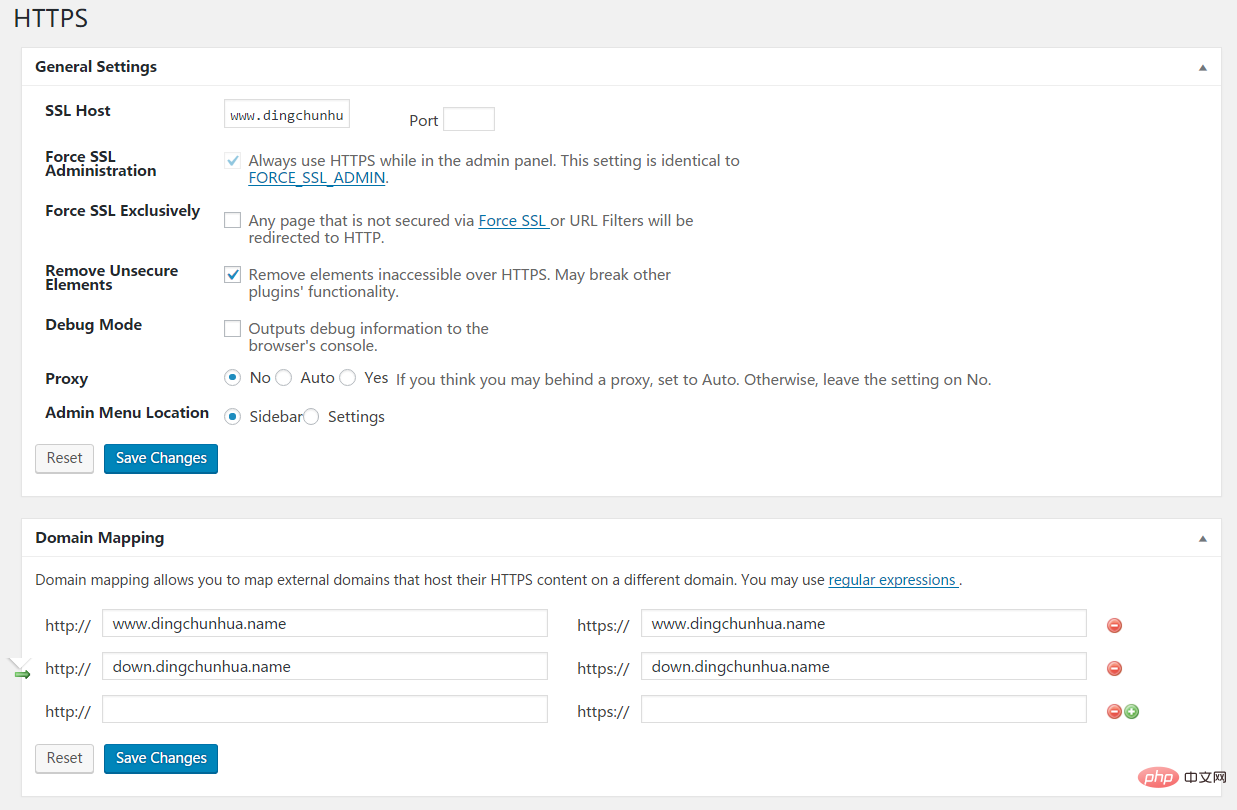
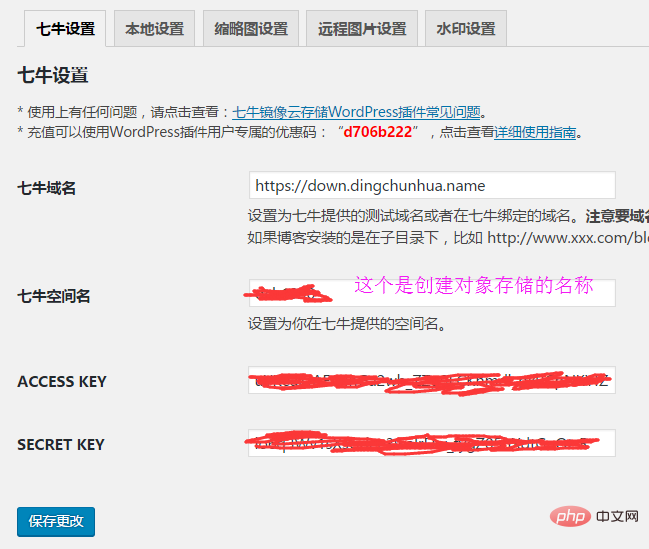
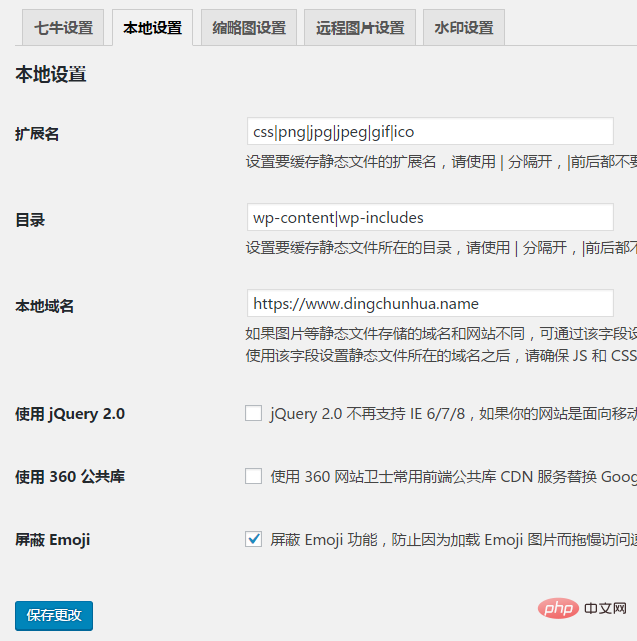
First method: download https plug-in and Qiniu cloud storage plug-in, various plug-ins The configuration is as shown below.
https plug-in:

Qiniu cloud storage plug-in: (My pictures are all saved in Qiniu object storage)

Figure 1

Figure 2
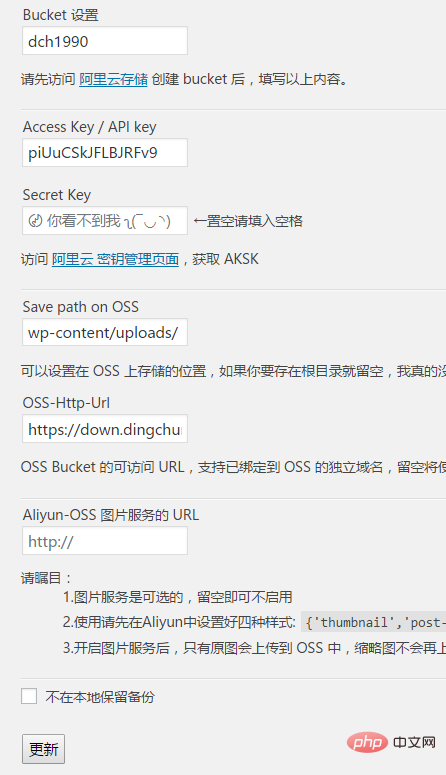
Second type: oss configuration is as follows

2. Modify external links, which are unsafe links. My blog website mainly needs to modify the following.
a. Baidu statistics modification (already supported); b. Baidu sharing modification (not supported, localized Baidu sharing is required); c. theme image modification (one by one); d. image modification in the content; e. Sina follow button localization (who knows can share it with bloggers)
4. cdn configuration
www domain name directly uploads the certificate and key to Alibaba Cloud , just select 443 when returning to the source. If you cannot leave a message, cancel js loading.
Finally you should be able to completely configure ssl.
The above is the detailed content of How to install SSL certificate and configure WordPress CDN under Linux Nginx. For more information, please follow other related articles on the PHP Chinese website!


