How to configure nginx ssl certificate to achieve https access
一,环境说明
服务器系统:ubuntu16.04lts
服务器ip地址:47.89.12.99
域名:bjubi.com
二,域名解析到服务器
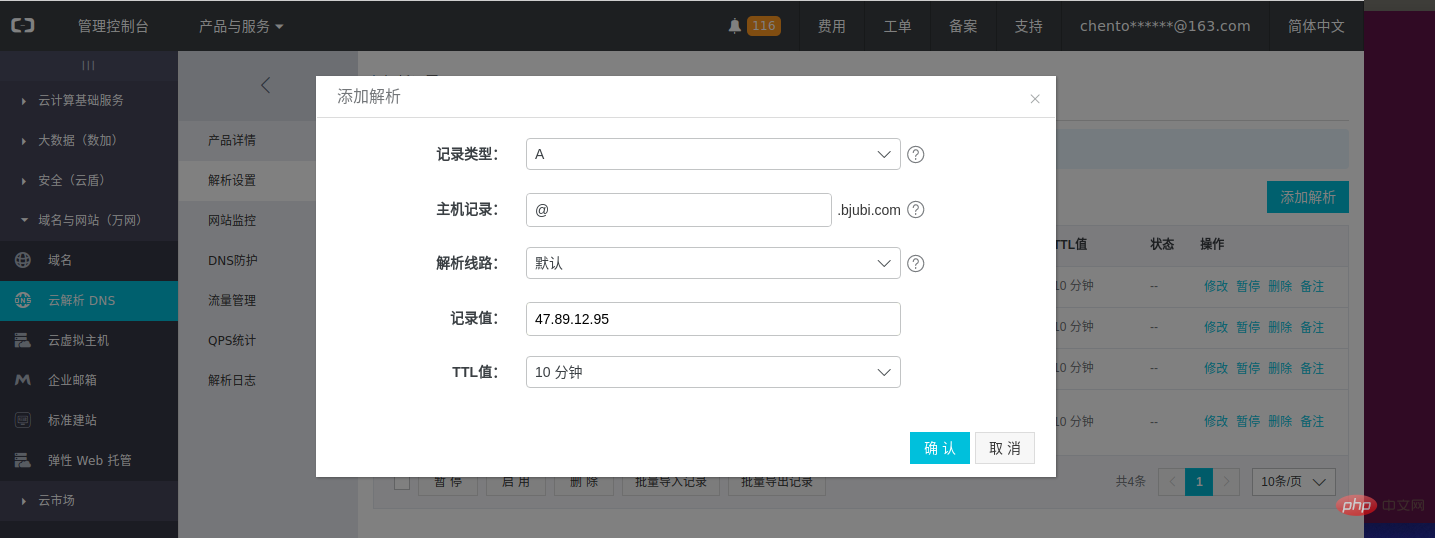
在阿里云控制台-产品与服务-云解析dns-找到需要解析的域名点“解析”,进入解析页面后选择【添加解析】按钮会弹出如下页面:
主机记录这里选择@,记录值就是服务器ip地址,确认。
三,申请ca证书
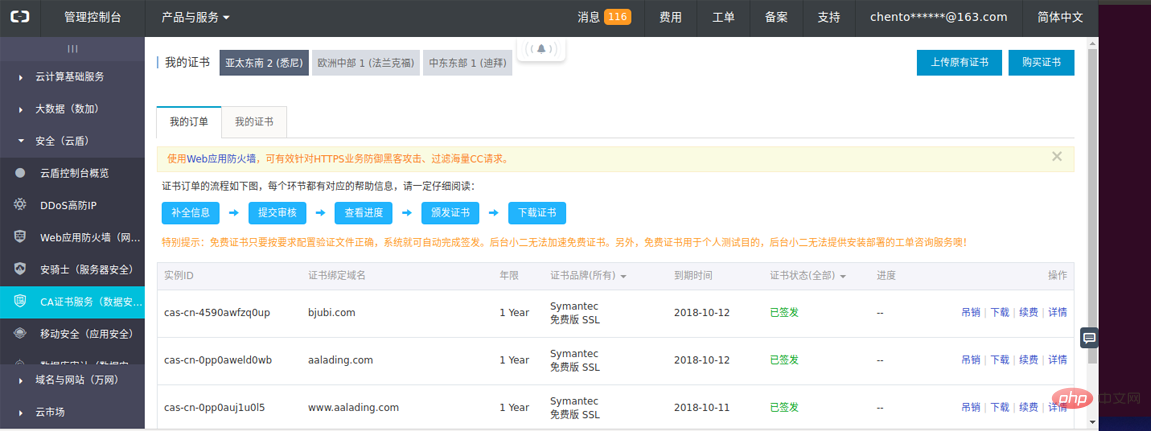
在阿里云控制台-产品与服务-安全(云盾)-ca证书服务(数据安全),点击购买证书,
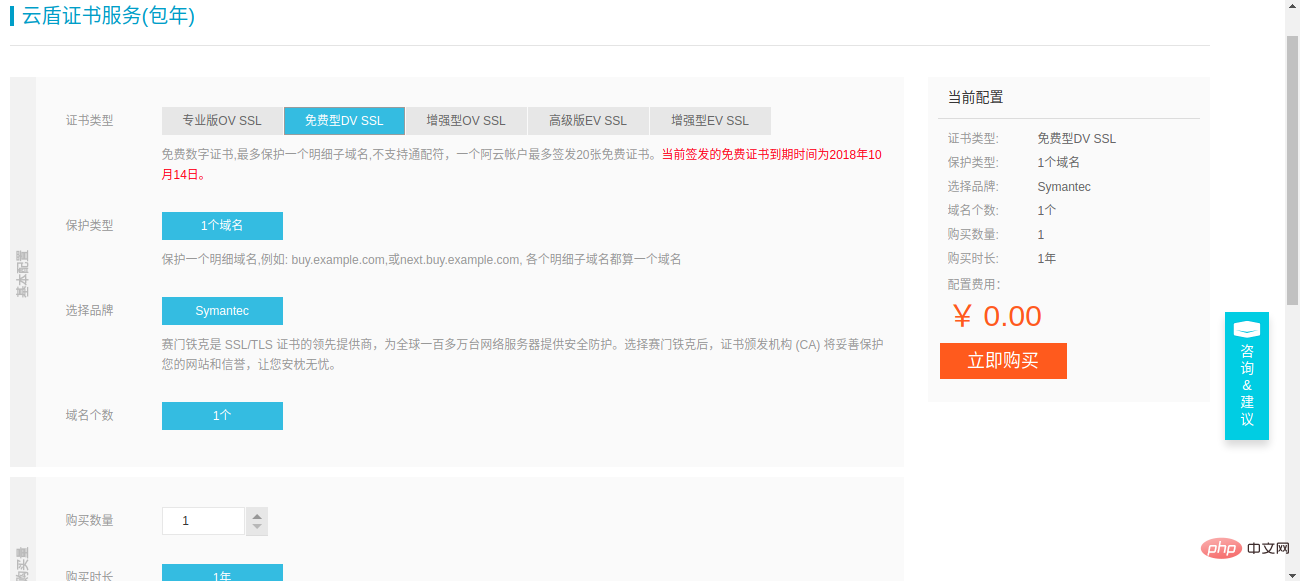
选择“免费版dv ssl”,点击立即购买:
然后点去支付:
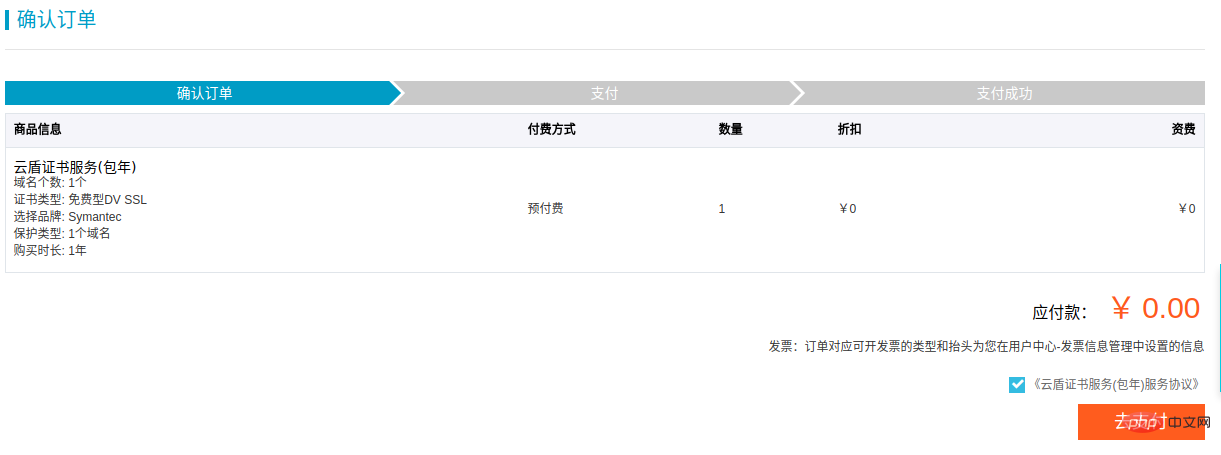
最后确认支付:
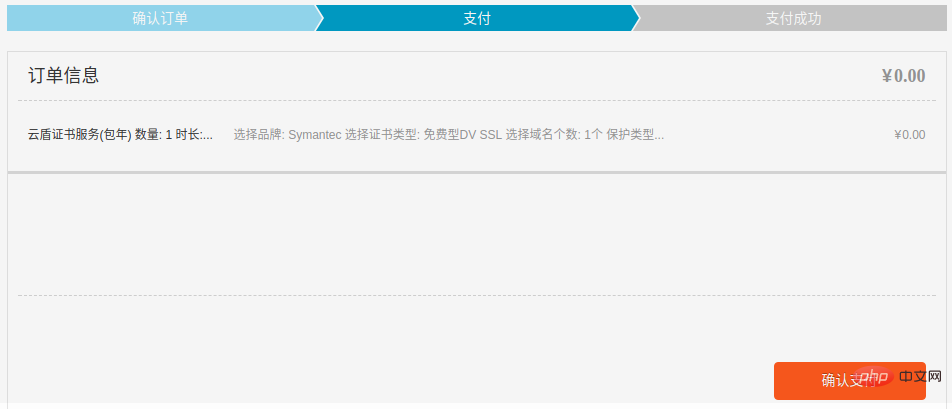
就会回到管理界面:

点击“补全”,输入要解析的域名,点下一步:
说明:因为我们这里申请的是开发版免费证书,所以一个证书仅支持一个域名认证,不支持通配符。
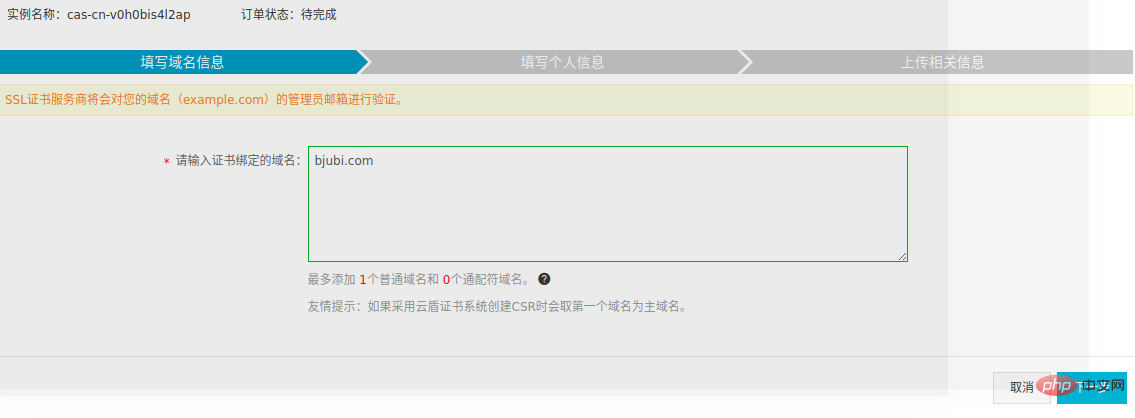
等待几分钟,证书状态变为“已签发”后,证书就申请成功了。
四,下载证书
列表中找到已签发的证书,下载:

进入下载页面,找到ngin页签中nginx配置信息,并“下载证书 for nginx”:
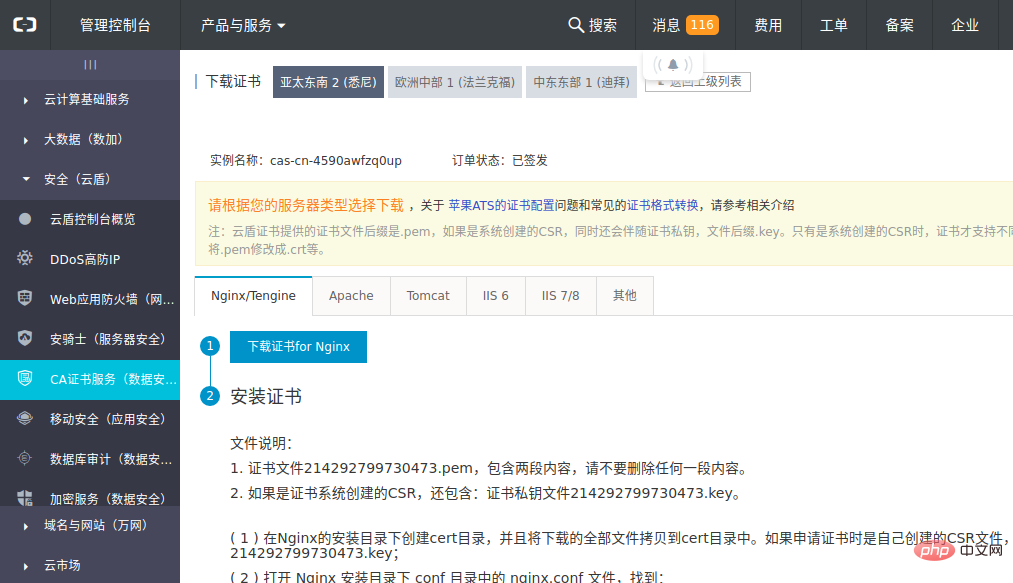
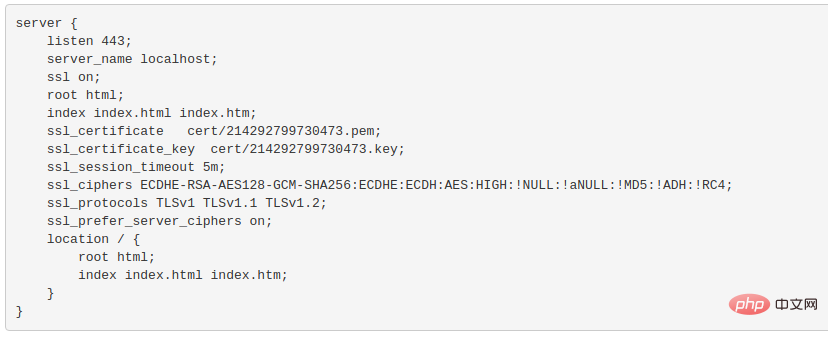
记录以下内容,为了一会儿配置nginx用:
下载的文件有两个:
1,214292799730473.pem
2,214292799730473.key
五,服务器安装,配置nginx
登录到服务器:
$ apt-get update // 更新软件
$ apt-get install nginx // 安装nginx
1,nginx的安装目录为:/etc/nginx/。进入目录,增加cert/文件夹,把刚刚下载的两个文件上传到cert/文件夹中。
2,在/etc/nginx/sites-enabled/下,增加bjubi.com文件。内容如下:
说明:下面的配置是对443端口和80端口进行监听,443端口要启用ssl。监听443端口的server配置可以仿照上面ca认证页面的nginx配置示例进行配置。
root节点笔者创建了一个bjubi.com/的文件夹,专门存放来自这个域名的请求以示区分。
bjubi.com/文件夹下增加一个index.html文件,里面仅仅写了一行
welcome。server {
listen 443;
server_name bjubi.com; // 你的域名
ssl on;
root /var/www/bjubi.com; // 前台文件存放文件夹,可改成别的
index index.html index.htm;// 上面配置的文件夹里面的index.html
ssl_certificate cert/214292799730473.pem;// 改成你的证书的名字
ssl_certificate_key cert/214292799730473.key;// 你的证书的名字
ssl_session_timeout 5m;
ssl_ciphers ecdhe-rsa-aes128-gcm-sha256:ecdhe:ecdh:aes:high:!null:!anull:!md5:!adh:!rc4;
ssl_protocols tlsv1 tlsv1.1 tlsv1.2;
ssl_prefer_server_ciphers on;
location / {
index index.html index.htm;
}
}
server {
listen 80;
server_name bjubi.com;// 你的域名
rewrite ^(.*)$ https://$host$1 permanent;// 把http的域名请求转成https
}Copy after login
server {
  listen 443;
  server_name bjubi.com; // 你的域名
  ssl on;
  root /var/www/bjubi.com; // 前台文件存放文件夹,可改成别的
  index index.html index.htm;// 上面配置的文件夹里面的index.html
  ssl_certificate cert/214292799730473.pem;// 改成你的证书的名字
  ssl_certificate_key cert/214292799730473.key;// 你的证书的名字
  ssl_session_timeout 5m;
  ssl_ciphers ecdhe-rsa-aes128-gcm-sha256:ecdhe:ecdh:aes:high:!null:!anull:!md5:!adh:!rc4;
  ssl_protocols tlsv1 tlsv1.1 tlsv1.2;
  ssl_prefer_server_ciphers on;
  location / {
    index index.html index.htm;
  }
}
server {
  listen 80;
  server_name bjubi.com;// 你的域名
  rewrite ^(.*)$ https://$host$1 permanent;// 把http的域名请求转成https
}配置完成后,检查一下nginx配置文件是否可用,有successful表示可用。
$ nginx -t // 检查nginx配置文件
配置正确后,重新加载配置文件使配置生效:
$ nginx -s reload // 使配置生效
至此,nginx的https访问就完成了,并且通过rewrite方式把所有http请求也转成了https请求,更加安全。
如需重启nginx,用以下命令:
$ service nginx stop // 停止
$ service nginx start // 启动
$ service nginx restart // 重启
七,访问效果
输入http:bjubi.com也会自动跳转至https页面。
说明:如果是云服务器比如阿里云ecs,需要到阿里云ecs的管理后台的安全组,修改端口过滤规则把80端口和443端口开放才能访问到。

The above is the detailed content of How to configure nginx ssl certificate to achieve https access. For more information, please follow other related articles on the PHP Chinese website!

Hot AI Tools

Undresser.AI Undress
AI-powered app for creating realistic nude photos

AI Clothes Remover
Online AI tool for removing clothes from photos.

Undress AI Tool
Undress images for free

Clothoff.io
AI clothes remover

Video Face Swap
Swap faces in any video effortlessly with our completely free AI face swap tool!

Hot Article

Hot Tools

Notepad++7.3.1
Easy-to-use and free code editor

SublimeText3 Chinese version
Chinese version, very easy to use

Zend Studio 13.0.1
Powerful PHP integrated development environment

Dreamweaver CS6
Visual web development tools

SublimeText3 Mac version
God-level code editing software (SublimeText3)

Hot Topics
 1386
1386
 52
52
 How to configure cloud server domain name in nginx
Apr 14, 2025 pm 12:18 PM
How to configure an Nginx domain name on a cloud server: Create an A record pointing to the public IP address of the cloud server. Add virtual host blocks in the Nginx configuration file, specifying the listening port, domain name, and website root directory. Restart Nginx to apply the changes. Access the domain name test configuration. Other notes: Install the SSL certificate to enable HTTPS, ensure that the firewall allows port 80 traffic, and wait for DNS resolution to take effect.
 How to check nginx version
Apr 14, 2025 am 11:57 AM
The methods that can query the Nginx version are: use the nginx -v command; view the version directive in the nginx.conf file; open the Nginx error page and view the page title.
 How to start nginx server
Apr 14, 2025 pm 12:27 PM
Starting an Nginx server requires different steps according to different operating systems: Linux/Unix system: Install the Nginx package (for example, using apt-get or yum). Use systemctl to start an Nginx service (for example, sudo systemctl start nginx). Windows system: Download and install Windows binary files. Start Nginx using the nginx.exe executable (for example, nginx.exe -c conf\nginx.conf). No matter which operating system you use, you can access the server IP
 How to check the name of the docker container
Apr 15, 2025 pm 12:21 PM
You can query the Docker container name by following the steps: List all containers (docker ps). Filter the container list (using the grep command). Gets the container name (located in the "NAMES" column).
 How to check whether nginx is started
Apr 14, 2025 pm 01:03 PM
How to confirm whether Nginx is started: 1. Use the command line: systemctl status nginx (Linux/Unix), netstat -ano | findstr 80 (Windows); 2. Check whether port 80 is open; 3. Check the Nginx startup message in the system log; 4. Use third-party tools, such as Nagios, Zabbix, and Icinga.
 How to run nginx apache
Apr 14, 2025 pm 12:33 PM
To get Nginx to run Apache, you need to: 1. Install Nginx and Apache; 2. Configure the Nginx agent; 3. Start Nginx and Apache; 4. Test the configuration to ensure that you can see Apache content after accessing the domain name. In addition, you need to pay attention to other matters such as port number matching, virtual host configuration, and SSL/TLS settings.
 How to create a mirror in docker
Apr 15, 2025 am 11:27 AM
Steps to create a Docker image: Write a Dockerfile that contains the build instructions. Build the image in the terminal, using the docker build command. Tag the image and assign names and tags using the docker tag command.
 How to start containers by docker
Apr 15, 2025 pm 12:27 PM
Docker container startup steps: Pull the container image: Run "docker pull [mirror name]". Create a container: Use "docker create [options] [mirror name] [commands and parameters]". Start the container: Execute "docker start [Container name or ID]". Check container status: Verify that the container is running with "docker ps".


