 Operation and Maintenance
 Nginx
Nginx
 How to configure nginx and tomcat to access images and static pages
How to configure nginx and tomcat to access images and static pages
The first method: nginx configuration
1. Create the file path:
[root@localhost /]# mkdir /data/soft/
[root@localhost ~]# cd /data/soft/
[root@localhost soft]# mkdir html images
2. Put the image under the images directory
[root@localhost soft]# cd images/
[root@localhost images]# ll
总用量 80
-rw-r--r--. 1 root root 9503 4月 25 17:06 thpzfulfjn.jpg
-rw-r--r--. 1 root root 16083 4月 25 17:06 thr2c5vcmz.jpg
-rw-r--r--. 1 root root 12218 4月 25 17:06 thrg3yx53t.jpg
-rw-r--r--. 1 root root 15048 4月 25 17:06 thsuf51vtr.jpg
-rw-r--r--. 1 root root 21799 4月 25 17:06 thvwslf8ze.jpg
3. Put a test file under the html directory
[root@localhost html]# cat index.html
this is test page !!!!
4. Install nginx and start it
It depends on your preference whether to use yum or compile. I choose to compile and formulate the installation module by myself
Unzip the three packages of pcre-8.34.tar.gz zlib-1.2.8.tar.gz openssl-1.0.1g.tar.gz and install them
tar -zxvf pcre-8.34.tar.gz
cd pcre-8.34
/configure && make && make install
tar -zxvf zlib-1.2.8.tar.gz
cd zlib-1.2.8
/configure && make && make install
tar -zxvf openssl-1.0.1g.tar.gz
cd openssl-1.0.1g
/config && make && make install
Install nginx
tar -zxvf nginx-1.9.0.tar.gz
cd nginx-1.9.0
#./configure --prefix=/data/soft/nginx \
--user=www \
--group=www \
--with-mail \
--with-mail_ssl_module \
--with-http_ssl_module \
--with-http_flv_module \
--with-http_dav_module \
--with-http_sub_module \
--with-http_spdy_module \
--with-http_realip_module \
--with-http_addition_module \
--with-http_gzip_static_module \
--with-http_stub_status_module \
--with-pcre=/data/src/pcre-8.34 \
--with-zlib=/data/src/zlib-1.2.8 \
--with-openssl=/data/src/openssl-1.0.1g
Compile and install
make && make install
groupadd www
useradd -g www www
Modify nginx configuration file
[root@localhost nginx]# vim conf/nginx.conf
 server {
  listen 80;
  server_name localhost;
  #charset koi8-r;
  #access_log logs/host.access.log main;
  location ~ .*\.(gif|jpg|jpeg|png)$ {
   expires 24h;
   root /data/soft/images/;#指定图片存放路径
   access_log /data/soft/nginx/logs/images.log;#日志存放路径
   proxy_store on;
   proxy_store_access user:rw group:rw all:rw;
   proxy_temp_path /data/soft/images/;#图片访问路径
   proxy_redirect off;
   proxy_set_header host 127.0.0.1;
   client_max_body_size 10m;
   client_body_buffer_size 1280k;
   proxy_connect_timeout 900;
   proxy_send_timeout 900;
   proxy_read_timeout 900;
   proxy_buffer_size 40k;
   proxy_buffers 40 320k;
   proxy_busy_buffers_size 640k;
   proxy_temp_file_write_size 640k;
   if ( !-e $request_filename)
   {
     proxy_pass http://127.0.0.1;#默认80端口
   }
  }
   location / {
   root /data//soft/html; #html访问路径
   index index.html index2.htm; #html文件名称
   }
  }
error_page 404 /404.html;5. At this time, you can test and see
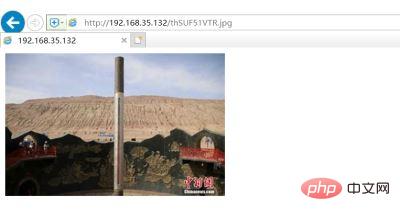
First the html page

Looking at the pictures

Obviously, static pages and pictures can be accessed successfully under nginx settings. Let’s start tomcat access settings
Second method: tomcat
1. Check the jdk version
 java -version
openjdk version "1.8.0_65"
openjdk runtime environment (build 1.8.0_65-b17)
openjdk 64-bit server vm (build 25.65-b01, mixed mode)
2. Unzip tomcat and start it
tar -xvf apache-tomcat-8.5.30.tar.gz
[root@localhost tomcat]# sh bin/startup.sh
3. Test whether it can be accessed locally

#4. If the above is normal, then put the page folder under wepapps. Note that there is inde.html page in the html folder.
[root@localhost soft]# cp -rp html/ /data/soft/tomcat/webapps/
Test access to the html page

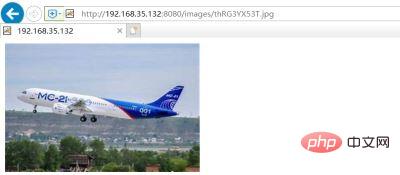
Continue to put the picture folder under wepapps. There are pictures under images.
[root@localhost images]# cp -rp /data/soft/images/ /data/soft/tomcat/webapps/
Access directly on the browser as follows

The above is the detailed content of How to configure nginx and tomcat to access images and static pages. For more information, please follow other related articles on the PHP Chinese website!

Hot AI Tools

Undresser.AI Undress
AI-powered app for creating realistic nude photos

AI Clothes Remover
Online AI tool for removing clothes from photos.

Undress AI Tool
Undress images for free

Clothoff.io
AI clothes remover

AI Hentai Generator
Generate AI Hentai for free.

Hot Article

Hot Tools

Notepad++7.3.1
Easy-to-use and free code editor

SublimeText3 Chinese version
Chinese version, very easy to use

Zend Studio 13.0.1
Powerful PHP integrated development environment

Dreamweaver CS6
Visual web development tools

SublimeText3 Mac version
God-level code editing software (SublimeText3)

Hot Topics
 1377
1377
 52
52
 What's wrong with nginx running for a while?
Apr 14, 2025 am 07:18 AM
The reasons why nginx hangs up after running for a period of time: 1. Memory leak; 2. Configuration error; 3. Insufficient resources; 4. External factors. Solution: 1. Diagnose memory leaks; 2. Fix configuration errors; 3. Provide more resources; 4. Exclude external factors.
 How to implement nginx load balancing
Apr 14, 2025 am 07:21 AM
Nginx load balancing defines backend servers through the upstream module and uses the location block to proxy the request to these servers. Supports load balancing strategies such as polling, minimum number of connections, response time weighting, and ip_hash. Configuration examples include defining an upstream group and pointing to it using the proxy_pass directive.
 nginx restart command
Apr 14, 2025 am 07:27 AM
nginx restart command: sudo systemctl restart nginx. Other related commands include: 1. Start: sudo systemctl start nginx; 2. Stop: sudo systemctl stop nginx; 3. Check status: sudo systemctl status nginx.
 Apr 14, 2025 am 07:36 AM
Nginx Autoindex is a function of generating directory listing HTML pages, which is used to browse files and view file information when requesting directories instead of files. It can be customized with configuration options such as displaying the exact file size, local time, and custom page format. Advantages include easy browsing, easy configuration and providing file information. Disadvantages include security risks, performance impact, and the inability to customize the appearance of the page.
 What is the reason for nginx403
Apr 14, 2025 am 07:39 AM
nginx 403 error indicates that the client does not have permission to access the resource. Factors that cause this problem may include: permission settings, nginx configuration, CGI script errors, .htaccess files, or other reasons. Troubleshooting steps include: checking permission settings, reviewing nginx configuration, testing CGI scripts, checking .htaccess files, excluding firewalls or security software, and checking servers and file systems.
 How to configure virtual hosts in nginx
Apr 14, 2025 am 08:15 AM
Configuring nginx virtual host allows multiple websites to be hosted on a single server, each with a separate domain name and root directory. The specific configuration steps include: creating a virtual host configuration file to configure the server block, specifying the server listening port, virtual host domain name and document root directory to enable the virtual host, and linking the configuration file to the enabled directory to reload nginx
 How to redirect in nginx
Apr 14, 2025 am 08:42 AM
Methods for redirecting through Nginx are 301 permanent redirects (update links or mobile pages) and 302 temporary redirects (handling errors or temporary changes). Configuring redirection involves using location directives in server blocks, advanced features include regular expression matching, proxy redirection, and condition-based redirection. Common uses of redirects include updating URLs, handling errors, redirecting HTTP to HTTPS, and guiding users to a specific country or language version.
 The relationship between nginx and web server
Apr 14, 2025 am 07:09 AM
nginx is a lightweight, non-blocking web server and reverse proxy, commonly used for front-end proxy, load balancing, and caching. Its relationship with a web server is usually: Front-end proxy: nginx handles requests and forwards them to the back-end server. Load Balancer: nginx distributes requests to multiple backend servers. Caching: nginx caches frequently accessed files for performance.


