 Operation and Maintenance
 Linux Operation and Maintenance
 How to transfer files directly between two servers in Linux
How to transfer files directly between two servers in Linux
scp is the abbreviation of secure copy, which is a secure remote file copy command based on ssh login under the Linux system. scp is encrypted, rcp is unencrypted, scp is an enhanced version of rcp.
Because scp transmission is encrypted, it may slightly affect the speed. In addition, scp does not occupy resources and does not increase the system load much. In this regard, rsync is far behind it. Although rsync is faster than scp, when there are many small files, rsync will cause very high hard disk I/O, while scp basically does not affect the normal use of the system.
Scenario: Suppose I have two servers now (the public network IP and the intranet IP here can be transmitted to each other. Of course, it is faster to use the intranet IP to transmit each other. **The public network IP is inconvenient to publish)
Sessions1: 47.95.208.2**
内网:172.17.31.174
User:root
Sessions2: 47.94.92.2**
内网:172.17.31.173
User:root
Two methods commonly used here:
1. When transferring files from one remote server to another (you want to transfer files to others)
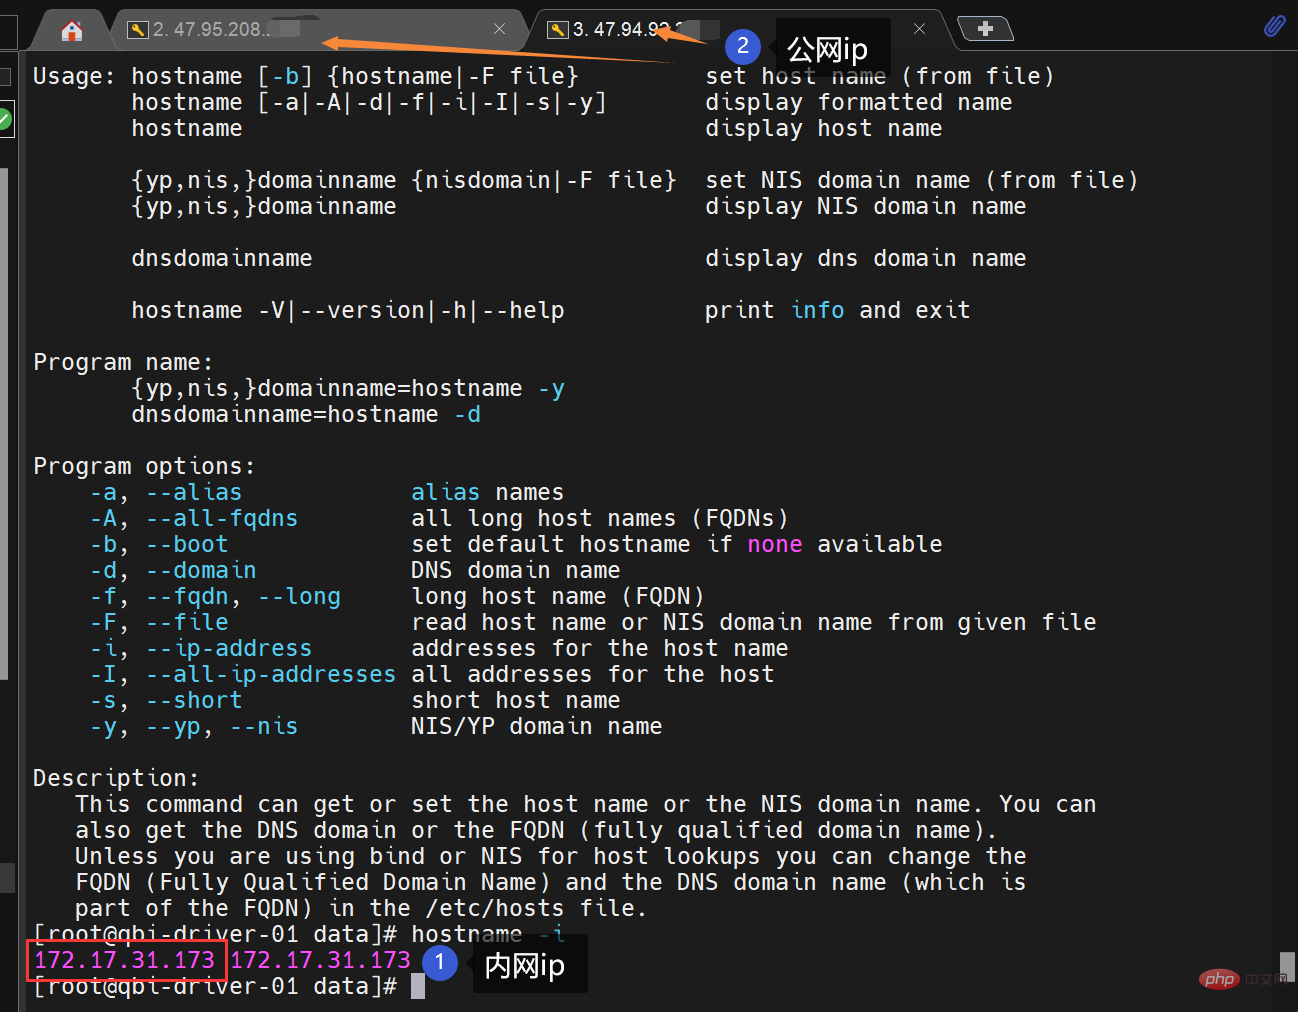
Now we log in to 172.17 .31.173 This server wants to pass the current test.mysql to others (172.17.31.174 this server)
hostname -i You can view the current ip


Command:
scp test.sql root@172.17.31.174:/data/
If the two servers are not directly configured for password-free login, it is required enter password.

I use the intranet IP here, so the transfer is faster. If you use the public network, it will be much slower (personal test)
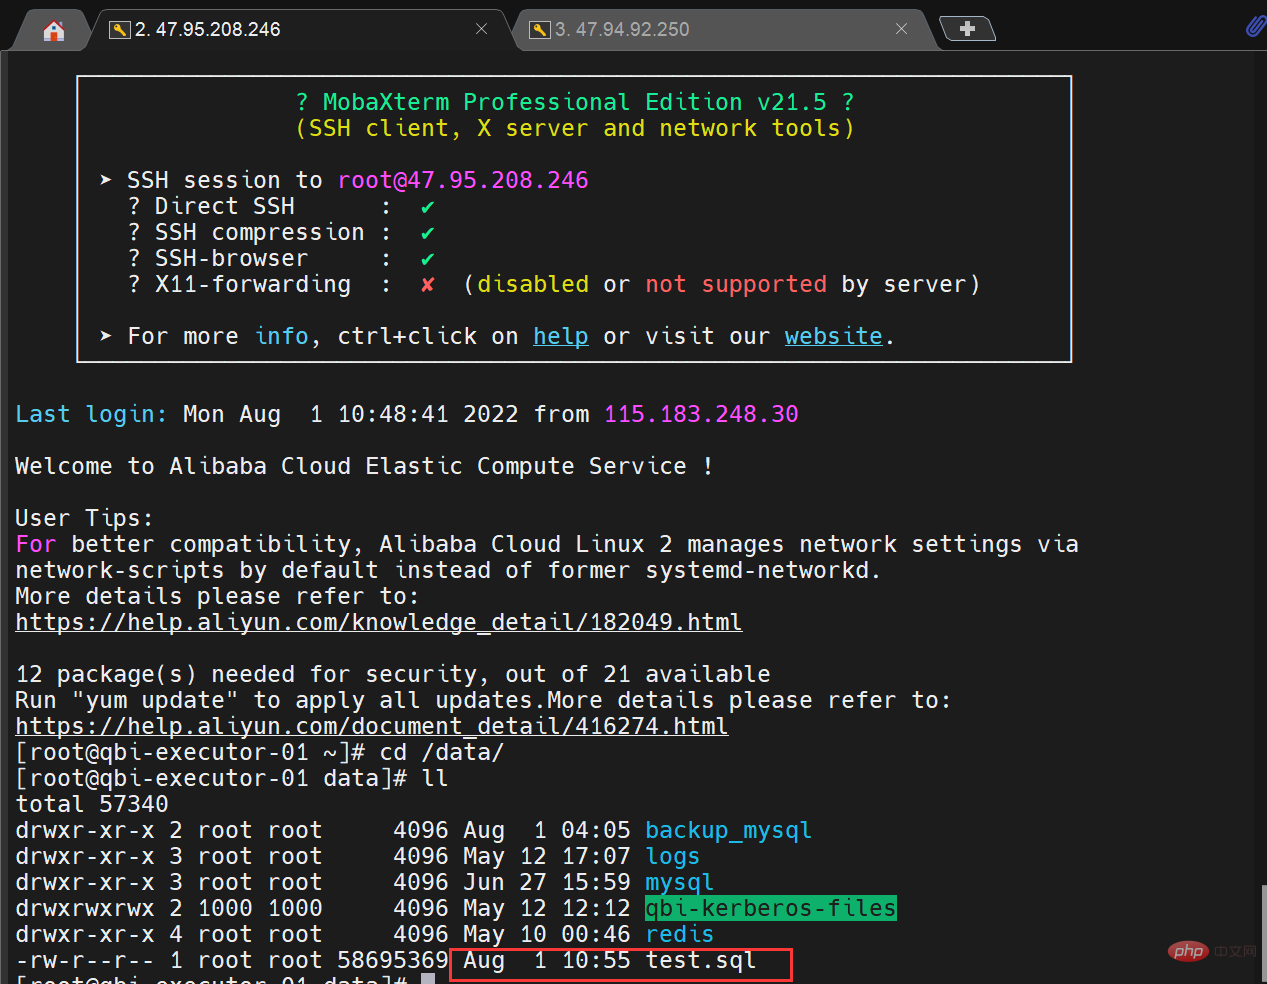
Transfer completed!
Check it on the server with IP suffix 174:

Appendix:
scp [optional parameter] file_source file_target
Commonly used -r,-C
-1: 强制scp命令使用协议ssh2
-2: 强制scp命令使用协议ssh3
-4: 强制scp命令只使用IPv4寻址
-6: 强制scp命令只使用IPv6寻址
-B: 使用批处理模式(传输过程中不询问传输口令或短语)
-C: 允许压缩。(将-C标志传递给ssh,从而打开压缩功能)
-p: 保留原文件的修改时间,访问时间和访问权限。
-q: 不显示传输进度条。
-r: 递归复制整个目录。
-v: 详细方式显示输出。scp和ssh(1)会显示出整个过程的调试信息。这些信息用于调试连接,验证和配置问题。
-c cipher:        以cipher将数据传输进行加密,这个选项将直接传递给ssh。
-F ssh_config:    指定一个替代的ssh配置文件,此参数直接传递给ssh。
-i identity_file: 从指定文件中读取传输时使用的密钥文件,此参数直接传递给ssh。
-l limit:         限定用户所能使用的带宽,以Kbit/s为单位。
-o ssh_option:    如果习惯于使用ssh_config(5)中的参数传递方式,
-P port:          注意是大写的P, port是指定数据传输用到的端口号
-S program:       指定加密传输时所使用的程序。此程序必须能够理解ssh(1)的选项。
2. On the local server, get files from another server (you want to get files from others)
Create a new file in the 173 service data directory A local_test is used to test the folder (testing the -r parameter)

and then go to the local server (*174 this one). The local server here is relative.
Command:
scp -r root@172.17.31.173:/data/local_test /data/

To copy the folder, you need to add -r after scp
Vernacular description:
scp root@远程的服务器Ip:文件路径 存放路径
Copy on the remote server to the local server (log in to the remote server and transfer files to others (local))
Command:
scp test.sql root@172.17.31.174:/data/
Requires someone else’s (local) IP address to transfer
Log in to the local server and get the file from the remote server (take the initiative to get the file from someone else)
Command:
scp -r root@172.17.31.173:/data/local_test /data/
Requires a remote ip (other people's) address to get the file
The above is the detailed content of How to transfer files directly between two servers in Linux. For more information, please follow other related articles on the PHP Chinese website!

Hot AI Tools

Undresser.AI Undress
AI-powered app for creating realistic nude photos

AI Clothes Remover
Online AI tool for removing clothes from photos.

Undress AI Tool
Undress images for free

Clothoff.io
AI clothes remover

Video Face Swap
Swap faces in any video effortlessly with our completely free AI face swap tool!

Hot Article

Hot Tools

Notepad++7.3.1
Easy-to-use and free code editor

SublimeText3 Chinese version
Chinese version, very easy to use

Zend Studio 13.0.1
Powerful PHP integrated development environment

Dreamweaver CS6
Visual web development tools

SublimeText3 Mac version
God-level code editing software (SublimeText3)

Hot Topics
 1387
1387
 52
52
 How to use docker desktop
Apr 15, 2025 am 11:45 AM
How to use Docker Desktop? Docker Desktop is a tool for running Docker containers on local machines. The steps to use include: 1. Install Docker Desktop; 2. Start Docker Desktop; 3. Create Docker image (using Dockerfile); 4. Build Docker image (using docker build); 5. Run Docker container (using docker run).
 How to view the docker process
Apr 15, 2025 am 11:48 AM
Docker process viewing method: 1. Docker CLI command: docker ps; 2. Systemd CLI command: systemctl status docker; 3. Docker Compose CLI command: docker-compose ps; 4. Process Explorer (Windows); 5. /proc directory (Linux).
 What to do if the docker image fails
Apr 15, 2025 am 11:21 AM
Troubleshooting steps for failed Docker image build: Check Dockerfile syntax and dependency version. Check if the build context contains the required source code and dependencies. View the build log for error details. Use the --target option to build a hierarchical phase to identify failure points. Make sure to use the latest version of Docker engine. Build the image with --t [image-name]:debug mode to debug the problem. Check disk space and make sure it is sufficient. Disable SELinux to prevent interference with the build process. Ask community platforms for help, provide Dockerfiles and build log descriptions for more specific suggestions.
 What computer configuration is required for vscode
Apr 15, 2025 pm 09:48 PM
VS Code system requirements: Operating system: Windows 10 and above, macOS 10.12 and above, Linux distribution processor: minimum 1.6 GHz, recommended 2.0 GHz and above memory: minimum 512 MB, recommended 4 GB and above storage space: minimum 250 MB, recommended 1 GB and above other requirements: stable network connection, Xorg/Wayland (Linux)
 vscode cannot install extension
Apr 15, 2025 pm 07:18 PM
The reasons for the installation of VS Code extensions may be: network instability, insufficient permissions, system compatibility issues, VS Code version is too old, antivirus software or firewall interference. By checking network connections, permissions, log files, updating VS Code, disabling security software, and restarting VS Code or computers, you can gradually troubleshoot and resolve issues.
 Can vscode be used for mac
Apr 15, 2025 pm 07:36 PM
VS Code is available on Mac. It has powerful extensions, Git integration, terminal and debugger, and also offers a wealth of setup options. However, for particularly large projects or highly professional development, VS Code may have performance or functional limitations.
 What is vscode What is vscode for?
Apr 15, 2025 pm 06:45 PM
VS Code is the full name Visual Studio Code, which is a free and open source cross-platform code editor and development environment developed by Microsoft. It supports a wide range of programming languages and provides syntax highlighting, code automatic completion, code snippets and smart prompts to improve development efficiency. Through a rich extension ecosystem, users can add extensions to specific needs and languages, such as debuggers, code formatting tools, and Git integrations. VS Code also includes an intuitive debugger that helps quickly find and resolve bugs in your code.
 How to back up vscode settings and extensions
Apr 15, 2025 pm 05:18 PM
How to back up VS Code configurations and extensions? Manually backup the settings file: Copy the key JSON files (settings.json, keybindings.json, extensions.json) to a safe location. Take advantage of VS Code synchronization: enable synchronization with your GitHub account to automatically back up all relevant settings and extensions. Use third-party tools: Back up configurations with reliable tools and provide richer features such as version control and incremental backups.


