

(practice project) continues to be updated.
Next, prepare to develop the request assertion function. Regarding what requirements this function needs to be implemented and what it looks like, I referred to other excellent industry tools, such as apifox, metersphere, etc.
So I decided to develop the most commonly used ones first: JSONPath, Response time, Text, and among these, JSONPath takes precedence.
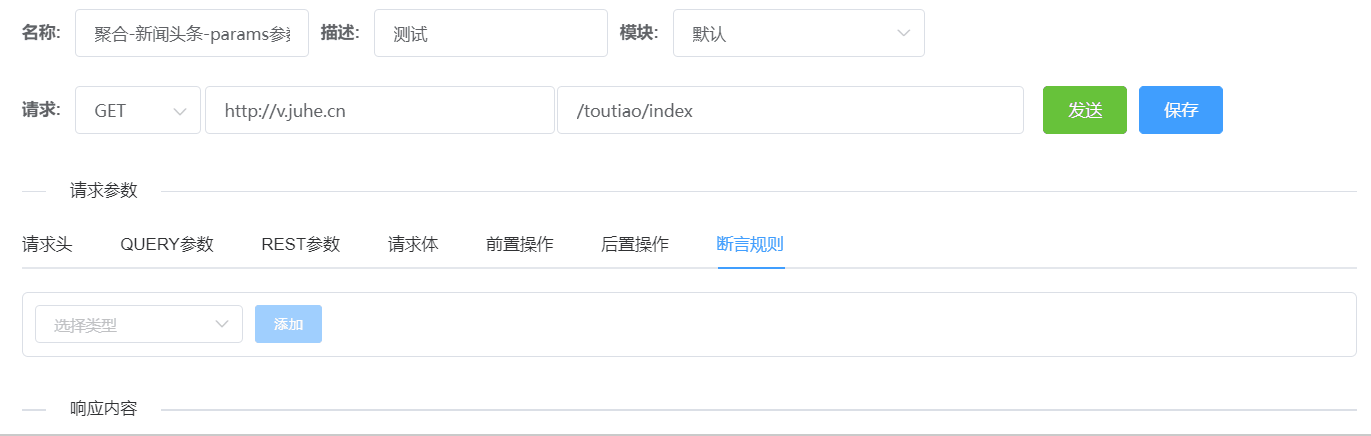
Old rule, let’s take a look at the effect of this front-end component first.
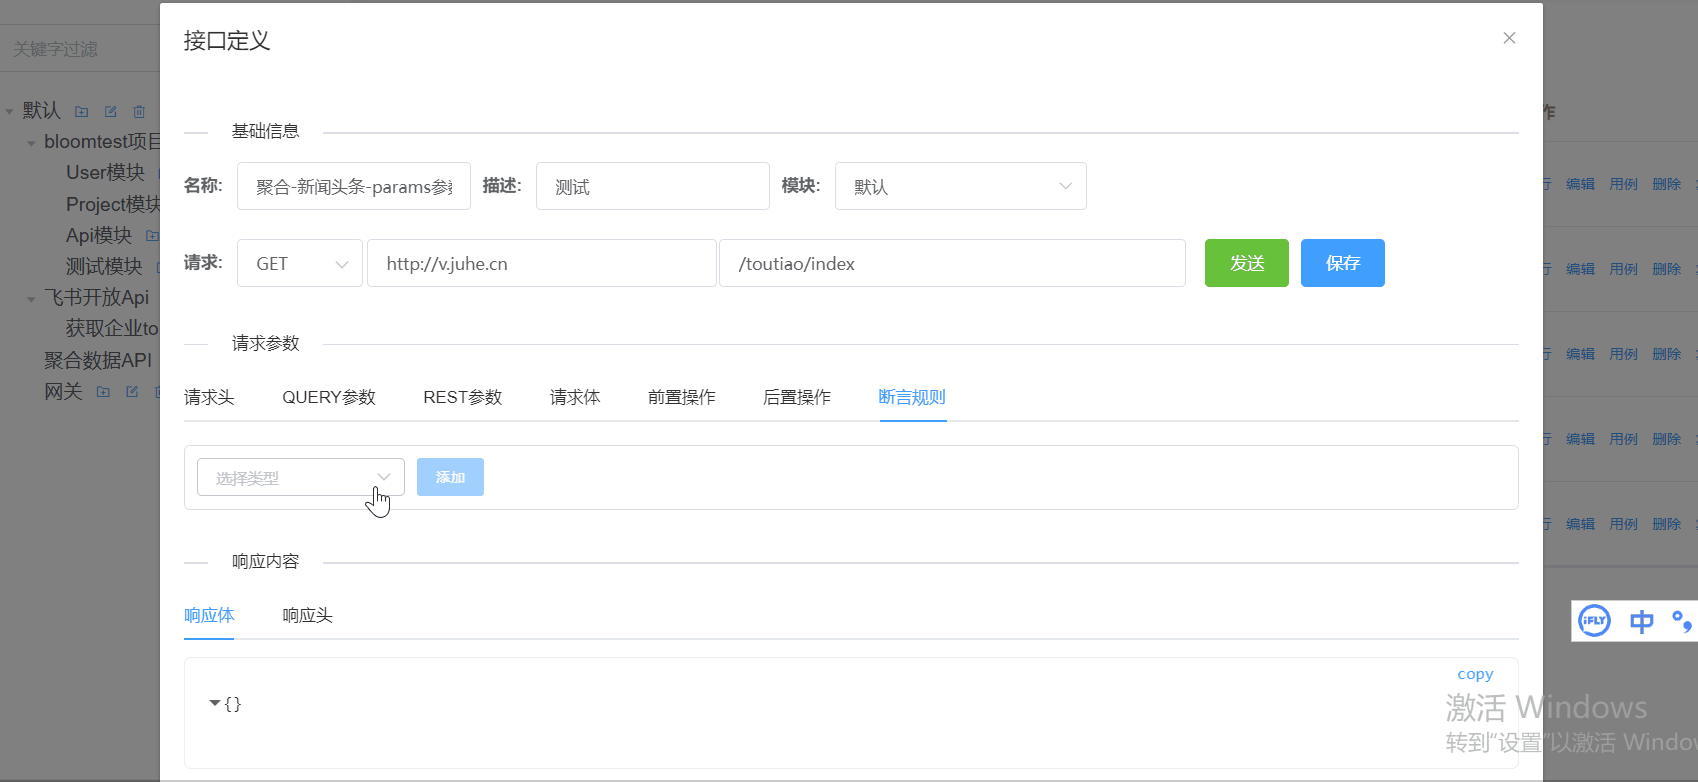
The above functional effects are actually completed by 3 components together. The position of

in the project code is as shown in the figure.
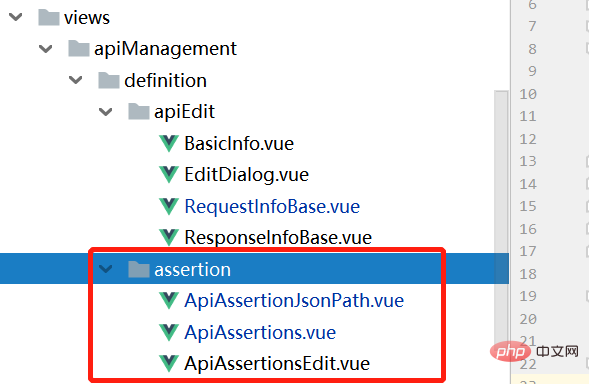
ApiAssertions: The outermost component, mainly the entrance to add assertions, and the place to integrate different types of assertion subcomponents.
ApiAssertionsEdit: Different assertion components need to provide editing functions. This is also the place to integrate different types of assertion editing sub-components.
ApiAssertionJsonPath: This component is the lowest-level component for assertions of the JSONPath type.
The inclusion relationship of these three components is: ApiAssertions -> ApiAssertionsEdit -> ApiAssertionJsonPath.
Since there is no ready-made solution in elementUI, it is still necessary to use scattered elementUI components to combine them, just like building blocks.
After taking stock, I probably used the following elementUI components. Interested children can go to the official website to learn more:
##el-select Selector
, el-col, this is the Layout
, input box
, tips
, button
2. Component development
1. ApiAssertions
 #Then add a button and make a control, that is, it is disabled and cannot be clicked when the type is not selected.
 Then this contains the sub-component
, here v-if is used to determine the type, when the type value is # This component is only displayed when ##JSON_PATH is displayed.
Regarding component types, these are always on, so in order to be more standardized, I extracted these values and put them into a separate  ApiTestModel.js
export const ASSERTION_TYPE = {
  TEXT: 'Text',
  JSON_PATH: 'JSONPath',
  DURATION: 'Duration'
} Next, there is an editing component ApiAssertionsEdit which is also its subcomponent, because after clicking Add, the list of corresponding JSONPath will be displayed, and it can continue to be edited. . Notice that the above two sub-components are bound to custom attributes  assertions
props:
  props: {
    assertions: {
      type: Object,
      default: () => {
        return {}
      }
    }
},2. ApiAssertionsEditThis component is used to provide the editing function of the added JSONPath, and can provide assertions list display effect. In addition, there are functions such as deletion and disabling of assertions. List display uses 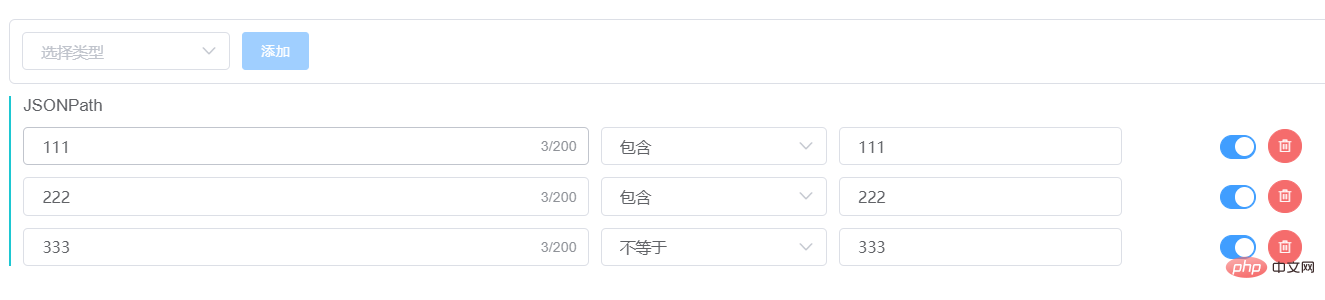 v-for
v-for
Here is a  :edit="true"
ApiAssertionJsonPath component, its function is described below. 3. ApiAssertionJsonPath

代码里用不同的elementUI组件把每列的内容定义好即可。
注意在上层组件传来的edit,在这里是用来判断当前是否为编辑状态的,是的话就显示删除和禁用的组件。

其他的代码就不具体截图了,有需要的童鞋可以获取源码对着看。
接下来就要开发对应的后端功能,就是如何把断言数据落到数据库里,也就是jsonpath这个对象里的这些字段。
    jsonPath: {
      type: Object,
      default: () => {
        return {
          type: ASSERTION_TYPE.JSON_PATH,
          expression: undefined,
          option: undefined,
          expect: undefined,
          description: undefined,
          enable: true
        }
      }
},The above is the detailed content of How to implement interface assertion function in springboot+vue component development. For more information, please follow other related articles on the PHP Chinese website!


![[Web front-end] Node.js quick start](https://img.php.cn/upload/course/000/000/067/662b5d34ba7c0227.png)


