

How to configure keepalived dual-machine hot standby nginx

环境准备:
2台centos: 192.168.0.105 和192.168.0.118, 虚拟ip(vip)为192.168.0.119
配置keepavlived
分别在105和118上安装keepalived
yum install keepalived
准备心跳角本
keepalived的配置相当灵活,可以定时执行角本命令,用于心跳检查,比如,我们访问nginx发现nginx不可访问时,就关闭keepalived,从而切换到从nginx来实现不间断的服务支持。
vi /etc/keepalived/keepalived.conf
#!/bin/bash

count=0
for (( k=0; k<2; k++ ))
do
 check_code=$( curl --connect-timeout 3 -sl -w "%{http_code}\\n" http://localhost:81 -o /dev/null )
 if [ "$check_code" != "200" ]; then
  count=count +1
  continue
 else
  count = 0
  break
 fi
done
if [ "$count" != "0" ]; then
 killall keepalived
 exit 1
else
 exit 0
fi这段角本的意思就是说每次的心跳检查会执行一个for循环,访问,在for的2次循环中如果返回的状态都不是200就会关闭keepalived。这个角本在105和118两台机器上都要准备好。
设置118机器上的keepalived为主节点,105机器上的keepalived为从节点,它们两个的配置文件差不太多
vi /etc/keepalived/keepalived.conf
118机器keepalived的配置文件
! configuration file for keepalived
vrrp_script chk_nginx {
 script "/etc/keepalived/check_nginx.sh" # 心跳检测角本
 interval 2 #脚本执行间隔,每2s检测一次
 weight -5 #脚本结果导致的优先级变更,检测失败(脚本返回非0)则优先级 -5
 fall 3 #检测连续2次失败才算确定是真失败。会用weight减少优先级(1-255之间)
 rise 2 #检测1次成功就算成功。但不修改优先级
}
vrrp_instance vi_1 {
 state master #指定keepalived的角色,master表示此主机是主服务器,backup表示此主机是备用服务器
 interface eth0 #指定监测网络的接口。实例绑定的网卡,因为在配置虚拟ip的时候必须是在已有的网卡上添加的
 mcast_src_ip 192.168.0.118 ## 发送多播数据包时的源ip地址
 virtual_router_id 51 #虚拟路由标识,master和backup必须是一致的
 priority 100 #定义优先级,数字越大,优先级越高
 advert_int 2 #设定master与backup负载均衡器之间同步检查的时间间隔,单位是秒
 authentication { #设置验证类型和密码。主从必须一样
  auth_type pass #设置vrrp验证类型,主要有pass和ah两种
  auth_pass 1111 #设置vrrp验证密码,在同一个vrrp_instance下,master与backup必须使用相同的密码才能正常通信
 }
 virtual_ipaddress {
  192.168.0.119 #vrrp 虚拟地址 如果有多个vip,换行填写
 }
 track_script {
  chk_nginx # 心跳脚本,即在 vrrp_script 部分指定的名字
 }
}115机器上的角本对上面的角本稍做变动即可
改变 state master -> state backup,priority 100 -> priority 90,mcast_src_ip 192.168.0.118 -> mcast_src_ip 192.168.0.105。其他的地方保持不变,是不是很简单。
! configuration file for keepalived
vrrp_script chk_nginx {
 script "/etc/keepalived/check_nginx.sh"
 interval 2
 weight -5
}
vrrp_instance vi_1 {
 state backup # 修改
 interface eth0
 mcast_src_ip 192.168.0.105 # 修改 为本机ip
 virtual_router_id 51
 priority 90 #数字变小
 advert_int 2
 authentication {
  auth_type pass
  auth_pass 1111
 }
 virtual_ipaddress {
  192.168.0.119
 }
 track_script {
  chk_nginx
 }
}到这里keepalived的简单配置就完成了下面就启动keepalived
service keepalived start
安装nginx
查看nginx的依赖库是否完整
rpm -qa zlib
rpm -qa zlib-devel
rpm -qa openssl
rpm -qa openssl-devel
rpm -qa pcre
rpm -qa pcre-devel
rpm -qa gcc

如果没有就安装
yum -y install gcc zlib zlib-devel openssl openssl-devel pcre-devel
下载并解压nginx
mkdir nginxsrc
cd nginxsrc/

wget http://nginx.org/download/nginx-1.13.9.tar.gz
tar zxvf nginx-1.13.9.tar.gz
cd nginx-1.13.9/

./configure --prefix=/usr/local/nginx --with-http_ssl_module --with-http_stub_status_module --with-http_realip_module
安装在/usr/local/nginx/sbin/nginx 目录下
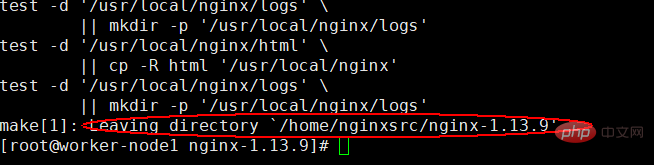
make&&make install

执行成功后会显示leaving directory
启动
/usr/local/nginx/sbin/nginx

检查
ps aux|grep nginx

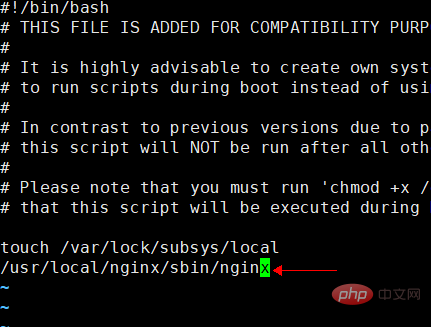
开机启动
vi /etc/rc.local
添加一行
/usr/local/nginx/sbin/nginx
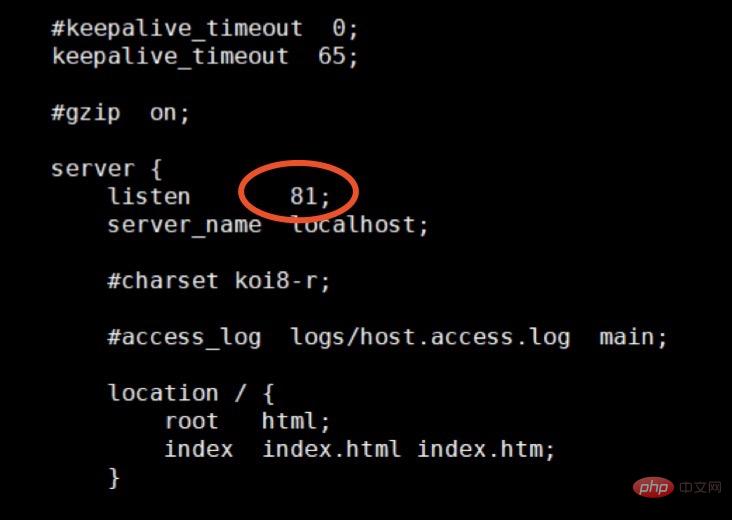
因为我的机器上80端口被别的应用占用了,所以就修改105和118的 nginx.conf 把端口80 修改为81
vi /usr/local/nginx/conf/nginx.conf
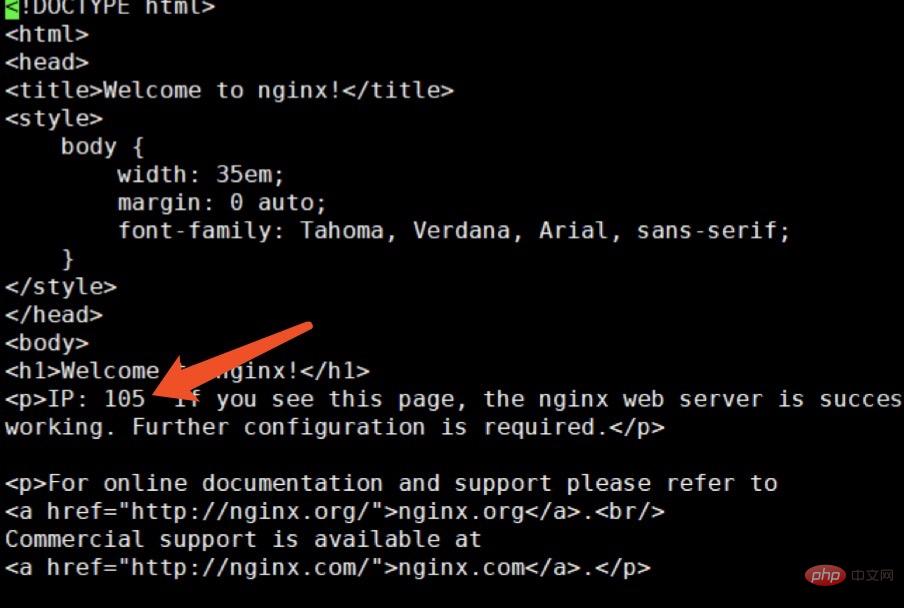
分别个性105 和119上的index.html 加上一个ip以便们们识别打开的是哪个ip上的index.html
vi /usr/local/nginx/html/index.html
nginx重新加载配置
/usr/local/nginx/sbin/nginx -s reload
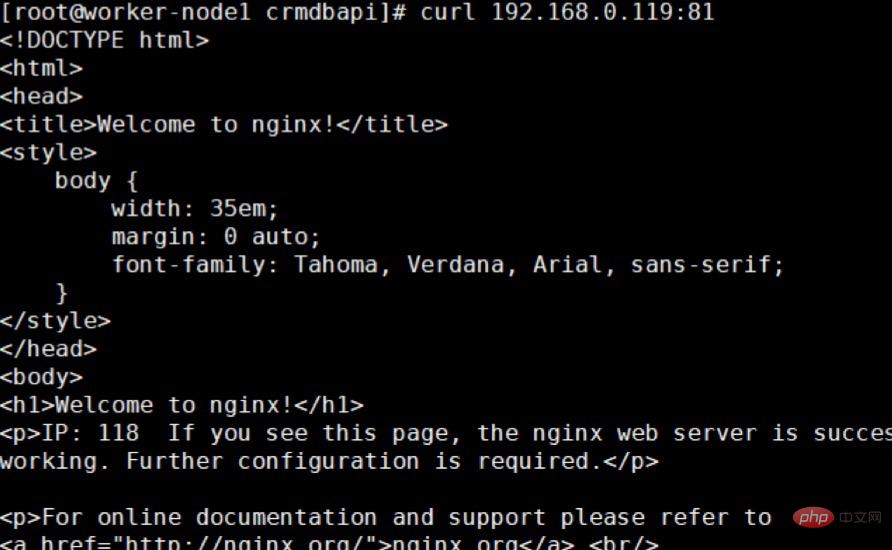
好了,我们访问一下
curl 192.168.0.119:81
返回的html是 118机器上的index.html
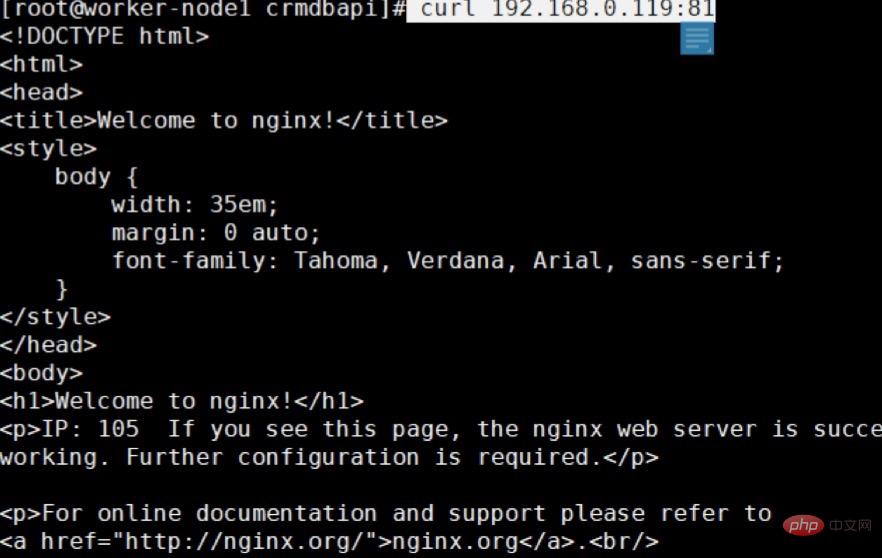
现在我们把118的nginx停止
/usr/local/nginx/sbin/nginx -s stop
这时118上的keepalived的心跳检查角本发现nginx无法访问会把keepalived关闭,然后转向从节点
我们再访问一下119
curl 192.168.0.119:81
在118上重新启动nginx和keepalived
再访问119 返回的网址是118上的index.html
The above is the detailed content of How to configure keepalived dual-machine hot standby nginx. For more information, please follow other related articles on the PHP Chinese website!

Hot AI Tools

Undresser.AI Undress
AI-powered app for creating realistic nude photos

AI Clothes Remover
Online AI tool for removing clothes from photos.

Undress AI Tool
Undress images for free

Clothoff.io
AI clothes remover

Video Face Swap
Swap faces in any video effortlessly with our completely free AI face swap tool!

Hot Article
Hot Tools

Notepad++7.3.1
Easy-to-use and free code editor

SublimeText3 Chinese version
Chinese version, very easy to use

Zend Studio 13.0.1
Powerful PHP integrated development environment

Dreamweaver CS6
Visual web development tools

SublimeText3 Mac version
God-level code editing software (SublimeText3)
Hot Topics
 1387
1387
 52
52

 How to configure cloud server domain name in nginx
Apr 14, 2025 pm 12:18 PM
How to configure cloud server domain name in nginx
Apr 14, 2025 pm 12:18 PM
How to configure an Nginx domain name on a cloud server: Create an A record pointing to the public IP address of the cloud server. Add virtual host blocks in the Nginx configuration file, specifying the listening port, domain name, and website root directory. Restart Nginx to apply the changes. Access the domain name test configuration. Other notes: Install the SSL certificate to enable HTTPS, ensure that the firewall allows port 80 traffic, and wait for DNS resolution to take effect.
 How to check nginx version
Apr 14, 2025 am 11:57 AM
How to check nginx version
Apr 14, 2025 am 11:57 AM
The methods that can query the Nginx version are: use the nginx -v command; view the version directive in the nginx.conf file; open the Nginx error page and view the page title.
 How to start nginx server
Apr 14, 2025 pm 12:27 PM
How to start nginx server
Apr 14, 2025 pm 12:27 PM
Starting an Nginx server requires different steps according to different operating systems: Linux/Unix system: Install the Nginx package (for example, using apt-get or yum). Use systemctl to start an Nginx service (for example, sudo systemctl start nginx). Windows system: Download and install Windows binary files. Start Nginx using the nginx.exe executable (for example, nginx.exe -c conf\nginx.conf). No matter which operating system you use, you can access the server IP
 How to check whether nginx is started
Apr 14, 2025 pm 01:03 PM
How to check whether nginx is started
Apr 14, 2025 pm 01:03 PM
How to confirm whether Nginx is started: 1. Use the command line: systemctl status nginx (Linux/Unix), netstat -ano | findstr 80 (Windows); 2. Check whether port 80 is open; 3. Check the Nginx startup message in the system log; 4. Use third-party tools, such as Nagios, Zabbix, and Icinga.
 How to check the name of the docker container
Apr 15, 2025 pm 12:21 PM
How to check the name of the docker container
Apr 15, 2025 pm 12:21 PM
You can query the Docker container name by following the steps: List all containers (docker ps). Filter the container list (using the grep command). Gets the container name (located in the "NAMES" column).
 How to run nginx apache
Apr 14, 2025 pm 12:33 PM
How to run nginx apache
Apr 14, 2025 pm 12:33 PM
To get Nginx to run Apache, you need to: 1. Install Nginx and Apache; 2. Configure the Nginx agent; 3. Start Nginx and Apache; 4. Test the configuration to ensure that you can see Apache content after accessing the domain name. In addition, you need to pay attention to other matters such as port number matching, virtual host configuration, and SSL/TLS settings.
 How to create a mirror in docker
Apr 15, 2025 am 11:27 AM
How to create a mirror in docker
Apr 15, 2025 am 11:27 AM
Steps to create a Docker image: Write a Dockerfile that contains the build instructions. Build the image in the terminal, using the docker build command. Tag the image and assign names and tags using the docker tag command.
 How to start containers by docker
Apr 15, 2025 pm 12:27 PM
How to start containers by docker
Apr 15, 2025 pm 12:27 PM
Docker container startup steps: Pull the container image: Run "docker pull [mirror name]". Create a container: Use "docker create [options] [mirror name] [commands and parameters]". Start the container: Execute "docker start [Container name or ID]". Check container status: Verify that the container is running with "docker ps".
