 Operation and Maintenance
 Nginx
Nginx
 How to install Nginx and configure automatic startup on CentOS7
How to install Nginx and configure automatic startup on CentOS7
1. Download the installation package from the official website
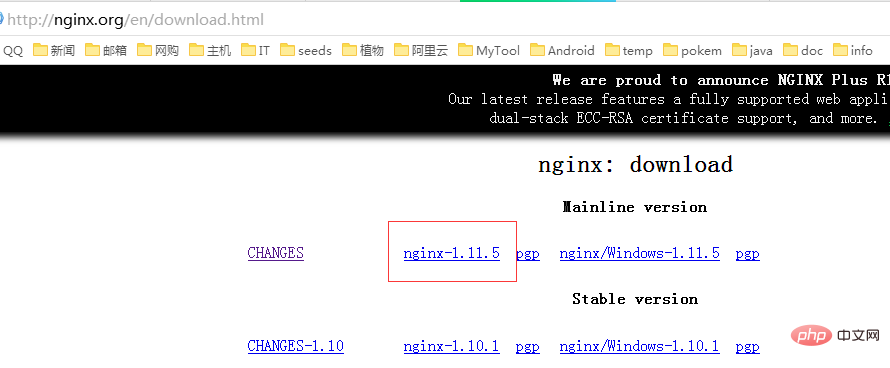
Choose the version suitable for Linux. Here, select the latest version. Download it locally and upload it to the server or download it directly with the wget command under centos.

Switch to the /usr/local directory and download the software package
# cd /usr/local
# wget http://nginx.org/download/nginx-1.11.5.tar.gz
2. Install nginx
First execute the following command to install the nginx dependent library. If the dependent library is missing, the installation may fail. For details, please refer to the error message at the end of the article.
# yum install gcc-c++
# yum install pcre
# yum install pcre-devel
# yum install zlib
# yum install zlib-devel
# yum install openssl
# yum install openssl-devel
Extract the installation package
# tar -zxvf nginx-1.11.5.tar.gz
nginx was decompressed to the /usr/local/nginx-1.11.5 directory (do not decompress the compressed package to the /usr/local/nginx directory or rename the decompressed directory to nginx (because nginx will be installed in the /usr/local/nginx directory by default), switch to the nginx-1.11.5/ directory
# cd /usr/local/nginx-1.11.5/
Execute # ./configure
# ./configure
This operation will detect the current system environment to ensure that nginx can be successfully installed. After performing this operation, the following prompts may appear:
checking for os
linux 3.10.0-123.el7.x86_64 x86_64
checking for c compiler ... not found
./configure: error: c compiler cc is not found
If the above error message appears, execute yum install gcc-c to install gcc,
./configure: error: the http rewrite module requires the pcre library.
You can either disable the module by using --without-http_rewrite_module
option, or install the pcre library into the system, or build the pcre library
statically from the source with nginx by using --with-pcre=
If the above prompt appears, it means that the pcre library is missing
./configure: error: the http gzip module requires the zlib library.
you can either disable the module by using --without-http_gzip_module
option, or install the zlib library into the system, or build the zlib library
Statically from the source with nginx by using --with-zlib=
If the above prompt appears, it means that the zlib library is missing
If not A ./configure: error prompt appears, indicating that nginx can be installed in the current environment. Execute make and make install to compile nginx
# make
# make install
. If there are no errors, it means that nginx has been successfully installed. The default installation location is /usr/local/nginx , the previous /usr/local/nginx-1.11.5/ can be deleted.
If cp: 'conf/koi-win' and '/usr/local/nginx/conf/koi-win' are the same file appears, it may be that you decompressed the installation package to /usr /local/nginx directory, the solution is to rename the directory to another name and then execute make, make install.
3. Configure nginx to boot up
switch Go to the /lib/systemd/system/ directory and create the nginx.service file vim nginx.service
# cd /lib/systemd/system/
# vim nginx.service
The content of the file is as follows:
[unit]
description=nginx
after=network.target

[service]
type=forking
execstart=/usr/local/nginx/sbin/nginx
execreload=/usr/local/nginx/sbin/nginx reload
execstop=/usr/local/nginx/sbin/nginx quit
privatetmp=true

[install]
wantedby=multi-user.target
Exit and save the file, execute systemctl enable nginx.service to enable nginx Start up
# systemctl enable nginx.service
systemctl start nginx.service Start nginx
systemctl stop nginx.service End nginx
systemctl restart nginx.service Restart nginx
4. Verify whether the installation is successful
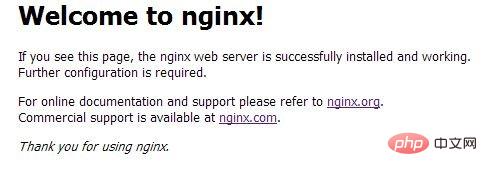
Enter http://server ip/ If you can see the nginx interface, it means the installation is successful

The above is the detailed content of How to install Nginx and configure automatic startup on CentOS7. For more information, please follow other related articles on the PHP Chinese website!

Hot AI Tools

Undresser.AI Undress
AI-powered app for creating realistic nude photos

AI Clothes Remover
Online AI tool for removing clothes from photos.

Undress AI Tool
Undress images for free

Clothoff.io
AI clothes remover

Video Face Swap
Swap faces in any video effortlessly with our completely free AI face swap tool!

Hot Article

Hot Tools

Notepad++7.3.1
Easy-to-use and free code editor

SublimeText3 Chinese version
Chinese version, very easy to use

Zend Studio 13.0.1
Powerful PHP integrated development environment

Dreamweaver CS6
Visual web development tools

SublimeText3 Mac version
God-level code editing software (SublimeText3)

Hot Topics
 How to configure cloud server domain name in nginx
Apr 14, 2025 pm 12:18 PM
How to configure an Nginx domain name on a cloud server: Create an A record pointing to the public IP address of the cloud server. Add virtual host blocks in the Nginx configuration file, specifying the listening port, domain name, and website root directory. Restart Nginx to apply the changes. Access the domain name test configuration. Other notes: Install the SSL certificate to enable HTTPS, ensure that the firewall allows port 80 traffic, and wait for DNS resolution to take effect.
 How to check the name of the docker container
Apr 15, 2025 pm 12:21 PM
You can query the Docker container name by following the steps: List all containers (docker ps). Filter the container list (using the grep command). Gets the container name (located in the "NAMES" column).
 How to check whether nginx is started
Apr 14, 2025 pm 01:03 PM
How to confirm whether Nginx is started: 1. Use the command line: systemctl status nginx (Linux/Unix), netstat -ano | findstr 80 (Windows); 2. Check whether port 80 is open; 3. Check the Nginx startup message in the system log; 4. Use third-party tools, such as Nagios, Zabbix, and Icinga.
 How to configure nginx in Windows
Apr 14, 2025 pm 12:57 PM
How to configure Nginx in Windows? Install Nginx and create a virtual host configuration. Modify the main configuration file and include the virtual host configuration. Start or reload Nginx. Test the configuration and view the website. Selectively enable SSL and configure SSL certificates. Selectively set the firewall to allow port 80 and 443 traffic.
 How to check nginx version
Apr 14, 2025 am 11:57 AM
The methods that can query the Nginx version are: use the nginx -v command; view the version directive in the nginx.conf file; open the Nginx error page and view the page title.
 How to start nginx server
Apr 14, 2025 pm 12:27 PM
Starting an Nginx server requires different steps according to different operating systems: Linux/Unix system: Install the Nginx package (for example, using apt-get or yum). Use systemctl to start an Nginx service (for example, sudo systemctl start nginx). Windows system: Download and install Windows binary files. Start Nginx using the nginx.exe executable (for example, nginx.exe -c conf\nginx.conf). No matter which operating system you use, you can access the server IP
 How to start containers by docker
Apr 15, 2025 pm 12:27 PM
Docker container startup steps: Pull the container image: Run "docker pull [mirror name]". Create a container: Use "docker create [options] [mirror name] [commands and parameters]". Start the container: Execute "docker start [Container name or ID]". Check container status: Verify that the container is running with "docker ps".
 How to create containers for docker
Apr 15, 2025 pm 12:18 PM
Create a container in Docker: 1. Pull the image: docker pull [mirror name] 2. Create a container: docker run [Options] [mirror name] [Command] 3. Start the container: docker start [Container name]


