 Backend Development
 Python Tutorial
 What are the tips for using Pycharm, the Python integrated development environment?
What are the tips for using Pycharm, the Python integrated development environment?
1. Python Integrated Development Environment-Pycharm Introduction
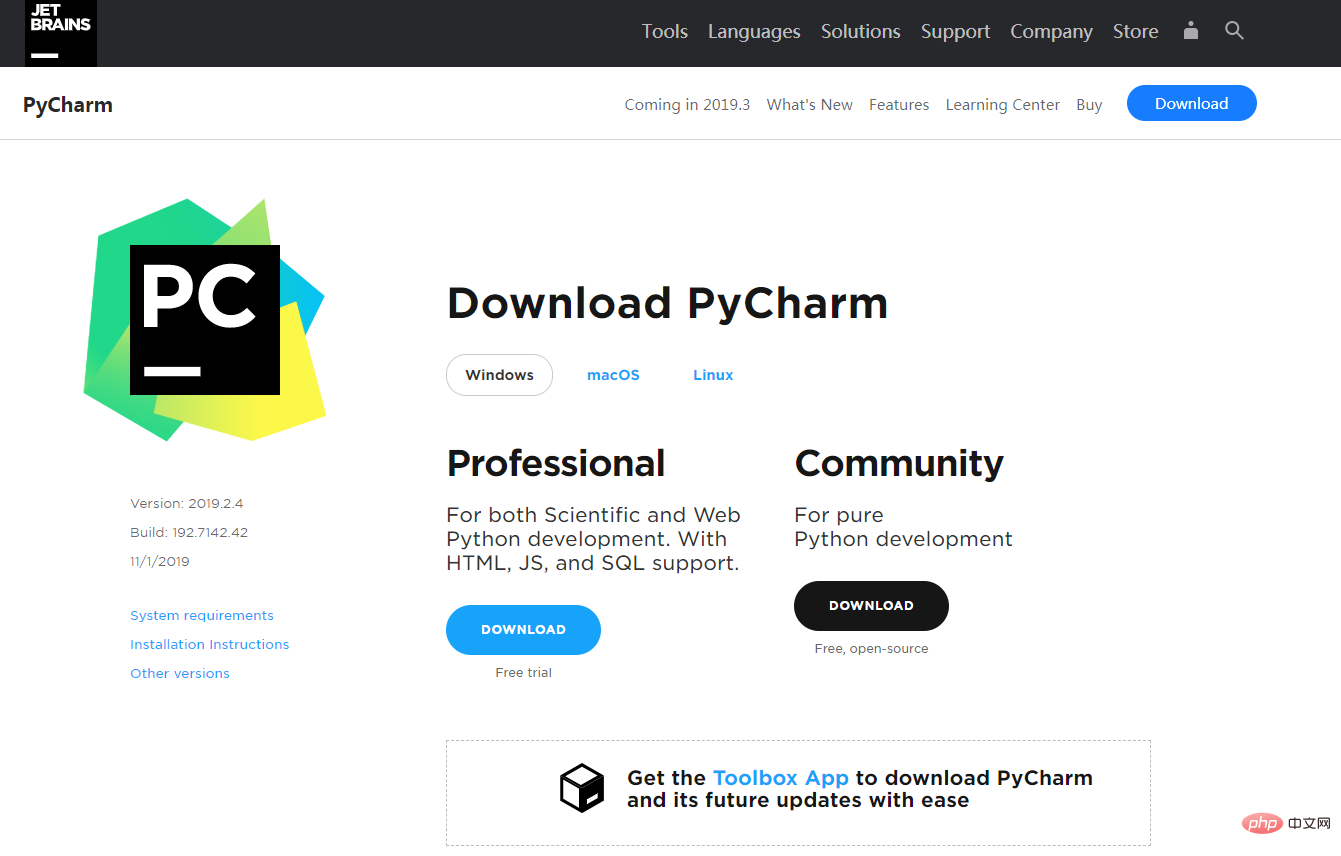
PyCharm is a powerful tool for writing complex functional codes that need to be structured. Here is an introduction to how to install PyCharm under Windows.
Operating system: Windows10
PyCharm version: community-2019.2.4
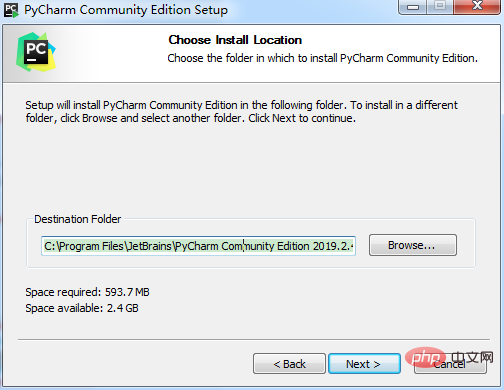
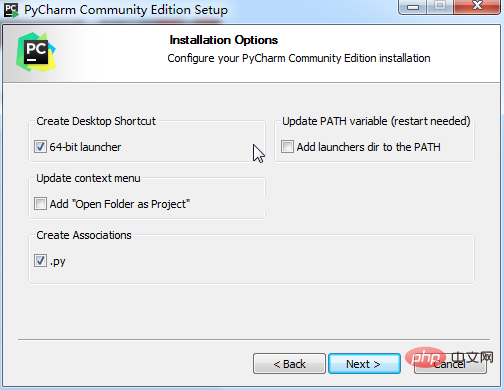 ##3. Click "Install" and wait for installation
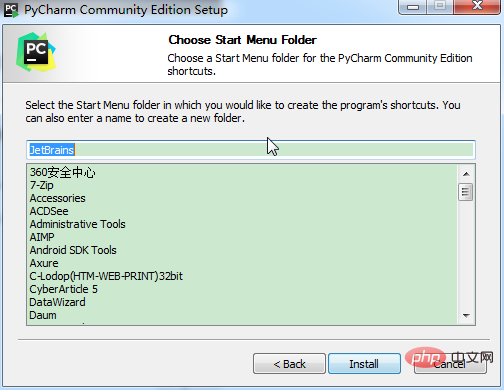 4. After the installation is completed, you will be prompted whether to restart the operating system immediately. To ensure functional integrity, select restart immediately.
 Install the professional version, Simplified Chinese is permanently free to use
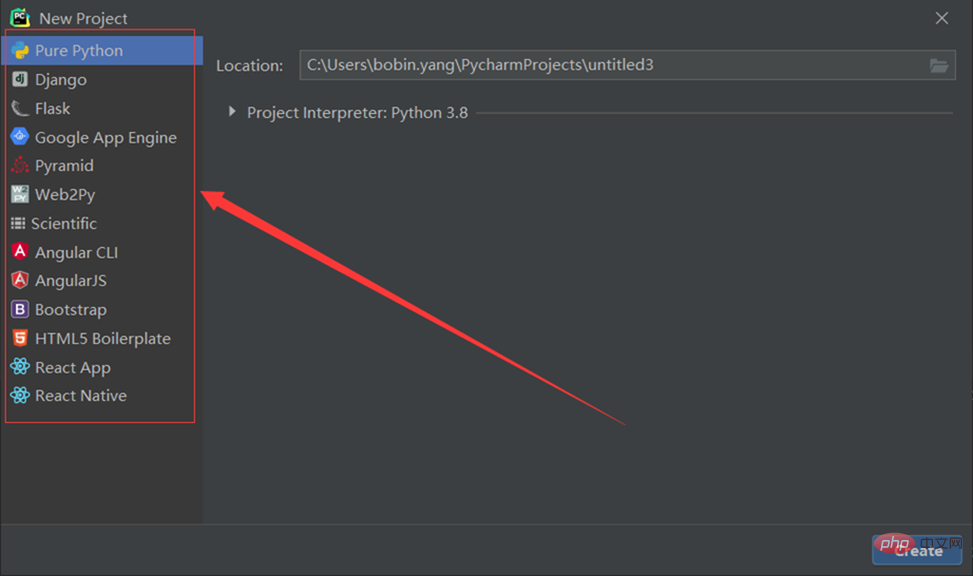
The community version of pycharm only has python projects and pure python. The professional version of pycharm has templates for Django projects, flask frameworks and other project file types.
 1. After downloading, open the compressed package and see the crack patch, installation program, and Chinese components arranged from top to bottom
 2. Click Install, the installation interface will pop up, click next, and the selection of the installation path will appear. Remember this path, which is required for the localization process.
Then keep clicking next until pycharm is installed, and check the run box on the last page.
Go here and choose to run pycharm. After starting, choose free use and click the blue button to enter the use. Interface
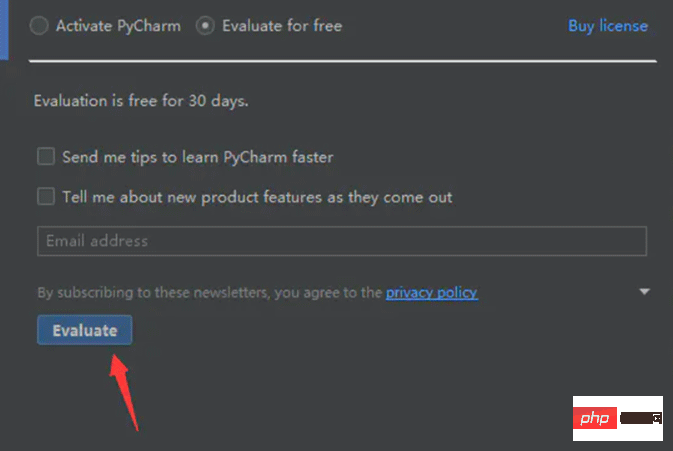 #3. Create or open the project according to the prompts and enter the main interface. At this time, drag the crack patch mentioned at the beginning of the article directly into the pycharm usage interface. A prompt will pop up, click Restart
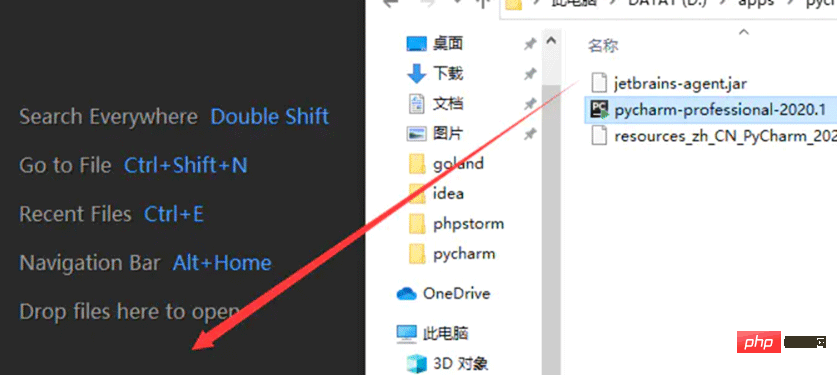
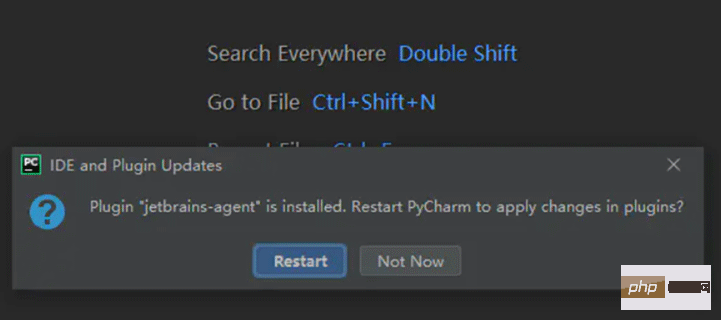 4. After restarting, you can see that the patch has taken effect. Follow the default selection. To activate, click the blue Install PyCharm button, and then wait until PyCharm restarts
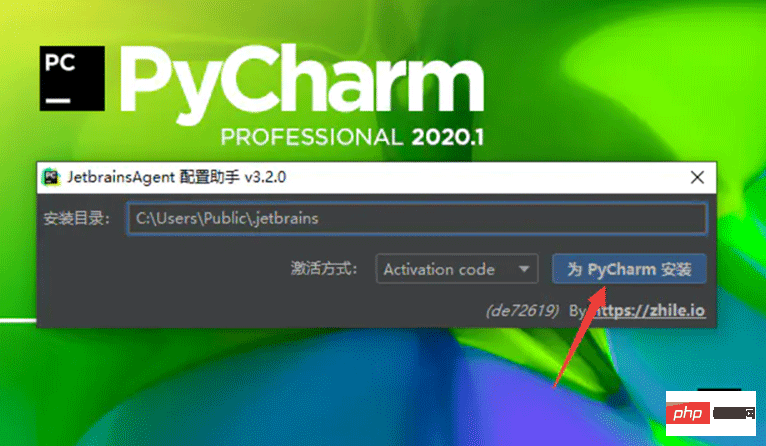
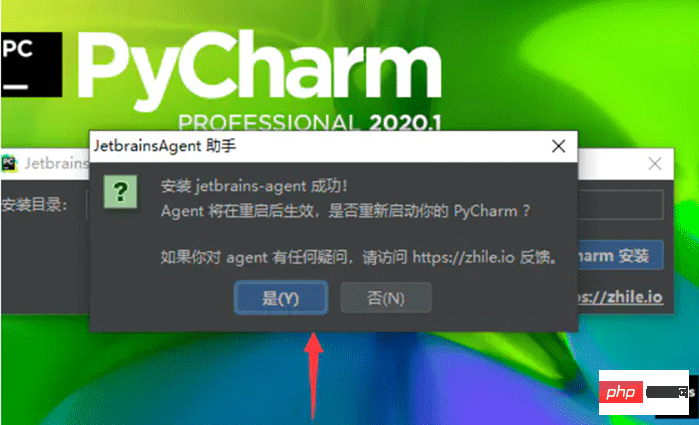 5. After entering the main interface, click Click the help on the toolbar and click the about button in the drop-down bar to view the registration information
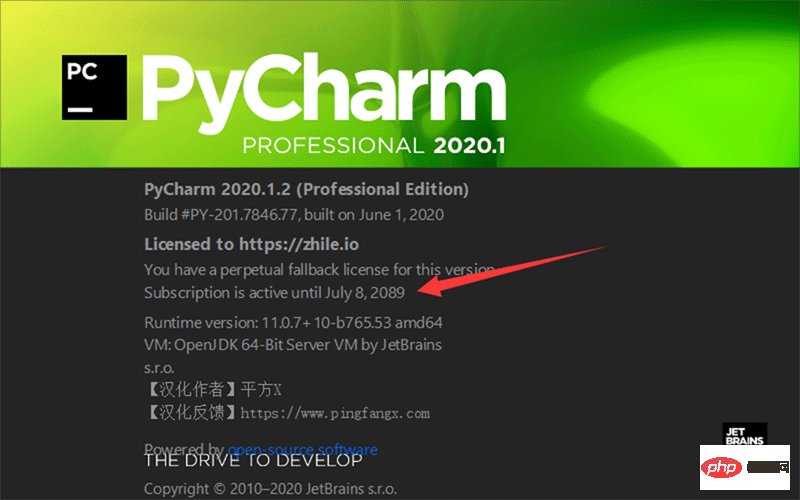 6. Congratulations, you can use it for free, and the period of use is until 2089. Let’s start your magical journey below, and use python to reach the top of your life
Conclusion: If you need Chineseization, copy the resources_zh_CN_PyCharm_2020_r1.jar Chineseization package to the lib file of the software installation path to Chineseize the software. Just restart.
Note: pychram2021 already comes with its own Chinese version.Open the menu bar File, select Settings, then select Pulgins, click Marketplace, search for chinese, and then click install to install. Just restart.3. Create a test program
1. After the configuration is completed, select “Creat new project”
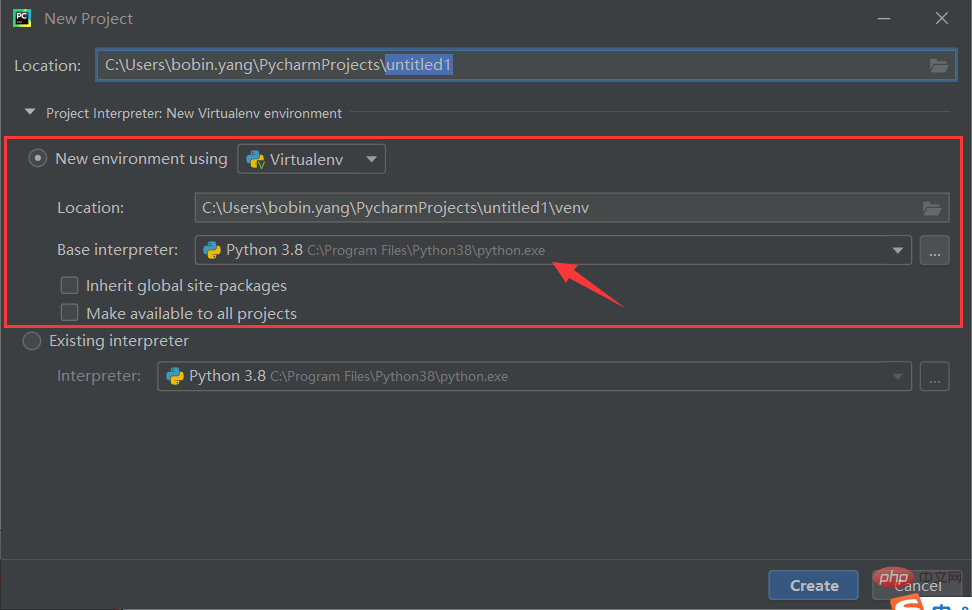
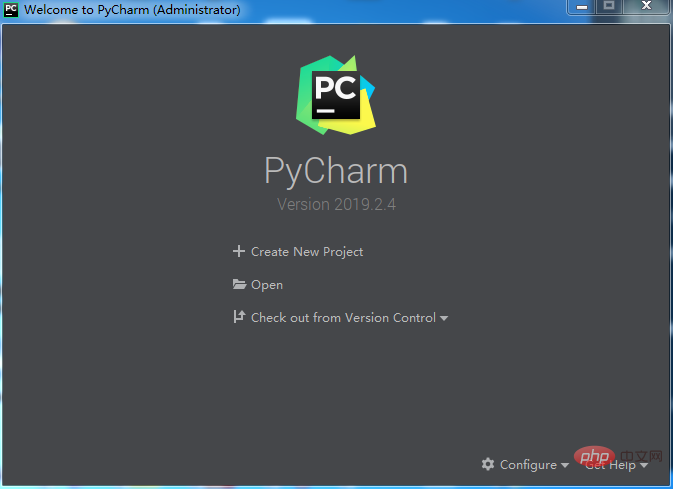 2. Select the path where the project is stored (this path must be empty, otherwise it cannot be created) to create a new project virtual environment by default, then click "Create" and wait for the environment to be configured.
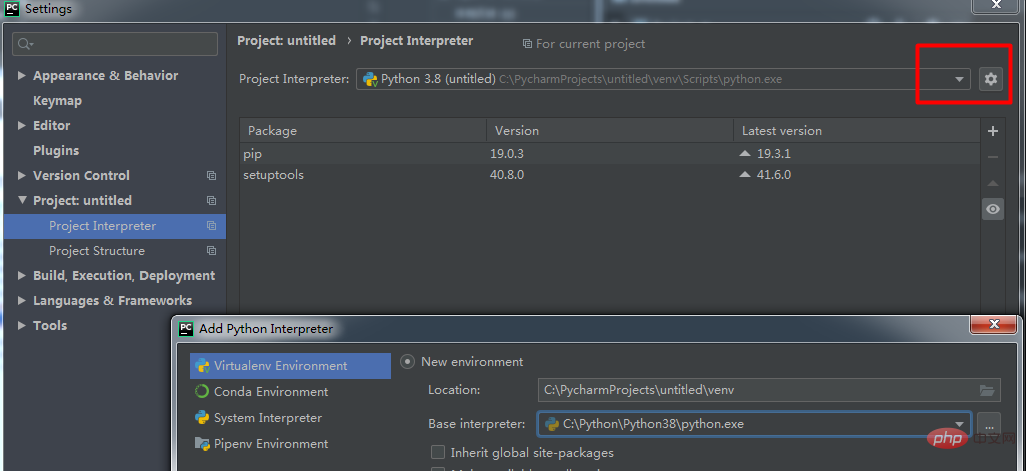
Python code requires a running environment to run. It is not recommended to use the system interpreter global interpreter directly in Pycharm. The third-party packages to be used are also managed here.
When creating a Python project, pycharm can choose the virtual environment you need to use. This time we introduce the use of the default Virtualenv.
The virtual running environment can separate projects. Each project can have an independent running environment. Of course, you can let multiple projects share a virtual environment.
Fill in the project path and project name in Location;
The second Location is the path of the virtual environment
Select the global Python interpreter in the Base interpreter drop-down box;
Check Inherit global site-packages: you can use third-party libraries in the base interpreter (that is, use cmd command to install the third-party library globally), if not selected, it will be completely isolated from the outside world;
Check Make available to all projects: This virtual environment can be provided to other projects.
Virtualenv creates a venv folder in the root directory of the project by default to store the contents of the virtual environment.
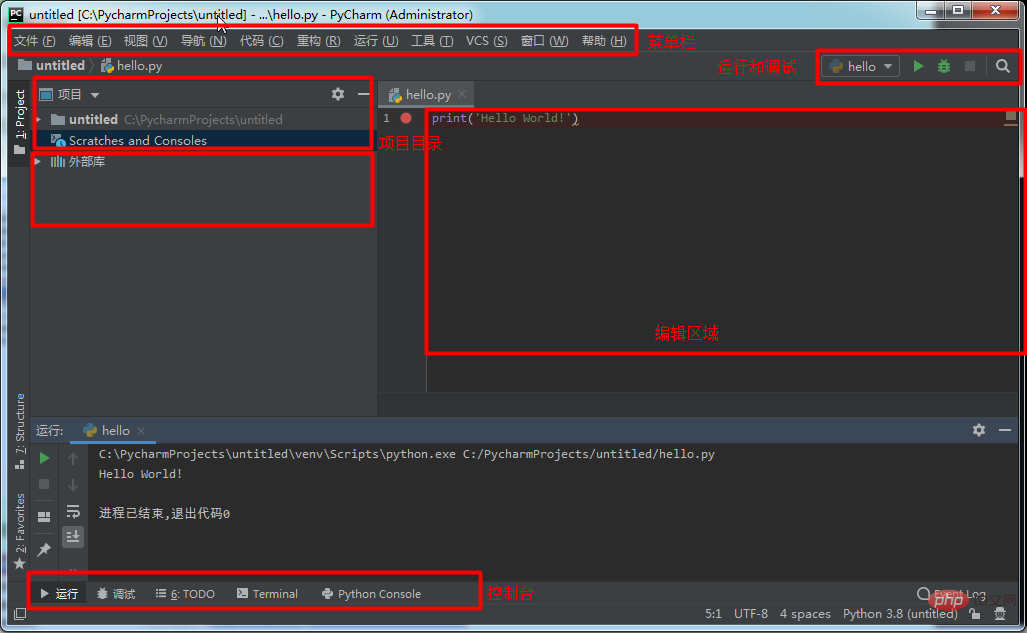
#3. After the configuration is completed, just "Close" the pop-up prompt box. Of course, it’s okay if you’re interested and want to take a look. Overall structure of the interface
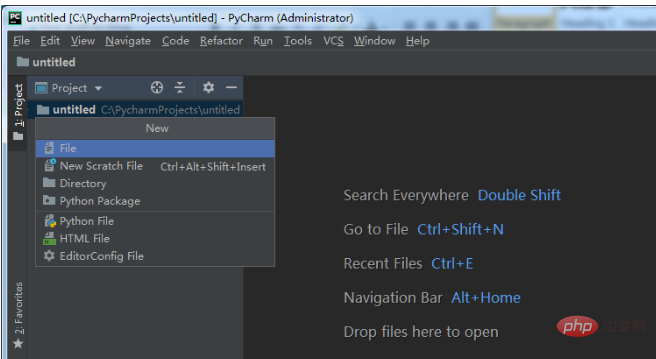
#After entering the main interface, right-click the path created above and click "New" - "Python File"
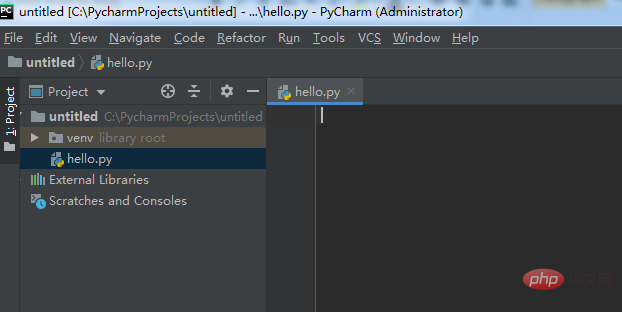
4. Enter a file name and press Enter. The system will automatically generate and open a tab with the .py suffix
5. Enter at the cursor print('Hello World!'), then right-click the tab and select Run, or use the shortcut key Ctrl shift F10
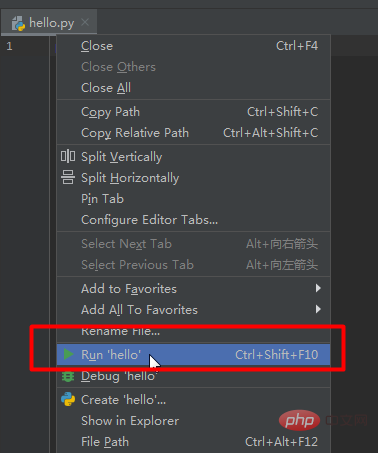
6. The running results will automatically pop up in the area below the software. If the following results appear, congratulations, you succeeded!

4. Chinese Pycharm
Note: Please close PyCharm before Chinese language, and as a noble developer, try not to use
1. Obtain the Chinese package: see the end of the article
2. Place the Chinese package "resources_cn.jar" under lib in the installation directory
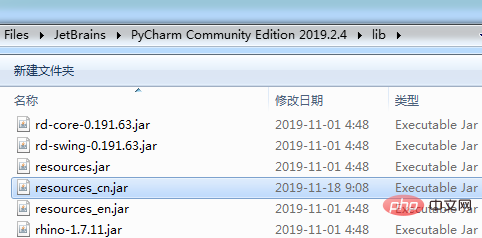
3. Restart PyCharm
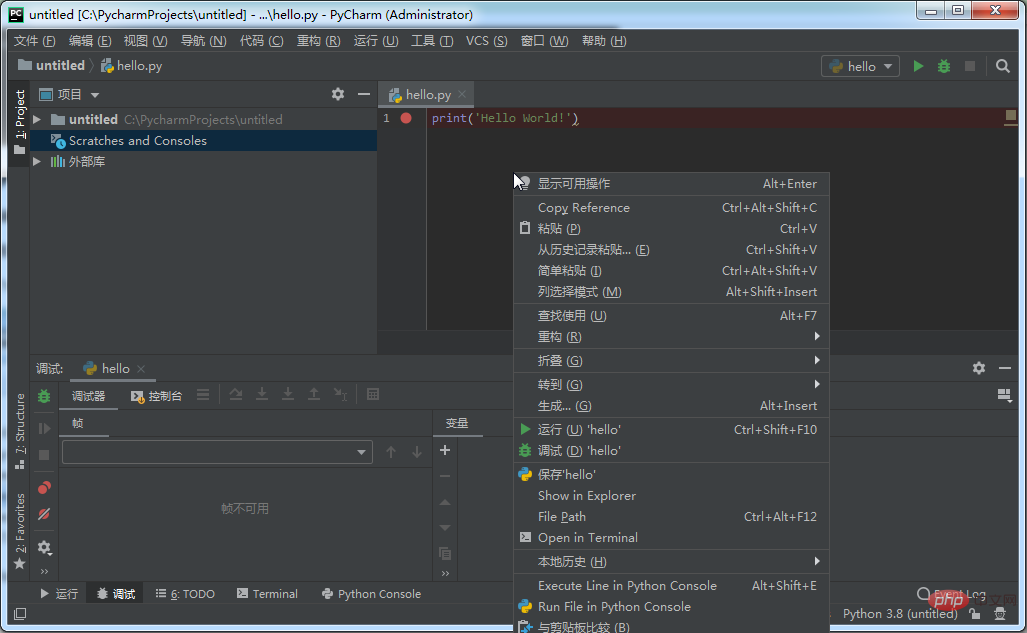
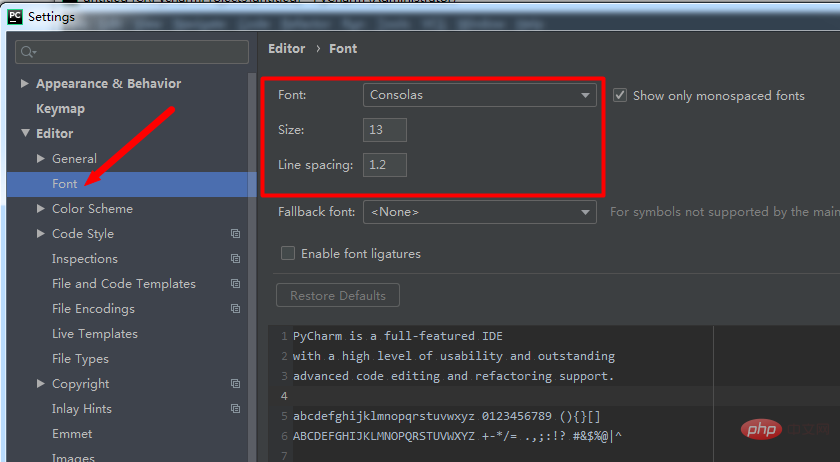
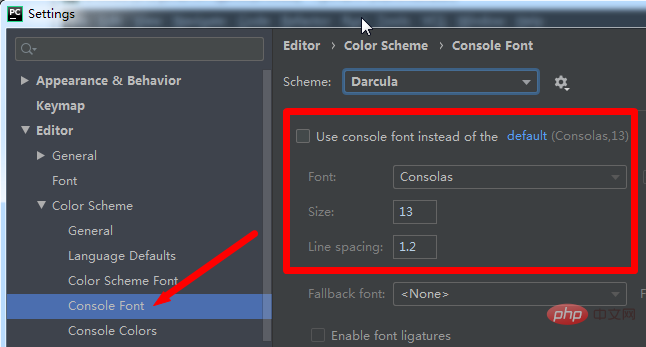
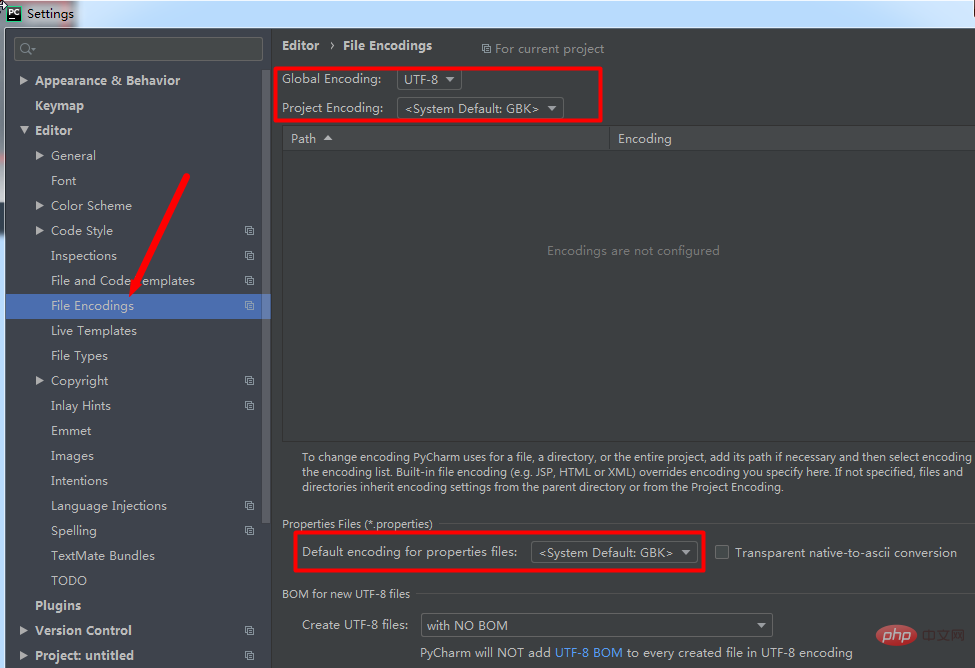
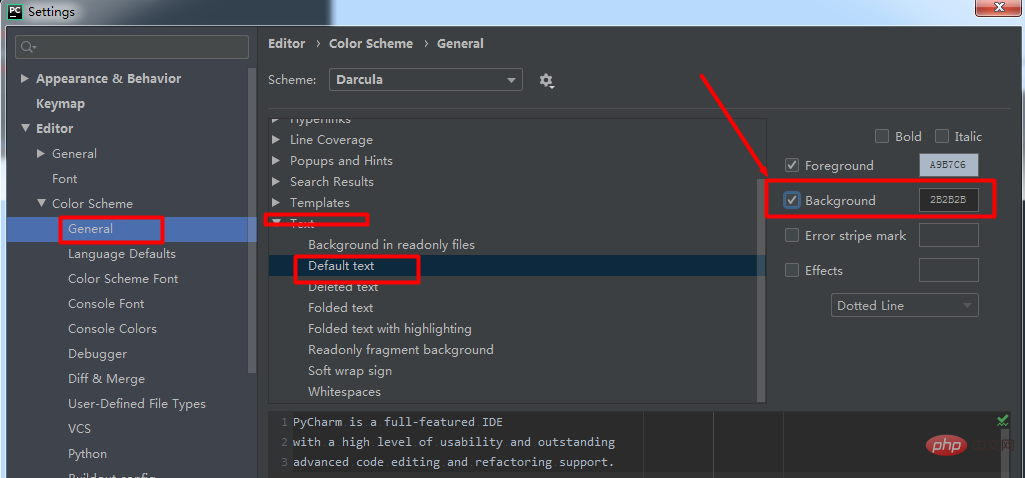
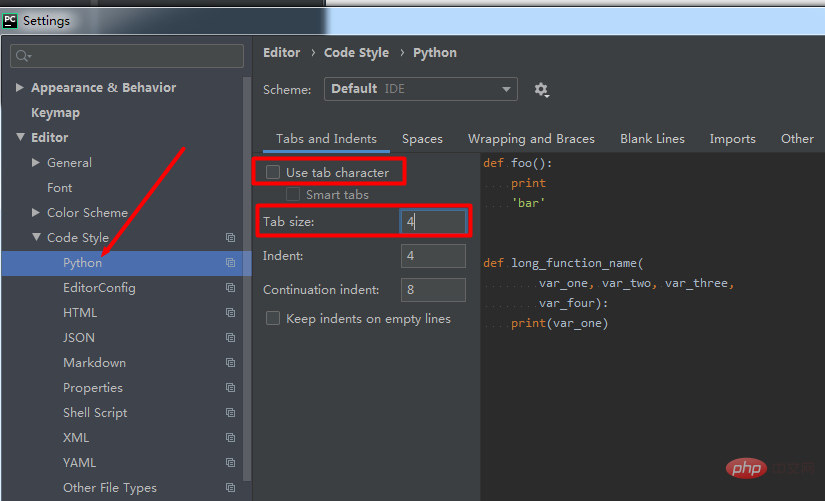
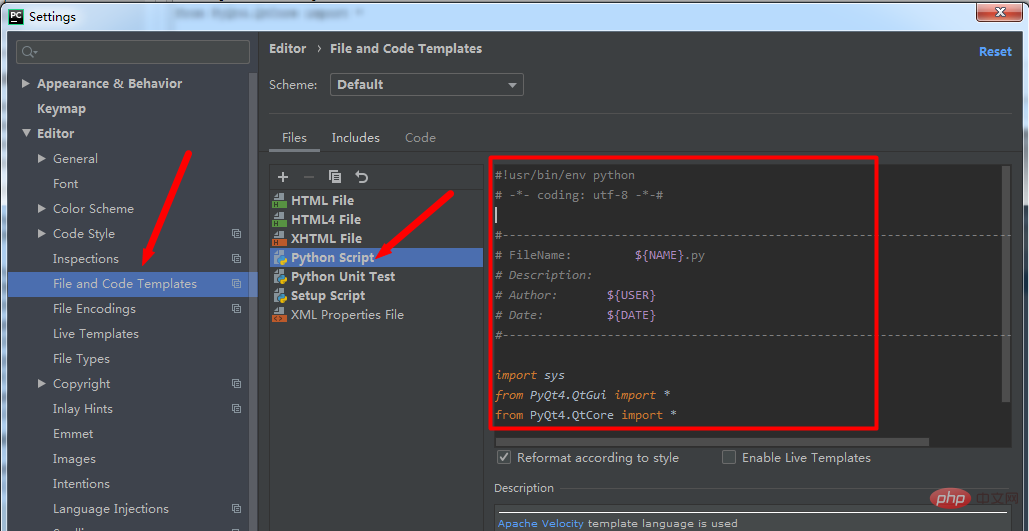
#!usr/bin/env python
# -*- coding: utf-8 -*-#

#-------------------------------------------------------------------------------
# FileName:         ${NAME}.py
# Description:
# Author:       ${USER}
# Date:         ${DATE}
#-------------------------------------------------------------------------------

import sys
from PyQt4.QtGui import *
from PyQt4.QtCore import *- ${PROJECT_NAME} - Current Project name;
${NAME} - the file name specified in the dialog box for creating the file;
${USER} - the current user name;
${DATE} - the current system date;
${TIME} - the current system time;
${YEAR} - year;
- ##${MONTH} - month; ##${DAY} - day;
- ${HOUR} - hours;
- ${MINUTE} - minutes;
- ${PRODUCT_NAME} - IDE name of created file;
- ${MONTH_NAME_SHORT} - English month abbreviation, such as: Jan, Feb, etc;
- ${ MONTH_NAME_FULL} - The full name of the month in English, such as: January, February, etc;
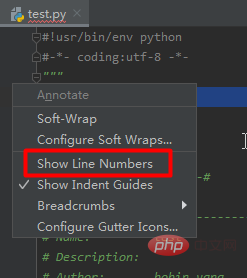
- 8. Display the line number
Right-click on the place where the line number is displayed and check Show Line number.
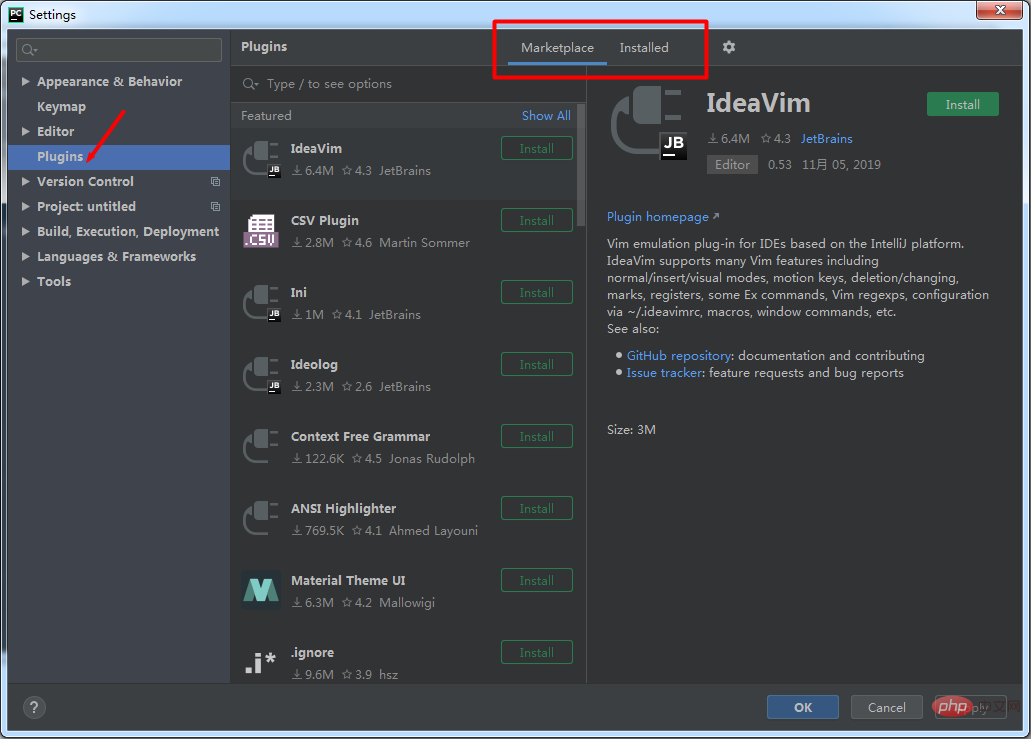
 9. Install plug-ins
Settings->Plugins->Browse repositories, and then enter the plug-in you want to install.
 10. Copy the file path
Right click->copy path.
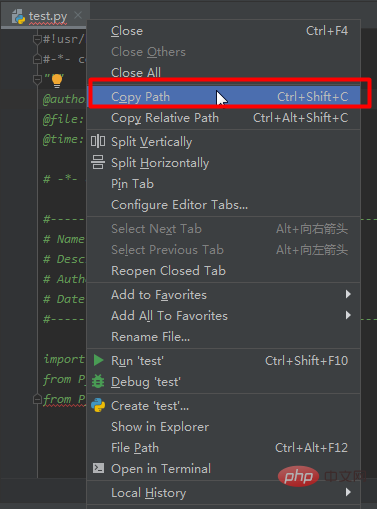 11. Open
right click->Show In Explorer in the file manager.
12. View a statement or quote
Place the cursor in the middle of the word, and then press ctrl b or press the ctrl key and the left mouse button.
13. View project structure
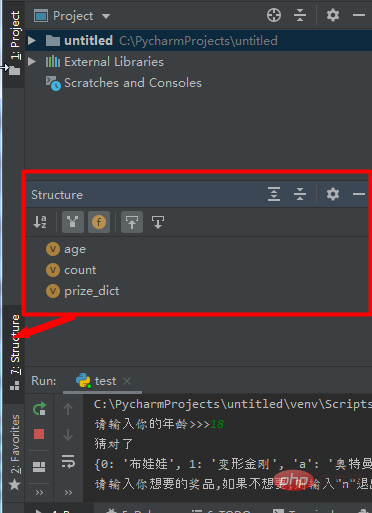 14. DEBUG
 15. Common shortcut keys
- ctrl c: Copy the selected content; when the content is not selected, copy the current line.
- ctrl x: Cut the selected content; cut the current line when the content is not selected.
- ctrl v: Paste
- ctrl d: Copy the current line to the next line.
- ctrl y: Delete the current line.
- shift enter: jump to the next line.
- ctrl /: Add a comment.
- tab: Indent.
- shift tab: Cancel indentation.
- ctrl f: Find.
- ctrl shift r: Find in the current project.
- ctrl Minus sign: Collapse the current code block.
- ctrl plus sign: Expand the current code block.
- ctrl shift minus sign: Collapse all code blocks in the current file.
- ctrl shift plus sign: Expand all code libraries of the current file.
- ctrl z: Go back to the previous step
- shift ctrl z: Go back to the next step
- 6. Solve the problem that PyCharm is slow when downloading Python third-party libraries
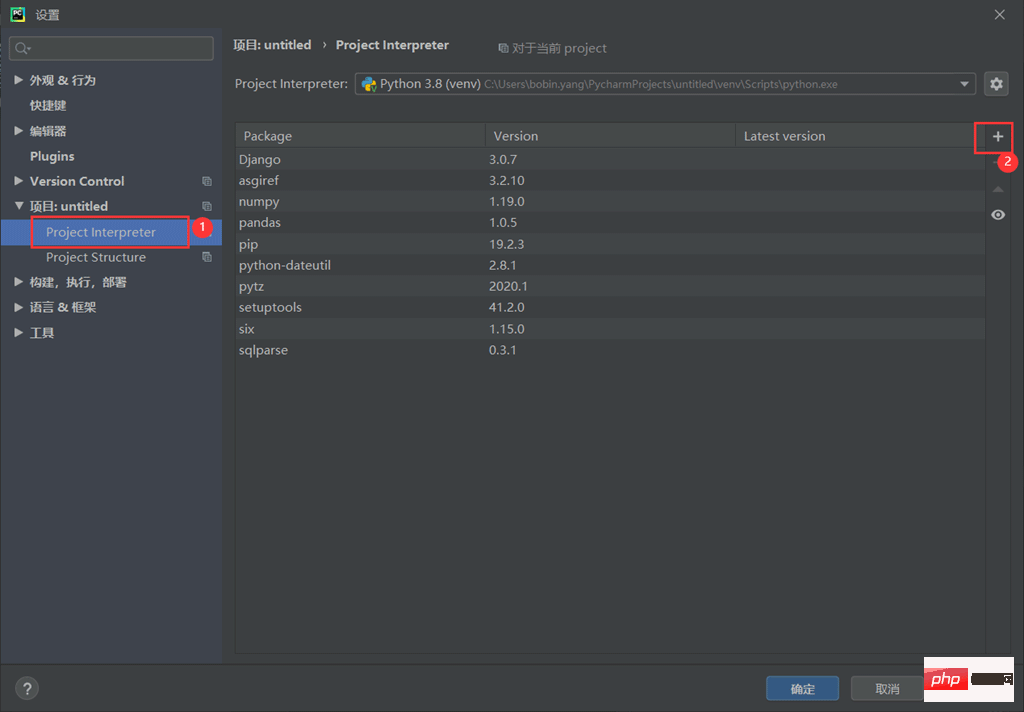
Open Pycharm, click File --> Settings, select Project Interproter in the Project ** option on the left, and click " ” option, that is, the Install installation option. The specific steps are as shown below:
 Select the Manage Repositories option in the lower left corner
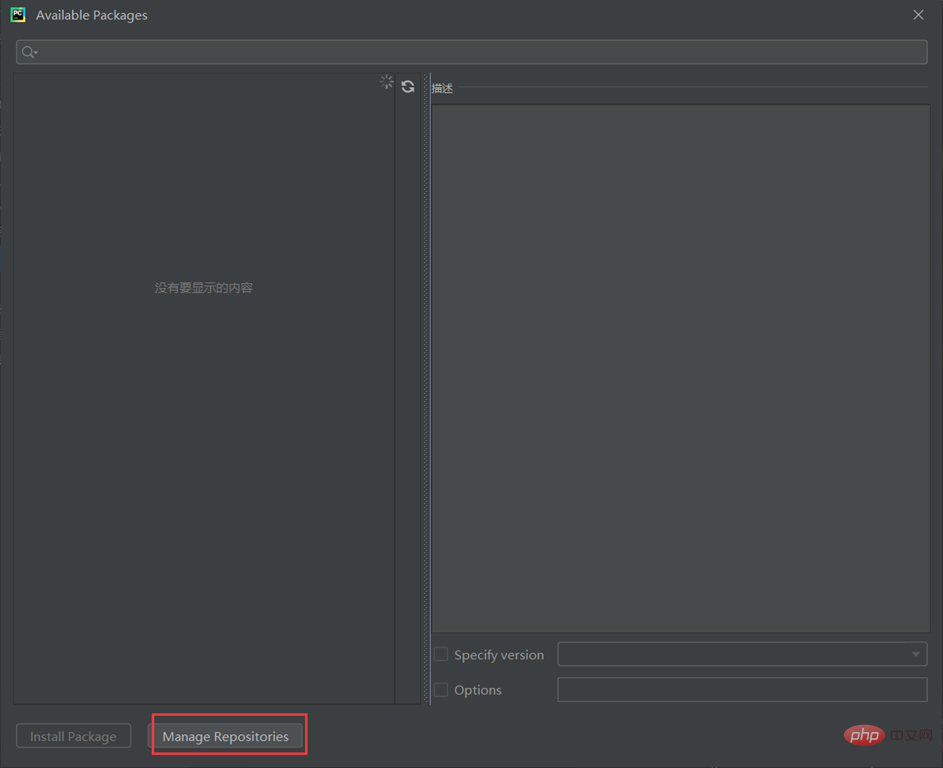 At this time, you can find that pip in Python is the official source. When using pip to install in China, it is very slow, so it is recommended to change it to the source address in China.
The specific method is to click on the default official source, select uninstall, and then add the domestic source address. The specific steps are as shown in the figure below:
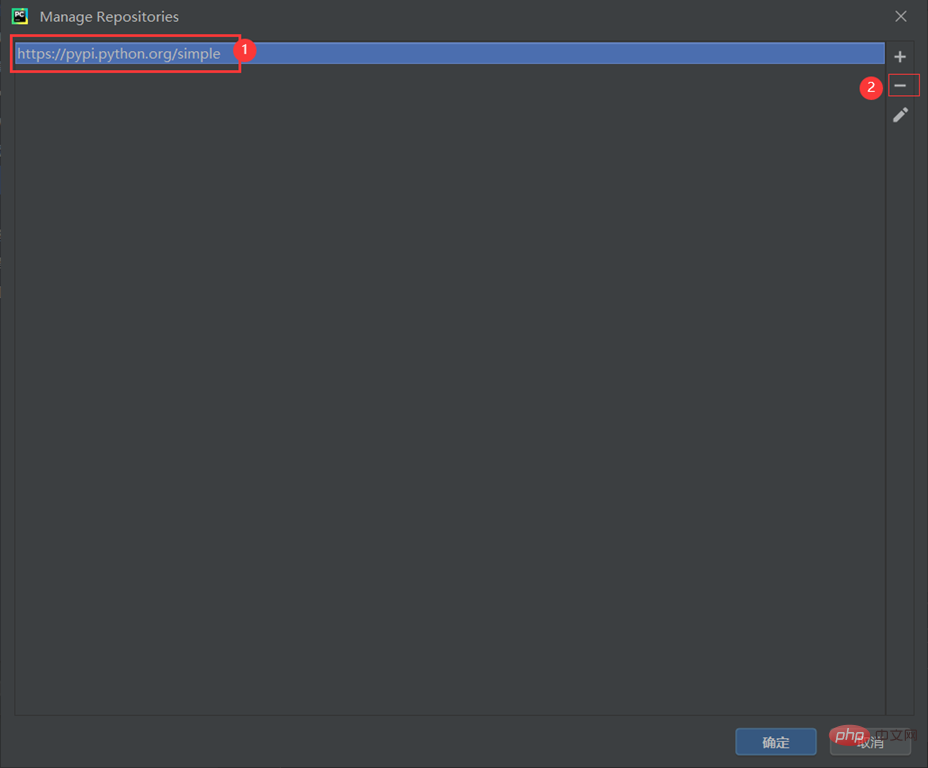 Currently domestic pip Mirror sources include:
Douban: http://pypi.douban.com/simple/
Ali: http:// mirrors.aliyun.com/pypi/simple/
Then add the domestic source address in the pop-up window below.
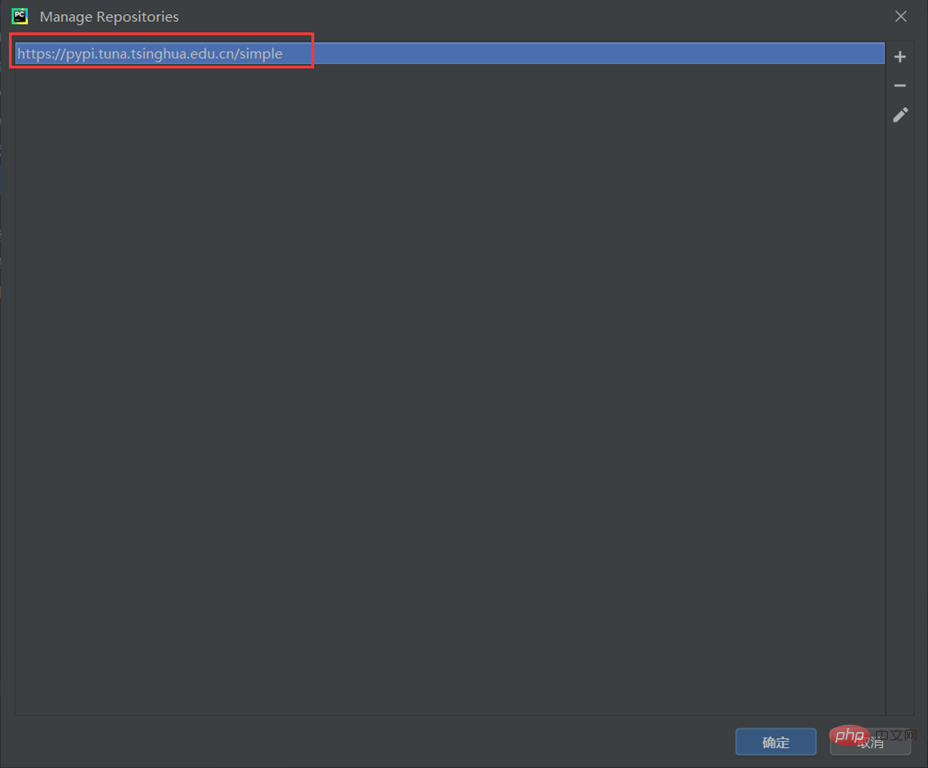 At this point the source address has been updated, click OK.
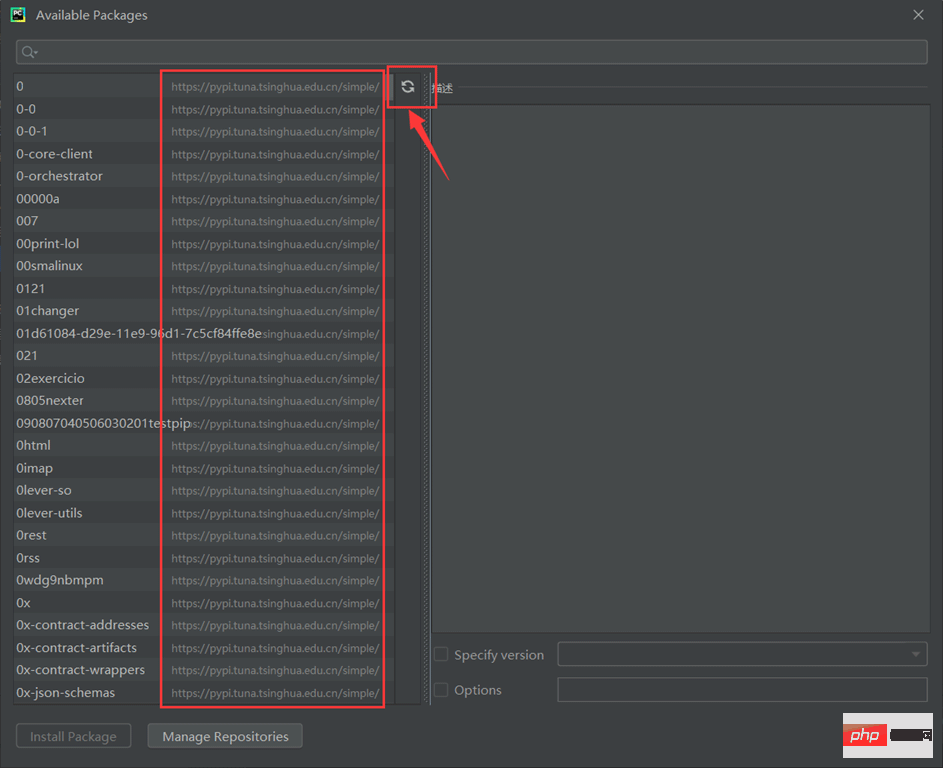 Select an installation package to download, and you will find Waiting times are significantly reduced.
At this point, if the above method still does not solve the problem, create a new file pip.ini in the %HOMEPATH%\pip\ directory of the Windows system and add the following content to the file.
[global]
timeout = 6000
index-url = https://pypi.tuna.tsinghua.edu.cn/simple
trusted-host = https://pypi.tuna.tsinghua.edu.cn
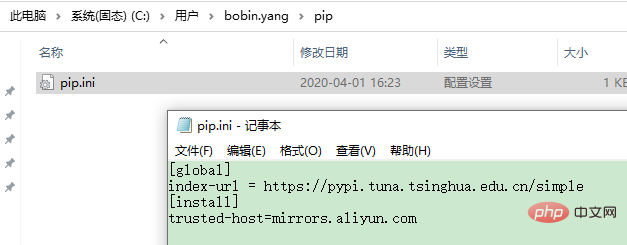
注意:通过PyCharm下载的包位于项目的虚拟环境中。
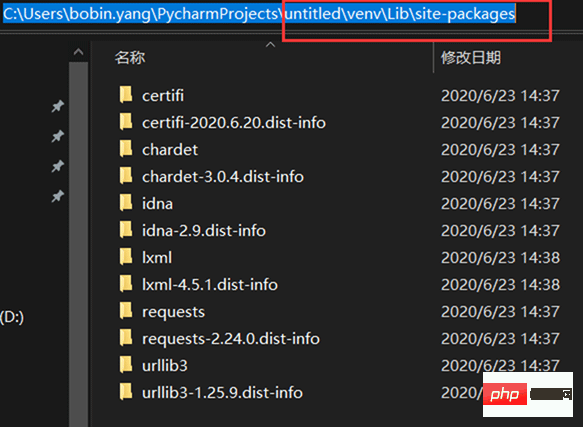
The above is the detailed content of What are the tips for using Pycharm, the Python integrated development environment?. For more information, please follow other related articles on the PHP Chinese website!

Hot AI Tools

Undresser.AI Undress
AI-powered app for creating realistic nude photos

AI Clothes Remover
Online AI tool for removing clothes from photos.

Undress AI Tool
Undress images for free

Clothoff.io
AI clothes remover

AI Hentai Generator
Generate AI Hentai for free.

Hot Article

Hot Tools

Notepad++7.3.1
Easy-to-use and free code editor

SublimeText3 Chinese version
Chinese version, very easy to use

Zend Studio 13.0.1
Powerful PHP integrated development environment

Dreamweaver CS6
Visual web development tools

SublimeText3 Mac version
God-level code editing software (SublimeText3)

Hot Topics
 How to beautify the XML format
Apr 02, 2025 pm 09:57 PM
XML beautification is essentially improving its readability, including reasonable indentation, line breaks and tag organization. The principle is to traverse the XML tree, add indentation according to the level, and handle empty tags and tags containing text. Python's xml.etree.ElementTree library provides a convenient pretty_xml() function that can implement the above beautification process.
 How to open xml format
Apr 02, 2025 pm 09:00 PM
Use most text editors to open XML files; if you need a more intuitive tree display, you can use an XML editor, such as Oxygen XML Editor or XMLSpy; if you process XML data in a program, you need to use a programming language (such as Python) and XML libraries (such as xml.etree.ElementTree) to parse.
 Does XML modification require programming?
Apr 02, 2025 pm 06:51 PM
Modifying XML content requires programming, because it requires accurate finding of the target nodes to add, delete, modify and check. The programming language has corresponding libraries to process XML and provides APIs to perform safe, efficient and controllable operations like operating databases.
 Is there any mobile app that can convert XML into PDF?
Apr 02, 2025 pm 08:54 PM
An application that converts XML directly to PDF cannot be found because they are two fundamentally different formats. XML is used to store data, while PDF is used to display documents. To complete the transformation, you can use programming languages and libraries such as Python and ReportLab to parse XML data and generate PDF documents.
 Is there a free XML to PDF tool for mobile phones?
Apr 02, 2025 pm 09:12 PM
There is no simple and direct free XML to PDF tool on mobile. The required data visualization process involves complex data understanding and rendering, and most of the so-called "free" tools on the market have poor experience. It is recommended to use computer-side tools or use cloud services, or develop apps yourself to obtain more reliable conversion effects.
 Is the conversion speed fast when converting XML to PDF on mobile phone?
Apr 02, 2025 pm 10:09 PM
The speed of mobile XML to PDF depends on the following factors: the complexity of XML structure. Mobile hardware configuration conversion method (library, algorithm) code quality optimization methods (select efficient libraries, optimize algorithms, cache data, and utilize multi-threading). Overall, there is no absolute answer and it needs to be optimized according to the specific situation.
 How to convert XML files to PDF on your phone?
Apr 02, 2025 pm 10:12 PM
It is impossible to complete XML to PDF conversion directly on your phone with a single application. It is necessary to use cloud services, which can be achieved through two steps: 1. Convert XML to PDF in the cloud, 2. Access or download the converted PDF file on the mobile phone.
 How to convert XML to PDF on your phone?
Apr 02, 2025 pm 10:18 PM
It is not easy to convert XML to PDF directly on your phone, but it can be achieved with the help of cloud services. It is recommended to use a lightweight mobile app to upload XML files and receive generated PDFs, and convert them with cloud APIs. Cloud APIs use serverless computing services, and choosing the right platform is crucial. Complexity, error handling, security, and optimization strategies need to be considered when handling XML parsing and PDF generation. The entire process requires the front-end app and the back-end API to work together, and it requires some understanding of a variety of technologies.


