
Before we built our own image warehouse, this time we changed the method and uploaded the image to
Docker Hub.
First we have to register an account for Docker Hub, Docker Hub address: https://hub.docker.com /
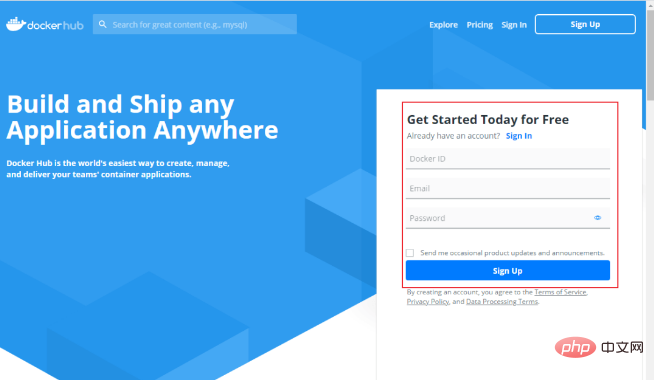
Deploy the application using the previous mall-tiny-fabric project, first Modify the pom.xml file, mainly to add the authentication information of Docker Hub and modify the image prefix. The specific contents are as follows;
<configuration> <!-- Docker 远程管理地址--> <dockerHost>http://192.168.5.94:2375</dockerHost> <!-- 增加认证信息--> <authConfig> <push> <!--Docker Hub 客户名--> <username>macrodocker</username> <!--Docker Hub 密码--> <password>xxx</password> </push> </authConfig> <images> <image> <!--修改镜像前缀为Docker Hub 客户名--> <name>macrodocker/${project.name}:${project.version}</name> </image> </images> </configuration>After the modification is completed, use the package command to package the image to the Linux server, and then use the docker:push command to push the image to Go to Docker Hub: 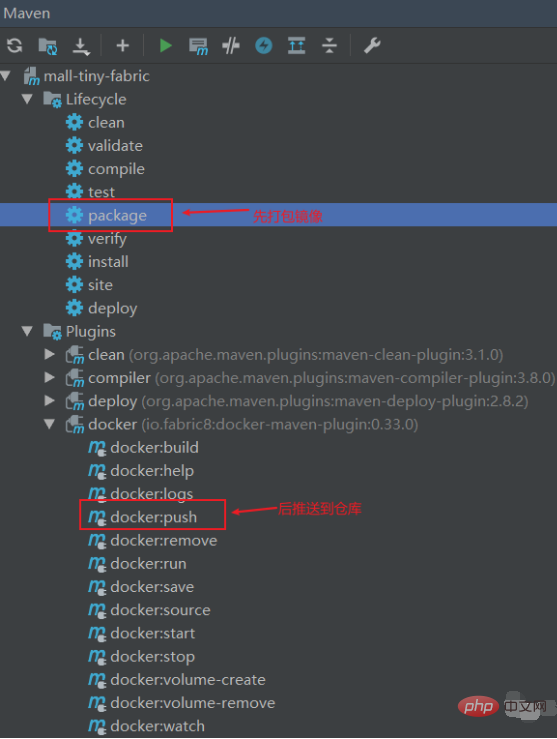
After the push is successful, you can see the image in Docker Hub. 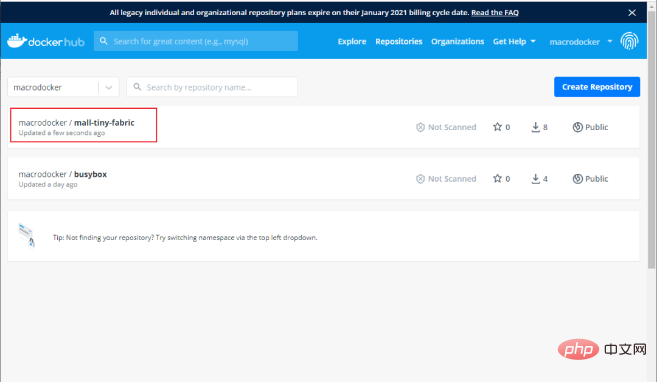
Next we will deploy the application to K8S, including
SpringBootapplication deployment and# Deployment of ##MySQL.
Deploy MySQL
mysql-deployment.yamlfor creation Deployment, please refer to the comments for details;
apiVersion: apps/v1kind: Deploymentmetadata: # 指定Deployment的名称 name: mysql-deployment # 指定Deployment的标签 labels: app: mysqlspec: # 指定创立的Pod副本数量 replicas: 1 # 定义如何查找要管理的Pod selector: # 管理标签app为mysql的Pod matchLabels: app: mysql # 指定创立Pod的模板 template: metadata: # 给Pod打上app:mysql标签 labels: app: mysql # Pod的模板规约 spec: containers: - name: mysql # 指定容器镜像 image: mysql:5.7 # 指定开放的端口 ports: - containerPort: 3306 # 设置环境变量 env: - name: MYSQL_ROOT_PASSWORD value: root # 使用存储卷 volumeMounts: # 将存储卷挂载到容器内部路径 - mountPath: /var/log/mysql name: log-volume - mountPath: /var/lib/mysql name: data-volume - mountPath: /etc/mysql name: conf-volume # 定义存储卷 volumes: - name: log-volume # hostPath类型存储卷在宿主机上的路径 hostPath: path: /home/docker/mydata/mysql/log # 当目录不存在时创立 type: DirectoryOrCreate - name: data-volume hostPath: path: /home/docker/mydata/mysql/data type: DirectoryOrCreate - name: conf-volume hostPath: path: /home/docker/mydata/mysql/conf type: DirectoryOrCreate
Deployment;Create by using the configuration file Create Deployment;
kubectl apply -f mysql-deployment.yaml
Deployment and find mysql-deployment Ready;
[macro@linux-local k8s]$ kubectl get deploymentsNAME READY UP-TO-DATE AVAILABLE AGEmysql-deployment 1/1 1 1 38snginx-volume-deployment 2/2 2 2 6d5h
Pod to be accessible through the service name, MySQL needs to be created Service, add configuration file mysql-service.yaml to create Service;
apiVersion: v1kind: Servicemetadata: # 定义服务名称,其余Pod可以通过服务名称作为域名进行访问 name: mysql-servicespec: # 指定服务类型,通过Node上的静态端口暴露服务 type: NodePort # 管理标签app为mysql的Pod selector: app: mysql ports: - name: http protocol: TCP port: 3306 targetPort: 3306 # Node上的静态端口 nodePort: 30306
Service;
kubectl apply -f mysql-service.yaml
Service and find mysql- service has been exposed on the 30306 port of Node;
[macro@linux-local k8s]$ kubectl get servicesNAME TYPE CLUSTER-IP EXTERNAL-IP PORT(S) AGEkubernetes ClusterIP 10.96.0.1 <none> 443/TCP 7d23hmysql-service NodePort 10.107.189.51 <none> 3306:30306/TCP 7snginx-service NodePort 10.101.171.181 <none> 80:30080/TCP 6d2h
mall## after the deployment is completed #Database, and import related tables, table address: macrozheng/mall-learning/blob/master/document/sql/mall.sql
, first configure an SSH channel; 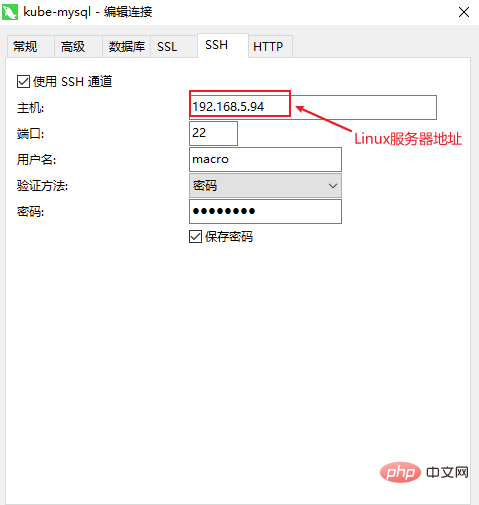
server To access the database in Minikube, just add the IP and port of the database in Minikube.
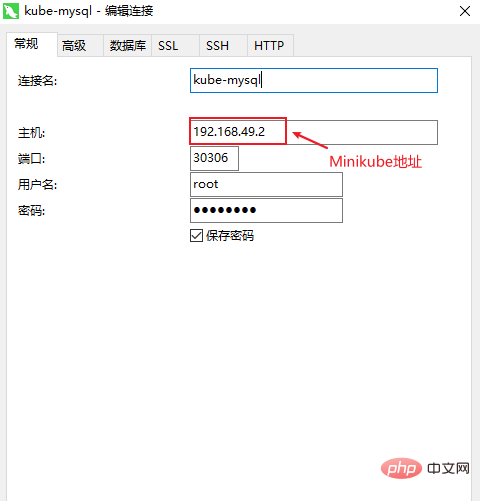
First add the configuration file
Deployment, where we can override the default configuration in SpringBoot through environment variables;
apiVersion: apps/v1kind: Deploymentmetadata: name: mall-tiny-fabric-deployment labels: app: mall-tiny-fabricspec: replicas: 1 selector: matchLabels: app: mall-tiny-fabric template: metadata: labels: app: mall-tiny-fabric spec: containers: - name: mall-tiny-fabric # 指定Docker Hub中的镜像地址 image: macrodocker/mall-tiny-fabric:0.0.1-SNAPSHOT ports: - containerPort: 8080 env: # 指定数据库连接地址 - name: spring.datasource.url value: jdbc:mysql://mysql-service:3306/mall?useUnicode=true&characterEncoding=utf-8&serverTimezone=Asia/Shanghai # 指定日志文件路径 - name: logging.path value: /var/logs volumeMounts: - mountPath: /var/logs name: log-volume volumes: - name: log-volume hostPath: path: /home/docker/mydata/app/mall-tiny-fabric/logs type: DirectoryOrCreate
kubectl apply -f mall-tiny-fabric-deployment.yaml
[macro@linux-local k8s]$ kubectl get podsNAME READY STATUS RESTARTS AGEmall-tiny-fabric-deployment-8684857dff-pnz2t 1/1 Running 0 47smysql-deployment-5dccc96ccf-sfxvg 1/1 Running 0 25mnginx-volume-deployment-6f6c89976d-nv2rn 1/1 Running 4 6d6hnginx-volume-deployment-6f6c89976d-tmhc5 1/1 Running 4 6d5h[macro@linux-local k8s]$ kubectl logs -f mall-tiny-fabric-deployment-8684857dff-pnz2t
Service, add the configuration file mall-tiny-fabric-service.yaml to create Service;
apiVersion: v1kind: Servicemetadata: name: mall-tiny-fabric-servicespec: type: NodePort selector: app: mall-tiny-fabric ports: - name: http protocol: TCP port: 8080 targetPort: 8080 # Node上的静态端口 nodePort: 30180
kubectl apply -f mall-tiny-fabric-service.yaml
[macro@linux-local k8s]$ kubectl get servicesNAME TYPE CLUSTER-IP EXTERNAL-IP PORT(S) AGEkubernetes ClusterIP 10.96.0.1 <none> 443/TCP 7d23hmall-tiny-fabric-service NodePort 10.100.112.84 <none> 8080:30180/TCP 5smysql-service NodePort 10.107.189.51 <none> 3306:30306/TCP 13mnginx-service NodePort 10.101.171.181 <none> 80:30080/TCP 6d2h
curl command Download the Swagger page of the project, but you can only view the returned string of HTML codes.
curl $(minikube ip):30180/swagger-ui.html
因为使用
Minikube安装的K8S Node处于Linux服务器的内网环境,无法直接从外部访问,所以我们需要安装一个Nginx反向代理商下才能访问。
首先我们需要安装Nginx,
安装完成后增加一个Nginx的配置文件,这里我的配置路径为/mydata/nginx/conf/conf.d/,用于将mall-tiny.macrozheng.com域名的访问代理商到K8S中的SpringBoot应用中去,proxy_pass为上面curl使用的路径;
server { listen 80; server_name mall-tiny.macrozheng.com; #修改域名 location / { proxy_set_header Host $host:$server_port; proxy_pass http://192.168.49.2:30180; #修改为代理商服务地址 index index.html index.htm; } error_page 500 502 503 504 /50x.html; location = /50x.html { root /usr/share/nginx/html; }}重启Nginx服务,再修改访问Linux服务器的本机host文件,增加如下记录;
192.168.5.94 mall-tiny.macrozheng.com
之后就可直接在本机上访问K8S上的SpringBoot应用了,访问地址:http://mall-tiny.macrozheng.com/swagger-ui.html
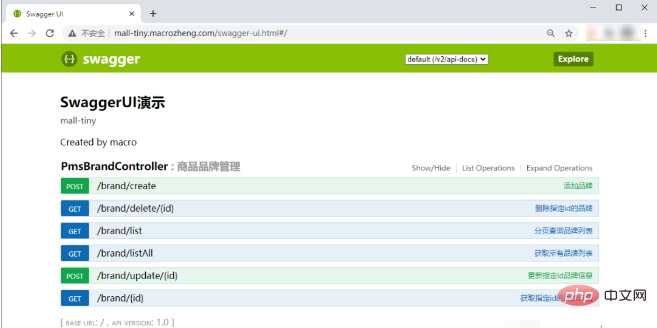
The above is the detailed content of How to deploy SpringBoot application to K8S. For more information, please follow other related articles on the PHP Chinese website!
 The difference between k8s and docker
 SpringBoot project building steps
 What is the difference between j2ee and springboot
 What does Douyin sw prompt sound mean?
 How to use videos in java
 The role of server network card
 How to sum three-dimensional arrays in php
 What is a Bitcoin Futures ETF?
 What are the new features of Hongmeng OS 3.0?


