How to set up Nginx domain name forwarding to a specified port
Enter /usr/local/nginx/conf
sudo cd /usr/local/nginx/conf
Create the vhost directory
sudo mkdir vhost
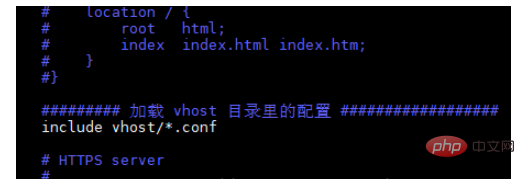
Modify the nginx.conf file
sudo cp nginx.conf nginx.conf_back
sudo vim nginx.conf

Set the hosts file of the access machine to simulate access. The machine I am using here is Windows 10. The hosts file is in the c:\windows\system32\drivers\etc folder.

Create port proxy configuration file
sudo cd vhost
sudo vim www.jaydenmall.com.conf
server {
# 监听 80 端口
listen 80;
autoindex on;
server_name www.jaydenmall.com;
access_log /usr/local/nginx/logs/access.log combined;
index index.html index.htm index.jsp index.php;
if ( $query_string ~* ".*[\;'\<\>].*" ){
return 404;
}
location / {
# 反向代理到 8080 端口
proxy_pass http://127.0.0.1:8080;
add_header access-control-allow-origin *;
}
}Restart nginx
sudo ../../sbin/nginx -s reload
There may be errors, in which case you need to use nginx The -c parameter specifies the location of the nginx.conf file.

sudo killall -9 nginx # 杀掉 nginx 进程
sudo /usr/local/nginx/sbin/nginx -c /usr/local/nginx/conf/nginx.conf
sudo ../../sbin/nginx -s reload # 重启
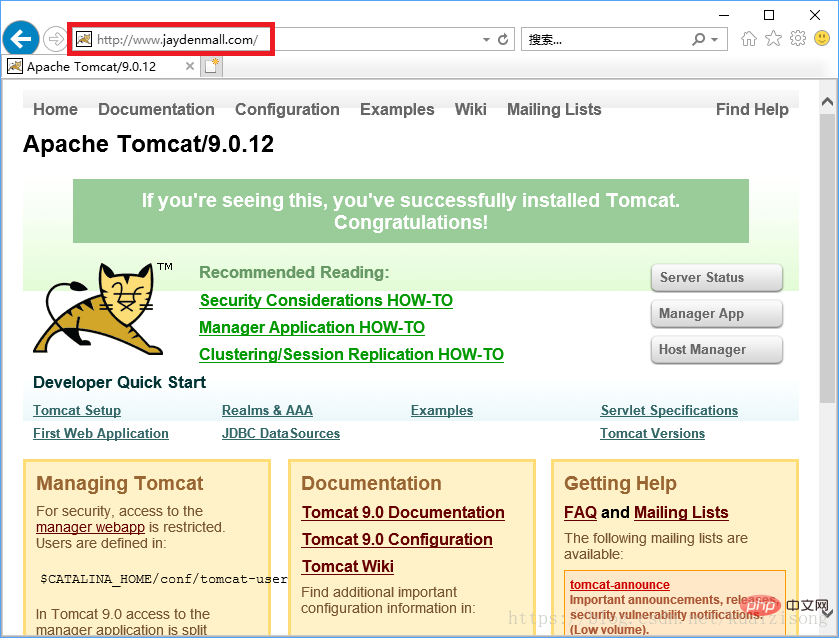
The port reverse proxy is successful. Note that the red part is the default port 80, which actually points to port 8080 of tomcat.

The above is the detailed content of How to set up Nginx domain name forwarding to a specified port. For more information, please follow other related articles on the PHP Chinese website!

Hot AI Tools

Undresser.AI Undress
AI-powered app for creating realistic nude photos

AI Clothes Remover
Online AI tool for removing clothes from photos.

Undress AI Tool
Undress images for free

Clothoff.io
AI clothes remover

AI Hentai Generator
Generate AI Hentai for free.

Hot Article

Hot Tools

Notepad++7.3.1
Easy-to-use and free code editor

SublimeText3 Chinese version
Chinese version, very easy to use

Zend Studio 13.0.1
Powerful PHP integrated development environment

Dreamweaver CS6
Visual web development tools

SublimeText3 Mac version
God-level code editing software (SublimeText3)

Hot Topics
 How to allow external network access to tomcat server
Apr 21, 2024 am 07:22 AM
To allow the Tomcat server to access the external network, you need to: modify the Tomcat configuration file to allow external connections. Add a firewall rule to allow access to the Tomcat server port. Create a DNS record pointing the domain name to the Tomcat server public IP. Optional: Use a reverse proxy to improve security and performance. Optional: Set up HTTPS for increased security.
 How to run thinkphp
Apr 09, 2024 pm 05:39 PM
Steps to run ThinkPHP Framework locally: Download and unzip ThinkPHP Framework to a local directory. Create a virtual host (optional) pointing to the ThinkPHP root directory. Configure database connection parameters. Start the web server. Initialize the ThinkPHP application. Access the ThinkPHP application URL and run it.
 Welcome to nginx!How to solve it?
Apr 17, 2024 am 05:12 AM
To solve the "Welcome to nginx!" error, you need to check the virtual host configuration, enable the virtual host, reload Nginx, if the virtual host configuration file cannot be found, create a default page and reload Nginx, then the error message will disappear and the website will be normal show.
 How to communicate between docker containers
Apr 07, 2024 pm 06:24 PM
There are five methods for container communication in the Docker environment: shared network, Docker Compose, network proxy, shared volume, and message queue. Depending on your isolation and security needs, choose the most appropriate communication method, such as leveraging Docker Compose to simplify connections or using a network proxy to increase isolation.
 How to register phpmyadmin
Apr 07, 2024 pm 02:45 PM
To register for phpMyAdmin, you need to first create a MySQL user and grant permissions to it, then download, install and configure phpMyAdmin, and finally log in to phpMyAdmin to manage the database.
 How to deploy nodejs project to server
Apr 21, 2024 am 04:40 AM
Server deployment steps for a Node.js project: Prepare the deployment environment: obtain server access, install Node.js, set up a Git repository. Build the application: Use npm run build to generate deployable code and dependencies. Upload code to the server: via Git or File Transfer Protocol. Install dependencies: SSH into the server and use npm install to install application dependencies. Start the application: Use a command such as node index.js to start the application, or use a process manager such as pm2. Configure a reverse proxy (optional): Use a reverse proxy such as Nginx or Apache to route traffic to your application
 How to generate URL from html file
Apr 21, 2024 pm 12:57 PM
Converting an HTML file to a URL requires a web server, which involves the following steps: Obtain a web server. Set up a web server. Upload HTML file. Create a domain name. Route the request.
 What to do if the installation of phpmyadmin fails
Apr 07, 2024 pm 03:15 PM
Troubleshooting steps for failed phpMyAdmin installation: Check system requirements (PHP version, MySQL version, web server); enable PHP extensions (mysqli, pdo_mysql, mbstring, token_get_all); check configuration file settings (host, port, username, password); Check file permissions (directory ownership, file permissions); check firewall settings (whitelist web server ports); view error logs (/var/log/apache2/error.log or /var/log/nginx/error.log); seek Technical support (phpMyAdmin


