
 Backend Development
Python Tutorial
How to achieve the effect of dragging virtual squares with Python+OpenCV
Backend Development
Python Tutorial
How to achieve the effect of dragging virtual squares with Python+OpenCV
How to achieve the effect of dragging virtual squares with Python+OpenCV

1. Project effect
2. Core process
1. OpenCV reads the video stream and draws a rectangle on each frame of the picture.
2. Use mediapipe to obtain finger key point coordinates.
3. Based on the coordinate position of the finger and the coordinate position of the rectangle, determine whether the finger point is on the rectangle. If so, the rectangle will follow the finger movement.
3. Code process
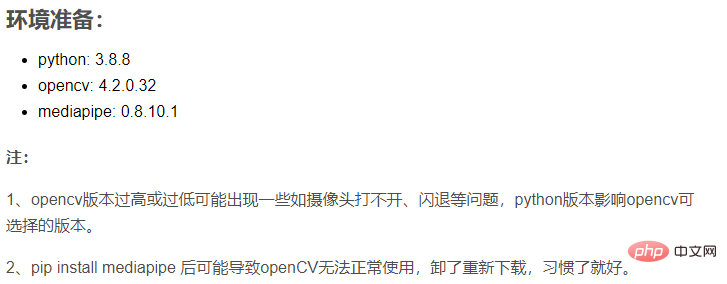
Environment preparation:
python: 3.8.8
opencv: 4.2.0.32
mediapipe: 0.8 .10.1
Note:
1. If the opencv version is too high or too low, there may be some problems such as the camera not being able to open, crashing, etc. The python version affects the selectable version of opencv.
2. OpenCV may not be able to be used normally after pip install mediapipe. Uninstall it and download it again. Just get used to it.
1. Read the camera video and draw a rectangle
import cv2
import time
import numpy as np


# 调用摄像头 0 默认摄像头
cap = cv2.VideoCapture(0)

# 初始方块数据
x = 100
y = 100
w = 100
h = 100

# 读取一帧帧照片
while True:
    # 返回frame图片
    rec,frame = cap.read()

    # 镜像
    frame = cv2.flip(frame,1)

    # 画矩形
    cv2.rectangle(frame, (x, y), (x + w, y + h), (255, 0, 255), -1)

    # 显示画面
    cv2.imshow('frame',frame)

    # 退出条件
    if cv2.waitKey(1) & 0xFF == ord('q'):
        break

cap.release()
cv2.destroyAllWindows()This is a very basic step. At this time, when we run this code and the camera is turned on, we will be surprised to see our handsome face. face, and there is a 100*100 purple rectangle in the upper left corner.
2. Import mediapipe to process finger coordinates
pip install mediapipe
Some problems may occur at this time, such as openCV suddenly becoming unavailable. It doesn’t matter, uninstall it and download it again.
mediapipe details: Hands - mediapipe (google.github.io)
In short, it will return us 21 finger key points Coordinates, that is, its position ratio in the video screen (0~1), we multiply it by the width and height of the corresponding screen to get the coordinates corresponding to the finger.
This time I used the tips of my index finger and middle finger, which are numbers 8 and 12.
2.1 Configure some basic information
import cv2
import time
import numpy as np
import mediapipe as mp


mp_drawing = mp.solutions.drawing_utils
mp_drawing_styles = mp.solutions.drawing_styles
mp_hands = mp.solutions.hands

hands =  mp_hands.Hands(
    static_image_mode=True,
    max_num_hands=2,
min_detection_confidence=0.5)2.2 When processing each frame of image, add
    frame.flags.writeable = False
    frame = cv2.cvtColor(frame, cv2.COLOR_BGR2RGB)
    # 返回结果
    results = hands.process(frame)

    frame.flags.writeable = True
frame = cv2.cvtColor(frame, cv2.COLOR_RGB2BGR)When we are in When reading each frame of picture in the video stream, it is converted from BGR to RGB and supplied to the hands object generated by mediapipe for reading. It will return the information of the key points of the fingers in this picture. We only need to continue to draw on it. on every frame of the picture.
    # 如果结果不为空
    if results.multi_hand_landmarks:

        # 遍历双手(根据读取顺序,一只只手遍历、画画)
        for hand_landmarks in results.multi_hand_landmarks:
            mp_drawing.draw_landmarks(
                frame,
                hand_landmarks,
                mp_hands.HAND_CONNECTIONS,
                mp_drawing_styles.get_default_hand_landmarks_style(),
mp_drawing_styles.get_default_hand_connections_style())2.3 The complete code of this step
import cv2
import time
import numpy as np
import mediapipe as mp


mp_drawing = mp.solutions.drawing_utils
mp_drawing_styles = mp.solutions.drawing_styles
mp_hands = mp.solutions.hands

hands =  mp_hands.Hands(
    static_image_mode=True,
    max_num_hands=2,
    min_detection_confidence=0.5)


# 调用摄像头 0 默认摄像头
cap = cv2.VideoCapture(0)

# 方块初始数组
x = 100
y = 100
w = 100
h = 100


# 读取一帧帧照片
while True:
    # 返回frame图片
    rec,frame = cap.read()

    # 镜像
    frame = cv2.flip(frame,1)


    frame.flags.writeable = False
    frame = cv2.cvtColor(frame, cv2.COLOR_BGR2RGB)
    # 返回结果
    results = hands.process(frame)

    frame.flags.writeable = True
    frame = cv2.cvtColor(frame, cv2.COLOR_RGB2BGR)


    # 如果结果不为空
    if results.multi_hand_landmarks:

        # 遍历双手(根据读取顺序,一只只手遍历、画画)
        # results.multi_hand_landmarks n双手
        # hand_landmarks 每只手上21个点信息
        for hand_landmarks in results.multi_hand_landmarks:
            mp_drawing.draw_landmarks(
                frame,
                hand_landmarks,
                mp_hands.HAND_CONNECTIONS,
                mp_drawing_styles.get_default_hand_landmarks_style(),
                mp_drawing_styles.get_default_hand_connections_style())


    # 画矩形
    cv2.rectangle(frame, (x, y), (x + w, y + h), (255, 0, 255), -1)

    # 显示画面
    cv2.imshow('frame',frame)

    # 退出条件
    if cv2.waitKey(1) & 0xFF == ord('q'):
        break

cap.release()
cv2.destroyAllWindows()3. Position calculation
Our experiment requires dragging the square, so there must be some that do not drag time, so we might as well obtain the positions of the index finger (8) and middle finger (12) tips according to the previous step. If they are close, we will change the coordinates of the block according to the position of the fingers when they coincide with the block.
Full code
import cv2
import time
import math
import numpy as np
import mediapipe as mp
# mediapipe配置
mp_drawing = mp.solutions.drawing_utils
mp_drawing_styles = mp.solutions.drawing_styles
mp_hands = mp.solutions.hands
hands = mp_hands.Hands(
static_image_mode=True,
max_num_hands=2,
min_detection_confidence=0.5)
# 调用摄像头 0 默认摄像头
cap = cv2.VideoCapture(0)
# cv2.namedWindow("frame", 0)
# cv2.resizeWindow("frame", 960, 640)
# 获取画面宽度、高度
width = int(cap.get(cv2.CAP_PROP_FRAME_WIDTH))
height = int(cap.get(cv2.CAP_PROP_FRAME_HEIGHT))
# 方块初始数组
x = 100
y = 100
w = 100
h = 100
L1 = 0
L2 = 0
on_square = False
square_color = (0, 255, 0)
# 读取一帧帧照片
while True:
# 返回frame图片
rec,frame = cap.read()
# 镜像
frame = cv2.flip(frame,1)
frame.flags.writeable = False
frame = cv2.cvtColor(frame, cv2.COLOR_BGR2RGB)
# 返回结果
results = hands.process(frame)
frame.flags.writeable = True
frame = cv2.cvtColor(frame, cv2.COLOR_RGB2BGR)
# 如果结果不为空
if results.multi_hand_landmarks:
# 遍历双手(根据读取顺序,一只只手遍历、画画)
# results.multi_hand_landmarks n双手
# hand_landmarks 每只手上21个点信息
for hand_landmarks in results.multi_hand_landmarks:
mp_drawing.draw_landmarks(
frame,
hand_landmarks,
mp_hands.HAND_CONNECTIONS,
mp_drawing_styles.get_default_hand_landmarks_style(),
mp_drawing_styles.get_default_hand_connections_style())
# 记录手指每个点的x y 坐标
x_list = []
y_list = []
for landmark in hand_landmarks.landmark:
x_list.append(landmark.x)
y_list.append(landmark.y)
# 获取食指指尖
index_finger_x, index_finger_y = int(x_list[8] * width),int(y_list[8] * height)
# 获取中指
middle_finger_x,middle_finger_y = int(x_list[12] * width), int(y_list[12] * height)
# 计算两指尖距离
finger_distance = math.hypot((middle_finger_x - index_finger_x), (middle_finger_y - index_finger_y))
# 如果双指合并(两之间距离近)
if finger_distance < 60:
# X坐标范围 Y坐标范围
if (index_finger_x > x and index_finger_x < (x + w)) and (
index_finger_y > y and index_finger_y < (y + h)):
if on_square == False:
L1 = index_finger_x - x
L2 = index_finger_y - y
square_color = (255, 0, 255)
on_square = True
else:
# 双指不合并/分开
on_square = False
square_color = (0, 255, 0)
# 更新坐标
if on_square:
x = index_finger_x - L1
y = index_finger_y - L2
# 图像融合 使方块不遮挡视频图片
overlay = frame.copy()
cv2.rectangle(frame, (x, y), (x + w, y + h), square_color, -1)
frame = cv2.addWeighted(overlay, 0.5, frame, 1 - 0.5, 0)
# 显示画面
cv2.imshow('frame',frame)
# 退出条件
if cv2.waitKey(1) & 0xFF == ord('q'):
break
cap.release()
cv2.destroyAllWindows()The above is the detailed content of How to achieve the effect of dragging virtual squares with Python+OpenCV. For more information, please follow other related articles on the PHP Chinese website!

Hot AI Tools

Undresser.AI Undress
AI-powered app for creating realistic nude photos

AI Clothes Remover
Online AI tool for removing clothes from photos.

Undress AI Tool
Undress images for free

Clothoff.io
AI clothes remover

Video Face Swap
Swap faces in any video effortlessly with our completely free AI face swap tool!

Hot Article
Hot Tools

Notepad++7.3.1
Easy-to-use and free code editor

SublimeText3 Chinese version
Chinese version, very easy to use

Zend Studio 13.0.1
Powerful PHP integrated development environment

Dreamweaver CS6
Visual web development tools

SublimeText3 Mac version
God-level code editing software (SublimeText3)
Hot Topics
 1386
1386
 52
52

 Can vs code run in Windows 8
Apr 15, 2025 pm 07:24 PM
Can vs code run in Windows 8
Apr 15, 2025 pm 07:24 PM
VS Code can run on Windows 8, but the experience may not be great. First make sure the system has been updated to the latest patch, then download the VS Code installation package that matches the system architecture and install it as prompted. After installation, be aware that some extensions may be incompatible with Windows 8 and need to look for alternative extensions or use newer Windows systems in a virtual machine. Install the necessary extensions to check whether they work properly. Although VS Code is feasible on Windows 8, it is recommended to upgrade to a newer Windows system for a better development experience and security.
 How to run programs in terminal vscode
Apr 15, 2025 pm 06:42 PM
How to run programs in terminal vscode
Apr 15, 2025 pm 06:42 PM
In VS Code, you can run the program in the terminal through the following steps: Prepare the code and open the integrated terminal to ensure that the code directory is consistent with the terminal working directory. Select the run command according to the programming language (such as Python's python your_file_name.py) to check whether it runs successfully and resolve errors. Use the debugger to improve debugging efficiency.
 Can visual studio code be used in python
Apr 15, 2025 pm 08:18 PM
Can visual studio code be used in python
Apr 15, 2025 pm 08:18 PM
VS Code can be used to write Python and provides many features that make it an ideal tool for developing Python applications. It allows users to: install Python extensions to get functions such as code completion, syntax highlighting, and debugging. Use the debugger to track code step by step, find and fix errors. Integrate Git for version control. Use code formatting tools to maintain code consistency. Use the Linting tool to spot potential problems ahead of time.
 Is the vscode extension malicious?
Apr 15, 2025 pm 07:57 PM
Is the vscode extension malicious?
Apr 15, 2025 pm 07:57 PM
VS Code extensions pose malicious risks, such as hiding malicious code, exploiting vulnerabilities, and masturbating as legitimate extensions. Methods to identify malicious extensions include: checking publishers, reading comments, checking code, and installing with caution. Security measures also include: security awareness, good habits, regular updates and antivirus software.
 Python: Automation, Scripting, and Task Management
Apr 16, 2025 am 12:14 AM
Python: Automation, Scripting, and Task Management
Apr 16, 2025 am 12:14 AM
Python excels in automation, scripting, and task management. 1) Automation: File backup is realized through standard libraries such as os and shutil. 2) Script writing: Use the psutil library to monitor system resources. 3) Task management: Use the schedule library to schedule tasks. Python's ease of use and rich library support makes it the preferred tool in these areas.
 What is vscode What is vscode for?
Apr 15, 2025 pm 06:45 PM
What is vscode What is vscode for?
Apr 15, 2025 pm 06:45 PM
VS Code is the full name Visual Studio Code, which is a free and open source cross-platform code editor and development environment developed by Microsoft. It supports a wide range of programming languages and provides syntax highlighting, code automatic completion, code snippets and smart prompts to improve development efficiency. Through a rich extension ecosystem, users can add extensions to specific needs and languages, such as debuggers, code formatting tools, and Git integrations. VS Code also includes an intuitive debugger that helps quickly find and resolve bugs in your code.
 Golang vs. Python: Concurrency and Multithreading
Apr 17, 2025 am 12:20 AM
Golang vs. Python: Concurrency and Multithreading
Apr 17, 2025 am 12:20 AM
Golang is more suitable for high concurrency tasks, while Python has more advantages in flexibility. 1.Golang efficiently handles concurrency through goroutine and channel. 2. Python relies on threading and asyncio, which is affected by GIL, but provides multiple concurrency methods. The choice should be based on specific needs.
 Can visual studio code run python
Apr 15, 2025 pm 08:00 PM
Can visual studio code run python
Apr 15, 2025 pm 08:00 PM
VS Code not only can run Python, but also provides powerful functions, including: automatically identifying Python files after installing Python extensions, providing functions such as code completion, syntax highlighting, and debugging. Relying on the installed Python environment, extensions act as bridge connection editing and Python environment. The debugging functions include setting breakpoints, step-by-step debugging, viewing variable values, and improving debugging efficiency. The integrated terminal supports running complex commands such as unit testing and package management. Supports extended configuration and enhances features such as code formatting, analysis and version control.
