
When applying MyBatis, use object-relational mapping to map objects and Aliase.
It is clearly written in the Mybatis documentation that if you do not clearly define the Aliase of the entity class, the framework will automatically use the Class Name as an alias.
Then the problem comes. When using java -jar xxx.jar& to start, the following error will be reported,
Error resolving class. Cause: org.apache.ibatis. type.TypeException: Could not resolve type alias "XXXXX".Cause: java.lang.ClassNotFoundException: Cannot find class: XXXXX
From the exception information, it is obvious that the alise corresponding cannot be retrieved locally class, and eventually caused the initialization failure of sqlSessionFactory and so on. Moreover, the hanging rail is that there is no problem if you start it directly in Idea. This problem will only occur when you start the jar package.
Refer to the article of blogger A_Beaver. It turns out that the facroty of mybatis needs Only by loading SpringBoot's unique virtual file system can the class path be identified.
public SpringBootVFS() {
    this.resourceResolver = new PathMatchingResourcePatternResolver(getClass().getClassLoader());
}From the above code, the resource loading is actually implemented through PathMatchingResourcePatternResolver.
To fix this problem, you only need to configure the mybatis configuration class. Just set up the factory,
@Bean(name = "masterSqlSessionFactory")
    @Primary
    public SqlSessionFactory sqlSessionFactory(@Qualifier("masterDataSource") DataSource dataSource) throws Exception {
        SqlSessionFactoryBean bean = new SqlSessionFactoryBean();
        bean.setDataSource(dataSource);
        bean.setVfs(SpringBootVFS.class);//设置SpringBootVFS
        bean.setTypeAliasesPackage("com.fulan.domain.red");
        ...
}1.1 Create the project
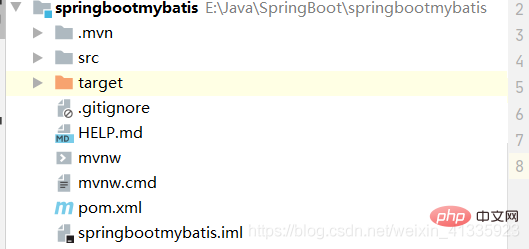
1.2 Modify the POM file and add relevant dependencies
Modify the pom.xml file and add the following dependencies.
<!--Thymeleaf启动器-->
 <dependency>
 <groupId>org.springframework.boot</groupId>
 <artifactId>spring-boot-starter-thymeleaf</artifactId>
 </dependency>
 <dependency>
 <groupId>org.springframework.boot</groupId>
 <artifactId>spring-boot-starter-web</artifactId>
 </dependency>
 <!--mybatis启动器-->
 <dependency>
 <groupId>org.mybatis.spring.boot</groupId>
 <artifactId>mybatis-spring-boot-starter</artifactId>
 <version>2.1.3</version>
 </dependency>
 <!--jdbc启动器-->
 <dependency>
 <groupId>org.springframework.boot</groupId>
 <artifactId>spring-boot-starter-jdbc</artifactId>
 </dependency>
 <!--数据库驱动坐标-->
 <dependency>
 <groupId>mysql</groupId>
 <artifactId>mysql-connector-java</artifactId>
 <version>8.0.12</version>
 </dependency>
 <!--Druid数据源依赖-->
 <dependency>
 <groupId>com.alibaba</groupId>
 <artifactId>druid</artifactId>
 <version>1.1.10</version>
 </dependency>
1.3 Configure the data source
Configure the following code in the application.yml file.
spring:
  datasource:
    driver-class-name: com.mysql.cj.jdbc.Driver
    url: jdbc:mysql://localhost:3306/test?useUnicode=true&characterEnconding=utf-8&useSSL=false&serverTimezone=GMT%2B8
    username: root
    password: root
type: com.alibaba.druid.pool.DruidDataSource2.1 Add the generator plug-in coordinates
<!--配置generator插件-->
 <plugin>
 <groupId>org.mybatis.generator</groupId>
 <artifactId>mybatis-generator-maven-plugin</artifactId>
 <version>1.4.0</version>
 <dependencies>
 <dependency>
 <groupId>mysql</groupId>
 <artifactId>mysql-connector-java</artifactId>
 <version>8.0.12</version>
 </dependency>
 </dependencies>
 <!--指定配置文件的路径-->
 <configuration>
 <configurationFile>${project.basedir}/src/main/resources/generator.xml</configurationFile>
 <verbose>true</verbose>
 <overwrite>true</overwrite>
 </configuration>
</plugin>2.2 Add the generator configuration file
Name the file generator.xml and add it to src/main/resources.
<?xml version="1.0" encoding="UTF-8"?>
<!DOCTYPE generatorConfiguration
        PUBLIC "-//mybatis.org//DTD MyBatis Generator Configuration 1.0//EN"
        "http://mybatis.org/dtd/mybatis-generator-config_1_0.dtd">

<generatorConfiguration>
        <context id="testTables" targetRuntime="MyBatis3">
            <commentGenerator>
                <!-- 是否去除自动生成的注释 true:是 : false:否 -->
                <property name="suppressAllComments" value="true" />
            </commentGenerator>
            <!-- 数据库连接信息:驱动类、连接地址、用户名、密码-->
            <jdbcConnection driverClass="com.mysql.cj.jdbc.Driver"
                connectionURL="jdbc:mysql://localhost:3306/test?useUnicode=true&characterEnconding=utf-8&useSSL=false&serverTimezone=UTC"
                            userId="root" password="root">
            </jdbcConnection>
            <!-- 默认false,把JDBC DECIMAL 和 NUMERIC 类型解析为 Integer true,把JDBC DECIMAL
                和 NUMERIC 类型解析为java.math.BigDecimal -->
            <javaTypeResolver>
                <property name="forceBigDecimals" value="false" />
            </javaTypeResolver>
            <!--targetProject:生成PO类的位置-->
            <javaModelGenerator targetPackage="com.example.springbootmybatis.pojo"
                targetProject=".srcmainjava">
                <!--enableSubPackages:是否让schema作为包的后缀-->
                <property name="enableSubPackages" value="false" />
                <!-- 从数据库返回的值被清理前后的空格 -->
                <property name="trimStrings" value="true" />
            </javaModelGenerator>
            <!--对应的mapper.xml文件 -->
            <sqlMapGenerator targetPackage="com.example.springbootmybatis.mapper"
                targetProject=".srcmainjava">
                <!--enableSubPackages:是否让schema作为包的后缀-->
                <property name="enableSubPackages" value="false" />
            </sqlMapGenerator>
            <!-- 对应的Mapper接口类文件 -->
            <javaClientGenerator type="XMLMAPPER"
                                 targetPackage="com.example.springbootmybatis.mapper" targetProject="./src/main/java">
                <!--enableSubPackages:是否让schema作为包的后缀-->
                <property name="enableSubPackages" value="false" />
            </javaClientGenerator>
            <!-- 指定数据库表 -->
            <table schema="" tableName="users"></table>
            <!-- 列出要生成代码的所有表,这里配置的是不生成Example文件 -->
<!--            <table tableName="userinfo" domainObjectName="UserInfoPO"  -->
<!--                enableCountByExample="false" enableUpdateByExample="false"  -->
<!--                enableDeleteByExample="false" enableSelectByExample="false"  -->
<!--                selectByExampleQueryId="false">  -->
<!--                <property name="useActualColumnNames" value="false" />  -->
<!--            </table>  -->
        </context>
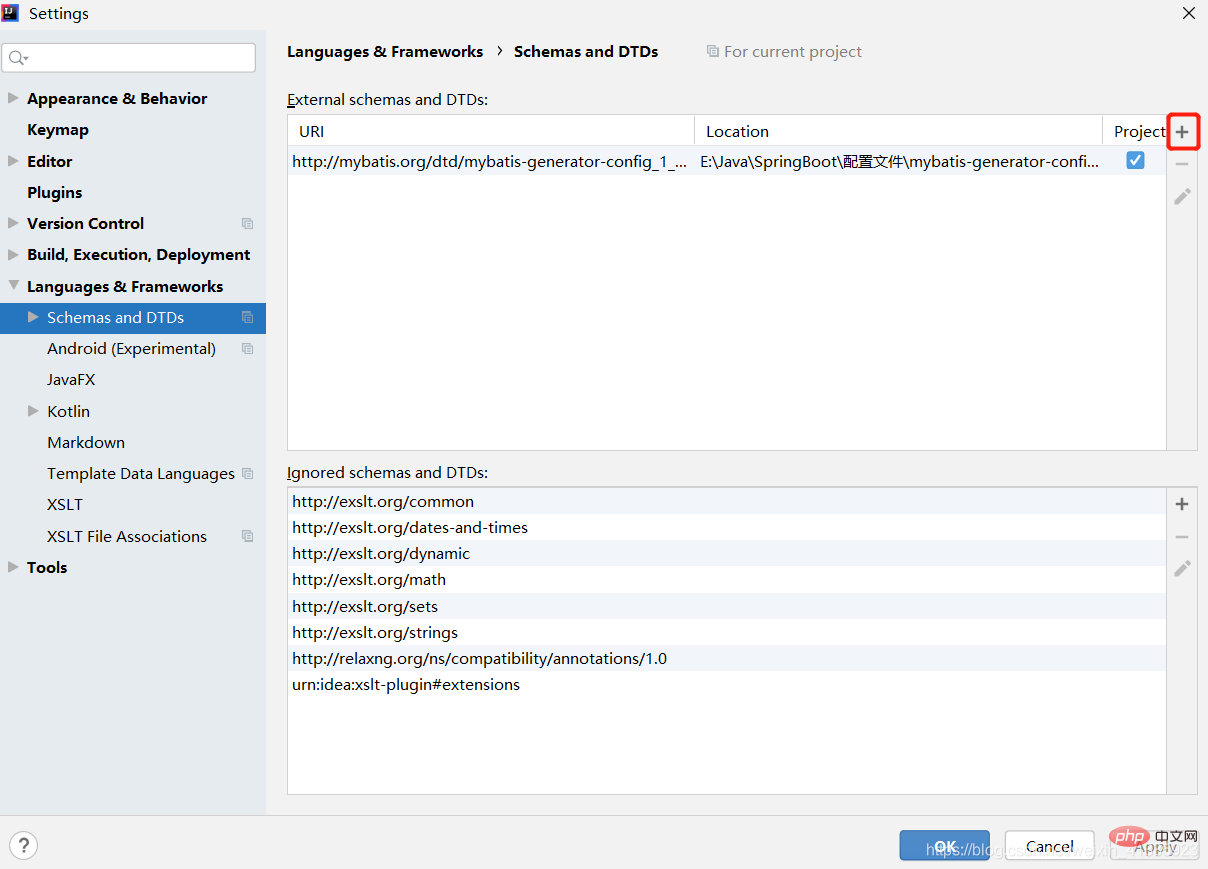
</generatorConfiguration>2.3 Add the DTD file of the generator configuration file
You can add it in File->Settings in the toolbar, or you can press alt shift directly in the file Automatically added.
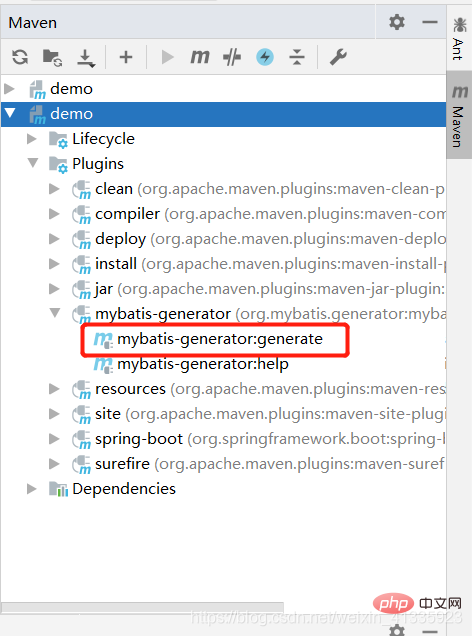
2.4 Run the generator plug-in to generate code
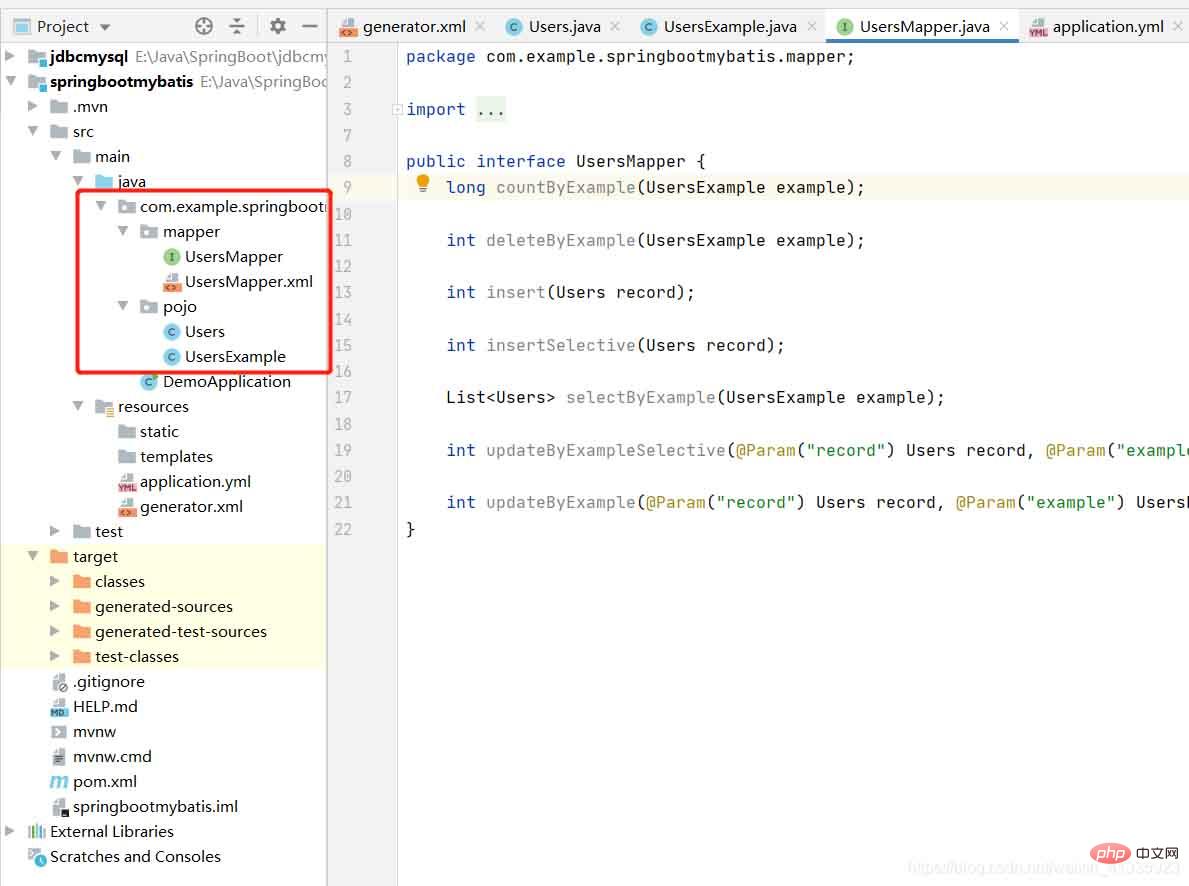
3.1 Add the coordinates of the resource copy plug-in
<!--配置资源拷贝插件-->
 <resources>
 <resource>
 <directory>src/main/java</directory>
 <includes>
 <include>**/*.xml</include>
 </includes>
 </resource>
 <resource>
 <directory>src/main/resources</directory>
 <includes>
 <include>**/*.yml</include>
 </includes>
 </resource>
 </resources>
3.2 Modify the startup class to add the @MapperScan annotation
package com.example.springbootmybatis;
import org.mybatis.spring.annotation.MapperScan;
import org.springframework.boot.SpringApplication;
import org.springframework.boot.autoconfigure.SpringBootApplication;
@SpringBootApplication
@MapperScan("com.example.springbootmybatis.mapper")//指定扫描接口与映射配置文件的包名
public class DemoApplication {
 public static void main(String[] args) {
 SpringApplication.run(DemoApplication.class, args);
 }
}mybatis: # 扫描classpath中mapper目录下的映射配置文件,针对于映射文件放到了resources目录下 mapper-locations: classpath:/mapper/*.xml # 定义包别名,使用pojo时可以直接使用pojo的类型名称不用加包名 type-aliases-package: com.example.springbootmybatis.pojo
5.1 Create page
<!DOCTYPE html>
<html xmlns:th="http://www.thymeleaf.org">
<link rel="shortcut icon" href="../resources/favicon.ico" th:href="@{/static/favion.ico}">
<head>
    <meta charset="UTF-8">
    <title>测试SpringBoot连接PostgreSQL数据库</title>
</head>
<body>
    <form th:action="@{/user/addUser}" method="post">
        <input type="text" name="userid"><br>
        <input type="text" name="username"><br>
        <input type="text" name="usersex"><br>
        <input type="submit" value="添加"><br>
    </form>
</body>
</html>5.2 Create Controller
5.2.1 PageController
package com.example.springbootmybatis.controller;
import org.springframework.stereotype.Controller;
import org.springframework.web.bind.annotation.PathVariable;
import org.springframework.web.bind.annotation.RequestMapping;
/**
 * 页面跳转Controller
 */
@Controller
public class PageController {
    /**
     * 页面跳转方法
     */
    @RequestMapping("/{page}")
    public String showPage(@PathVariable String page){
        return page;
    }
}5.2.2 UsersController
package com.example.springbootmybatis.controller;
import com.example.springbootmybatis.pojo.Users;
import com.example.springbootmybatis.service.UsersService;
import org.springframework.beans.factory.annotation.Autowired;
import org.springframework.stereotype.Controller;
import org.springframework.web.bind.annotation.PostMapping;
import org.springframework.web.bind.annotation.RequestMapping;
import org.springframework.web.bind.annotation.RestController;
/**
 * 用户管理Controller
 */
@RestController
@RequestMapping("/user")
public class UsersController {
    @Autowired
    private UsersService usersService;
    /**
     * 添加用户
     */
    @PostMapping("/addUser")
    public String addUsers(Users users){
        try {
            this.usersService.addUsers(users);
        } catch (Exception e){
            e.printStackTrace();
            return "error";
        }
        return "redirect:/ok";
    }
}5.3 Create Service interface implementation class Impl
/**
 * 用户管理业务层
 */
@Service
public class UsersServiceImpl implements UsersService {
    @Autowired
    private UsersMapper usersMapper;
    @Override
    @Transactional
    public void addUsers(Users users) {
        this.usersMapper.insert(users);
    }
}Interface
public interface UsersService {
    void addUsers(Users users);
}1. Mybatis Generator is automatically generated, and the database table with the same name will also be generated
[WARNING] Table Configuration users matched more than one table (test..users,performance_schema..users)
[WARNING] Cannot obtain primary key information from the database, generated objects may be incomplete
This question is answered on the MyBatis Generator official website.
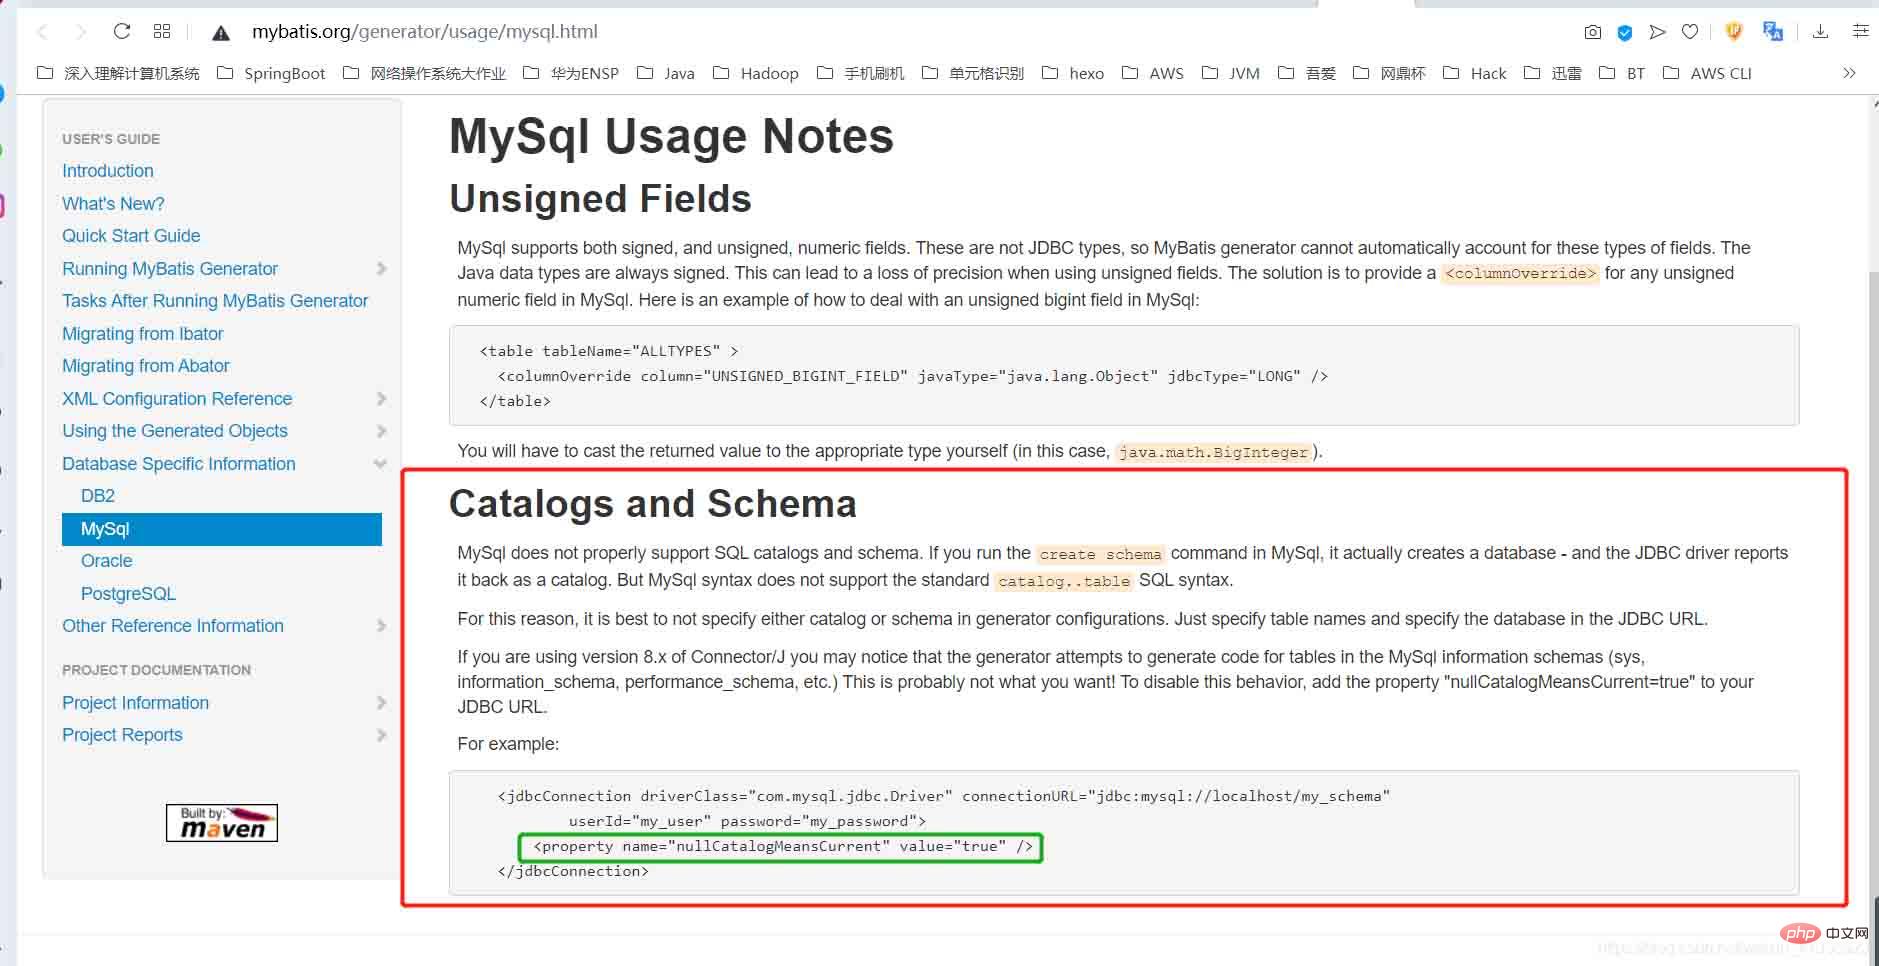
The translation is as follows: Mysql cannot properly support SQL catalogs and schema. Therefore, it is best not to specify catalog and schema in the generator configuration file. Just specify the name of the data table and specify the database in the JDBC URL. If you use the mysql-connector-java 8.x version, the generator will generate code for the tables of the information database (sys, information_schema, performance_schema) in MySql. To avoid this operation, please add the attribute "nullCatalogMeansCurrent=true" to the JDBC URL .
Modify the configuration file generator.xml
<jdbcConnection driverClass="com.mysql.cj.jdbc.Driver"
                        connectionURL="jdbc:mysql://localhost:3306/test?useUnicode=true&characterEnconding=utf-8&useSSL=false&serverTimezone=UTC"
                        userId="username" password="password">
            <property name="nullCatalogMeansCurrent" value="true"/>
</jdbcConnection>2. A 500 error appears on the page
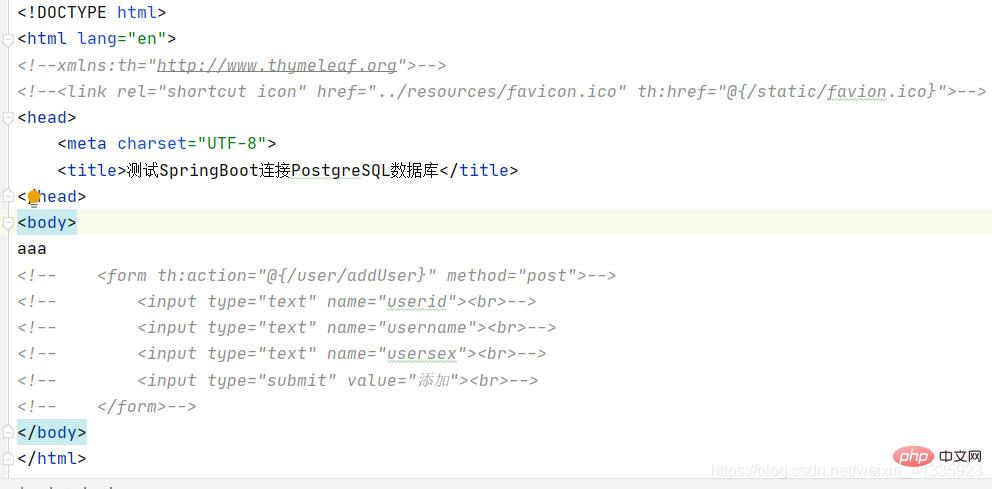
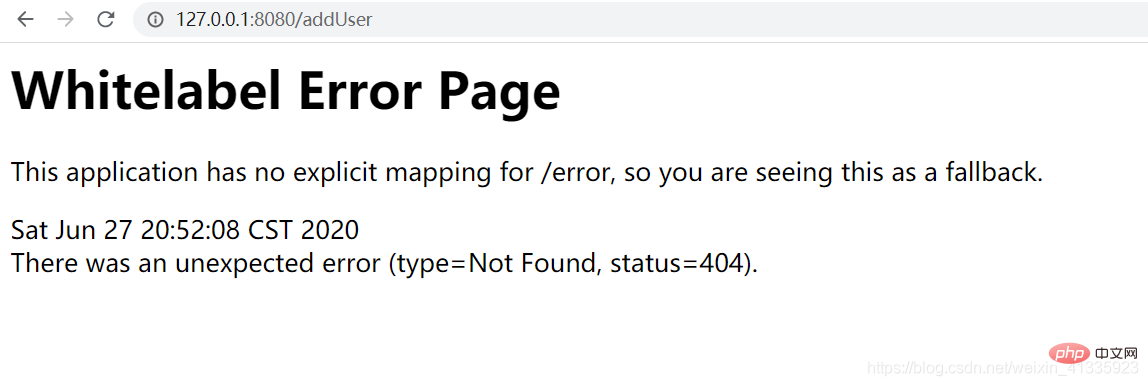
2020-06-27 14:23:42.459 ERROR 19676 --- [nio-8080-exec-1] o.a.c.c.C.[.[.[/].[dispatcherServlet] : Servlet.service() for servlet [dispatcherServlet] in context with path [] threw exception [Circular view path [addUsers]: would dispatch back to the current handler URL [/addUsers] again. Check your ViewResolver setup! (Hint: This may be the result of an unspecified view, due to default view name generation.)] with root cause
javax.servlet.ServletException: Circular view path [addUsers]: would dispatch back to the current handler URL [/addUsers] again. Check your ViewResolver setup! (Hint: This may be the result of an unspecified view, due to default view name generation.)
at org.springframework.web.servlet.view.InternalResourceView.prepareForRendering(InternalResourceView.java:210) ~[spring-webmvc-5.2.7.RELEASE.jar:5.2.7.RELEASE]
at
查了很多博客,但是都不是自己的问题,自己的问题是在pom.xml配置文件中的资源路径中,没有写所有,而是单独的xml和yml配置文件。要加载所有的静态资源。
<!--原本的-->
<!--资源文件的路径-->
 <resource>
 <directory>src/main/resources</directory>
 <includes>
 <include>**/*.yml</include>
                    <include>**/*.xml</include>
 </includes>
 <!-- <filtering>false</filtering>-->
 </resource>
<!--修改后的-->
<!--资源文件的路径-->
 <resource>
 <directory>src/main/resources</directory>
 <includes>
 <include>**/*.*</include>
 </includes>
 <!-- <filtering>false</filtering>-->
</resource>The above is the detailed content of How SpringBoot solves the problem of TypeAliases configuration failure. For more information, please follow other related articles on the PHP Chinese website!
 SpringBoot project building steps
 What is the difference between j2ee and springboot
 How to open bak file
 How to delete my WeChat address
 Introduction to the function of converting uppercase to lowercase in Python
 java configure jdk environment variables
 How to restore videos that have been officially removed from Douyin
 What is a TmP file


