1. Add dependencies and configure
to use users in Spring Security.
<dependency>
    <groupid>org.springframework.boot</groupid>
    <artifactid>spring-boot-starter-security</artifactid>
</dependency>
We now need to configure user information and permission configuration.
@Configuration
public class WebSecurityConfig extends WebSecurityConfigurerAdapter {
    // 指定密码的加密方式
    @SuppressWarnings("deprecation")
    @Bean
    PasswordEncoder passwordEncoder(){
        // 不对密码进行加密
        return NoOpPasswordEncoder.getInstance();
    }

    // 配置用户及其对应的角色
    @Override
    protected void configure(AuthenticationManagerBuilder auth) throws Exception {
        auth.inMemoryAuthentication()
                .withUser("admin").password("123").roles("ADMIN","USER")
                .and()
                .withUser("hangge").password("123").roles("USER");
    }

    // 配置 URL 访问权限
    @Override
    protected  void configure(HttpSecurity http) throws Exception {
        http.authorizeRequests() // 开启 HttpSecurity 配置
                .anyRequest().authenticated() // 用户访问所有地址都必须登录认证后访问
                .and().formLogin().permitAll(); // 开启表单登录
    }
}2. Write WebSocket configuration
@Configuration
@EnableWebSocketMessageBroker
public class WebSocketConfig implements WebSocketMessageBrokerConfigurer {

    @Override
    public void configureMessageBroker(MessageBrokerRegistry config) {
        // 设置消息代理的前缀,如果消息的前缀为"/queue",就会将消息转发给消息代理(broker)
        // 再由消息代理广播给当前连接的客户端
        //也可设置多个 broker,如:config.enableSimpleBroker("/topic","/queue");
        config.enableSimpleBroker("/queue");
        // 下面方法可以配置一个或多个前缀,通过这些前缀过滤出需要被注解方法处理的消息。
        // 例如这里表示前缀为"/app"的destination可以通过@MessageMapping注解的方法处理
        // 而其他 destination(例如"/topic""/queue")将被直接交给 broker 处理
        config.setApplicationDestinationPrefixes("/app");
    }

    @Override
    public void registerStompEndpoints(StompEndpointRegistry registry) {
        // 定义一个前缀为"/chart"的endpoint,并开启 sockjs 支持。
        // sockjs 可以解决浏览器对WebSocket的兼容性问题,客户端将通过这里配置的URL建立WebSocket连接
        registry.addEndpoint("/chat").withSockJS();
    }

}3. Write case code
1. Write entity
@Data
public class Chat {

    // 消息的目标用户
    private String to;

    // 消息的来源用户
    private String from;

    // 消息的主体内容
    private String content;

}2. Write Controller
@Controller
public class DemoController {

    @Autowired
    SimpMessagingTemplate messagingTemplate;

    // 处理来自"/app/chat"路径的消息
    @MessageMapping("/chat")
    public void chat(Principal principal, Chat chat) {
        // 获取当前登录用户的用户名
        String from = principal.getName();
        // 将用户设置给chat对象的from属性
        chat.setFrom(from);
        // 再将消息发送出去,发送的目标用户就是 chat 对象的to属性值
        messagingTemplate.convertAndSendToUser(chat.getTo(),
                "/queue/chat", chat);
    }

}4. Write page
Create the chat2.html page in the resources/static directory as a peer-to-peer chat page.
After the connection is successful, the subscribed address is "/user/queue/chat", which has more "/user" prefix than the address configured on the server. This is because the path prefix is automatically added to the SimpMessagingTemplate class. .
nbsp;html>
<meta>
<title>单聊</title>
<script></script>
<script></script>
<script></script>
<script>
var stompClient = null;
// 建立一个WebSocket连接
function connect() {
// 首先使用 SockJS 建立连接
var socket = new SockJS('/chat');
// 然后创建一个STOMP实例发起连接请求
stompClient = Stomp.over(socket);
// 连接成功回调
stompClient.connect({}, function (frame) {
// 订阅服务端发送回来的消息
stompClient.subscribe('/user/queue/chat', function (chat) {
// 将服务端发送回来的消息展示出来
showGreeting(JSON.parse(chat.body));
});
});
}
// 发送消息
function sendMsg() {
stompClient.send("/app/chat", {},
JSON.stringify({'content':$("#content").val(),
'to':$("#to").val()}));
}
// 将服务端发送回来的消息展示出来
function showGreeting(message) {
$("#chatsContent")
.append("<div>" + message.from+":"+message.content + "");
}
// 页面加载后进行初始化动作
$(function () {
// 页面加载完毕后自动连接
connect();
$( "#send" ).click(function() { sendMsg(); });
});
</script>
<div>
<div>
</div>
<div>
请输入聊天内容:
<input>
目标用户:
<input>
<button>发送</button>
</div>
</div>
5. Verification results
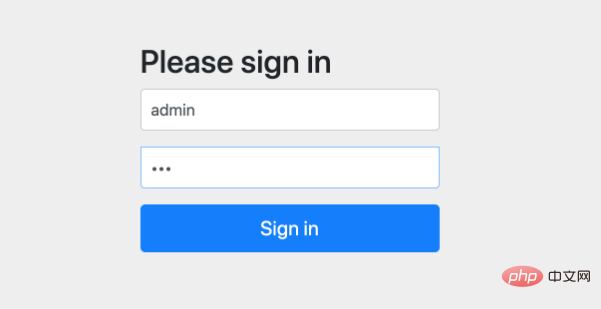
We used Spring Security and it will automatically jump to the default login page.

Here we configure two user information: admin/123, piao/123.


The above is the detailed content of How to use WebSocket to implement point-to-point messaging in SpringBoot. For more information, please follow other related articles on the PHP Chinese website!
 SpringBoot project building steps
 What is the difference between j2ee and springboot
 attributeusage
 How to restore normal printing when the printer is offline
 How to activate win7 professional version system
 How to obtain the serial number of a physical hard disk under Windows
 float usage in css
 What system is Honor?


