

Fix: Snipping Tool notification missing in Windows 11, 10

The screenshot tools Snip & Sketch on Windows are excellent. Microsoft has included many cool new features and shortcuts, making this tool almost indispensable for users. However, you may notice that no preview notification appears in the notification panel after taking a screenshot, which can be caused by many reasons. So, no need to waste any more time and just follow these solutions to find a quick fix.
Fix 1 – Check notification settings
You may have blocked Snip & Sketch notification settings.
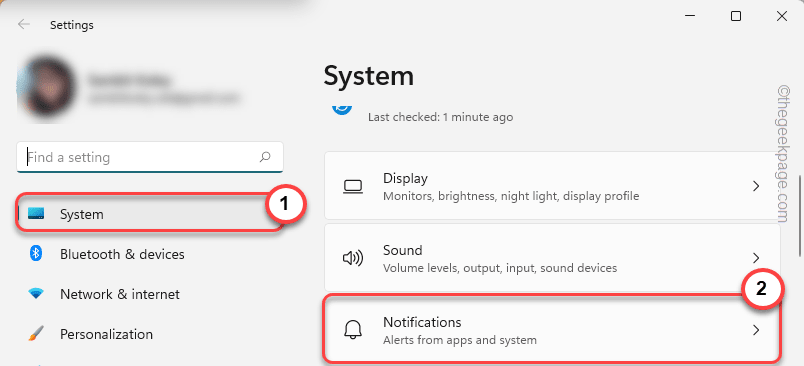
1. You must open settings. So, press the Windows key and the I key at the same time.
2. Now, go to “System” from the left pane.
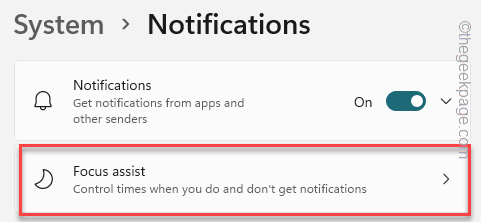
3. On the right side, click "Notifications" among all options.
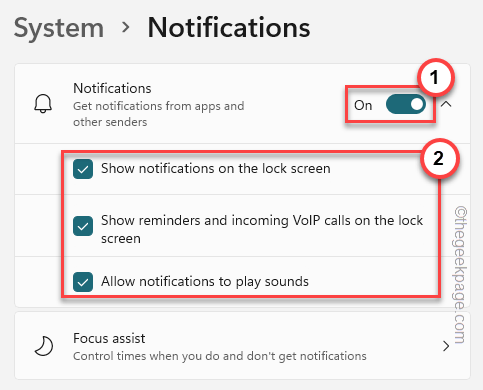
4. Just make sure the "Notifications" option is "On" and expand it.
5. Later, make sure check these options.
在锁定屏幕上显示通知允许通知播放声音
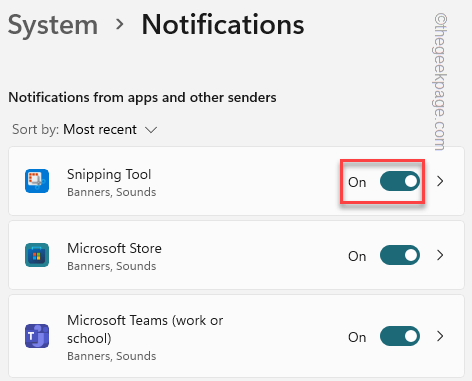
#6. Now, you have to make sure to allow Snip & Sketch notifications.
7. Just go down through the same window and open the "Snipping Tool" option "Open".
After that, close the Settings window and take a snapshot using the Win key Shift S keys simultaneously.
Check if the preview appears on the notification panel.
Fix 2 – Turn off Focus Assist
Focus Assist turns off notifications on your computer.
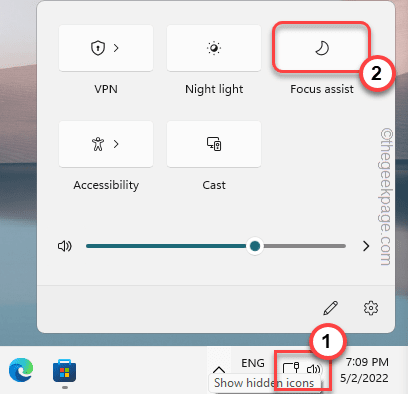
1. You will notice several icons in the upper left corner of the taskbar.
2. Click the network adapter icon or the sound icon once to open settings.
3. Now you can see " Focus Assist " in the pane.
4. Make sure "Focus Assist" is turned off.
#Please take a random screenshot on your system after disabling Focus Assist. If this solution fails, move on to the next solution.
Alternative Steps –
If you don’t see Focus Assist on the taskbar, you can disable it from Settings.
1. Open settings.
2. Then, click on the first setting "System".
3. After that, click "Notification".
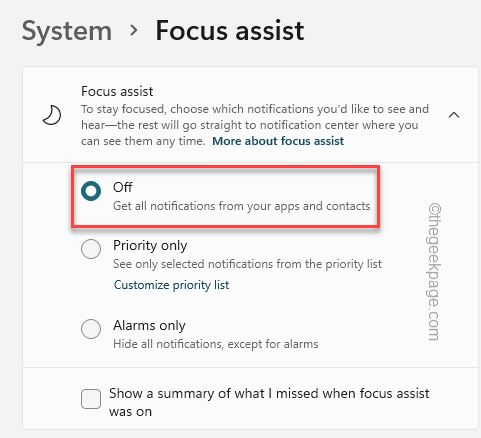
4. Here you will find the "Focus Assist" setting. click it.
5. In the focus assist settings, set it to "Off" to turn it off completely.
After that, close the settings and check.
Fix 3 - Reset Snip & Sketch
If changing Snip & Sketch notification settings doesn't work, try resetting the app.
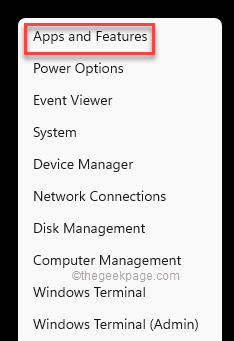
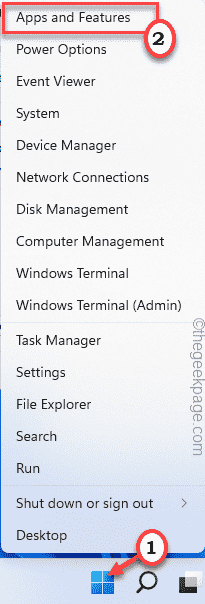
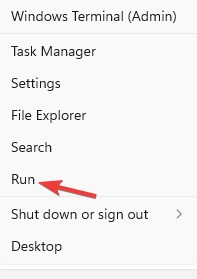
1. Press the Win key and X key once.
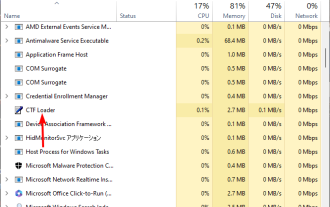
2. Then, click "Apps and Features".
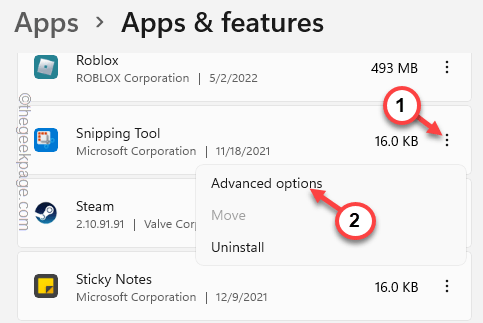
3. Now, scroll down the right pane of the screen and you will notice the " Snip & Sketch " application.
[
NOTE -
You may not see the Snip & Sketch tool in Settings. Instead, you may notice "Snipping Tool". It's the same.
]
4. Just click " ⋮ " next to the app name, then click "Advanced Options".
#5. You should try to repair the application before resetting.
6. Click "Repair" to start the repair process.
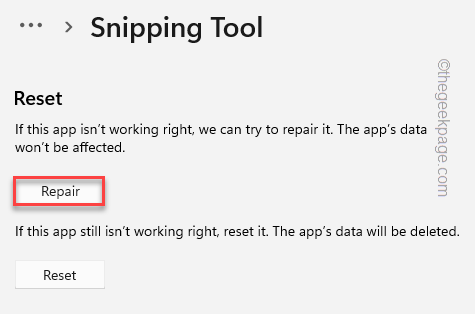
Allow some time to fix the application. After the repair process is completed, try taking a screenshot using the shortcut keys.
If this works, you don't need to follow any further instructions.
7. Otherwise, return to the settings page.
8. Here, click on the “Reset” option.
9. Click on the "Reset" option again to continue resetting the application.
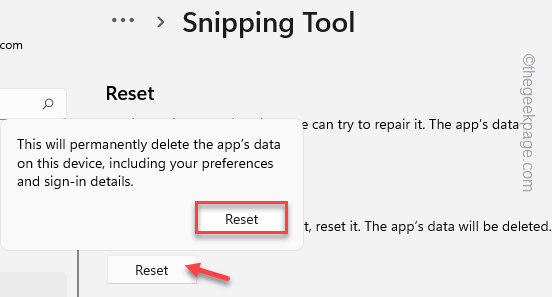
After resetting the Snip & Sketch app, you will no longer have notification issues.
Fix 4 – Update Snip & Sketch App
Update Snip & Sketch App.
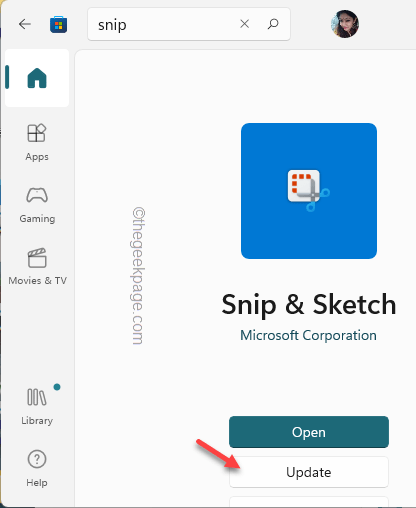
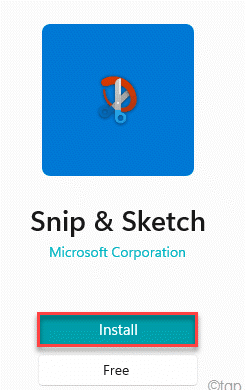
1. Open the Microsoft Store.
2. Use the search box to search for the "Snip" application.
3. After opening the Snip & Sketch app, you will see the "Update" option if there is an update.
Just click on it to update the app.
After updating the app, check if you can preview the captured screenshots.
Fix 5 – Uninstall and Reinstall Snip & Sketch
If all else fails, you can only uninstall and reinstall the tool.
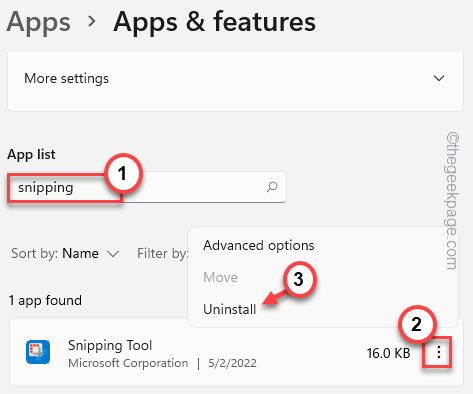
1. First, you can right-click the Windows icon and then click "Apps and Features".
#2. Look for a search box on the right. Just type " Snipping " into the search box.
3. Just click on the three-dot menu and then click "Uninstall" to uninstall the application.
4. Click "Uninstall" again to confirm.
# After uninstalling the app, close the settings.
1. Open a store.
2. Just enter " snip " in the search box.
3. Next, click " Snip & Sketch " to open it in the store.
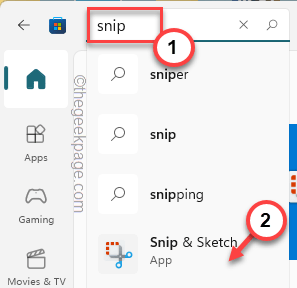
4. Then, click on “Install” to install the Snip & Sketch app on your system.
After installing Snip & Sketch, close the store.
Check later if this works for you.
Fix 6 – Disable Print Screen key use
The Print Screen key may be used as a hotkey for Snip & Sketch.
1. Open the settings page.
2. In the left pane, click "Accessibility".
3. Now, scroll down and click on “Keyboard” settings.
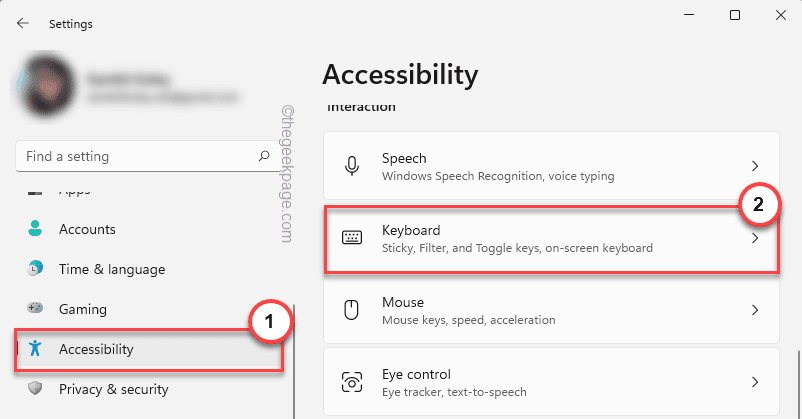
4. Look carefully for this option "Use print screen button to open screenshot" and set it to "Off" .
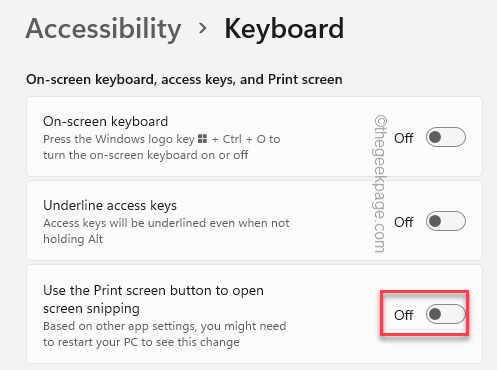
After that, close the Settings page and restart your computer.
Test if this solves your problem.
Alternative Tips–
1. Sometimes third-party applications that can take screenshots block the Win Shift S shortcut key. Like – CorelDRAW Graphics Suite, MaxTo and more.
So, uninstalling these apps may help you solve the problem.
The above is the detailed content of Fix: Snipping Tool notification missing in Windows 11, 10. For more information, please follow other related articles on the PHP Chinese website!

Hot AI Tools

Undresser.AI Undress
AI-powered app for creating realistic nude photos

AI Clothes Remover
Online AI tool for removing clothes from photos.

Undress AI Tool
Undress images for free

Clothoff.io
AI clothes remover

Video Face Swap
Swap faces in any video effortlessly with our completely free AI face swap tool!

Hot Article
Hot Tools

Notepad++7.3.1
Easy-to-use and free code editor

SublimeText3 Chinese version
Chinese version, very easy to use

Zend Studio 13.0.1
Powerful PHP integrated development environment

Dreamweaver CS6
Visual web development tools

SublimeText3 Mac version
God-level code editing software (SublimeText3)
Hot Topics
 1387
1387
 52
52

 Windows 11 doesn't recognize Bootrec? Apply this simple fix
May 20, 2023 pm 01:50 PM
Windows 11 doesn't recognize Bootrec? Apply this simple fix
May 20, 2023 pm 01:50 PM
The boot sector is a critical part of the drive that takes over shortly after the computer boots. When you have a problem, bootrec is here to help. But what should you do if bootrec is not recognized in Windows 11? The boot sector contains the MBR or Master Boot Record, which helps locate the operating system on the drive and load it. Moreover, its issues may prevent you from booting Windows 11 efficiently or at all. Speaking of issues, many are reporting Bootrec/Fixboot access denied messages and we have detailed this issue in a separate tutorial. In this case, it is recommended that you run the bootrec command to eliminate this issue. If you encounter when running the command
 How many processes should be running on Windows 11?
May 24, 2023 pm 08:12 PM
How many processes should be running on Windows 11?
May 24, 2023 pm 08:12 PM
Windows 11 is a great operating system, but it can sometimes be slow and not work properly. If you are experiencing performance issues, it may be the number of running processes. One of the simplest ways to optimize your system is to adjust the number of processes running on your computer at any given time. If you've ever had your computer freeze or crash because you were running too many programs at once, this article is for you. What background tasks can I turn off? Background tasks run in the background of your device and are very important as they help keep your system stable. They include updates, synchronization and other services. While some background tasks can be useful, others take up space on your computer without providing any real benefit. The background tasks that can be turned off vary from user to user. Take us as
 What to do if a black screen appears when taking a screenshot on a win10 computer_How to deal with a black screen when taking a screenshot on a win10 computer
Mar 27, 2024 pm 01:01 PM
What to do if a black screen appears when taking a screenshot on a win10 computer_How to deal with a black screen when taking a screenshot on a win10 computer
Mar 27, 2024 pm 01:01 PM
1. Press the win key + r key, enter regedit, and click OK. 2. In the opened registry editor window, expand: HKEY_LOCAL_MACHINESYSTEMCurrentControlSetControlGraphicsDriversDCI, select Timeout on the right and double-click. 3. Then change 7 in [Numeric Data] to 0, and confirm to exit.
 iPhone screenshots not working: How to fix it
May 03, 2024 pm 09:16 PM
iPhone screenshots not working: How to fix it
May 03, 2024 pm 09:16 PM
Screenshot feature not working on your iPhone? Taking a screenshot is very easy as you just need to hold down the Volume Up button and the Power button at the same time to grab your phone screen. However, there are other ways to capture frames on the device. Fix 1 – Using Assistive Touch Take a screenshot using the Assistive Touch feature. Step 1 – Go to your phone settings. Step 2 – Next, tap to open Accessibility settings. Step 3 – Open Touch settings. Step 4 – Next, open the Assistive Touch settings. Step 5 – Turn on Assistive Touch on your phone. Step 6 – Open “Customize Top Menu” to access it. Step 7 – Now you just need to link any of these functions to your screen capture. So click on the first
 HP scanner not working on Windows 11? 4 simple tips to try
May 27, 2023 pm 09:10 PM
HP scanner not working on Windows 11? 4 simple tips to try
May 27, 2023 pm 09:10 PM
HP scanner not working on Windows 11 is a common problem and is often encountered after Windows 11 upgrade. Scanners from other brands such as Canon, Epson, and Panasonic also have similar problems. However, scanners are prone to errors, so sometimes they stop working altogether. Apart from the recent upgrade to Windows 11, this issue can also occur due to outdated or faulty drivers, corrupted system files, corrupted Windows updates due to errors, etc. Initial Troubleshooting As with any other external device, there are some basic things you need to check first before starting the actual software tweaks. First, make sure your scanner or multifunction printer is turned on. At least one of the buttons on the printer panel should light up.
 How to take screenshots on Redmi 13c?
Mar 04, 2024 pm 09:13 PM
How to take screenshots on Redmi 13c?
Mar 04, 2024 pm 09:13 PM
Recently, many consumers are considering replacing their mobile phones, and Redmi13C is a very cost-effective choice. The performance configuration of this phone is excellent. In order to facilitate daily use, let me briefly introduce how to take screenshots on Redmi 13C. Let’s find out together! How to take a screenshot on Redmi 13c 1. Shortcut key to take a screenshot: Press the power button and volume down key of the Redmi phone at the same time to take a screenshot. 2. Gesture screenshot: Enter the settings of the Redmi phone, find "More settings", find and click "Gesture and key shortcuts", then enable the "three-finger pull-down" operation and set it to take a screenshot. In this way, when you need to take a screenshot, you only need to slide down on the screen with three fingers to take a screenshot. 3. Take a screenshot of the notification bar: from the phone screen
 How to send Mac screenshot to WeChat
Feb 06, 2024 am 09:55 AM
How to send Mac screenshot to WeChat
Feb 06, 2024 am 09:55 AM
How to send a Mac screenshot to WeChat? First, find launchpad on the desktop, open it, find WeChat, then click WeChat to log in, and finally enter the shortcut key setting window in the pop-up preferences. How to send Mac screenshots to WeChat 1. Find launchpad on the desktop. 2. Then find WeChat. 3. Click to log in to WeChat. 4. After logging in, find the WeChat option in the upper left corner of the computer page and open it. 5. Then go to the preference settings option in the pop-up menu to enter the shortcut settings window. Finally, find the screenshot function in the shortcut key settings page and set the keys.
 How to Take Screenshots on Lenovo ThinkPad X13 Notebook: Shortcut Key Guide
Jan 01, 2024 pm 09:11 PM
How to Take Screenshots on Lenovo ThinkPad X13 Notebook: Shortcut Key Guide
Jan 01, 2024 pm 09:11 PM
Screenshotting is a very common feature on computers, as it makes it easy to capture and share what's on your screen. There are many ways to take screenshots on a computer. Now, let’s introduce the commonly used screenshot methods on Lenovo ThinkPad X13 notebook. Lenovo ThinkPad X13 screenshot method introduction Regarding the screenshot method on the computer, there are many options available. Here, we will focus on the methods of taking screenshots with ThinkPad X13’s shortcut keys and taking screenshots with mainstream software. ThinkPadX13 provides a simple shortcut key screenshot function. You only need to press the Fn key and the PrtSc key to save a screenshot of the current screen contents to the clipboard. After that you can open any picture editing software like Paint