
I used to use 1.8.2 to build my blog, and it was still installed on the machine. I took it over and used it. Of course, the new version will fix many bugs. , try to learn newer versions as much as possible, this article should be regarded as an introductory article.
# 下载django
pip install django==1.8.2 -i https://pypi.mirrors.ustc.edu.cn/simple/
# 创建文件夹并启动虚拟环境
virtualenv django_demo
cd django_demo
source bin/activate
# 创建存放django文件的文件夹
mkdir learn_django
cd learn_django
# 创建项目
python django-admin.py startproject django_web
# 创建应用
python manage.py startapp django_app
# 编辑django_web中的settings.py文件,将django_app加入到apps中
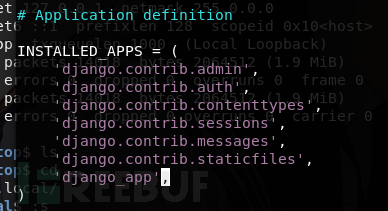
This completes the most basic construction
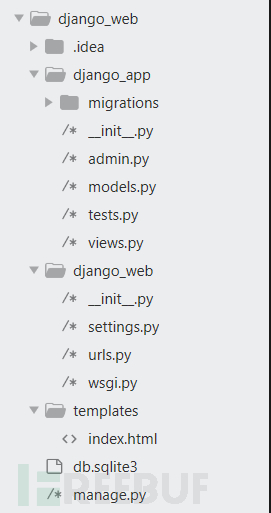
Run the service and take a look

MVC is a well-known pattern: model (model ), view (view), controller (controller)
The user enters the url on the page, transfers it to the url controller, and then matches the corresponding view function according to the url, viwe will go to models Get the data, and then the models get the data from the database and return it to the view. The view returns the data to be displayed to the template, and then outputs it to the page.
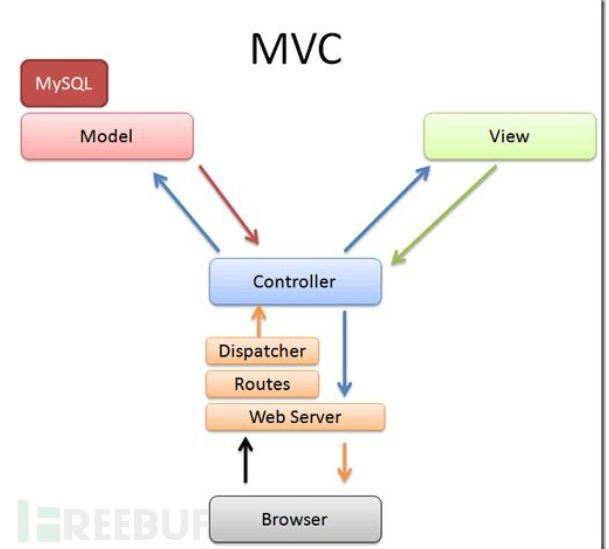
Django is also an MVC framework, but in Django, the part where the controller accepts user input is handled by the framework itself, so django pays more attention to Model, view, and templates are the MTV model.
After requesting a url, match the corresponding view area, the view goes to models (a level of managed data) to find the data we want, then loads the data into the templates layer, and then presents it to us. 
The two are very similar. It can be said that MTV is based on MVC.
Create template layer
Of course, if you only want simple data to be displayed on the Web page, There is no need to create a template, just return it directly in the views function, but it is better to formalize it.
Create the templates folder in learn_django (it will be created automatically if it is a django project created by IDE). This is our template folder to add a visual template index.html
    <title>Django Learning</title>


    <h2>Hellow,Django!</h2>>
Create the view layer
The view layer is usually a view function that matches the url and returns the corresponding Web page passed in
from django.shortcuts import render
# Create your views here.
def index(request):
    return render(request,'index.html')
Create url layer
We can build a URL mapping layer to find the corresponding view function based on the incoming URL and return the corresponding template rendering result
from django.conf.urls import include, url
from django.contrib import admin
from django_app.views import index
urlpatterns = [
    url(r'^admin/', include(admin.site.urls)),
# 用正则去对url进行匹配,然后将视图函数匹配给相应的url
    url(r'^index/',index),
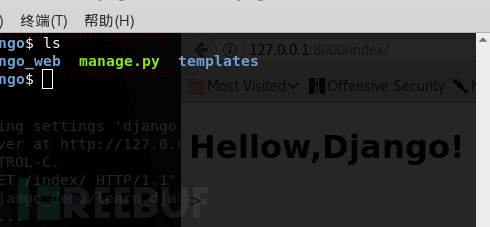
Run the service, the default is port 8000
python manage.py runserver

Some students will have some problems at this step Some minor problems are that templates cannot be returned. The situation may be different between Windows and Linux. In Linux, the templates directory needs to be placed in the app directory to find it.
The reason lies in the template path setting problem in settings.py. If the templates directory is placed in the project root directory, just add the templates path in settings.

The previous section talks about static pages. If you need to implement dynamic ones, then We have to talk about the interaction with database storage, and models need to be written accordingly to obtain data.
mysql django
Install the corresponding database interface driver. There are roughly three types: mysqldb, pymysql, and mysqlclient.
By default, the sqlite3 database in the web root directory is used

Modify it to the corresponding mysql information
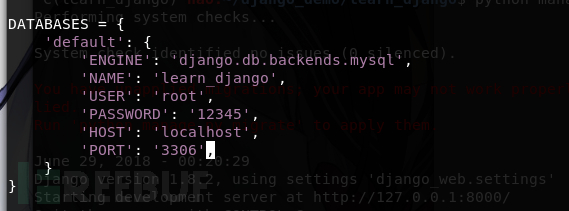
Create mysql database, specify the character set as UTF-8

models layer

Create the corresponding relationship between model objects and database fields
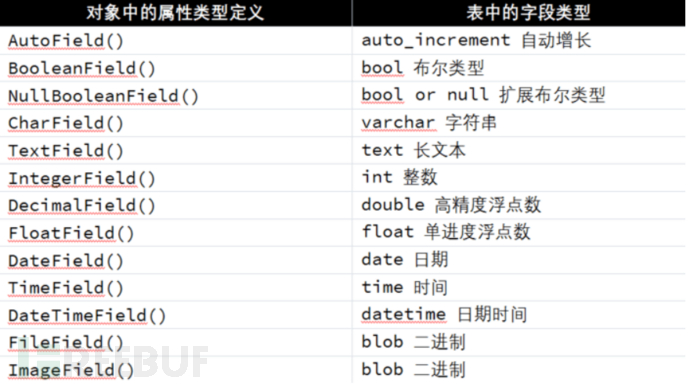
字段定义中的特殊属性

from django.db import models
# Create your models here.
class DjangoTest(models.Model):
    text = models.CharField(max_length=20)

生成迁移文件并执行迁移
python manage.py makemigrations
python manage.py migrate
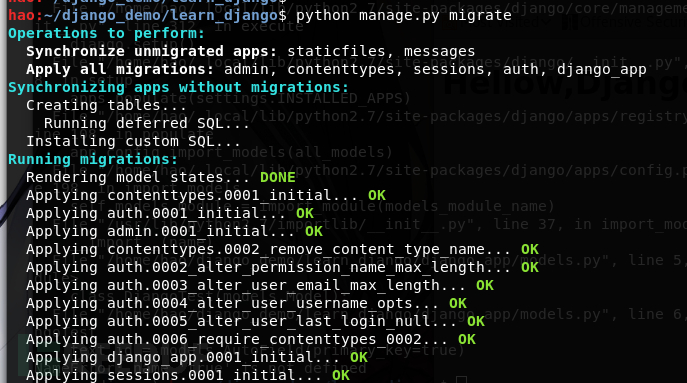
查看创建的信息 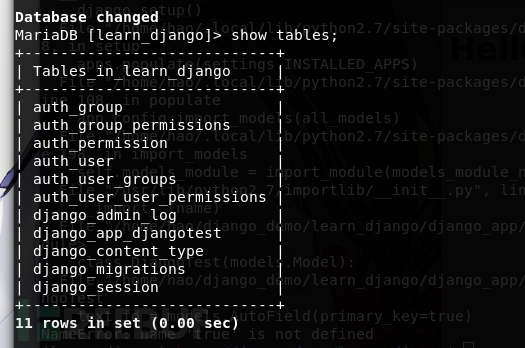
建立一些测试数据 
在去创建views层之前,我们先对models层进行测试,看是否提取出了数据
可以用两种方法:
1、直接在models中填写提取数据
也可以写在view层,这个无所谓
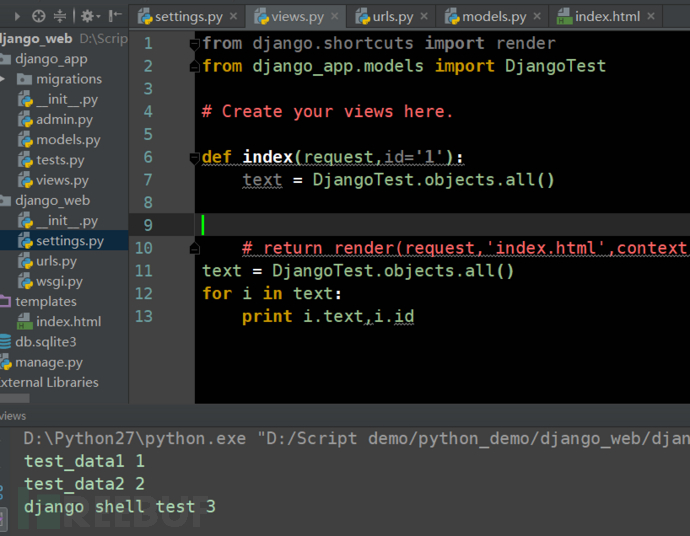
运行后可能会出现,因为在项目中单独运行python文件,需要搜索环境变量,而并没有指定,所以需要进行设置
django.core.exceptions.ImproperlyConfigured: Requested setting DEFAULT_INDEX_TABLESPACE, but settings are not configured. You must either define the environment variable DJANGO_SETTINGS.....
pycharm解决方法:https://blog.csdn.net/u011013781/article/details/52155761
2、使用django shell
# 打开django shell
python manage.py shell
import django
django.setup()
from django_app.models imoort DjangoTest as dj
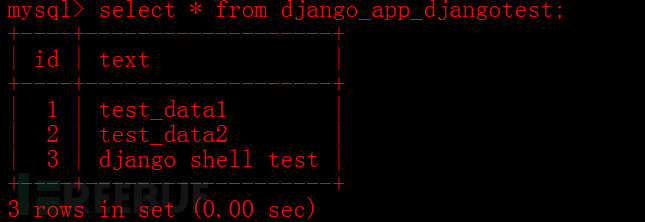
# 添加数据,结果见下方图片
a = dj(text="django shell test")
a.save()
# 查询数据,get查询单个数据,filter查询多个模型,all查询
dj.objects.all()
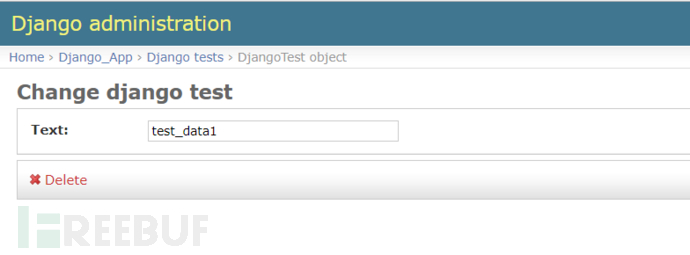
django admin可以帮我们快速管理后台数据
# 创建管理员 python manage.py createsuperuser ``` 
将我们的模型注册到admin中,打开admin.py

将我们的模型注册到admin中,打开admin.py
from django.contrib import admin
# Register your models here.
from models import DjangoTest
admin.site.register(DjangoTest)
这样就可以在管理员界面管理模型
view与url层
当用户请求django站点上的某个页面时,django会使用路由解析模块来解析路由,默认是app目录下的urls.py。
django加载该路由解析模块,并寻找可用的urlpatterns,这是一个python列表,然后django依次匹配列表中每个url模式,在遇到第一个与请求相匹配的模式时停下来,然后调用对应的视图,视图是一个python函数(或者是一个基于类的视图)。
一个简单的路由选择模块示例:
from django.conf.urls import url
from . import views
urlpatterns = [
    url(r'^articles/2003/$', views.special_case_2003),
    url(r'^articles/([0-9]{4})/$', views.year_archive),
    url(r'^articles/([0-9]{4})/([0-9]{2})/$', views.month_archive),
    url(r'^articles/([0-9]{4})/([0-9]{2})/([0-9]+)/$', views.article_detail),
]
与之对应的请求的例子:
第三个模式将与请求/articles/2005/03/匹配。Django 将调用函数views.month_archive(request, '2005', '03')。
/articles/2005/3/ 不匹配任何URL 模式,因为列表中的第三个模式要求月份应该是两个数字。
/articles/2003/ 将匹配列表中的第一个模式不是第二个,因为模式按顺序匹配,第一个会首先测试是否匹配。请像这样自由插入一些特殊的情况来探测匹配的次序。
/articles/2003 不匹配任何一个模式,因为每个模式要求URL 以一个斜线结尾。
最后一个模式将被匹配到/articles/2003/03/03/。Django 将调用函数views.article_detail(request, '2003', '03', '03')。
根据url后边的数值,赋予相应的参数:id
urls.py
from django.conf.urls import include, url
from django.contrib import admin
from django_app.views import index
urlpatterns = [
    url(r'^admin/', include(admin.site.urls)),
    url(r'^index/(?P<id>[0-9])/$', index),
]
</id>
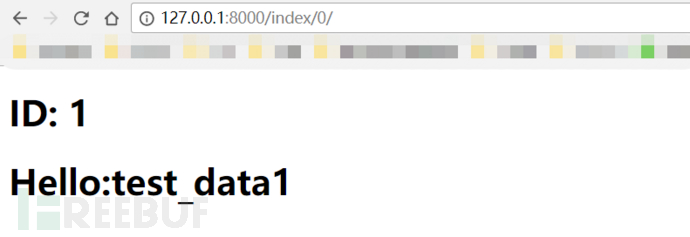
将对于的id参数代入查询获取数据列表中指定索引的值(忽略这的一点小细节错误)
views.py
from django.shortcuts import render
from django_app.models import DjangoTest
# Create your views here.
def index(request,id):
    text = DjangoTest.objects.all()
    iden = int(id)
    context = {'text':text[iden]}
    return render(request,'index.html',context)
模版层
模版层语法参考

    <meta charset="UTF-8">
    <title>Django test</title>


        <h2>ID: {{ text.id }}</h2>
        <h2>Hello:{{ text.text }}


</h2>实际运行效果

修复前
from django.shortcuts import render
from django.contrib.auth import authenticate, login
import django
django.setup()
# Create your views here.
def index(request):
    if request.method == 'GET':
        return render(request,'index.html')
    else:
        username = request.POST['username']
        password = request.POST['password']
        user = authenticate(username=username,password=password)
        if user is not None:
            if user.is_active:
                login(request, user)
                template = 'Hello {user}! , You can set your email is:' + request.POST.get('email')
                return render(request, 'index.html', {"value": template.format(user=request.user)})
            else:
                info = "The password is valid, but the account has been disabled!"
                return render(request, 'index.html', {"value": info})
        else:
            info = "The username and password were incorrect."
            return render(request, 'index.html', {"value": info})
如果没有添加认证选项,即使在原代码上做了更改,返回的用户也将永远是匿名用户。
由于我之前已经创建了一个超级用户(用户名:admin,密码:admin),因此可以直接使用该用户进行身份认证。
认证之后返回登录用户的用户名,我们可以自己通过post方法传入一个邮箱地址上去作为临时地址,如果用户名信息出现任何错误,返回相应的错误信息。
使用django认证系统
User对象是认证系统的核心,默认user的基本属性有username、password、email.....
代码中邮箱信息直接通过format拼接在了字符串中,然后展示在页面里,我们可以通过以下payload来获取敏感数据,将user变量中的password属性 作为变量信息进行拼接,从而进行获取
payload: {user.password}

修复后
index.html
将其他的文本信息直接存放在模版中
nbsp;html>


    <meta>
    <title>Django test</title>


    <h2>Hello, Django!</h2>
    <h3>hello {{ user }}, You can set your email is:{{ value }}</h3>


views.py
.....
email = request.POST.get('email')
return render(request, 'index.html', {"value": email})
...测试与修复前
只是简单的接收post参数值,然后让其显示在页面上
views.py

def index(request):
    if request.method == 'GET':
        return render(request,'index.html')
    else:
        info = request.POST.get('info')
        return render(request,'index.html',{"value":info})

index.html


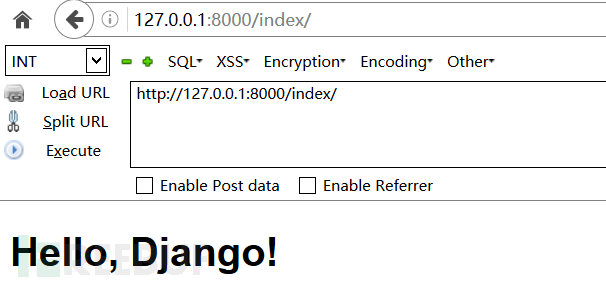
    <h2>Hello, Django!</h2>
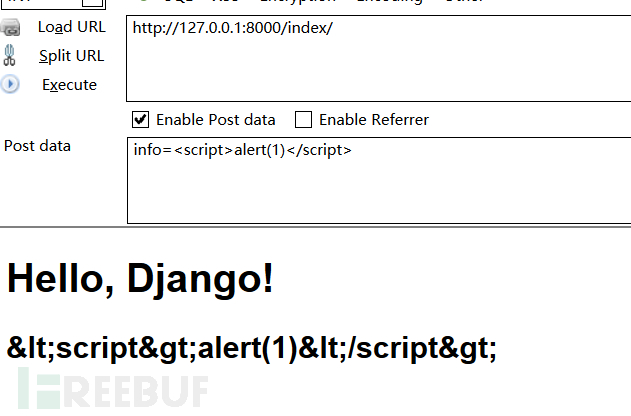
<h3>{{ value }}</h3>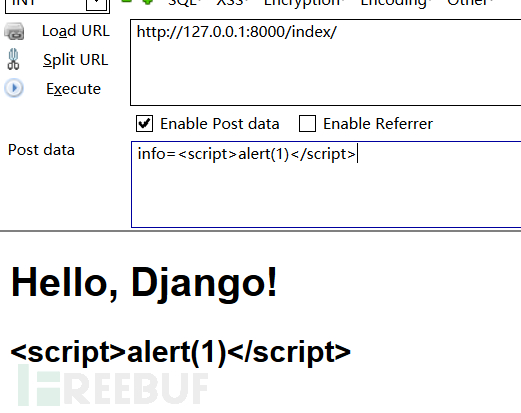 当键入payload时,并没有预想的弹窗,因为django自动为开发者提供了escape功能,让html代码在render之前先进行转义,然后再显示出来。
除了自动开启的escape,还有safe、autoescape、make_Safe等
autoescape测试
    {% autoescape off %}
    <h3>{{ value }}</h3>
    {% endautoescape %}
当其值为off时,即存在xss漏洞
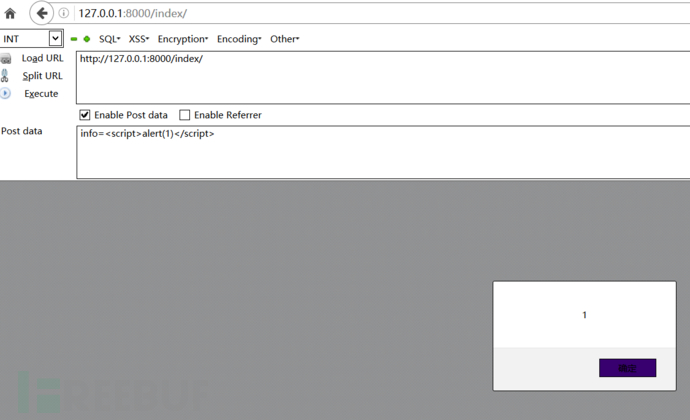
safe测试
    <h2>Hello, Django!</h2>
<h3>{{ value | safe }}</h3>通过safe关闭了模版的安全机制,出现XSS漏洞
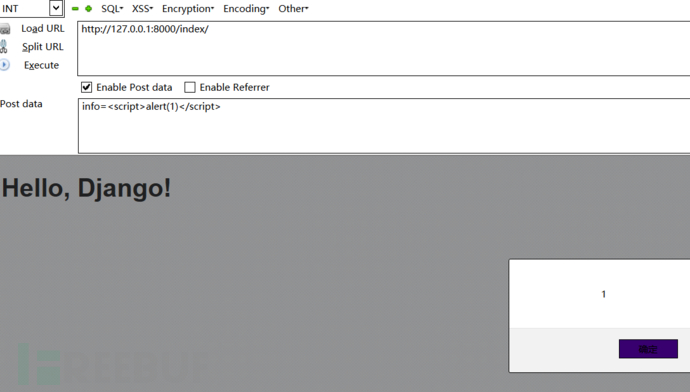
还有几种情况也可能存在XSS:
1、var mystr = "\{ \{ value | escapejs \} \}"
2、safe、make_safe、autoescape
3、DOM型XSS
4、HttpResponse返回动态内容
修复后
import cgi
# Create your views here.
def index(request):
    if request.method == 'GET':
        return render(request,'index.html')
    else:
        info = request.POST.get('info')
        info = cgi.escape(info)
        return render(request,'index.html',{"value":info})
使用cgi模块需要注意:
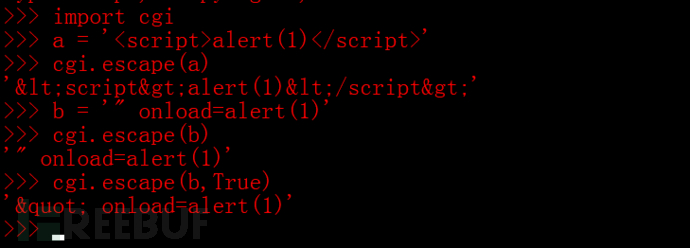
设为True,让其转义尽可能多的导致逃逸的字符。
Django QuerySet
查看django queryset执行的SQL
from django_app.models import DjangoTest as dj
print dj.objects.all().query

得到
SELECT `django_app_djangotest`.`id`, `django_app_djangotest`.`text` FROM `django_app_djangotest`
简化之后就是
SELECT id,text FROM django_app_djangotest;

extra实现别名、条件、排序等
以select为例:
tag = dj.objects.all().extra(select={"tag_id":'id'})
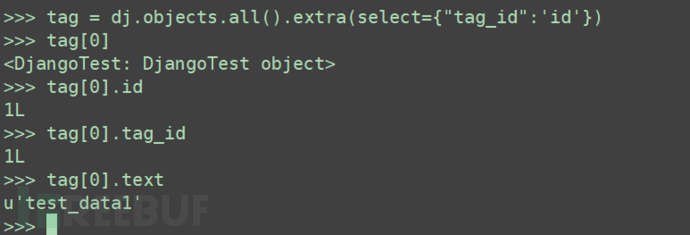
以where为例:
在extra中,可以使用原生SQL语句作为当前的where参数进行查询。
条件为id=1,结果即查询出了一条数据
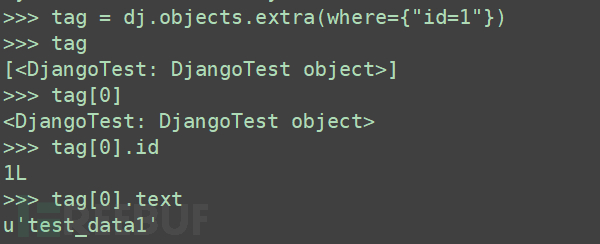
raw方法实现原生的SQL语句查询
a = dj.objects.raw('SELECT id,text FROM django_app_djangotest ')
raw()方法支持索引访问(a[0])
也可以打印当前赋予的这个变量a都有哪些方法
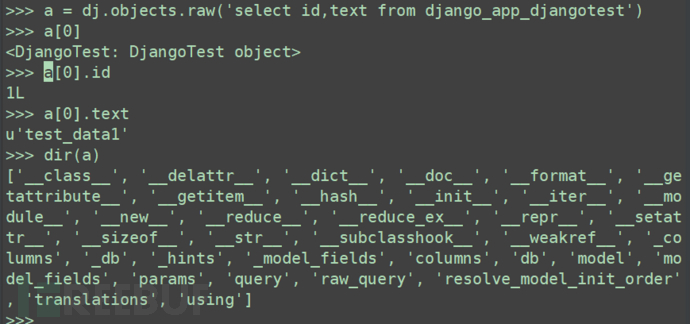

直接利用API来查询数据
django.connection

MySQL API
诸如mysqldb、pymysql、mysqlclient,在views层写好sql语句,根据传入的参数值来查询,得出结果后返回给模版就可以了
修复前
views.py
from django.shortcuts import render
from django_app.models import DjangoTest as dj
# Create your views here.
def index(request):
    if request.method == 'GET':
        return render(request,'index.html')
    else:
        id = request.POST.get('id')
        tag = dj.objects.extra(where={'id={}'.format(id)})[0].text
        return render(request,'index.html',{"value":tag})
接下来就可以进行愉快的测试了
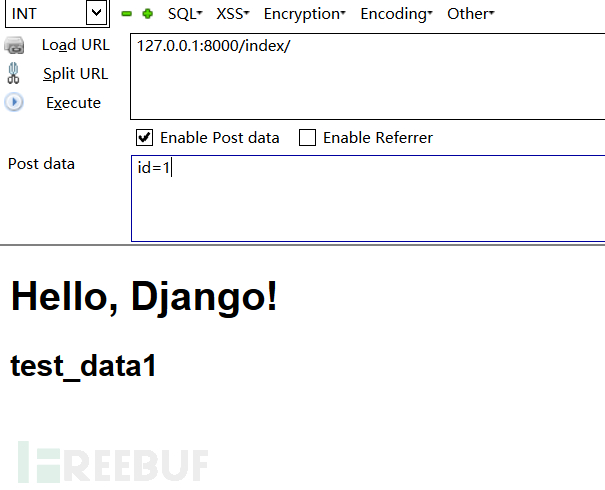
测试篇
a = dj.objects.extra(where={'id=1'})
SELECT `django_app_djangotest`.`id`, `django_app_djangotest`.`text` FROM `django_app_djangotest` WHERE (id=1asdasdad)
先输入payload查看django传递回数据库的sql语句是什么

更改后的payload

 后边又构造测试了几个,SQL语句是正确,但是django传入SQL语句时会提示里边的语法问题,并且就算语法正确,也返回不了数据。(这其实有点问题,后边做完一想,没拿到mysql shell里边去测,终端里边测对了,再拿过来,这里有点懒没再弄)
又因为id的值,从而在页面中显示不出来,所以这时候想到了延时注入

在这里调用a的时候会延时3秒

我们在Web页面中进行测试
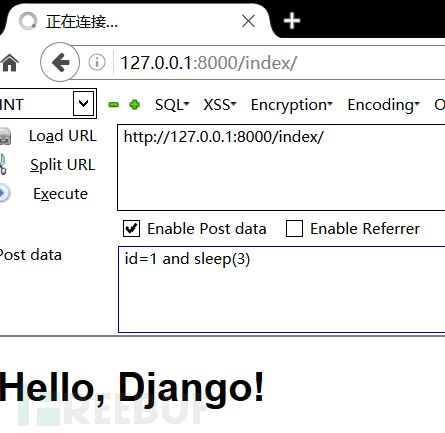
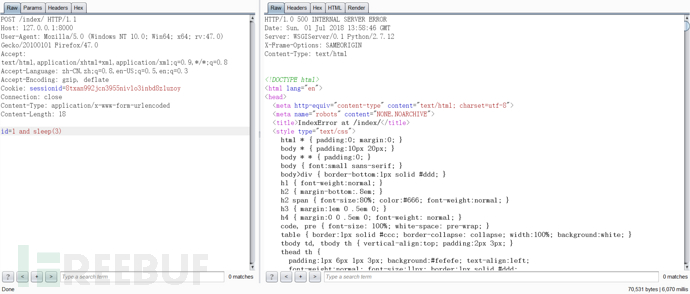
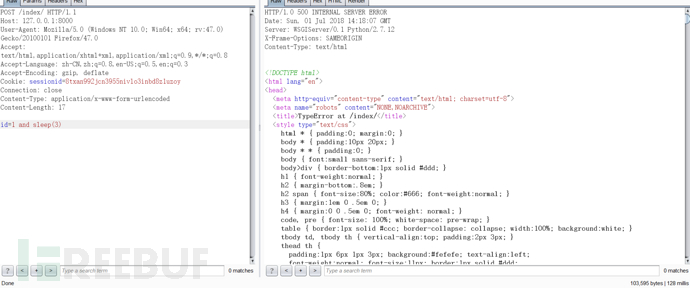
关于这里的秒数是成倍关系,以前看到过一篇帖子,说是当时间满足出现成倍的关系时,应该是查询出了多条数据,每一个row执行一次延时。
接下来就好办了
x = dj.objects.extra(where={"id=1 and if(substr((select user()),1,1)='r',sleep(3),1)"})
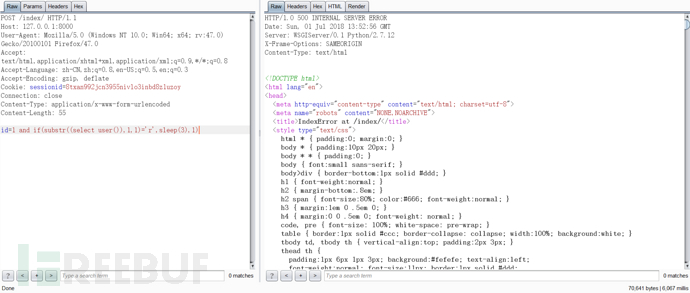
后边的步骤跟着盲注的流程走就OJBK了。
有时候不要直接在django shell中执行,先去mysql命令行把命令敲对了,也确实可以执行payload时候再回来测试,确保第一步先正确。

刚刚提到的是extra模块中的where子句,其他类型的数据提取方法已经在前面讨论过了,需要具体问题具体分析
修复后
views.py
from django.shortcuts import render
from django_app.models import DjangoTest as dj
# Create your views here.
def index(request):
    if request.method == 'GET':
        return render(request,'index.html')
    else:
        id = request.POST.get('id')
        tag = dj.objects.extra(where=['id=%s'],params=id)
        info = tag[0].text
        return render(request,'index.html',{"value":info})
用户发送的请求再匹配到视图函数进行处理时,视图函数的相关机制会对敏感信息进行处理,导致一些恶意语句被过滤
现在测试就不会了
The above is the detailed content of What is Django development and offensive and defensive testing like?. For more information, please follow other related articles on the PHP Chinese website!
 ie shortcut cannot be deleted
 Mac shortcut key list
 How to modify folder 777 permissions
 How to connect asp to access database
 How to read macro control data in javascript
 The difference between console cable and network cable
 How to represent negative numbers in binary
 What does wifi deactivated mean?


