

Native integration
Create project
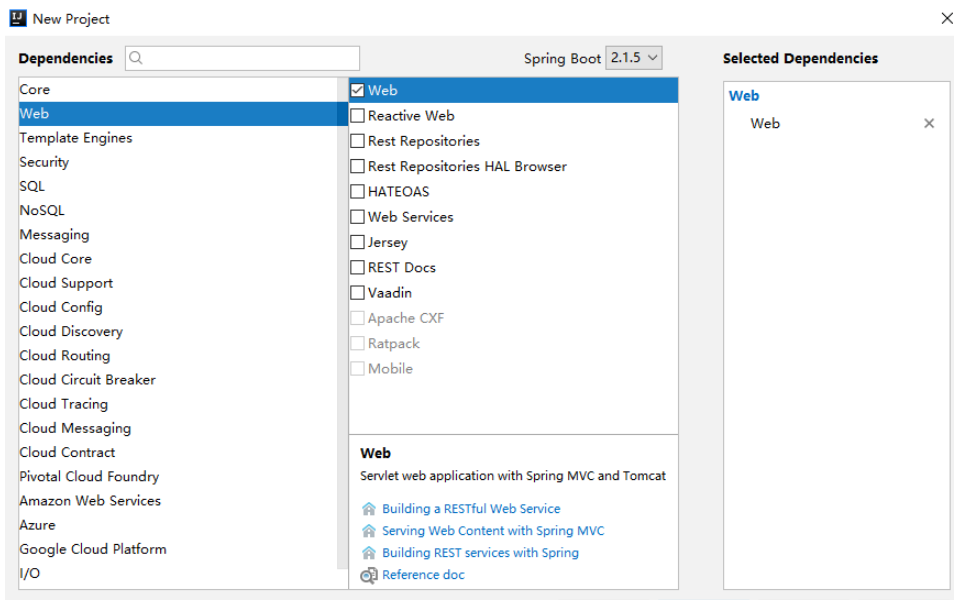
To create a Spring Boot project, you only need to add Web dependencies:
After the project is successfully created, add Shiro-related dependencies. The dependencies in the complete pom.xml file are as follows:
<dependencies>
  <dependency>
    <groupid>org.springframework.boot</groupid>
    <artifactid>spring-boot-starter-web</artifactid>
  </dependency>
  <dependency>
    <groupid>org.apache.shiro</groupid>
    <artifactid>shiro-web</artifactid>
    <version>1.4.0</version>
  </dependency>
  <dependency>
    <groupid>org.apache.shiro</groupid>
    <artifactid>shiro-spring</artifactid>
    <version>1.4.0</version>
  </dependency>
</dependencies>
Create Realm
Next we will customize the core component Realm:
public class MyRealm extends AuthorizingRealm {
  @Override
  protected AuthorizationInfo doGetAuthorizationInfo(PrincipalCollection principals) {
    return null;
  }
  @Override
  protected AuthenticationInfo doGetAuthenticationInfo(AuthenticationToken token) throws AuthenticationException {
    String username = (String) token.getPrincipal();
    if (!"javaboy".equals(username)) {
      throw new UnknownAccountException("账户不存在!");
    }
    return new SimpleAuthenticationInfo(username, "123", getName());
  }
}Just implement simple authentication operations in Realm without authorization. The specific writing method of authorization is the same as Shiro in SSM, so I won’t go into details. The authentication here means that the username must be javaboy and the user password must be 123. If these conditions are met, you can log in successfully!
Configuring Shiro
Next, configure Shiro:
@Configuration
public class ShiroConfig {
  @Bean
  MyRealm myRealm() {
    return new MyRealm();
  }

  @Bean
  SecurityManager securityManager() {
    DefaultWebSecurityManager manager = new DefaultWebSecurityManager();
    manager.setRealm(myRealm());
    return manager;
  }

  @Bean
  ShiroFilterFactoryBean shiroFilterFactoryBean() {
    ShiroFilterFactoryBean bean = new ShiroFilterFactoryBean();
    bean.setSecurityManager(securityManager());
    bean.setLoginUrl("/login");
    bean.setSuccessUrl("/index");
    bean.setUnauthorizedUrl("/unauthorizedurl");
    Map<string> map = new LinkedHashMap();
    map.put("/doLogin", "anon");
    map.put("/**", "authc");
    bean.setFilterChainDefinitionMap(map);
    return bean;
  }
}</string>Configuring Shiro here mainly configures 3 Beans:
First you need to provide an instance of Realm.
When configuring Realm, you need to set it in SecurityManager.
Configure a ShiroFilterFactoryBean and specify path interception rules, etc. in ShiroFilterFactoryBean.
Configure login and test interfaces.
Among them, ShiroFilterFactoryBean has slightly more configurations, and the configuration meaning is as follows:
setSecurityManager means specifying SecurityManager.
setLoginUrl indicates the specified login page.
setSuccessUrl indicates the specified login success page.
The path interception rules are configured in the next Map. Note that they must be in order.
After these things are configured, configure the login Controller:
@RestController
public class LoginController {
  @PostMapping("/doLogin")
  public void doLogin(String username, String password) {
    Subject subject = SecurityUtils.getSubject();
    try {
      subject.login(new UsernamePasswordToken(username, password));
      System.out.println("登录成功!");
    } catch (AuthenticationException e) {
      e.printStackTrace();
      System.out.println("登录失败!");
    }
  }
  @GetMapping("/hello")
  public String hello() {
    return "hello";
  }
  @GetMapping("/login")
  public String login() {
    return "please login!";
  }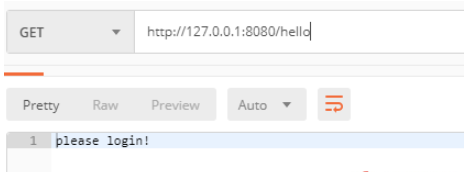
}When testing, first access the /hello interface. Since you are not logged in, it will automatically jump Go to the /login interface:
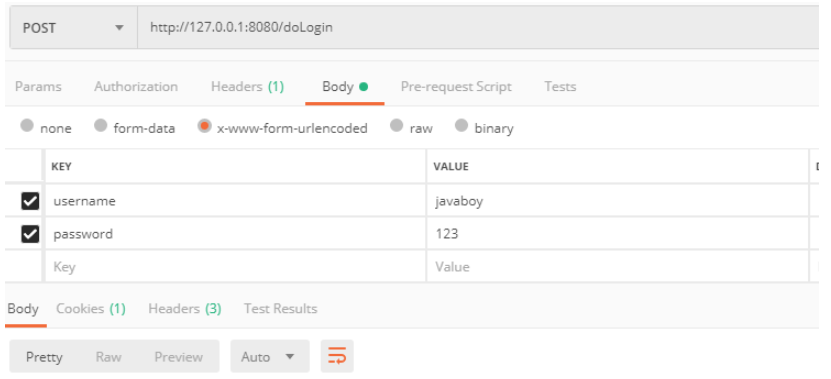
Then call the /doLogin interface to complete the login:
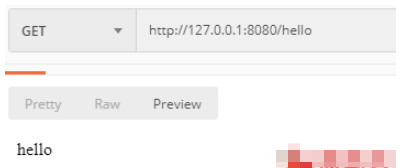
Visit the /hello interface again. Can be accessed successfully:
Use Shiro Starter
The above configuration method is actually equivalent to configuring the XML in SSM Get Spring Boot and rewrite it in Java code. In addition to this method, we can also directly use the Starter officially provided by Shiro.
Create the project, the same as above
After the creation is successful, add shiro-spring-boot-web-starter. This dependency can replace the previous shiro -web and shiro-spring two dependencies, the pom.xml file is as follows:
<dependencies>
  <dependency>
    <groupid>org.springframework.boot</groupid>
    <artifactid>spring-boot-starter-web</artifactid>
  </dependency>
  <dependency>
    <groupid>org.apache.shiro</groupid>
    <artifactid>shiro-spring-boot-web-starter</artifactid>
    <version>1.4.0</version>
  </dependency>
</dependencies>
Create Realm
The Realm and It’s the same as before, so I won’t go into details.
Configure the basic information of Shiro
Next, configure the basic information of Shiro in application.properties:
shiro.sessionManager.sessionIdCookieEnabled=true
shiro.sessionManager.sessionIdUrlRewritingEnabled=true
shiro.unauthorizedUrl=/unauthorizedurl
shiro.web.enabled=true
shiro.successUrl=/index
shiro.loginUrl=/login
Configuration explanation:
The first line indicates whether it is allowed to put the sessionId in the cookie
The second line indicates whether it is allowed to put the sessionId in the Url address block
The third line indicates the default jump path when accessing an unauthorized page
The fourth line indicates enabling shiro
The fifth line indicates the jump page for successful login
The sixth line indicates the login page
Configure ShiroConfig
@Configuration
public class ShiroConfig {
  @Bean
  MyRealm myRealm() {
    return new MyRealm();
  }
  @Bean
  DefaultWebSecurityManager securityManager() {
    DefaultWebSecurityManager manager = new DefaultWebSecurityManager();
    manager.setRealm(myRealm());
    return manager;
  }
  @Bean
  ShiroFilterChainDefinition shiroFilterChainDefinition() {
    DefaultShiroFilterChainDefinition definition = new DefaultShiroFilterChainDefinition();
    definition.addPathDefinition("/doLogin", "anon");
    definition.addPathDefinition("/**", "authc");
    return definition;
  }
}The above is the detailed content of How to integrate Shiro in SpringBoot. For more information, please follow other related articles on the PHP Chinese website!
 SpringBoot project building steps
 What is the difference between j2ee and springboot
 Can data between Hongmeng system and Android system be interoperable?
 Introduction to online calculator software
 The difference between rom and ram
 plugin.exe application error
 How to shut down after running the nohup command
 Ouyi trading platform app
 HTML to create web pages


![[Web front-end] Node.js quick start](https://img.php.cn/upload/course/000/000/067/662b5d34ba7c0227.png)


